
Do you want to bring the power of WordPress themes into your Dreamweaver projects? You’re in the right place.
Combining the versatility of WordPress with the customization capabilities of Dreamweaver can elevate your web design game. But how do you merge these two powerful tools without losing your mind in the process? This guide is crafted just for you.
Imagine creating stunning, unique websites with ease, all while leveraging the best of both platforms. Stay with us as we unlock the secrets to seamlessly integrating WordPress themes into Dreamweaver, simplifying your workflow, and enhancing your creative potential. Ready to transform your web design experience? Let’s dive in!
Getting Started With Dreamweaver
Dreamweaver is a tool for building websites. First, you need to install it on your computer. Go to the Adobe website. There, you can find Dreamweaver. Click on the download button. Follow the steps shown. Installation is easy and quick. Soon, you will have Dreamweaver ready to use.
Open Dreamweaver after installing it. Start a new project by selecting “New File” or “New Site.” Choose where to save your work. Name your project, so you remember it. Select the file type like HTML or CSS. Save your settings. Now, you have a new project ready to edit.
Credit: blog.adobe.com
Exploring WordPress Themes
Picking a WordPress theme is important. It sets the look of your site. Think about what you need. Choose a theme that fits your style. Check the theme’s features. Some themes are good for blogs. Others are better for shops. Look at the theme’s ratings. Read user reviews to know what others think. A good theme should work well. It should be fast and easy to use.
Themes can be found online. Visit the WordPress theme site. Download the theme to your computer. The theme file is often a ZIP file. You need to unzip the file. Use a tool to unzip it. Once unzipped, check the files. Make sure all necessary files are there. You can now upload the theme to Dreamweaver. Ensure you understand the theme structure. This helps in editing the theme easily.
Integrating WordPress Themes In Dreamweaver
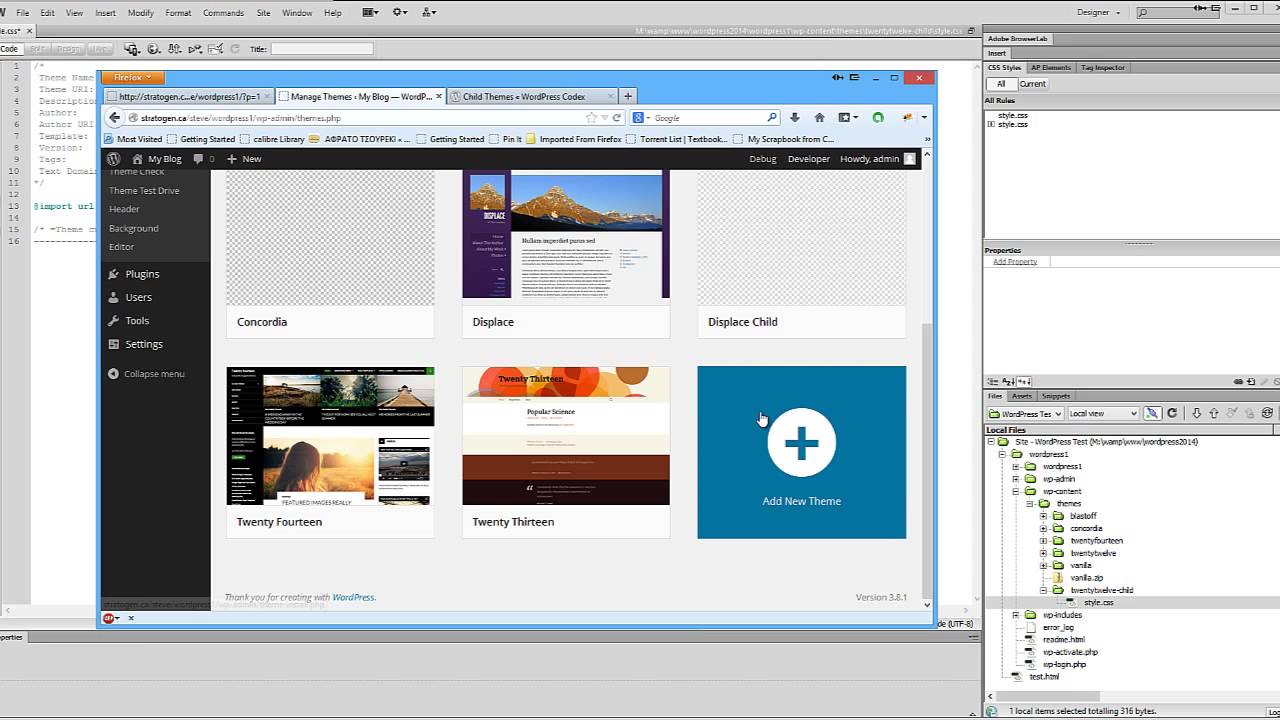
First, download your WordPress theme to your computer. Open Dreamweaver. Click on “Site” and then “New Site”. Name your site and set the local site folder. Click “Save”. Now, find the theme folder on your computer. Drag and drop this folder into Dreamweaver. This imports your theme. You can now see the theme files in the “Files” panel. This step is crucial for theme integration. Always make sure the files are complete.
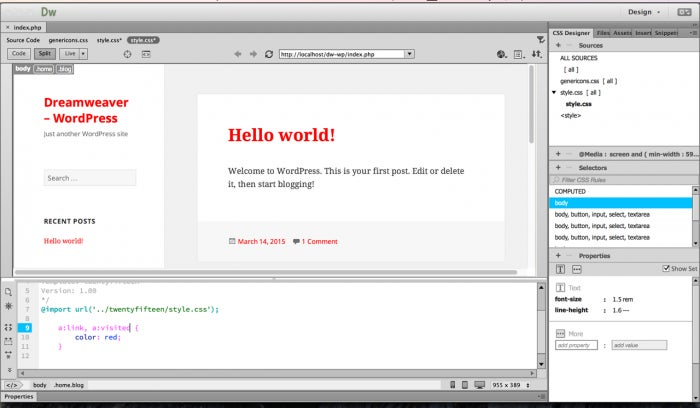
Open your theme’s index.php file in Dreamweaver. Look for the style.css file. This file controls the design. You can change colors and fonts here. Use the code editor for changes. Always save your work after edits. Preview your changes in a browser. This helps to see how the site will look online. Make sure all links work. This ensures a smooth user experience.
Customizing WordPress Themes
HTML and CSS are the building blocks of a website. You can change how your WordPress theme looks by editing them. CSS controls colors, fonts, and layout. HTML adds structure and content. Make small changes to learn. Try changing font size or color first. Save your work often. Mistakes happen. Look at your changes in a browser. See how they make a difference.
JavaScript brings websites to life. It adds interactive features. Slideshows, forms, and menus use JavaScript. Start with simple scripts. Use online resources for help. JavaScript can make a site more fun. But too much can slow it down. Test your scripts often. Make sure they work as you want.
Testing And Previewing Changes
Dreamweaver helps you see changes quickly. Use its preview tools for this. They show what your website will look like. You can check the layout and design. Ensure everything works as planned. Make adjustments if needed. This tool saves time and effort. It gives a clear picture of changes.
Websites look different on each browser. Test your theme across multiple browsers. This includes Chrome, Firefox, and Safari. Each browser may show your site differently. Check for errors or problems. Make sure it looks good everywhere. People use various browsers. Your site must work well on all. This ensures a smooth experience for users.
Credit: www.youtube.com
Deploying The Customized Theme
First, save your theme files on your computer. Then, use an FTP client to upload them. Connect to your WordPress server. Navigate to the wp-content/themes folder. Upload your theme folder here. This process will make your theme visible in WordPress. Go to your WordPress dashboard. Click on Appearance, then Themes. You will see your uploaded theme there.
Check if your theme works well with WordPress. Test it on different browsers. Make sure all parts display properly. Look for any broken links or images. Ensure that plugins work with your theme. Some plugins may not be compatible. Update your plugins if needed. This helps keep your site running smoothly.
Troubleshooting Common Issues
Explore the process of using WordPress themes in Dreamweaver. Manage files and folders correctly to avoid errors. Ensure compatibility by updating software to the latest version.
Resolving Theme Conflicts
WordPress themes may not work smoothly with Dreamweaver. Conflicts can occur due to different coding standards. Check the theme’s compatibility. Review the theme’s documentation. Ensure your Dreamweaver version is up-to-date. Sometimes, plugins create issues. Disable all plugins temporarily. Then activate them one by one. This helps in identifying the problematic plugin. Fixing these conflicts requires patience and careful observation.
Fixing Css And Script Errors
CSS errors can break your design. Open the CSS file in Dreamweaver. Look for any syntax errors. Missed semicolons or brackets often cause issues. Scripts may not run correctly. Check the JavaScript file. Ensure all paths are correct. Incorrect file paths lead to script errors. Use Dreamweaver’s built-in tools. They help in locating errors quickly. Make sure your files are linked properly. This ensures smooth operation.

Credit: www.websiteplanet.com
Frequently Asked Questions
Can You Integrate WordPress Themes In Dreamweaver?
Yes, Dreamweaver allows you to work with WordPress themes. You can design, edit, and customize themes using Dreamweaver’s HTML, CSS, and PHP tools. By connecting Dreamweaver to your WordPress site, you can manage files and see real-time changes, enhancing your workflow efficiency.
What Are The Steps To Use Dreamweaver With WordPress?
To use Dreamweaver with WordPress, first, set up your WordPress site. Then, configure Dreamweaver to connect to your site via FTP. Download the theme files to your local machine. Open these files in Dreamweaver to customize HTML, CSS, and PHP elements as needed.
Is Dreamweaver Compatible With WordPress Themes?
Yes, Dreamweaver is compatible with WordPress themes. It supports HTML, CSS, and PHP, making it suitable for WordPress development. You can edit theme files directly in Dreamweaver, ensuring seamless integration with your WordPress site for real-time updates and changes.
Can Dreamweaver Edit WordPress Theme Code?
Dreamweaver can edit WordPress theme code efficiently. It provides tools to modify HTML, CSS, and PHP code. You can make design and functionality changes directly in Dreamweaver. This allows for precise control over theme customization and layout adjustments.
Conclusion
Dreamweaver makes using WordPress themes easy and fun. With Dreamweaver, you can customize themes efficiently. Change design elements with simple clicks. Make your website unique and personal. Dreamweaver supports creativity and flexibility. Experiment with different themes. See what works best for your needs.
Enjoy the seamless integration between WordPress and Dreamweaver. It saves time and effort. Perfect for beginners and experts alike. Start building your dream website today. No complex coding required. Enjoy the process and watch your website come to life.


