
Are you ready to elevate your website with a new look, but feeling a bit overwhelmed by the thought of transferring your Envato theme to WordPress? You’re not alone.
Many people like you are eager to improve their online presence but worry about the technical hurdles. What if I told you that the process is simpler than you think? In this guide, you’ll discover an easy-to-follow plan that demystifies the entire transfer process.
By the end, you’ll not only have your stunning new theme up and running but also feel like a WordPress pro. Stick with us, and let’s turn your vision into reality without the stress.
Prerequisites For Theme Transfer
An Envato account is necessary. Create one on the Envato website. It is free to sign up. You need a valid email. Check your email for a confirmation link. Click on the link to activate your account. With the account, you can buy and download themes. Keep your login details safe. You will need them later.
Ensure WordPress is installed on your site. You need a hosting service. Choose a reliable one. Install WordPress through the hosting panel. Most hosting services offer a one-click install. Make sure your hosting meets WordPress requirements. This includes PHP version 7.4 or greater and MySQL version 5.6 or greater. Always have an updated version of WordPress. This ensures smooth theme transfer.
Credit: help.market.envato.com
Downloading The Theme From Envato
Open your Envato account. Go to the Downloads section. You will see all the themes you bought. Find the theme you want. Click on the theme name. This leads you to the download page.
Preparing Theme Files For Upload
Start by downloading the theme package from Envato. Save it on your computer. It comes as a ZIP file. You need to extract this file. Right-click and select “Extract.” This will create a new folder. This folder contains all the necessary files.
Inside, you will find documentation, a license file, and the main theme folder. Open the main theme folder. Here, look for another ZIP file. This is the installable theme file. Do not extract this one. It’s ready for upload to WordPress.
The theme folder contains many files. There are PHP files, CSS files, and JavaScript files. Each file has a job. PHP files control structure. CSS files make the site look good. JavaScript files add special effects.
Understanding these files helps in troubleshooting. It helps in making changes. But don’t worry. You don’t need to change them to upload the theme. Just keep the files organized.
Credit: help.elements.envato.com
Uploading Theme To WordPress
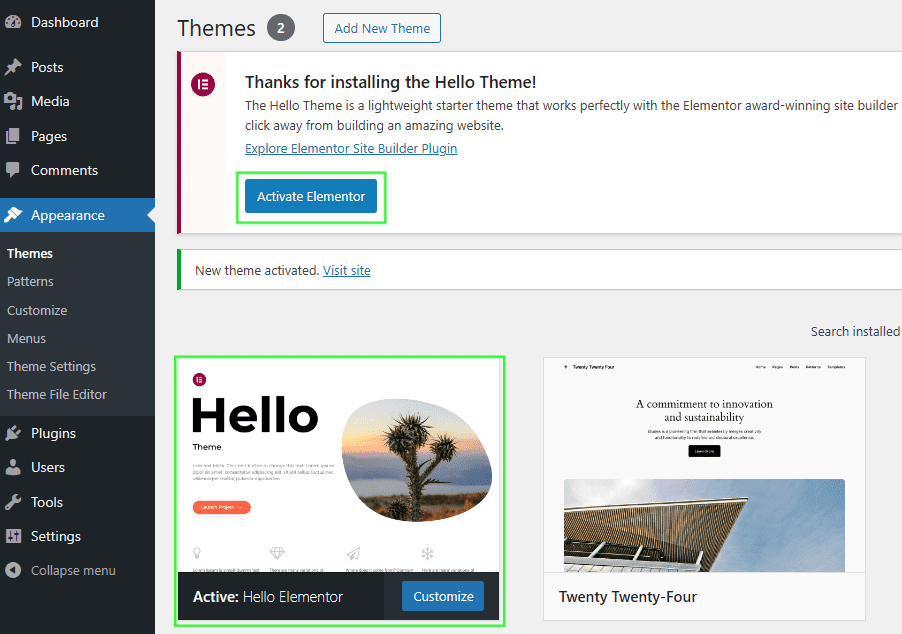
Open your WordPress dashboard. Click on Appearance, then Themes. Find the Add New button and click it. Now, press Upload Theme. Choose the Envato theme file you downloaded. Click Install Now. Wait a few moments. Your theme will upload. Once done, click Activate to use it. Your new theme is ready.
First, get an FTP client like FileZilla. Connect it to your website. Use your FTP credentials. Go to the wp-content/themes folder. Upload the unzipped theme folder here. Wait for the upload to finish. Go back to your WordPress dashboard. Navigate to Appearance and then Themes. Find your new theme. Click Activate. Now your site uses the new theme.
Activating Your New Theme
Setting the Theme as Active is easy. Go to your WordPress dashboard. Click on ‘Appearance’. Choose ‘Themes’. You will see your new Envato theme. Click ‘Activate’. Your theme is now active.
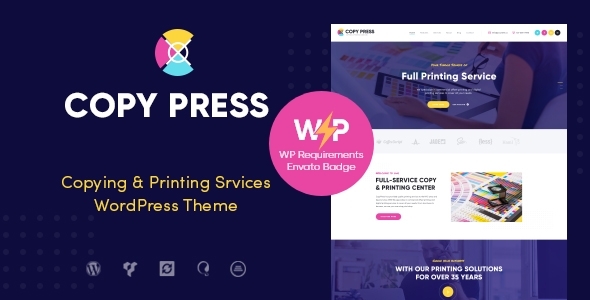
Checking for Compatibility Issues is important. Make sure your theme works with plugins. Some plugins might not work with new themes. Check your site after activating the theme. Look for any broken parts. Test your site on different devices. Ensure everything looks good. If there are problems, contact theme support. They can help fix issues.
Credit: themeforest.net
Customizing Your Theme
The WordPress Customizer is a great tool. It helps you change your theme easily. You can change the site title and tagline quickly. Colors can be adjusted for a unique look. You can also change the header image. Widgets are easy to place. Menus can be edited with a few clicks. It’s simple and fun to use. Experiment with different styles. See what looks best for your site.
Some themes need plugins to work well. You must install them. Go to the Plugins section in your dashboard. Click on Add New. Search for the plugin by name. Click on Install and then Activate. Some plugins help with SEO. Others make the site faster. Some are for security. Always keep plugins updated. This keeps your site safe.
Troubleshooting Common Issues
Upload errors can be frustrating. First, check your internet connection. A slow connection might cause issues. Make sure your theme file is not too large. WordPress has a file size limit. You may need to compress your theme. Use a tool like WinRAR or 7-Zip to reduce size. Also, ensure your theme file is in .zip format. WordPress only accepts .zip files. If the problem persists, contact your hosting provider. They might help you resolve the issue.
Plugin conflicts may disrupt your theme. First, disable all plugins. Then, enable them one by one. This helps identify the problematic plugin. Some plugins do not work well with certain themes. Consider finding an alternative plugin if conflicts occur. Always keep plugins updated. Updates can fix bugs and improve compatibility. If you still face issues, seek help from the theme’s support team. They might offer solutions specific to your theme.
Ensuring A Successful Theme Transfer
Check if every button works. Click each one. Make sure links are not broken. See if images load fast. Test the theme’s speed. Ensure the theme looks good on phones. Try different devices. Fix any errors you find. Use tools like browser developer tools. They help spot mistakes. Your theme should be smooth and quick.
Adjust colors to fit your brand. Use easy-to-read fonts. Check the header and footer. They should be neat. Place your logo in the right spot. Make sure the navigation menu is clear. Arrange your pages in order. Preview your site before going live. Ask friends to look at it. Their feedback helps improve it.
Frequently Asked Questions
How Do I Install An Envato Theme On WordPress?
To install an Envato theme on WordPress, download the theme from Envato Market. Go to your WordPress dashboard, navigate to Appearance > Themes, and click “Add New. ” Upload the downloaded theme file and activate it. Ensure you check any required plugins and theme settings for optimal performance.
Can I Transfer My Envato License To Another Site?
Yes, you can transfer your Envato license to another site. However, you need to delete the theme from the original site first. Then, install and activate the theme on the new site. Ensure you follow the licensing terms provided by Envato to maintain compliance.
What Should I Do If My Theme Doesn’t Work?
If your Envato theme doesn’t work, ensure you have installed all required plugins. Check for compatibility issues with other plugins or WordPress versions. Consult the theme documentation and support forums. If necessary, contact the theme developer for assistance and troubleshooting tips.
How Do I Update My Envato Theme On WordPress?
To update your Envato theme, log in to your Envato account and download the latest theme version. In WordPress, navigate to Appearance > Themes, and update your existing theme. Alternatively, use the Envato Market plugin for automatic updates to ensure your theme stays current.
Conclusion
Transferring your Envato theme to WordPress is straightforward. Follow the steps closely. Ensure your WordPress site is ready. Upload the theme file from Envato. Activate it in WordPress. Customize to match your style. Check for any updates and plugins. Test your site on various devices.
Make sure everything works smoothly. Seek help if needed. Remember, patience is key. Enjoy your new design! Your WordPress site now has a fresh look. Explore more themes for future projects. Keep learning and improving. Your creativity can shine.


