
Are you eager to make your WordPress site look as stunning as the demo you admired before purchasing? Installing sample data on your WordPress theme can be the secret ingredient to achieving that polished look.
You might feel a bit overwhelmed or unsure where to start, but don’t worry—you’re not alone. This guide is designed just for you, to simplify the process and turn it into a straightforward task. Imagine transforming your website into a vibrant, fully functional space that captivates every visitor.
Ready to turn that vision into reality? Dive into the step-by-step instructions and watch your site come to life, effortlessly.
Preparation For Installation
Ensure your WordPress version matches the theme’s needs. Some themes ask for the latest version. Others might need specific plugins. Check if your web host supports the theme’s requirements. This includes PHP and MySQL versions. A mismatch can cause errors or theme malfunction. Always verify before proceeding. This saves time and prevents issues.
Backing up your site is essential. Use a reliable plugin like UpdraftPlus. This tool makes saving your site simple. Store backups on cloud services like Google Drive. This ensures safety even if your site crashes. Restoring is easy with a good backup. Never skip this step. It keeps your data secure.
Downloading Sample Data
First, locate the source of the sample data for your theme. Often, this can be found on the theme’s official website. If not, check the documentation. Look for a section that mentions demo content or sample data. It’s usually available as a downloadable file.
Once the source is found, click on the download link. Save the files to your computer. The files may be in a ZIP format. Make sure you remember where you save them. This makes finding them easier later. You are now ready to upload the data to WordPress.
Importing Sample Data
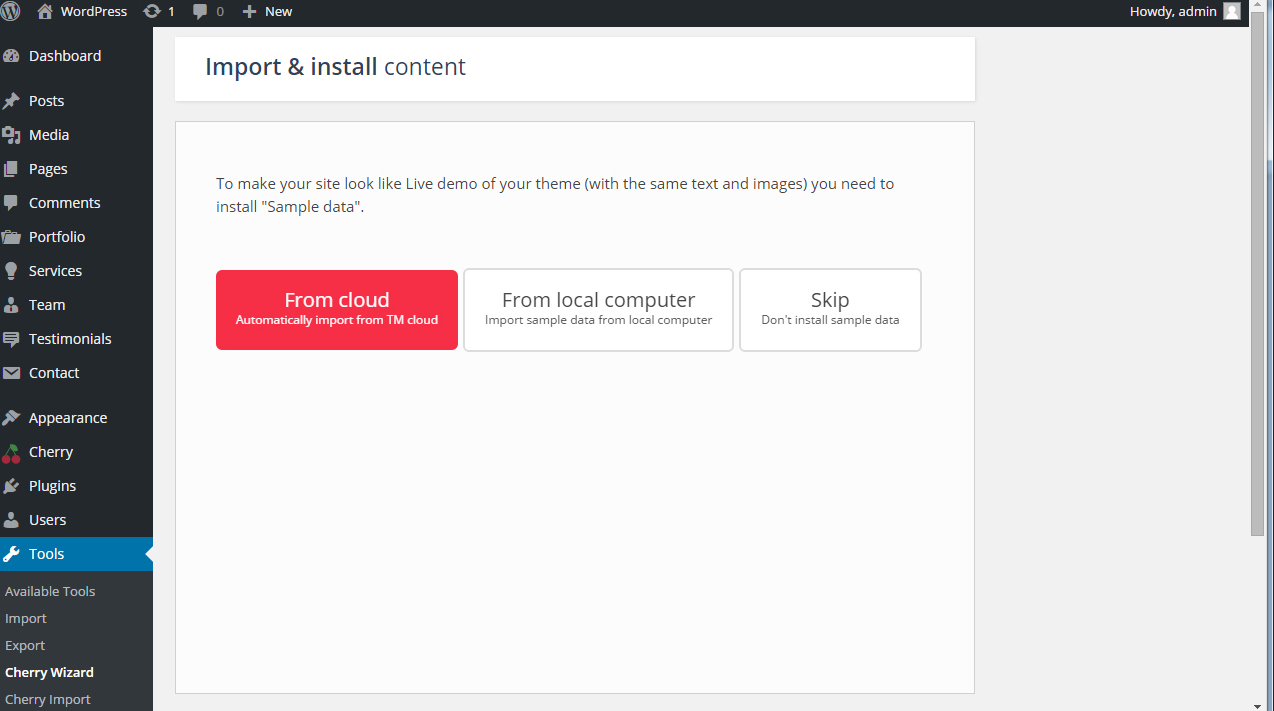
The WordPress Import Tool is simple. Go to your WordPress dashboard. Click on “Tools” and then “Import”. You’ll see different import options. Choose the WordPress option. Install the importer if needed. Upload your sample data file. Make sure it’s in the correct format. Click “Upload file and import”. Follow the instructions. Assign authors and import attachments if needed. Click “Submit”. Wait for the process to finish. Now, your sample data is installed.
Errors can happen during import. Don’t worry. Check your file format. It must be correct. Try another browser if needed. Disable plugins that might cause issues. Refresh your page and try again. Check your internet connection. It must be stable. If still stuck, seek help from support forums. They can guide you. Import errors can be solved. Stay patient and keep trying.

Credit: docs.oceanwp.org
Configuring Sample Data
Start by going to the theme settings. Look for the appearance tab. Here, you can find many options. Choose the right colors for your theme. Make sure the fonts are easy to read. Set the layout to match your style. These settings help your site look good.
Next, go to the menus section. Add pages to your navigation bar. This helps users find what they need. After that, check the widgets. They are small tools for your site. Drag and drop them to your sidebar. This can include search bars or recent posts. These changes make your site useful and friendly.
Testing And Verification
Installing sample data on a WordPress theme helps you see how the site will look. Use the theme’s demo import feature to add sample data. This process sets up pages, menus, and layouts automatically.
Check Site Appearance
Check if the site looks right. Sample data should display clearly. Look for missing images or broken links. Ensure text is readable. Colors and fonts should match the theme. Check the layout on different devices. Make sure everything fits the screen size.
Ensure Functionality
Test all buttons and menus. Click each link to see if it works. Try different pages and see if they load. Check the contact form and other features. Make sure the shopping cart works if you have one. Plugins should function without errors. Test again to be sure everything is working fine.

Credit: docs.oceanwp.org
Credit: www.templatemonster.com
Frequently Asked Questions
How Do I Install Sample Data On WordPress?
To install sample data on WordPress, access your theme’s settings or demo importer. Select the sample data option and follow the prompts. This process will import content, widgets, and settings to match the theme’s demo. Always back up your current site before importing sample data.
Why Use Sample Data With WordPress Themes?
Using sample data helps you visualize your theme’s potential layout and design. It provides a starting point for customization, making it easier to structure your content. Sample data can also showcase how your website can look, helping you make design decisions more effectively.
Can Sample Data Affect My Existing Content?
Yes, importing sample data can overwrite existing content. It’s crucial to back up your website before proceeding. This ensures you can restore your site if needed. Always test sample data on a staging environment first to avoid disrupting your live site.
Is It Safe To Delete Sample Data After Use?
Yes, deleting sample data after use is safe and recommended. Removing it helps keep your site clean and organized. Ensure you’ve customized your site content before deleting. Use a plugin or manual method to delete any unwanted sample content efficiently.
Conclusion
Installing sample data on your WordPress theme is simple and rewarding. It helps you visualize your site’s potential. Follow the steps carefully for best results. Start by downloading the sample data files. Import them using WordPress tools. Check your site for any errors.
Fix any issues promptly. Sample data enhances your design process. It gives a clear idea of layout and features. Practice makes perfect, so try it on different themes. Enjoy a more vibrant and functional site. Always backup your site before making changes.
A great way to kickstart your website journey!


