
You’re ready to give your WordPress site a fresh look, but you’re worried about losing all those precious custom tweaks you’ve made. Don’t worry; you’re not alone.
Many WordPress users face this challenge, and there’s a smart way to tackle it: installing a parent and child theme. Imagine keeping your site’s unique flair while enjoying new design updates. Sounds perfect, right? In this guide, you’ll learn how to seamlessly install a parent and child theme in WordPress without losing your customizations.
Discover how this approach not only preserves your hard work but also ensures your website remains flexible and future-proof. Dive in to find out how you can make this work for your WordPress site today!
Credit: www.wpbeginner.com
Understanding WordPress Themes
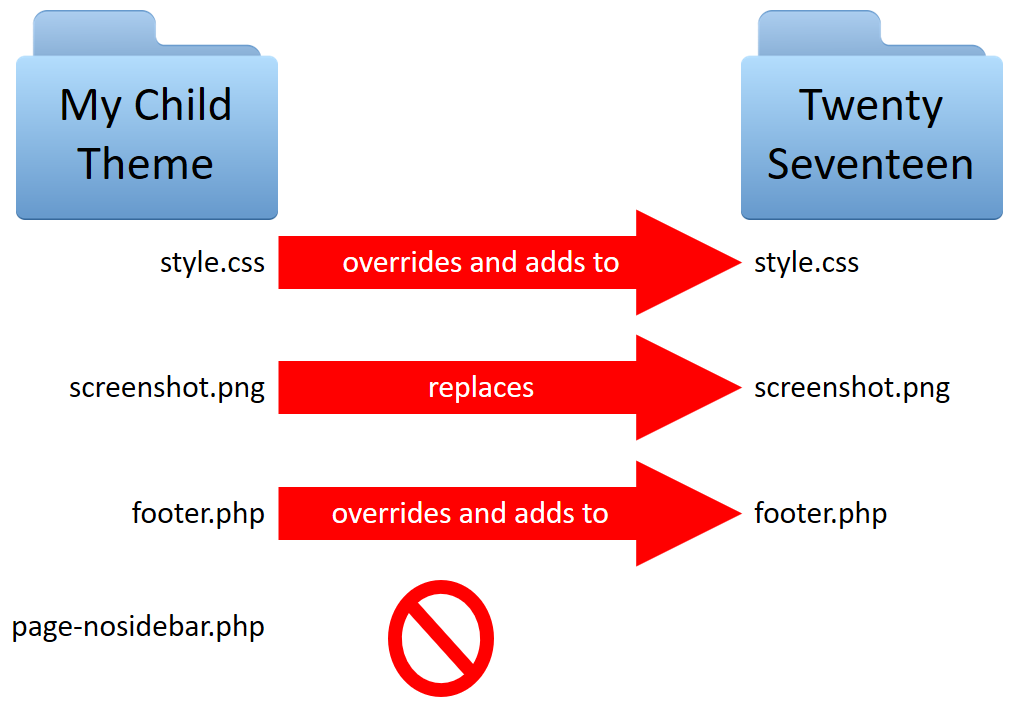
WordPress themes help to change how a website looks. A parent theme is the main theme. It has all the needed files. A child theme is a theme that depends on a parent. This child theme uses the main theme’s files. It allows you to make changes. These changes do not affect the parent theme. If the parent theme updates, your changes stay safe. This is why many choose child themes. They keep your work from getting erased.
Child themes have many benefits. They keep your custom changes safe. Updates to the parent theme do not change your work. This is a big help. Beginners find child themes easy to use. They let you experiment. Mistakes are not a problem. You can fix them quickly. Child themes also help with learning. You see how themes work. You can build skills this way. This makes them a good choice for many users.
Preparing For Theme Installation
Backup your website before making changes. This keeps your data safe. Use tools like UpdraftPlus or BackupBuddy. These tools help you save your website. Download your backup file. Store it in a safe place. This is a smart step.
Choose the right theme for your website. Search for themes that match your style. Look at ratings and reviews. Pick a theme with good support. Make sure it is up to date. A good theme keeps your website fresh. It improves user experience. Ensure the theme is compatible with your plugins. This helps everything work smoothly.
Installing A Parent Theme
First, find a parent theme you like. Download the theme file to your computer. Go to your WordPress dashboard. Click on Appearance and then Themes. Next, click Add New. Choose Upload Theme from the top. Click Choose File and select the theme you downloaded. Now, click Install Now. The theme will upload to your site.
Once the upload finishes, look for an Activate button. Click it to make the theme live on your site. Check your website to see the changes. The parent theme is now ready. You can add a child theme next. This helps keep changes safe during updates. Remember to save your work. Now you’re all set!
Credit: learn.wordpress.org
Creating A Child Theme
Create a new folder for your child theme. Make sure the folder name is unique. Use lowercase letters and no spaces. Place this folder inside the wp-content/themes directory. This is where WordPress keeps all theme files. It is important to keep things organized.
Inside your child theme folder, make a new file. Name it style.css. This file tells WordPress about your child theme. At the top, add this code:
/
 Theme Name: Your Child Theme Name
 Template: Parent Theme Folder Name
/
Replace “Your Child Theme Name” with your theme name. Replace “Parent Theme Folder Name” with the parent theme’s folder name.
Create another file in the child theme folder. Name it functions.php. This file adds extra features to your theme. It is like a toolbox for developers. You can copy code from the parent theme if needed.
Installing The Child Theme
To install a child theme in WordPress, first, ensure the parent theme is active. Then upload the child theme file and activate it. This process preserves changes during updates, maintaining the website’s functionality and design.
Upload The Child Theme
Start by logging into your WordPress dashboard. Navigate to the Appearance section. Click on Themes. Find the Add New button. Click on it. Choose Upload Theme. Select the child theme file from your computer. Click Install Now. Wait for the upload to finish.
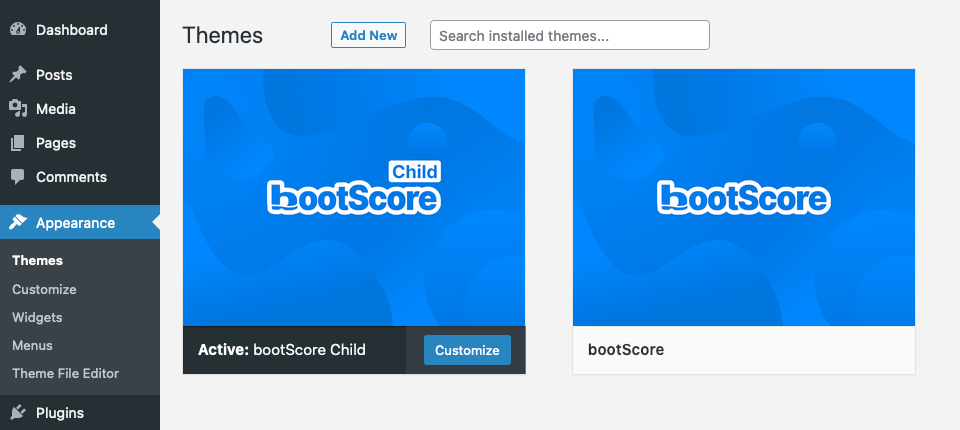
Activate The Child Theme
Go to the Themes page again. Find your newly uploaded child theme. Hover over it. Click on Activate. Your child theme is now active. Check your website. Make sure everything looks good. If something seems off, check your parent theme settings. Adjust if needed.
Credit: www.wpzoom.com
Customizing The Child Theme
Change the colors and fonts in your child theme. Open the style.css file. Add your custom CSS rules. Adjust the layouts using CSS grid or flexbox. Keep your code simple. Test changes on different devices. Make sure everything looks good. Save your work often.
Open the functions.php file in your child theme. You can add new functions here. Use PHP to write your code. Add features like a custom header or footer. Always back up your files before editing. Test the new functions on your site. Fix any errors you see.
Testing Your Theme Setup
Check for Errors: Look for any problems with your theme. Errors can spoil your site. Use tools to find these problems. Check your site’s homepage first. Then, click on pages and posts. Make sure everything loads quickly. Broken links need fixing. A slow site can annoy users. Check the theme’s code for mistakes. Use a plugin to help with this task. Errors must be fixed soon.
Ensure Compatibility: Your theme should work with plugins. It should also work on different devices. Test on phones, tablets, and computers. Check the site on different browsers. Chrome, Firefox, and Safari are popular ones. The site should look good on all screens. Make sure buttons work. Check forms and menus too. Compatibility keeps users happy. A good theme works well everywhere.
Troubleshooting Common Issues
Installing parent and child themes in WordPress can sometimes lead to issues. Common problems include theme compatibility and styling errors. Fix these by checking theme documentation and using proper coding practices.
Theme Not Displaying Correctly
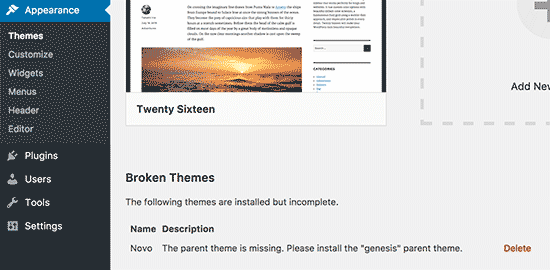
Check if the theme files are uploaded correctly. Sometimes, files get corrupted during upload. Verify the parent and child themes are active. Go to the theme settings in your dashboard. Ensure the child theme is linked to the parent theme. Sometimes, compatibility issues arise. Check if the theme is compatible with your WordPress version. You may need to update WordPress or the theme. Broken themes can cause display problems.
Styles Not Applying
Make sure the style.css file is properly linked. This file handles the appearance. Double-check if there are any CSS errors. Errors can block styles from showing. Ensure the child theme’s CSS is loading after the parent theme’s. Use browser tools to inspect the page. They help pinpoint missing styles. Sometimes, caching issues occur. Clear your browser cache to see changes.
Frequently Asked Questions
What Is A Parent Theme In WordPress?
A parent theme is the main framework in WordPress. It provides core functionality and design elements. It’s crucial for setting the foundation of a site. When a child theme is used, it inherits features from the parent theme. This setup allows for easier customization and updates.
Why Use A Child Theme In WordPress?
Using a child theme preserves your customizations during updates. It allows for modifications without altering the parent theme files. This setup ensures your site remains updated and secure. Customizing through a child theme keeps your changes intact. It provides a safer way to tweak your site’s appearance and functionality.
How Do You Activate A Child Theme?
To activate a child theme, go to the WordPress dashboard. Navigate to Appearance > Themes. Locate your child theme and click “Activate. ” Ensure the parent theme is installed and active. This process makes your child theme’s customizations live on your site.
Can You Customize A Parent Theme Directly?
Customizing a parent theme directly is not recommended. Changes can be lost during updates. Instead, use a child theme for modifications. This approach preserves your customizations and ensures site stability. It keeps your site secure and up-to-date without losing custom changes.
Conclusion
Installing a parent and child theme in WordPress is simple. Follow the steps carefully to ensure success. First, choose a reliable parent theme. Then, create a child theme for custom changes. This keeps your main theme safe during updates. Remember, practice makes perfect.
Test your changes regularly. Keep backups to avoid data loss. Use WordPress forums for help if needed. With patience, you’ll master theme installation. Your site will look professional and unique. Enjoy the flexibility and creativity WordPress offers. Happy designing!


