
Are you ready to take your web API game to the next level? Hosting your Web API on an IIS server can be a game-changer for your applications.
Imagine the power of seamless integration, robust security, and enhanced performance right at your fingertips. You might be wondering how to make this happen without getting lost in technical jargon or complex procedures. That’s exactly what we’re going to unravel for you today.
We’ll guide you through each step with clear and simple instructions, ensuring you feel confident and in control. By the end of this article, you’ll have the knowledge to successfully host your Web API on an IIS server, opening doors to new possibilities and efficient workflows. Stay with us, and let’s make it happen together!

Credit: www.youtube.com
Prerequisites
Your computer needs a few things. A Windows operating system is a must. It should be Windows 7 or newer. The system must have at least 4 GB of RAM. A dual-core processor is also needed. Ensure you have enough disk space. At least 5 GB of free space is good. A stable internet connection is important. This helps in downloading updates.
First, install the IIS server. It is found in Windows Features. Next, you need the .NET Framework. Version 4.5 or higher is best. Download Visual Studio. It helps in creating and managing your API. Make sure you have a SQL Server for database needs. Lastly, ensure your system has latest updates. This keeps everything running smoothly.
Preparing The Web Api
First, create a new project in Visual Studio. Choose Web API template. This helps in organizing your code. Name your project wisely. It should be clear. Add necessary dependencies. Use NuGet packages if needed. Make sure your code is clean. Comments help others understand. Test your API locally. Ensure it works before hosting. Debug any issues early.
Open Internet Information Services (IIS) Manager. Find your site in the list. Click on it. Set up application pool correctly. Use .NET version that matches your project. Import your Web API project. Use publish option in Visual Studio. Choose File System for publish method. Move the published files to IIS folder. Ensure all settings match your project needs. Test the API in the browser. Check if it responds correctly.
Setting Up Iis
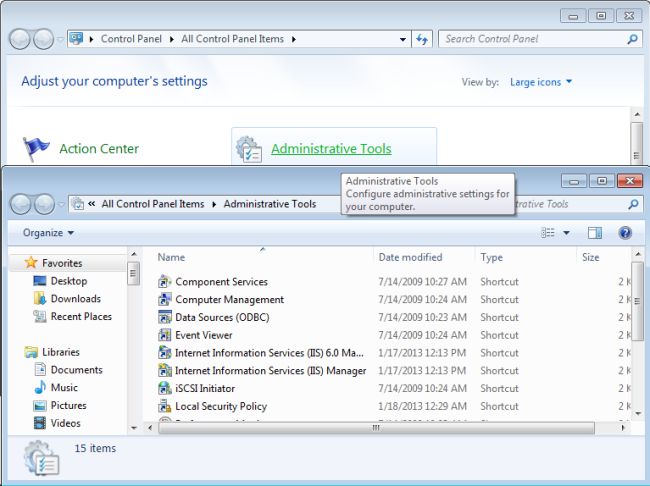
First, open the Control Panel on your computer. Find the option for Programs and Features. Click on it. Next, select Turn Windows features on or off. A new window will appear. Look for Internet Information Services (IIS). Check the box next to it. Click OK to install. Wait for the process to finish. Your computer may need to restart.
After installing, open the IIS Manager. You can find it in the Control Panel. Click on it to open. Look for Sites in the left panel. Select your site. Then, click on Authentication. Enable the options you need. Next, go to MIME Types. Add any types required for your Web API. Finally, save your changes. Your IIS is now configured.
Credit: www.c-sharpcorner.com
Deploying The Web Api
Open the IIS Manager on your computer. Look for the Sites option in the panel. Click on Add Website. Fill in the Site Name and Physical Path. Choose a port number. Use the default port 80 for HTTP. Ensure the Binding Type is set to HTTP. Click OK to create the site.
First, create a publish profile in Visual Studio. Choose Folder as the publish target. Select a folder to save the files. Click Publish to generate files. Move these files to the Physical Path of the site in IIS. Go back to IIS Manager. Right-click the site and select Manage Website. Click on Browse to see your API running.
Configuring Application Pool
Start by opening the IIS Manager on your server. Find the Application Pools node and click on it. Then, choose Add Application Pool from the Actions panel. Here, you need to type a name for your new pool. Set the .NET Framework version to the required version. Ensure the Managed Pipeline Mode is set to Integrated. Click OK to create the application pool. This pool keeps your web API running smoothly.
Select your web site from the IIS Manager. Click on Basic Settings in the Actions panel. Under the Application Pool section, choose the pool you created earlier. Click OK to save changes. This assigns your web API to the new application pool. Your API now uses the resources of this pool efficiently.

Credit: learn.microsoft.com
Setting Up Url Bindings
Host headers help manage multiple sites on one server. Each site gets a unique name. Open IIS Manager. Select your site. Click “Bindings” on the right. Add a new binding. Enter your desired host name. Make sure to match the host name to DNS settings.
SSL keeps data safe. Start by obtaining an SSL certificate. Install it on your server. Go to IIS Manager. Select your site. Click “Bindings”. Add a new binding. Choose “https” type. Select your SSL certificate. This ensures secure connections for users.
Testing The Web Api
Hosting a Web API on an IIS server involves setting up the server environment and deploying the API. Begin by installing IIS and configuring application pools. Upload and configure the Web API project files for seamless operation.
Accessing The Api Locally
Open your browser. Type the API URL in the address bar. Hit Enter. You should see the API response. If not, check your server settings. Also, make sure your API is running. Local testing is important. It helps catch errors early.
Testing Api Endpoints Externally
Use a tool like Postman for external testing. Enter the API URL in Postman. Choose the right HTTP method. Click on Send. Look at the response. If you see errors, check your firewall settings. Ensure the port is open. This allows external access. Testing externally is crucial. It shows how others will use your API.
Troubleshooting Common Issues
Deploying a Web API on an IIS server can face common issues. Ensure proper configuration settings for application pools and permissions. Always verify the API’s compatibility with IIS versions to prevent runtime errors.
Resolving Permission Issues
Permissions can cause problems when hosting Web Api. Check IIS settings. Make sure your application has read and write permissions. Verify the user account running your application. It must have the right access. Check file and folder permissions in your project. Ensure they allow necessary actions. Sometimes, user roles in IIS might be incorrect. Fix them by assigning the correct roles. Also, review your web.config file. It might have restrictive settings causing issues. Adjust these settings carefully.
Fixing Common Deployment Errors
Deployment errors can occur if settings are wrong. First, check your configuration files. Ensure they match your server setup. Look at IIS application pool settings. They must align with your Web Api requirements. Verify .NET version compatibility. Sometimes, mismatched versions lead to problems. Check your URL routing in the application. Incorrect routes can block your Api. Also, examine network settings. Misconfigured settings might prevent proper deployment.
Security Best Practices
Authentication checks who is using your Web API. It is very important. Use strong passwords for users. Multi-factor authentication adds extra security. It needs more than one method to verify users. Always keep user data private and secure. Do not share passwords. Use tools that track login activities. This helps find strange behavior. Keep systems updated to fix any security holes.
HTTPS makes data safe during transfer. It uses encryption to protect information. Always use HTTPS for Web APIs. SSL certificates are needed for HTTPS. They help verify websites are safe. They also protect user data. Make sure SSL certificates are current. Update them before they expire. This keeps your Web API secure. Monitor for any HTTPS errors. Fix them quickly to keep data safe.
Frequently Asked Questions
Can Web Api Be Hosted In Iis?
Yes, a Web API can be hosted in IIS. It requires creating a web application and deploying the API. IIS supports ASP. NET Web API hosting, providing robust features for scalability and security. Configuring application pools and bindings ensures efficient operation.
Hosting in IIS enhances performance and reliability for your API.
How Do I Host My Web Api?
Host your Web API using cloud platforms like AWS, Azure, or Google Cloud. Choose a server, configure it, and deploy. Ensure security settings are robust. Consider using Docker for containerization to simplify deployment and scalability. Regularly monitor performance and update for security patches.
How To Host A Web Service On Iis?
Install IIS on your Windows server. Open IIS Manager and create a new site. Set the site path, bindings, and application pool. Deploy your web service files in the site directory. Configure permissions and start the site. Test the service by accessing it through its URL.
How To Host .net Core Web Api As Windows Service?
Install the Microsoft. Extensions. Hosting. WindowsServices package. Modify Program. cs to use `Host. CreateDefaultBuilder()`. Add `UseWindowsService()` to the builder. Publish the application. Use the `sc create` command to register the service. Start the service with `net start`.
Conclusion
Hosting a Web API in IIS can simplify deployment. It offers a stable environment for your applications. Following the steps ensures a smooth setup process. Use IIS to enhance your API’s accessibility. It’s crucial for efficient management. Review your configurations to avoid common pitfalls.
Keep the server updated for security. Regular monitoring maintains optimal performance. Hosting in IIS supports scalability. It helps handle traffic effectively. Proper setup leads to reliable service delivery. Your Web API can thrive with IIS.


