
Are you ready to bring your Web API to the next level by hosting it in Azure? If you’re looking to scale efficiently, manage your resources smartly, and keep your application running smoothly, then this guide is exactly what you need.
Azure offers a robust platform with flexible options that can accommodate any project size, ensuring your API remains secure and responsive. Imagine having the peace of mind knowing your API can handle unexpected traffic spikes without a hitch. Throughout this article, we’ll walk you through the essential steps to host your Web API in Azure with ease and confidence.
By the end, you’ll have the tools and knowledge to make your API deployment not just possible, but seamless. Ready to unlock the potential of Azure for your Web API? Let’s dive in!
Azure Web Api Hosting Basics
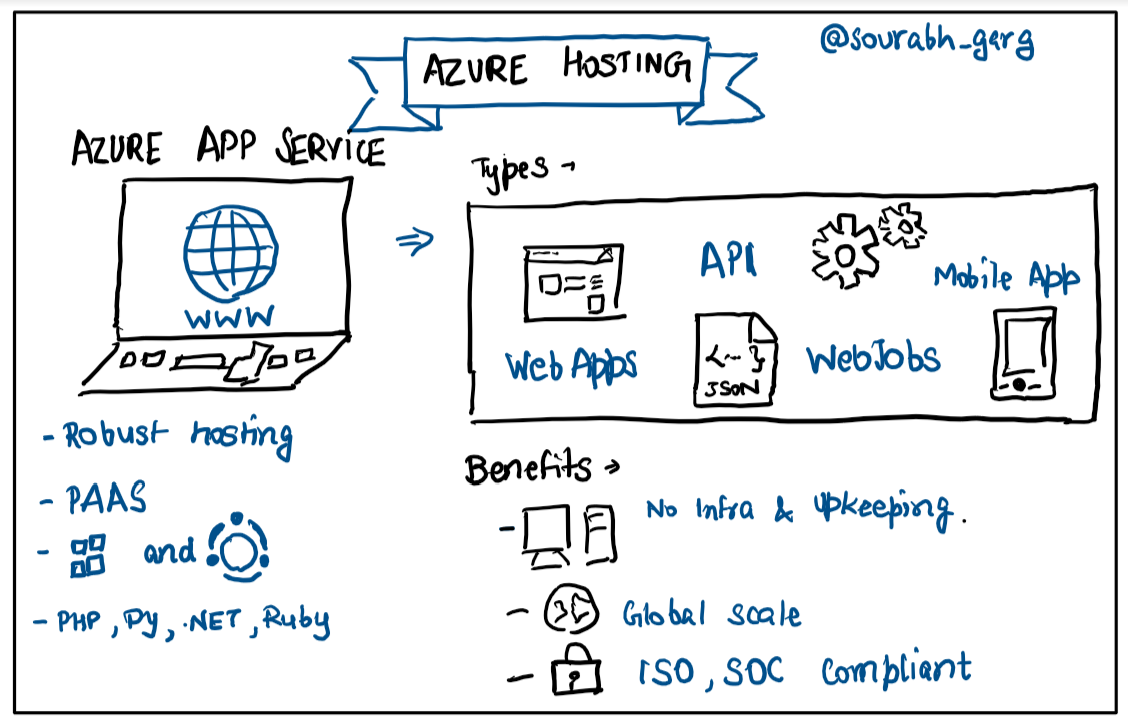
Azure is a cloud computing service by Microsoft. It helps businesses store and manage data online. You can use Azure to run apps or host websites. With Azure, you only pay for what you use. This makes it cost-effective for many users. Azure offers a wide range of services. These include storage, databases, and virtual machines.
Hosting on Azure has many benefits. First, it is scalable. This means you can add more resources as needed. Second, Azure is secure. It uses advanced security measures to protect your data. Third, Azure is reliable. It ensures that your apps run smoothly without any interruptions. Lastly, Azure provides support 24/7. This means help is always available if you need it.
Credit: faun.pub
Preparing Your Web Api
Ensure your code is clean. Check for errors. Use a source control tool like Git. This helps track changes. Install Visual Studio or another IDE. Your API should have a valid SSL certificate. This keeps data safe. Make sure your API is scalable. It should handle many users. You need an Azure account. Create one if needed. Set up Azure CLI for command operations. These tools are essential for deploying your API.
Optimize your API for speed. Use caching to store data. This makes it faster. Reduce unnecessary data. It saves bandwidth. Minimize API calls. They should be efficient. Use compression to shrink files. This helps in quick loading. Consider using Azure services for better performance. Monitor your API’s usage. It helps in improvement. Make sure your API is secure. Protect it from threats. These steps ensure your API runs smoothly.
Setting Up Azure Account
Start by visiting the Azure website. Click on the sign-up button. Provide your email address and a strong password. Verify your email. Fill in your personal details. Choose your country and region. Submit the form. Check your email for a confirmation link. Click to confirm your account. Now your Azure account is ready.
Azure offers various plans. Start with the free plan. It gives you basic services. If needed, upgrade to a paid plan. Look at your usage needs. Match them with the plan features. Check the pricing details before selecting. Choose the plan that suits your needs. Always keep an eye on your budget. Manage your subscription wisely.
Deploying Web Api To Azure
Begin by accessing the Azure Portal. Select “Create a Resource” and search for App Service. Fill in the details like name and subscription. Choose the runtime stack. Click “Review + Create” to make the resource. Once created, go to the App Service and click “Deployment Center”. Follow the steps to deploy your Web API. The Azure Portal is user-friendly and guides each step. This method is great for beginners.
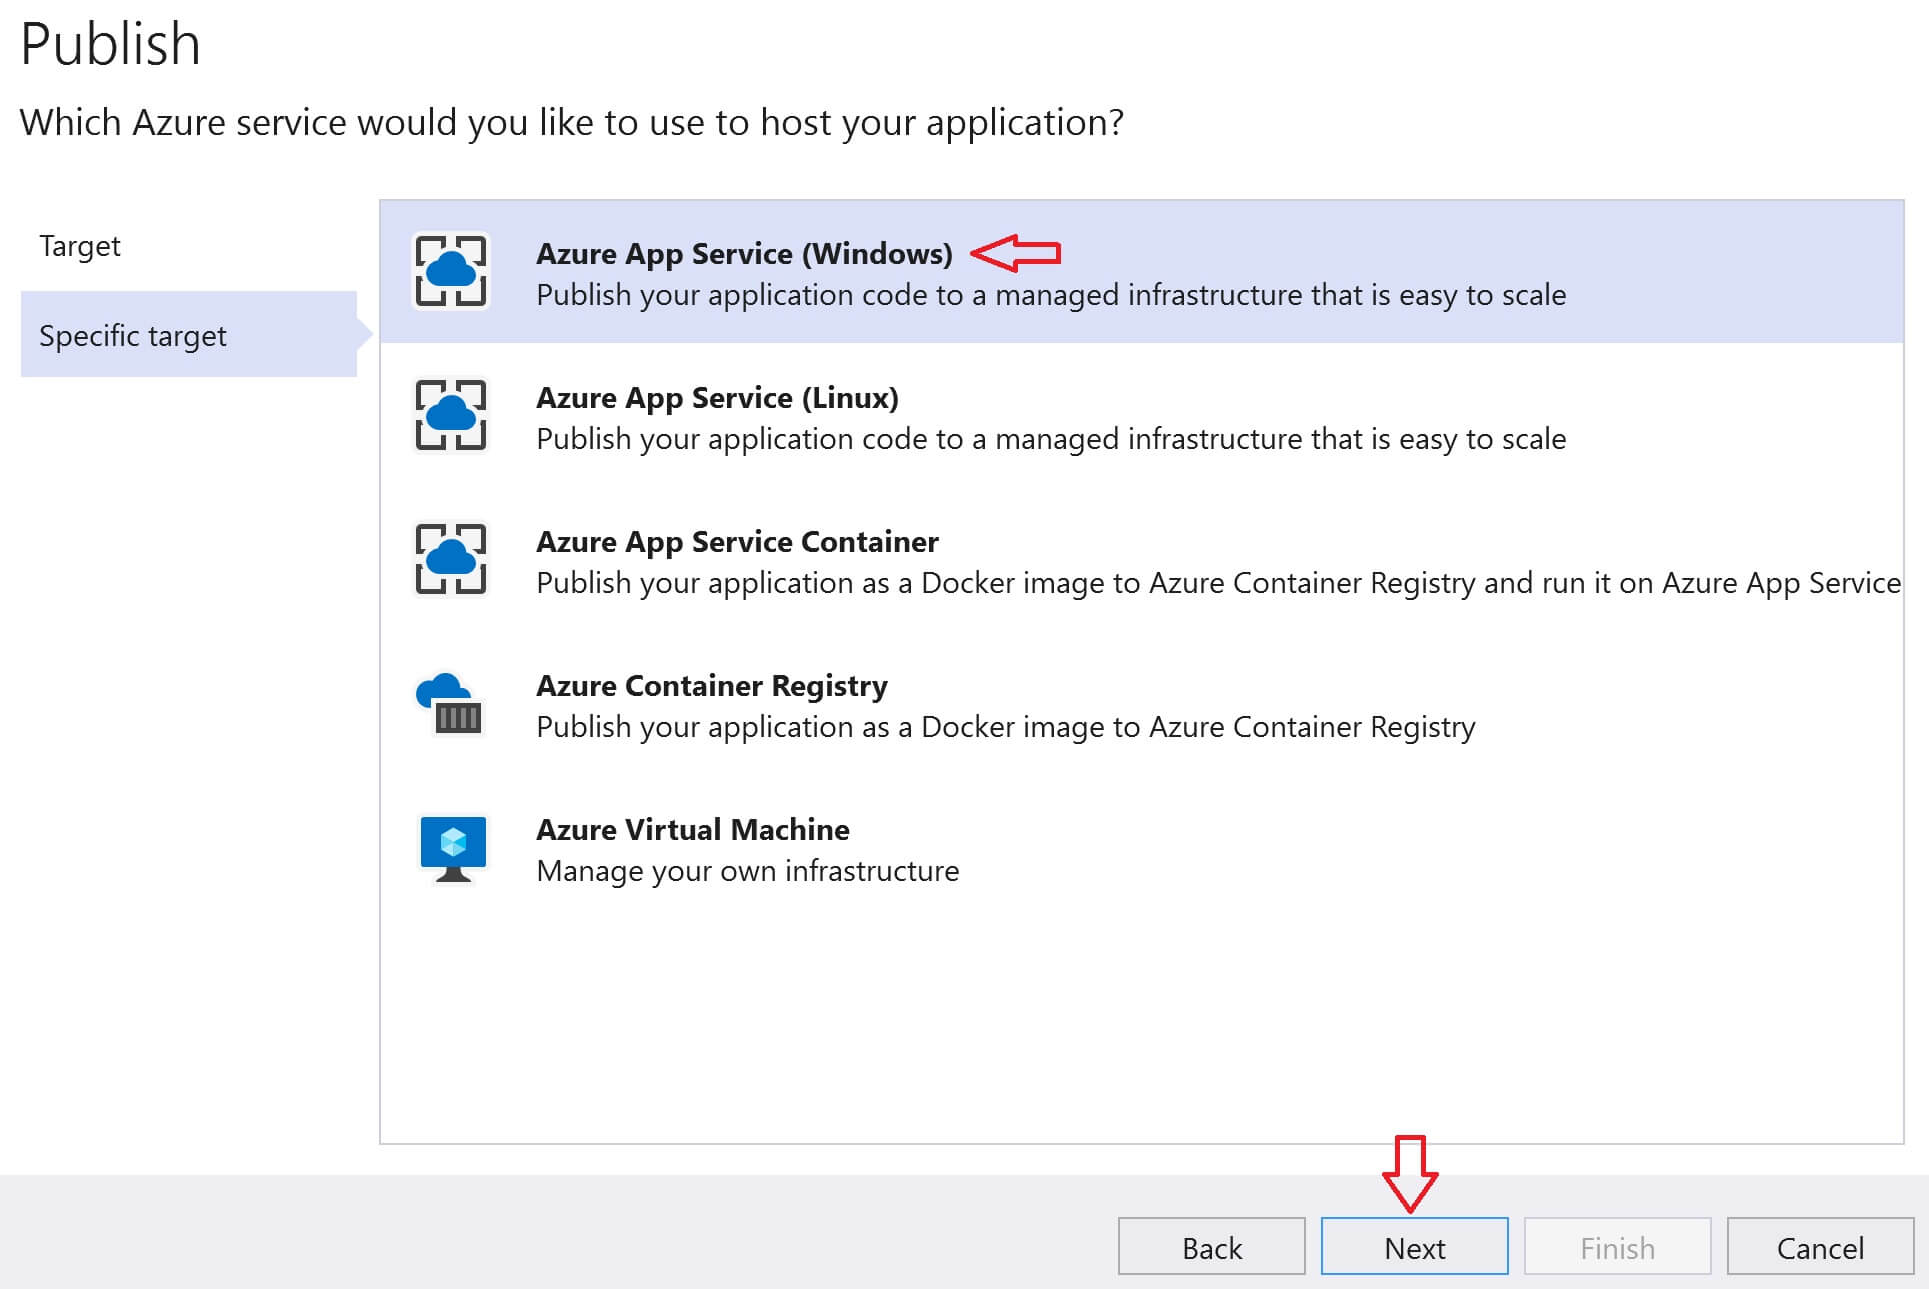
Open your project in Visual Studio. Click on “Build” and then “Publish”. Choose Azure as the publish target. Sign in to your Azure account. Select the App Service you created or make a new one. Visual Studio automates the deployment process. It makes things simple and fast. This is ideal for developers using Visual Studio.
First, install Azure CLI on your computer. Open the terminal and log in using `az login`. Create a Resource Group with `az group create`. Then, deploy the Web API using `az webapp up`. Azure CLI is powerful and flexible. It suits users who prefer command-line tools. This option is great for advanced users.
Configuring Azure Services
Begin by creating an App Service in Azure. This service hosts your Web API. Choose a resource group and select your subscription. Name your app and pick a region close to users. Always remember, a good name helps in easy identification. Select the .NET Core stack for better compatibility. Finally, pick the free pricing tier for testing.
Create an Azure SQL Database for storing data. First, navigate to the SQL Database option. Choose the same resource group as your App Service. This ensures seamless integration. Name your database. Select the basic tier for small workloads. Set up server login credentials carefully. Use these to access your database securely.
Azure Storage handles files and data. Create a Storage Account in the Azure portal. Select the same resource group for consistency. Choose a unique name for your storage account. Pick the region near your users. Use the Hot access tier for frequent access. This helps in quick data retrieval.
Monitoring And Scaling
Azure Monitor helps keep an eye on your app. It checks the app’s health and performance. You get alerts if something goes wrong. Logs and metrics are used to understand the app’s behavior. This helps in quick troubleshooting. Azure Monitor is like a watchful guardian for your app. It ensures your app runs smoothly.
Azure offers auto-scaling for your app. It adjusts resources as needed. More users need more resources. Fewer users need less. This saves money and keeps the app fast. Auto-scaling is smart. It works automatically. No need to adjust things manually. Your app stays ready for any demand.
Optimizing performance is important. Use caching to speed up responses. Load balancing helps distribute traffic evenly. Regular updates can fix bugs and improve speed. Keep an eye on resource usage. Adjust settings if needed. These steps make sure your app is fast and efficient. Users get a smooth experience every time.
Security Best Practices
Host your Web API in Azure for enhanced security and reliability. Utilize Azure’s built-in features to protect your data. Regularly update and monitor your API to prevent vulnerabilities.
Implementing Authentication
Authentication keeps your Web API safe. Use strong passwords. Use two-factor authentication. This adds an extra layer of security. Protect user accounts from unauthorized access. Secure access to your API. Only allow trusted users. This keeps your data safe.
Securing Data Transmission
Secure data transmission is important. Use HTTPS to encrypt data. This prevents data theft. Encryption makes data unreadable to hackers. Protect data moving between client and server. Keep sensitive information safe. Encryption builds trust with users. Protect their privacy.
Regular Security Audits
Conduct regular security audits. These find vulnerabilities in your system. Fix issues quickly. Keep your API secure. Stay ahead of threats. Use security tools to check for risks. Update security measures as needed. Regular audits keep your API strong.
Credit: www.pragimtech.com
Troubleshooting Common Issues
Hosting a Web API in Azure often poses challenges, like configuring the server or managing security settings. Addressing network issues and ensuring proper authentication can streamline the deployment process. Debugging tools in Azure assist in identifying errors, making hosting more efficient.
Handling Deployment Errors
Deployment errors can be frustrating. Always check your error logs first. Logs show where the problem starts. Verify your code is free from syntax mistakes. Make sure the Azure region matches your settings. Correct settings prevent deployment issues. Sometimes, files don’t upload correctly. Double-check file paths and permissions. File path errors often cause deployment failures. Keep your deployment files organized. This reduces errors.
Resolving Configuration Conflicts
Configuration conflicts arise from mismatched settings. Ensure all settings are consistent. Consistency is key to smooth operations. Review your configuration files thoroughly. Check for duplicate entries and remove them. Duplicate entries lead to confusion. Make sure your database settings are correct. Wrong settings can halt your API. Correct database settings are crucial. Communicate with your team about changes. This prevents conflicts.
Performance Bottlenecks
Performance bottlenecks slow down your API. Monitor your system regularly. Regular monitoring helps identify issues early. Check server load and optimize it. Heavy load causes slow response times. Optimized server load improves speed. Review your code for efficiency. Complex code can slow processes. Simple code runs faster. Use caching to speed up responses. It reduces server strain. Keep your API fast and efficient.
Credit: learn.microsoft.com
Frequently Asked Questions
How To Create A Web Api In Azure?
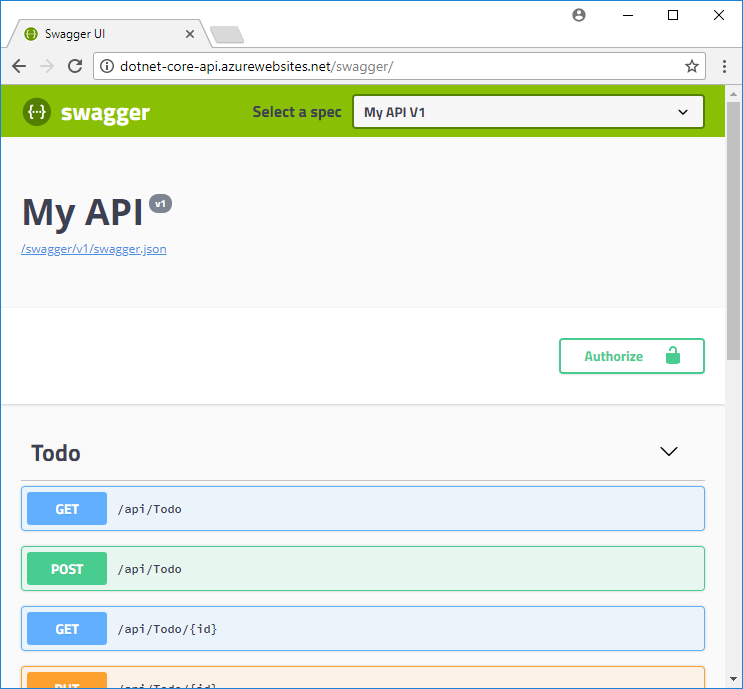
To create a web API in Azure, use Azure App Service. Start by setting up an App Service plan. Deploy your API using tools like Visual Studio or Azure CLI. Configure API settings, including authentication and CORS. Test and monitor your API using Azure’s built-in tools.
How Do I Host My Web Api?
Choose a cloud provider like AWS, Azure, or Google Cloud. Set up a server instance. Deploy your web API. Configure domain and SSL. Monitor performance and security.
How Do I Deploy .net Web Api In Azure?
Deploy. NET Web API in Azure using Visual Studio. Publish the API to Azure App Service directly. Configure settings in Azure portal and test deployment. Ensure API is running smoothly with proper monitoring. Use Azure DevOps for continuous integration and deployment.
What Is The Difference Between Web Api And Azure Api?
Web API is a framework for building HTTP services. Azure API Management provides tools for managing and securing APIs.
Conclusion
Hosting your Web API in Azure is simple. Azure offers reliability and scalability. You manage resources efficiently. Follow the steps outlined. Use Azure’s tools wisely. Ensure your API runs smoothly. Monitor performance regularly. Security remains crucial; implement best practices. Test thoroughly before deployment.
Azure provides excellent support options. Troubleshooting is easier with them. Remember, clear documentation helps. Share your experience with others. Hosting your API effectively can boost your project’s success. Azure’s capabilities can enhance your application’s reach. Keep learning and improving. Your efforts will pay off in the end.


