
Are you looking to run your Java web application right from your computer? Whether you’re a budding developer or a seasoned programmer, understanding how to host your Java web application locally can be a game-changer.
Imagine testing your app in real-time, tweaking it until it’s just right, all without the need for an external server. Sounds convenient, doesn’t it? In this guide, you’ll discover simple steps to set up your local environment, ensuring your application runs smoothly.
With this knowledge, you’ll gain greater control over your development process, troubleshoot effectively, and enhance your coding skills. Ready to unlock the full potential of your Java projects? Keep reading, and you’ll be hosting like a pro in no time.
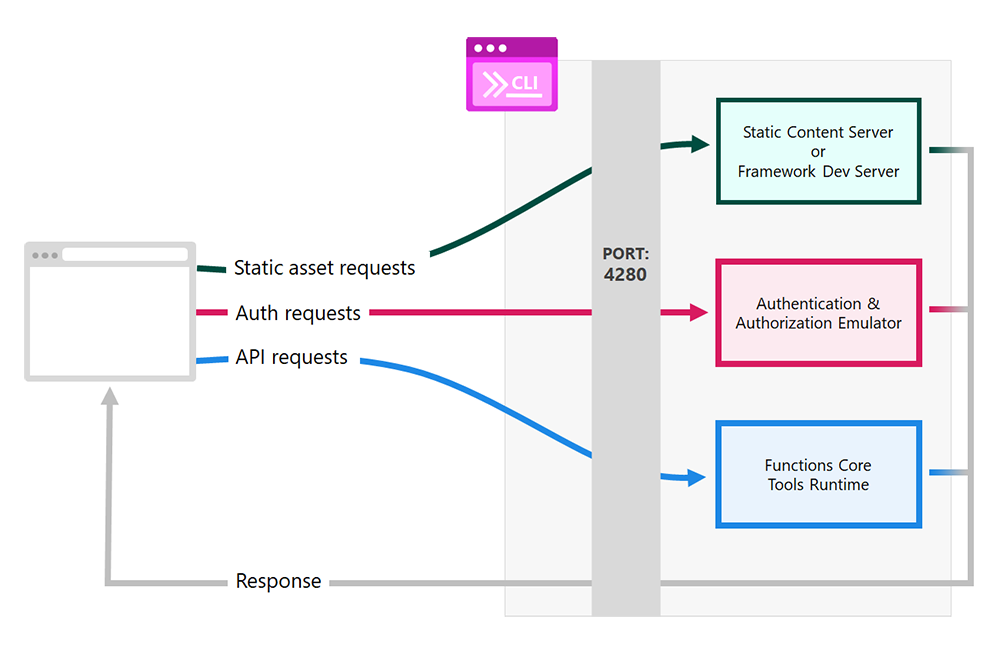
Credit: learn.microsoft.com
Setting Up The Development Environment
Set up your local server to host a Java web application. Start by installing Java Development Kit (JDK) and Apache Tomcat. Configure Tomcat to run your application efficiently. Use a text editor or an Integrated Development Environment (IDE) to write and manage code easily.
Installing Java Development Kit
First, you need the Java Development Kit (JDK). It helps run Java programs. Visit the Oracle website to download it. Choose the version that fits your computer. Follow the instructions to install. Ensure it is installed properly by typing java -version in the command line. You should see the version number.
Configuring Integrated Development Environment
An Integrated Development Environment (IDE) makes coding easier. IntelliJ IDEA and Eclipse are popular choices. Download and install one from their official sites. Open the IDE and set the JDK path. This connects Java with your IDE. Now, create a new project. You are ready to write and test Java code.
Building The Java Web Application
Start by opening your Java IDE. Click on File and choose New Project. Pick Java Web from the options. Name your project and choose a location on your computer. This will create the basic structure for your web app. Check that all folders are in place. These folders will hold your files and resources.
Open the pom.xml file in your project. This file is key for adding libraries. Search online for Java libraries you need. Copy the dependency code and paste it in the file. Save the file to update your project. These dependencies will help your app run better.
Configuring Web Server
First, download the Apache Tomcat software. Get it from the official site. Choose the version that matches your system. After downloading, locate the installation file. Double-click it to start the installation process. Follow the simple steps. Use the default settings for ease. Complete the installation. Apache Tomcat is now on your computer.
Open the Apache Tomcat folder. Find the conf folder inside. Look for the server.xml file. Open it with a text editor. Look for the port setting. Ensure the port is set to 8080. Save the changes. Close the text editor. Now, start the Tomcat server. This will run your Java web application locally.

Credit: umbrex.com
Deploying The Application
First, package your Java web app into a WAR file. Use a tool like Maven or Gradle. These tools help in building the application. Ensure all dependencies are included in the package. It’s important to avoid missing files. Double-check the package structure. Ensure it matches the required format.
Install Apache Tomcat on your local machine. This software acts like a server. Copy the WAR file to the Tomcat webapps directory. Start the Tomcat server using its control panel. Your application will be deployed automatically. Check if it runs by visiting localhost:8080 in a browser. Ensure the application loads without errors. If errors occur, check the logs for solutions.
Testing The Local Host Setup
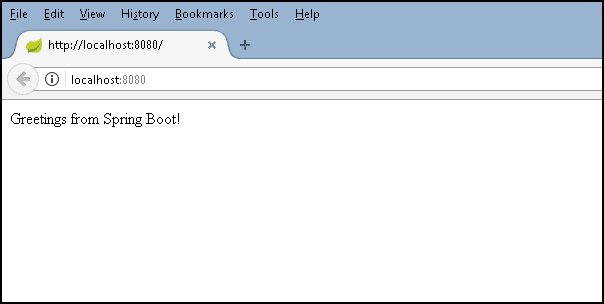
Accessing the Application Locally is easy. Open your web browser. Type localhost:8080 in the address bar. Hit enter. You should see your Java web app. If the page loads, your setup works.
Sometimes, the app does not show. Check if your server is running. Look at the terminal window. Make sure there are no errors. Restart the server if needed.
Next, verify the network connection. Ensure your computer is connected to the network. Try using another browser to test. This checks if the issue is browser-specific.
Troubleshooting Common Issues helps when things go wrong. First, examine the error messages. They give clues. Check your Java code for mistakes. Look for missing semicolons or typos. Debugging tools can assist.
Firewall settings might block connections. Adjust them if necessary. Ensure port 8080 is open. This lets data pass through.
Managing Database Connections
Setting up a local database is important for your Java app. First, download a database software like MySQL or PostgreSQL. Install it on your computer. Create a new database for your app. Use a simple name. Open the database software. Find the option to create a new database. Enter the name and click save. Your database is ready to use.
Connect your Java app to the database. Use a JDBC driver for this. Add the driver to your project. Find the database URL and credentials. Write a connection string in your code. Test the connection. Make sure it works without errors. Now your app can talk to the database.
Securing The Local Environment
Creating a local environment for Java web applications involves setting up servers like Apache Tomcat on your computer. Proper installation ensures smooth testing and development before deployment. This method offers full control over configurations, essential for optimizing performance and security.
Implementing Security Measures
Protecting your Java web application is key. Strong passwords are vital. Change them regularly. Use firewalls to block unwanted access. Encryption safeguards sensitive data. Keep software updated. Updates fix security gaps. Install antivirus programs. They detect and remove threats. Backup data often. This helps during data loss. Check permissions. Limit access to necessary users. SSL certificates encrypt web traffic. They prevent data interception.
Monitoring Application Performance
Watch your app’s performance closely. Use performance tools. They show how your app is running. Track loading times. Slow times frustrate users. Check server health often. A healthy server means a fast app. Analyze error logs. They reveal issues. Fix errors quickly. Use monitoring dashboards. They offer real-time insights. Set alerts for problems. Alerts warn you before issues grow.
Credit: code.visualstudio.com
Optimizing For Local Development
Local development tools help you build web apps faster. Use these tools for easier coding. They make your work simple. Tools like IntelliJ IDEA and Eclipse are popular. They offer many features. You can write and test code easily. These tools have built-in debuggers. Debugging is vital for finding errors. Tools help you spot mistakes quickly.
Utilizing Development Tools
Development tools help you code better. They offer code suggestions. These tools improve your coding speed. They make coding fun. Use shortcuts to save time. Shortcuts boost productivity. They are easy to learn. Use them daily for better results.
Improving Debugging Processes
Debugging is crucial for fixing bugs. Bugs make your app slow. Debugging tools help find bugs fast. Use breakpoints to pause code. Breakpoints help you see errors. They show where the code stops. Check variables when debugging. Variables hold data. They help understand code flow. Change variable values to test different scenarios. Testing is key to fixing issues.
Frequently Asked Questions
How To Host A Java Web Application?
Choose a reliable web hosting provider supporting Java applications. Deploy your application using a servlet container like Apache Tomcat. Upload your WAR file to the server. Configure server settings and ensure proper database connections. Test your application thoroughly to confirm successful deployment.
How Do I Host A Local Web Application?
Install a local server like XAMPP or WAMP. Configure your web application files in the server’s directory. Start the server to host the application locally. Access your application via a browser using “localhost”. Ensure necessary software components are installed for compatibility.
Where To Host A Java Web Application For Free?
Host Java web applications for free on platforms like Heroku, GitHub Pages, or Glitch. These services offer free tiers suitable for small projects. Explore cloud providers like AWS and Google Cloud with free trials for more advanced needs. Always review each platform’s limitations before choosing.
How To Run A Java Program On An Apache Server?
Install Apache Tomcat on the server to run Java programs. Deploy your Java application by placing the WAR file in the Tomcat “webapps” directory. Start Tomcat using the startup script. Access your Java program through the server’s URL, ensuring your code is compatible with the Java version on the server.
Conclusion
Hosting a Java web application locally is straightforward. Start with installing Java and a web server. Configure your server settings carefully. Test your application to ensure it runs smoothly. Local hosting helps developers test changes quickly. It’s an essential step before going live.
Troubleshooting is easier on a local server. You have full control and flexibility. Remember to keep your software updated. Secure your local environment to avoid issues. Practice makes perfect. With these steps, hosting locally becomes simple and efficient. Experiment and learn as you go.
Enjoy the process of building and testing your application.


