
Are you ready to take your Java web application to the next level by hosting it on Azure? Whether you’re a developer looking to expand your skills or a business owner seeking a robust platform for your applications, Azure offers a flexible and powerful solution.
Imagine the seamless deployment, scalability, and security enhancements you could achieve. You’ll discover step-by-step guidance on how to efficiently host your Java web application in Azure. This isn’t just about tech—it’s about empowering you to maximize your application’s potential and drive success.
So grab your coffee and get comfortable; you won’t want to miss what we have in store for you!
Setting Up Azure Account
Start by visiting the Azure website. Find the signup button. Click it. Fill in your details. Name, email, and phone number. Use a strong password. Write it down. You will need it later. Next, choose the free tier. This is the best for beginners. Confirm your details. Check your email. Look for a verification email. Click the link inside. Your account is ready.
Now, log in to your Azure account. Look at the dashboard. It is your control center. Here, you can manage resources. Check your billing. You can also find help here. Explore the options. Get familiar with the layout. This will help you later.

Credit: azure.microsoft.com
Choosing The Right Azure Service
Azure App Service is a popular choice. It is easy to use. It helps to host web apps quickly. You can deploy your Java app here. It supports many languages. It also has built-in security. This service scales well. It’s great for most web apps.
Azure Virtual Machines offer full control. You can install any software. It is like having your own server. This option is great for complex apps. It provides flexibility. It is more work than App Service. But it gives you more power.
Azure Kubernetes Service is perfect for containerized apps. It manages lots of containers. It makes scaling easy. Your Java app can run in small parts. This service handles them well. It is good for modern applications. It may be complex for small apps.
Preparing Java Web Application
Start by setting up the environment where your Java app will run. Choose the Java version that fits your application. You should also decide on the memory limits. Set the database connections if your app needs them. Make sure to secure your application by configuring the firewall settings. Use encryption for sensitive data.
Use Maven or Gradle to create a package. These tools help you manage dependencies. They make building applications easier. Maven uses POM files. Gradle uses build scripts. Both help in automating tasks. Choose the one that fits your needs. Packages made are ready to deploy. They are like boxes with everything inside.
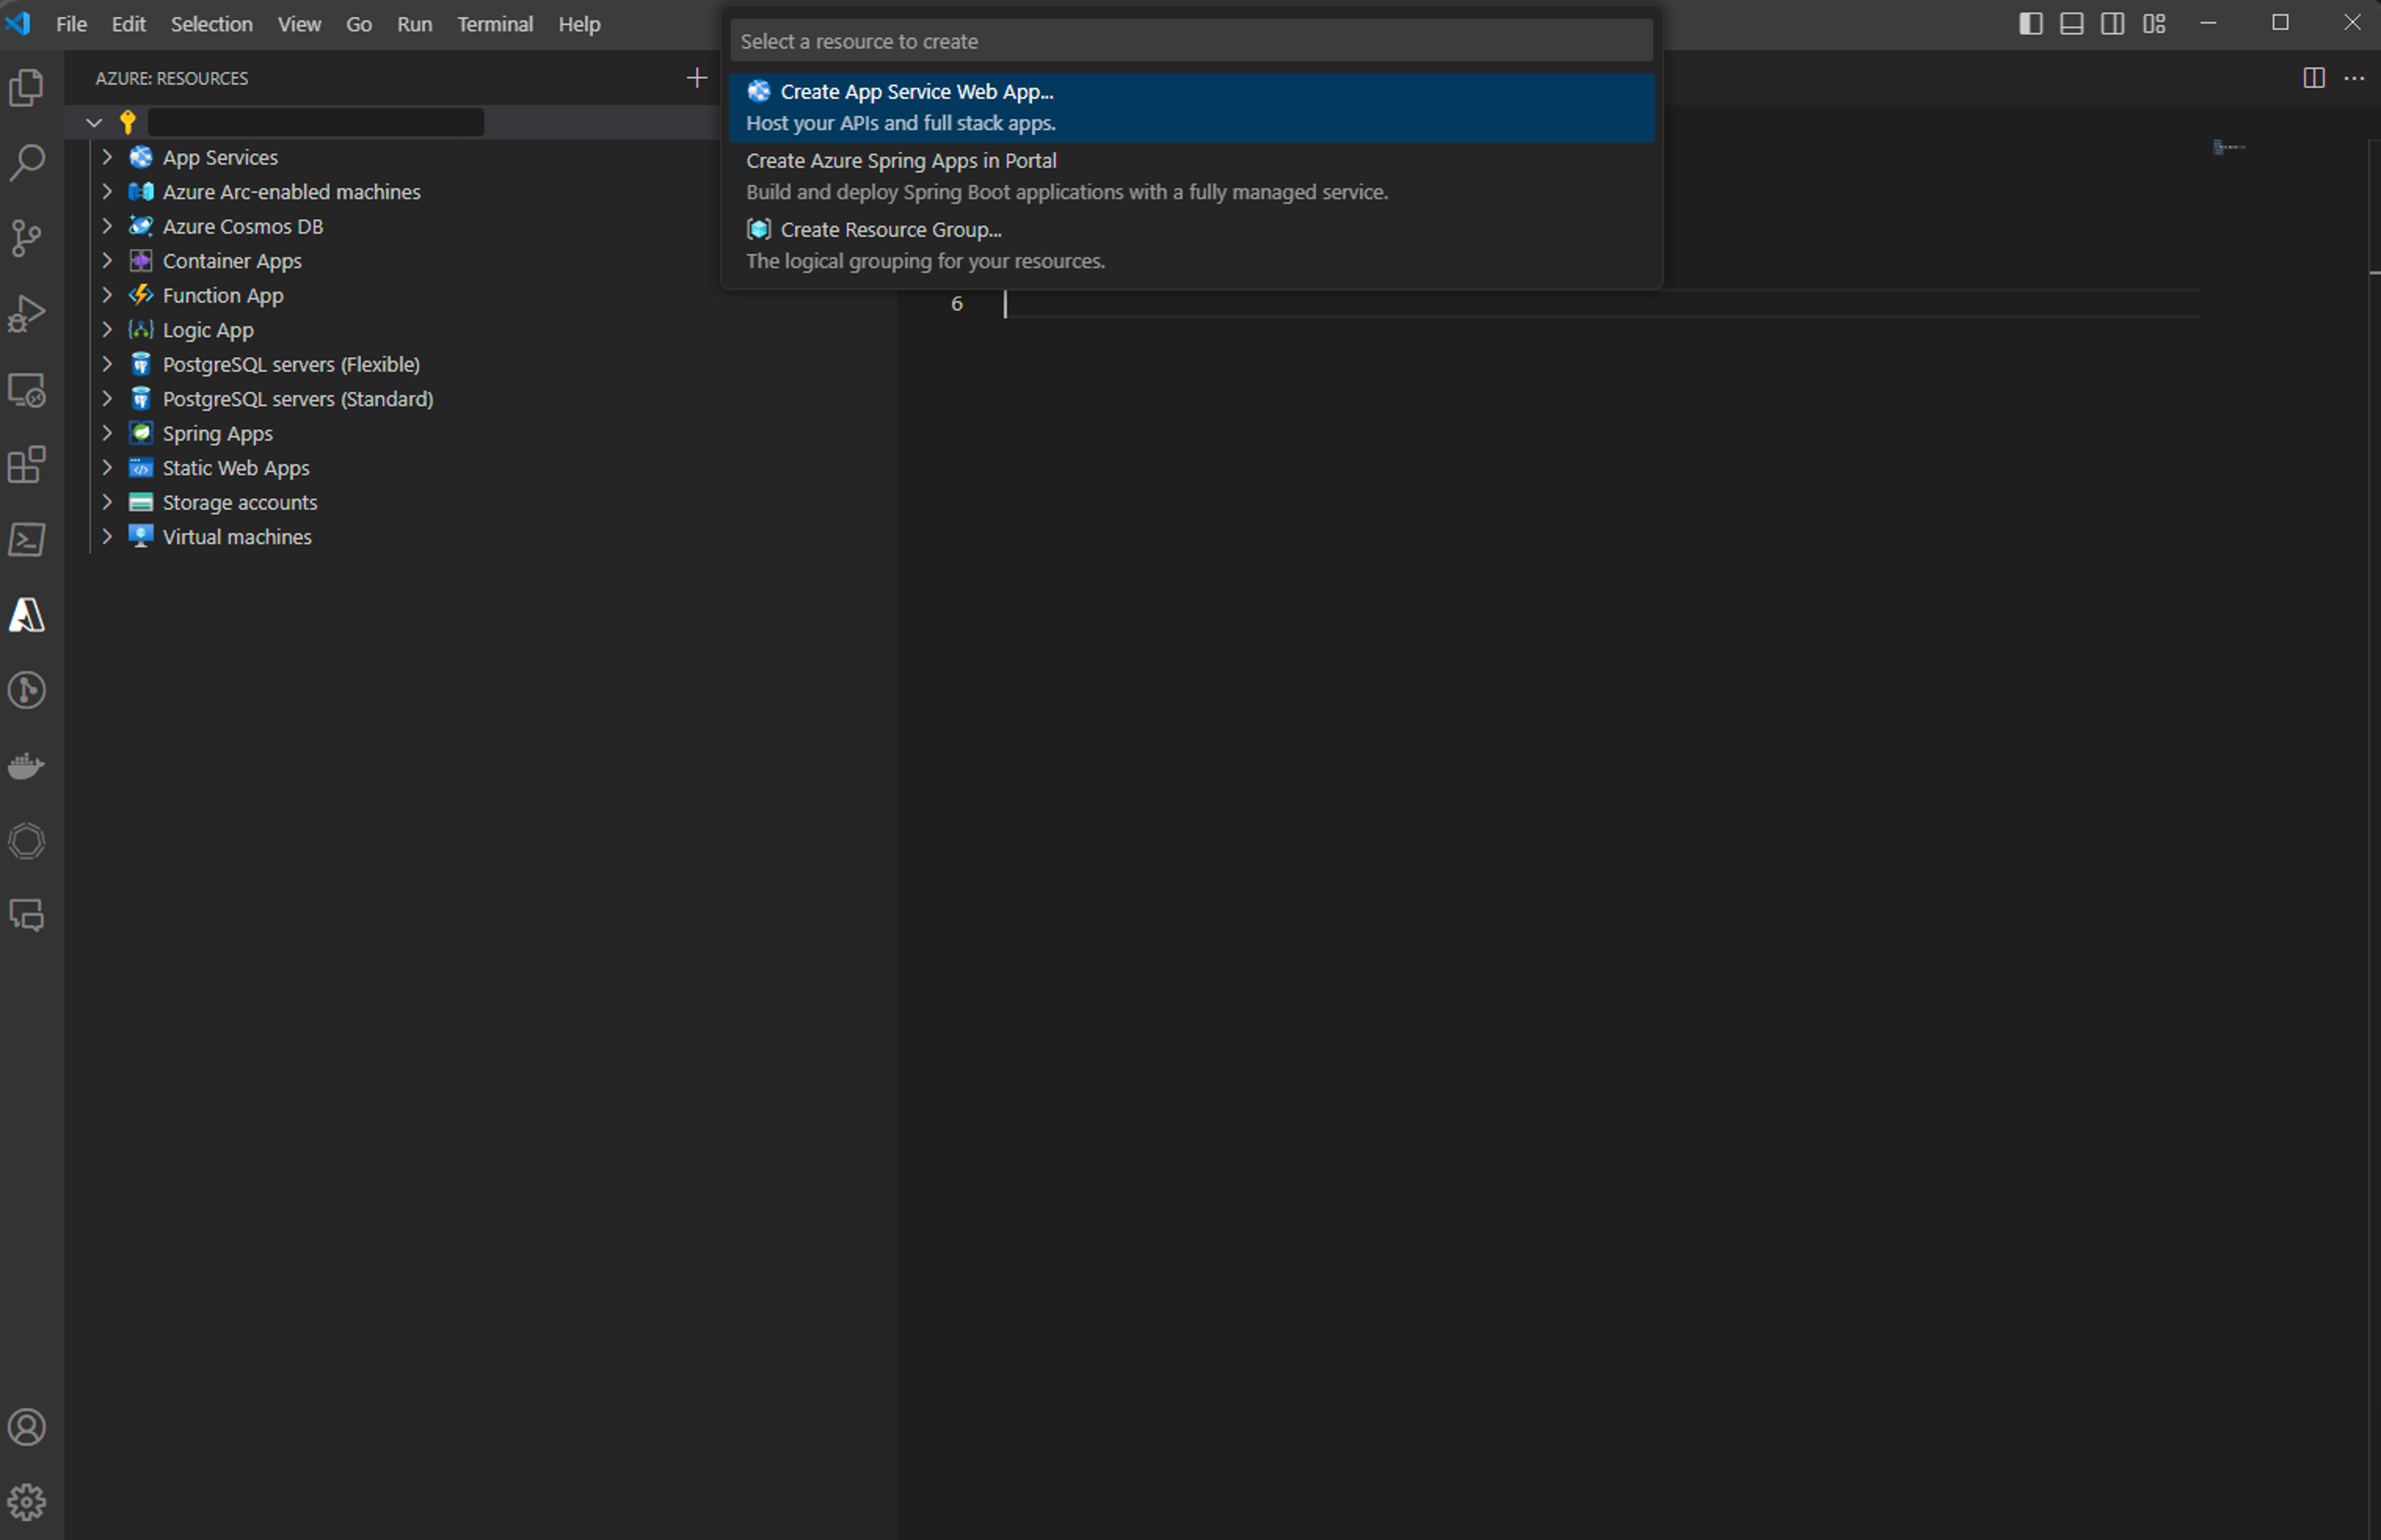
Credit: code.visualstudio.com
Deploying On Azure App Service
Start by logging into the Azure Portal. Next, select the Create a resource option. Choose App Service from the list. Fill in the details. Use a simple name for your app. Choose the Java runtime you need. Select the pricing plan that fits your needs. Finally, click on Create to set up the service.
First, install the Azure CLI tool. Open your terminal. Use the command az login to sign in. Next, create a new web app using az webapp create. Deploy your Java app with az webapp deploy. Make sure to specify your app’s name and directory.
Connect your GitHub repository to Azure. In your repository, create a new workflow file. Use the Azure Web Apps action. This action will deploy your app. Add your Azure credentials. Push your changes to GitHub. The workflow will run automatically. Your app gets deployed with every push.
Deploying On Azure Virtual Machines
Start by creating an Azure account. Access the Azure portal and click on “Create a resource”. Choose Virtual Machines from the list. Select your preferred operating system and size. Follow the steps to configure network settings and security options. Finally, review and launch your Virtual Machine.
Connect to your Virtual Machine using SSH. Install Java Development Kit (JDK) by entering simple commands. Update your package manager and install Java. Check the Java version to ensure it’s properly installed. This step is crucial for running your Java applications.
Transfer your Java application files to the Virtual Machine. Use secure copy (SCP) or file transfer protocol (FTP). Navigate to your application’s directory. Run your application using Java command line tools. Ensure everything is working by accessing the application’s URL. Test all features to confirm deployment success.
Deploying On Azure Kubernetes Service
Start by creating a Kubernetes cluster in Azure. Use the Azure portal. Choose the right settings. Set the node size and count. These affect performance. Ensure you have enough resources. It’s important for your app’s success.
A Docker image is a package. It contains everything your app needs. Build the image using a Dockerfile. This file has instructions. It tells Docker how to build the image. Once built, push it to a container registry. Azure has its own called Azure Container Registry. Use it to store your images.
Create a deployment file for Kubernetes. This file tells Kubernetes how to run your app. Define the number of replicas. More replicas mean better reliability. Set the image location. Specify your Docker image’s path. Apply the deployment using kubectl command. Watch your app come to life.
Configuring Azure Networking
Setting up Azure networking is key to hosting your Java web application. Start by creating a virtual network to connect your resources. Then, configure network security groups to control traffic flow.
Setting Up Dns And Domain
DNS connects your domain to your web app. It’s like a phone book for the web. You need a good DNS service. Azure provides a reliable DNS. First, register your domain. Then, link it to Azure DNS. This helps users find your app online. Ensure DNS settings are correct. Check your domain name servers. Make sure they point to Azure. This process is key for web traffic. Without it, users can’t reach your app. Double-check every detail. Errors can make your site vanish.
Configuring Load Balancer
A load balancer spreads traffic evenly. It helps your app stay fast. Azure has built-in load balancers. These tools keep apps running smooth. First, create a load balancer. Then, add your web app to it. This helps handle heavy web traffic. Configure health probes. They check if your app is online. Healthy apps get more traffic. This keeps your app fast and reliable. Without it, your app might slow down. Ensure all settings are correct. This is crucial for app performance.
Monitoring And Scaling
Azure Monitor helps you keep an eye on your apps. It shows how your app is doing. You can see performance and health. Azure Monitor gives alerts. Alerts tell you if something is wrong. You can set custom alerts. Make it warn you about special things. It helps you act fast when problems happen.
Autoscaling makes your app grow or shrink. It changes size based on demand. Azure lets you set rules for scaling. These rules decide when to add or remove resources. If many people use your app, it grows bigger. If fewer people use it, it shrinks. This saves money. Your app runs better and smoother.
Security Best Practices
Deploying a Java web application on Azure requires adherence to security best practices. Ensure secure authentication, use HTTPS, and regularly update dependencies. Configure firewall rules to protect your application from unauthorized access.
Implementing Ssl/tls
SSL/TLS encrypts data between users and your web app. This keeps data safe from bad people. Azure makes it easy to use SSL/TLS. You can get a certificate from Azure. This certificate helps prove your app is safe. Always keep your certificates up-to-date. This stops hackers from getting in. Use the HTTPS protocol. It is safer than HTTP.
Make sure all parts of your web app use SSL/TLS. This includes images and scripts. Even little things matter in security. Tell users your site is safe with a lock icon. This makes them feel secure.
Using Azure Security Center
Azure Security Center helps protect your web app. It shows you weak spots. Fix these to keep your app safe. The center offers many tools. These tools help monitor and guard your app. It gives advice on making your app better. Follow these tips for stronger security. Set alerts for unusual activity. This helps catch problems fast. Always check the security center. Regular checks keep your app safe.
Cost Management Tips
Deploying a Java web application in Azure can be cost-effective. Opt for Azure App Service for efficient hosting. Monitor resources regularly to control expenses effectively.
Estimating Costs
Start by checking Azure’s pricing calculator. It helps you see costs for different services. Choose the right plan for your Java app. Look at the pricing for storage, network, and compute resources. Use the calculator to find the best fit.
Think about how much traffic your app will have. More traffic means more cost. Keep an eye on the data transfer rates. This affects your budget.
Optimizing Resource Usage
Use autoscaling to adjust resources based on demand. This saves money. Monitor resource usage with Azure’s dashboard tools. You can see where to cut costs.
Choose the correct instance size for your app. Don’t pick bigger than needed. This helps keep costs low. Check app performance regularly. It ensures you use resources wisely.

Credit: learn.microsoft.com
Frequently Asked Questions
Can Java Run On Azure?
Yes, Java can run on Azure. Azure supports Java applications using Virtual Machines, App Service, and Azure Kubernetes Service. Azure provides Java SDKs and tools for seamless integration. Developers can easily deploy and manage Java applications in the Azure cloud environment.
How To Host A Java Web Application?
Choose a reliable hosting provider supporting Java. Install the necessary Java runtime environment and server software. Deploy your application using tools like Apache Tomcat or GlassFish. Configure database connections and security settings. Test thoroughly to ensure functionality and performance. Regularly update and maintain to keep your application running smoothly.
How To Deploy A Java Application On Cloud?
Deploy a Java application on the cloud using a provider like AWS, Google Cloud, or Azure. Create a virtual machine, install Java, and configure your server. Package your application into a WAR or JAR file, upload it, and set up your environment.
Verify deployment with testing.
How To Deploy An Application In Azure?
Deploy an application in Azure by creating a resource group. Choose your service, configure settings, and deploy. Use Azure DevOps for continuous integration and delivery. Monitor and scale your application easily through the Azure Portal. Ensure your application meets compliance and security standards.
Conclusion
Hosting your Java web application on Azure is straightforward. Follow the steps shared above. Ensure your Azure setup matches your application needs. This ensures smooth performance. Choose the right Azure services for your application. This helps manage resources efficiently. Always monitor your app’s performance regularly.
Make necessary adjustments for improvement. Azure’s flexibility supports scaling as your app grows. Stay informed about new Azure features. They can enhance your app’s capabilities. With Azure, your Java web application can reach its full potential. Start your hosting journey today and leverage Azure’s robust platform.


