
Are you ready to unleash the full potential of your Windows 10 computer by turning it into a powerful web server? Hosting your own web server might sound like a complex task reserved for tech gurus, but it’s simpler than you think.
Imagine having complete control over your website, hosting files, or even running applications directly from your PC. Whether you’re a budding developer, a small business owner, or just curious, this guide will make the process straightforward and accessible. With our step-by-step instructions, you’ll discover how to set up a web server on your Windows 10 machine in no time.
Stick around to learn how to transform your computer into a digital powerhouse and take the first step towards mastering your own corner of the internet.
Credit: www.faqforge.com
Choosing The Right Web Server Software
Apache and Nginx are popular choices for web servers. Apache is known for its flexibility and powerful modules. It works well with different platforms. Nginx is famous for its speed and efficiency. It handles many connections at once. Ideal for sites with lots of traffic.
IIS stands for Internet Information Services. It is made by Microsoft. It fits well with Windows systems. Easy to use for beginners. Provides security and scalability features. Great for hosting on Windows 10. Choose wisely based on your needs.
Installing Web Server Software
Begin by choosing a web server software. Options include Apache or Nginx. Visit their official website. Click on the download link. Make sure to choose the version for Windows 10. Save the installer file to your computer. Remember the location. This will help you find it later.
Locate the installer file on your computer. Double-click to start the installation process. Follow the on-screen instructions. Choose the default settings for ease. Click Next until you reach the end. Finally, click Finish to complete the installation. Your web server software is now ready.
Configuring Server Settings
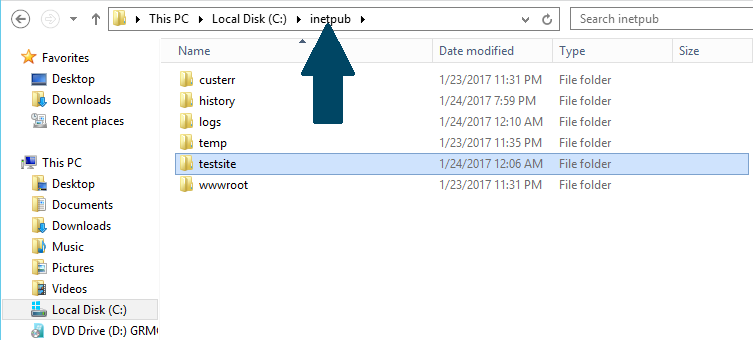
Choose a server software like Apache or Nginx. Download and install it on your Windows 10. Find the configuration files in the installation folder. Open these files with a text editor. Edit the settings to match your needs. Set the server root directory to your website folder. Save changes and close the editor.
Open the Windows Firewall settings. Select “Allow an app through firewall”. Find your server software in the list. Check both private and public boxes. Click OK. Open the server software. Set the port number to 80 for HTTP. Ensure the port is open in the firewall. Restart the server to apply changes.
Setting Up Domain And Dns
Choose a domain name. This is your website’s address. Select a name that is easy to remember. Visit a domain registrar website. Examples are GoDaddy or Namecheap. Search for your chosen name. If available, buy it. You might need to pay yearly. Some registrars offer discounts. Look for them to save money. Keep your domain name safe. Use a strong password. Write it down somewhere safe.
DNS links your domain to your server. Visit your registrar’s DNS settings page. Find DNS management or similar words. Add a new record. Choose “A record.” Enter your server’s IP address. Save the changes. Check if it works. Type your domain in a browser. Your site should show up. DNS changes can take time. Wait a few hours if needed.
Testing Your Web Server
Checking Accessibility is key after setting up your web server. Open a web browser on your computer. Type “localhost” in the address bar. Press Enter. Your website should appear. If it shows up, the server works. Try from another device. Use the computer’s IP address. Check if the website loads. This step confirms if others can see it.
Troubleshooting Common Issues can help when things go wrong. Sometimes, the firewall blocks access. Open firewall settings. Allow the web server through. Another issue is the web server service. Make sure it’s running. Restart it if needed. Check your website files. Ensure they are in the right folder. These steps help fix most problems.

Credit: www.wikihow.com
Optimizing Server Performance
Caching is a smart way to speed up a web server. It saves important data for quick access later. This means the server works less and responds faster. Memory caching is one popular method. It stores data in RAM, which is quick to access. Disk caching is another option. It saves data on the hard drive. It is slower than RAM but can hold more data. Browser caching helps users. Their browsers remember parts of your website. It makes loading faster next time they visit.
Load balancing is important for server health. It divides tasks among many servers. This prevents any one server from being overloaded. Round robin is a simple method. Tasks are given to each server one after another. Least connections is another choice. It sends tasks to the server with fewest connections. This keeps all servers working evenly. IP hash uses the user’s IP address. It always sends them to the same server. This can help with caching and speed.
Ensuring Security Measures
SSL certificates keep data safe between users and servers. They help stop hackers from seeing private information. Websites with SSL show a padlock icon. This means the site is secure. SSL certificates are important for online safety. They make sure data stays private. Users trust sites with SSL more.
Updates fix problems that could harm your computer. Always install them on time. They keep your system safe from new threats. Regular security updates protect your web server. They stop viruses and hackers from causing damage. Set your computer to update automatically. This way, you never miss an update. Keeping software updated is key for security.

Credit: www.youtube.com
Maintaining And Monitoring
Log files record all actions on your server. They show user visits and errors. Regularly check these logs. Look for unusual activity. Logs help you understand server performance. Keep an eye on error messages. They point out problems needing fixes. Make it a habit to review logs often. This keeps your server healthy and safe.
Use tools to watch server performance. Task Manager is built into Windows. It shows CPU, memory, and disk use. Another tool is Resource Monitor. It gives detailed insights. Third-party tools like Nagios help too. They provide alerts and reports. These tools help manage server load. Keep your server running smoothly. Regular monitoring prevents issues.
Frequently Asked Questions
How To Create A Web Server In Windows 10?
Install IIS through Control Panel to create a web server on Windows 10. Open Control Panel, select Programs, then Turn Windows features on or off. Check Internet Information Services, click OK, and wait for installation. Access IIS Manager from the Start menu to configure your web server.
How Do I Host My Own Website Server?
To host your own website server, choose reliable hardware and install server software like Apache. Register a domain name and configure DNS settings. Ensure security with firewalls and regular updates. Connect your server to a stable internet connection. Regularly monitor and maintain your server for optimal performance.
Can I Turn My Pc Into A Web Server?
Yes, you can turn your PC into a web server. Install server software like Apache or Nginx. Configure your firewall and router for external access. Ensure a static IP or use dynamic DNS. Regularly update security measures to protect your server.
Does Windows Have A Built-in Web Server?
Yes, Windows includes a built-in web server called Internet Information Services (IIS). IIS supports various protocols like HTTP and HTTPS. It allows hosting websites and web applications efficiently. You can access it through Windows Features and configure it according to your needs.
Suitable for both personal and professional use.
Conclusion
Hosting a web server on Windows 10 is simple with the right steps. Follow the guide to set up and maintain your server. Check configurations regularly to ensure smooth operation. Explore server software options to match your needs. Keep your security settings updated to protect data.
Regular backups are essential for data safety. Enjoy the process of building and managing your own server. With practice, you will gain confidence in server management. Feel free to experiment and learn. Your journey in hosting starts here, and it can be very rewarding.


