
Are you ready to launch your website but feeling overwhelmed by the technicalities of web hosting? You’re not alone.
Many people find the process daunting, but it doesn’t have to be. Imagine having a clear, step-by-step guide that makes web hosting as simple as following a recipe. That’s exactly what you’ll find here. You’ll discover how to set up web hosting without the stress and confusion.
No tech jargon, just straightforward instructions that you can easily follow. By the end, you’ll have the confidence to get your website online and visible to the world. Ready to take control and make your web presence a reality? Let’s dive in.
Choosing The Right Hosting Type
Shared hosting is like sharing a room with friends. Everyone uses the same space and resources. This is a budget-friendly option. It’s great for small websites with little traffic. If one site gets busy, others slow down. Good for beginners and small businesses.
VPS stands for Virtual Private Server. It’s like having your own room in a big house. You have more space and control. VPS is more expensive than shared hosting. It’s a good choice for growing websites. Offers better performance and security.
Dedicated hosting is like owning a house. You get all the resources for yourself. This is the most expensive option. Perfect for large websites with heavy traffic. Offers maximum control and security. Best for big companies and e-commerce sites.
Cloud hosting is like living in a hotel. You can add more rooms when needed. It’s flexible and scalable. Great for websites with changing traffic. You only pay for what you use. Provides high reliability and uptime.

Credit: invozone.com
Registering A Domain Name
Choosing the right domain registrar is important. Look for one with good reviews. Check their prices and services. Some registrars offer free email accounts. Others provide website builders. Always read the terms and conditions. Compare different registrars before deciding.
Pick a short and easy name. Make it simple to spell. Avoid using numbers and hyphens. The name should be catchy. Check if the name is available. You can use a domain search tool. Think about your audience. Ensure it reflects your brand or idea.
Domain privacy hides your personal information. It protects against spam and fraud. Some registrars offer privacy for free. Others may charge a small fee. Check what is included with the privacy service. It keeps your contact details safe. Consider privacy to protect yourself online.
Setting Up Your Hosting Account
Start by visiting the hosting site. Find the sign-up button. Click it to begin. Enter your name and email. Create a strong password. Keep it safe. Agree to the terms. Click submit. Your account is now ready.
Look at the different plans. Some are basic. Others offer more features. Think about your needs. Choose a plan that fits. Plans have different prices. Check your budget. Select the plan you want. Click buy to continue.
Find the control panel link. It’s in your account page. Click it to open. Enter your login details. Now you can see many tools. Use these to manage your website. The control panel helps you a lot.
Credit: www.hostinger.com
Uploading Your Website Files
FTP helps you upload files easily. Install an FTP client like FileZilla. Open it and connect to your server. Enter your server address, username, and password. Click “Connect” to access your files. Drag and drop your website files into the public_html folder. Wait for the upload to finish. Your files are now live!
Log in to your hosting control panel. Find the File Manager icon and click it. Navigate to the public_html folder. Click on the “Upload” button. Select the files from your computer. Upload them to the server. Once done, check your website. It’s up and running!
Download WordPress from wordpress.org. Extract the files on your computer. Use FTP or File Manager to upload them. Place them in the public_html folder. Open your browser and visit your domain. Follow the WordPress setup instructions. Fill in your database details. Click “Install WordPress”. Your WordPress site is ready!
Configuring Email Accounts
Start by logging into your hosting dashboard. Find the Email Accounts section. Click on Create New Email. Enter the desired email address. Choose a strong password. Click Save to finish. Your email account is now ready.
Go to the Email Forwarding option in your dashboard. Enter the email you want to forward. Type in the destination email address. Click on Add Forwarder. This will redirect emails to your chosen address.
Access your email through Webmail. Look for Webmail in your hosting dashboard. Click to open the login page. Enter your email and password. Click Login. You can now read and write emails easily.
Credit: wegic.ai
Ensuring Website Security
SSL certificates keep your website safe and secure. They make sure data is encrypted. Visitors trust your site more with SSL. It shows a lock icon in the browser. This tells users your site is secure.
A firewall protects your site from harmful attacks. It acts like a shield. It blocks bad traffic and only allows good traffic. This keeps your website safe and secure. Always keep your firewall turned on.
Backups are very important. They save copies of your site. If something goes wrong, you can restore your site. Make sure to backup your site often. This keeps your data safe.
Monitoring And Maintenance
Using performance tools helps check if your site is fast. Google PageSpeed Insights is a popular tool. It tells you how to make your site faster. Pingdom is another tool. It shows how your site loads and its speed. Checking your site’s speed often is important. A fast site keeps visitors happy. Slow sites make visitors leave.
Updating software keeps your site safe and fast. Sites use software like WordPress or Joomla. New updates fix bugs and improve features. Update plugins and themes too. Outdated plugins can cause security issues. Always check for software updates. Keeping things updated helps your site run smoothly.
Problems can happen on websites. Sometimes, pages don’t load. Check the internet connection first. If the site is slow, clear the cache. Error messages can appear. Look at the message for clues. Restarting the server can fix many problems. Ask for help if issues stay. Many sites have support teams.
Frequently Asked Questions
How To Web Hosting Step By Step?
Choose a reliable hosting provider. Select a suitable hosting plan. Register a domain name. Upload website files using FTP. Configure DNS settings for your domain.
How To Start Web Hosting?
Choose a reliable hosting provider. Select a hosting plan. Register a domain name. Set up your website files. Configure settings and launch your site.
Can I Host My Website By Myself?
Yes, you can host your website yourself. You’ll need a server, internet connection, and technical expertise. Self-hosting offers control but requires maintenance and security management. Consider the costs and time involved before proceeding. Many opt for third-party hosting for ease and support.
What Are The Basics Of Web Hosting?
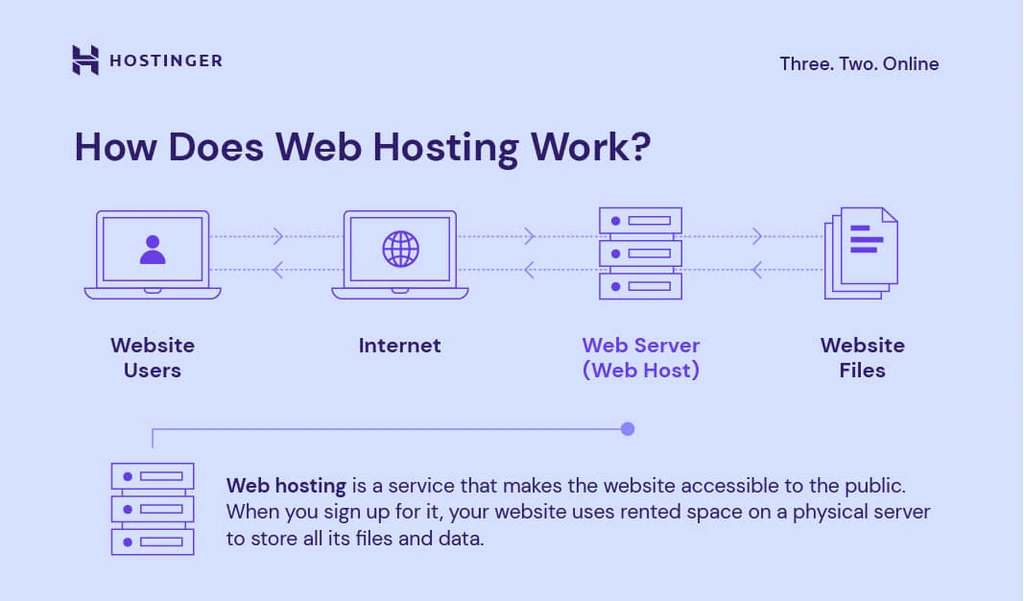
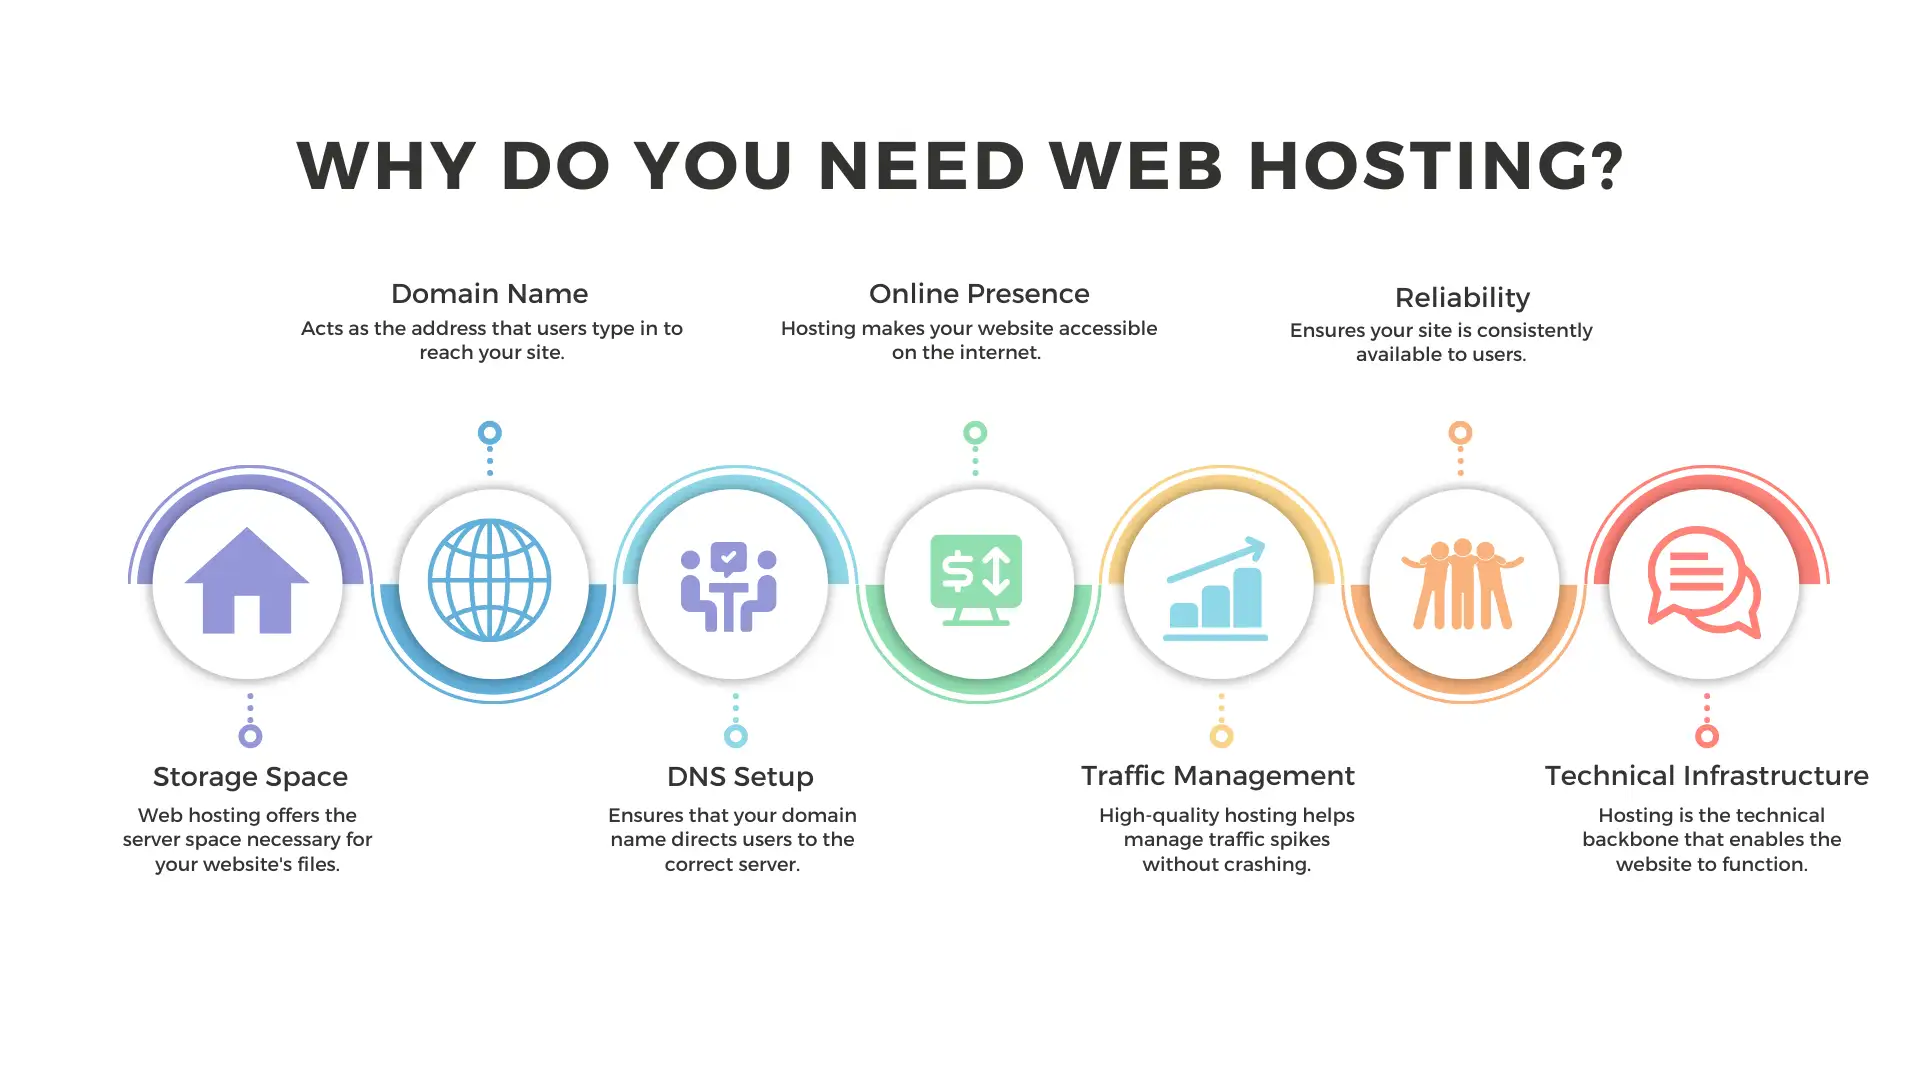
Web hosting involves storing your website files on a server. It makes your site accessible online. Choose between shared, VPS, or dedicated hosting based on your needs. Reliable hosting ensures faster loading times, better security, and uptime. Consider bandwidth, storage, and support options while selecting a web host.
Conclusion
Web hosting doesn’t have to be complicated. Follow the steps outlined here. Start with choosing the right hosting provider. Set up your domain and server. Install necessary software. Secure your website with backups and updates. Ensure your site runs smoothly.
Regularly monitor performance and security. Troubleshoot any issues quickly. Remember, practice makes perfect. Hosting gets easier with experience. Keep learning and exploring new tools. Your website deserves a strong foundation. Hosting it well is crucial. You now have the basic skills.
Go ahead and set up your site. Happy hosting!


