
Are you ready to unleash your creativity and design your very own WordPress theme using Dreamweaver? Imagine having the power to craft a unique online presence that truly represents your vision.
With Dreamweaver’s intuitive interface and powerful tools, you can turn your ideas into reality. This guide will walk you through the steps, making the process straightforward and enjoyable. Whether you’re a seasoned designer or a beginner eager to explore, you’ll find valuable insights to enhance your skills.
Dive in to discover how you can create a WordPress theme that stands out and captivates your audience. Your journey to mastering theme design in Dreamweaver starts here.
Setting Up Dreamweaver
First, download Dreamweaver from the Adobe website. Open the installer file. Follow the steps on the screen. Click “Next” to continue. Accept the terms and conditions. Choose the installation folder. Click “Install” to begin. Wait for the process to finish. Launch Dreamweaver when done.
Open Dreamweaver. Go to the “Edit” menu. Choose “Preferences”. Adjust settings like color theme. Choose a light or dark mode. Set code formatting options. Enable syntax highlighting for easier reading. Save your changes. Close the Preferences window.
Create a new site in Dreamweaver. Name your project. Link it to your WordPress folder. Use the site setup wizard. Select “Server” settings. Enter your server details. Click “Save”. Now, you can edit WordPress files. Dreamweaver makes editing easy.
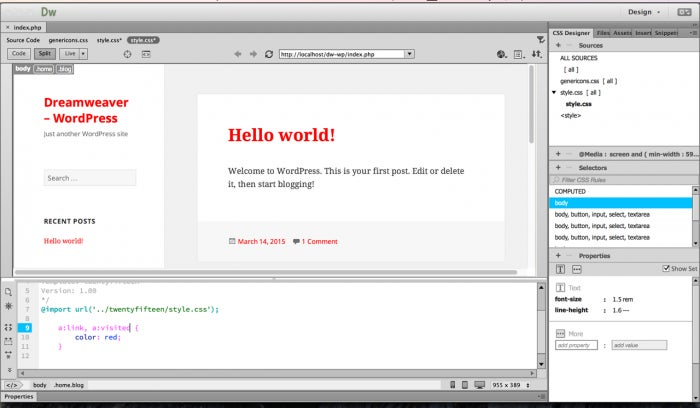
Credit: www.youtube.com
Creating A New Theme
Start by making a new folder. This folder is for your theme. Inside, create important files. These files include style.css and index.php. Style.css holds your theme’s styles. Index.php is for the main page structure. Remember to add the functions.php file too. This file adds extra features to your theme.
WordPress uses a special order. This order is called the hierarchy. The hierarchy decides which files show up. For example, the index.php file is used when no other files match. Other files like single.php or page.php are for specific pages. Knowing this order helps design better themes.
Designing The Layout
Building a theme starts with understanding HTML. HTML is the language of the web. It helps create the structure of your page. Think of it as the skeleton of your site. Use tags like
, , and more. Paragraphs use
. These tags help organize content. Each page has a head and body. The head contains title and links. The body contains the main content. HTML structure is key for good design.
CSS makes your website look nice. It changes colors, fonts, and sizes. Add style to your HTML. Use selectors like class and id. Each element can have its own style. CSS files link in the head. Keep styles consistent across pages. Margins and padding change spaces around content. CSS is like clothes for your website. Make sure it fits well. Try different styles to see what works. CSS makes your site more attractive.
Credit: blog.adobe.com
Incorporating WordPress Functions
Designing a WordPress theme in Dreamweaver involves smoothly incorporating WordPress functions. Ensure Dreamweaver is set to PHP mode to work with WordPress code effectively. Use the WordPress Loop to display posts dynamically, enhancing theme functionality.
Using WordPress Loops
The WordPress Loop is a key tool for theme design. It helps display posts on your site. Inside the loop, you find code to show titles, content, and more. Each post passes through the loop. This allows you to manage how posts look. Use PHP functions to customize the display. You can add tags like the_title() and the_content(). These tags show the post title and content. Make sure to end the loop correctly. This ensures your posts load properly.
Adding Widgets And Menus
Widgets and menus make your site user-friendly. Add widgets to sidebars for extra features. They can show search bars, recent posts, and more. Menus help users find pages easily. In Dreamweaver, you can edit these elements. Use WordPress functions like register_sidebar() for widgets. For menus, use wp_nav_menu(). Always test changes to ensure they work. This ensures a smooth user experience.
Testing And Debugging
Dreamweaver helps you check how your theme looks. Use the preview feature to see your design in different browsers. This helps find bugs early. You can see if images, text, and links work. Always check in popular browsers like Chrome, Firefox, and Safari. It makes sure everyone sees your theme correctly.
Sometimes things don’t work right. Maybe a button won’t click or text looks wrong. Check your code for mistakes. Small errors can cause big problems. Use Dreamweaver’s error checker to find issues fast. Test each part of your theme. Fix problems one by one. This helps keep your theme working well.
Optimizing For Performance
Crafting a WordPress theme in Dreamweaver requires a focus on performance optimization. Efficient coding practices ensure faster load times, enhancing user experience.
Minimizing Load Time
Faster websites keep users happy. Use optimized images and compressed files. Less data means quicker loading. Avoid large media files. Use lazy loading for images. This shows images as needed. Limit the number of plugins. Many plugins slow websites. Keep your theme code clean. Clean code helps speed.
Ensuring Mobile Responsiveness
Most people use phones for browsing. Make sure your theme works on phones. Use responsive design techniques. This makes the site adjust to screen sizes. Test your theme on different devices. Tablets, phones, and computers. Ensure all elements fit well. Buttons should be easy to click. Text should be easy to read. Mobile-friendly sites rank better in search engines.
Deploying The Theme
Crafting a WordPress theme in Dreamweaver involves deploying a well-structured design that enhances user experience. Easily integrate HTML and CSS elements to create a responsive layout, ensuring compatibility across devices. Effective deployment requires attention to file organization and seamless integration with WordPress functionalities.
Uploading To WordPress
First, save your theme files. Make sure all files are in one folder. Use a tool like an FTP client. Upload the folder to your WordPress themes directory. This directory is usually located in /wp-content/themes/. Be careful not to change file names. Check the upload is complete. If files are missing, re-upload them.
Activating And Customizing
Go to your WordPress dashboard. Click on Appearance and then Themes. Find your theme and click Activate. Your theme is now live. You can now customize it. Click on Customize. Change colors, fonts, and layouts. Save your changes to see them live. Enjoy your new theme!
Credit: www.elegantthemes.com
Frequently Asked Questions
How Do I Start Designing A WordPress Theme?
To start designing a WordPress theme in Dreamweaver, first set up a local environment. Install WordPress and create a new theme folder. Use Dreamweaver’s code editor to modify theme files like style. css and index. php. Preview changes locally before deploying to your live WordPress site.
Can Dreamweaver Edit WordPress Themes?
Yes, Dreamweaver can edit WordPress themes effectively. It offers a visual interface and code editor, making it easier to manage WordPress files. You can edit HTML, CSS, and PHP files. Dreamweaver also provides live preview features to see real-time changes in your WordPress theme design.
Is Dreamweaver Good For WordPress Development?
Dreamweaver is suitable for WordPress development, especially for beginners. Its visual interface simplifies theme design and code management. Dreamweaver supports PHP and CSS, essential for WordPress development. It also integrates with FTP for easy file transfer. However, experienced developers might prefer more advanced IDEs.
What Files Are Essential For A WordPress Theme?
A WordPress theme requires essential files like style. css, index. php, and functions. php. Style. css contains the theme’s design elements. Index. php is the main template file. Functions. php adds custom features. Additional template files like header. php and footer.
php help structure the theme layout effectively.
Conclusion
Designing a WordPress theme in Dreamweaver is a rewarding task. You blend creativity with technical skill. Dreamweaver offers tools that simplify the process. Always focus on user-friendly design. Consider responsive elements for mobile devices. Pay attention to colors and fonts.
These small details enhance user experience. Practice and patience lead to improvement. Keep experimenting with new ideas. Explore different design trends. Your unique theme can stand out. Enjoy the journey of creation. Each project is an opportunity to learn. Embrace challenges and celebrate successes.
Your WordPress theme can reflect your creativity.


