
Are you tired of the same old font on your WordPress theme? Want to give your website a fresh, unique look that stands out?
Changing the font can transform the entire vibe of your site, making it more appealing and professional. But if you’re not a tech wizard, altering fonts might seem daunting. Fear not! This guide is crafted especially for you, breaking down the process into simple, actionable steps.
With just a few clicks, you can enhance your site’s readability and aesthetic appeal, capturing your audience’s attention instantly. Dive in, and discover how easy it is to customize your WordPress theme’s font, making your website truly yours.
Choosing The Right Font
Picking the right font is vital for your website. Some fonts look great but might not work well on all devices. It’s important to check font compatibility across different browsers. This helps to ensure your site looks good everywhere. Consider using Google Fonts for a wide range of options. They are free and work well on most devices.
Readability is crucial for your audience. Choose fonts that are easy to read. Simple fonts like Arial or Verdana are often best. They help users understand your content quickly. Avoid using too many different fonts. This can make your site look messy. Stick to one or two for a clean look.

Credit: wordpress.com
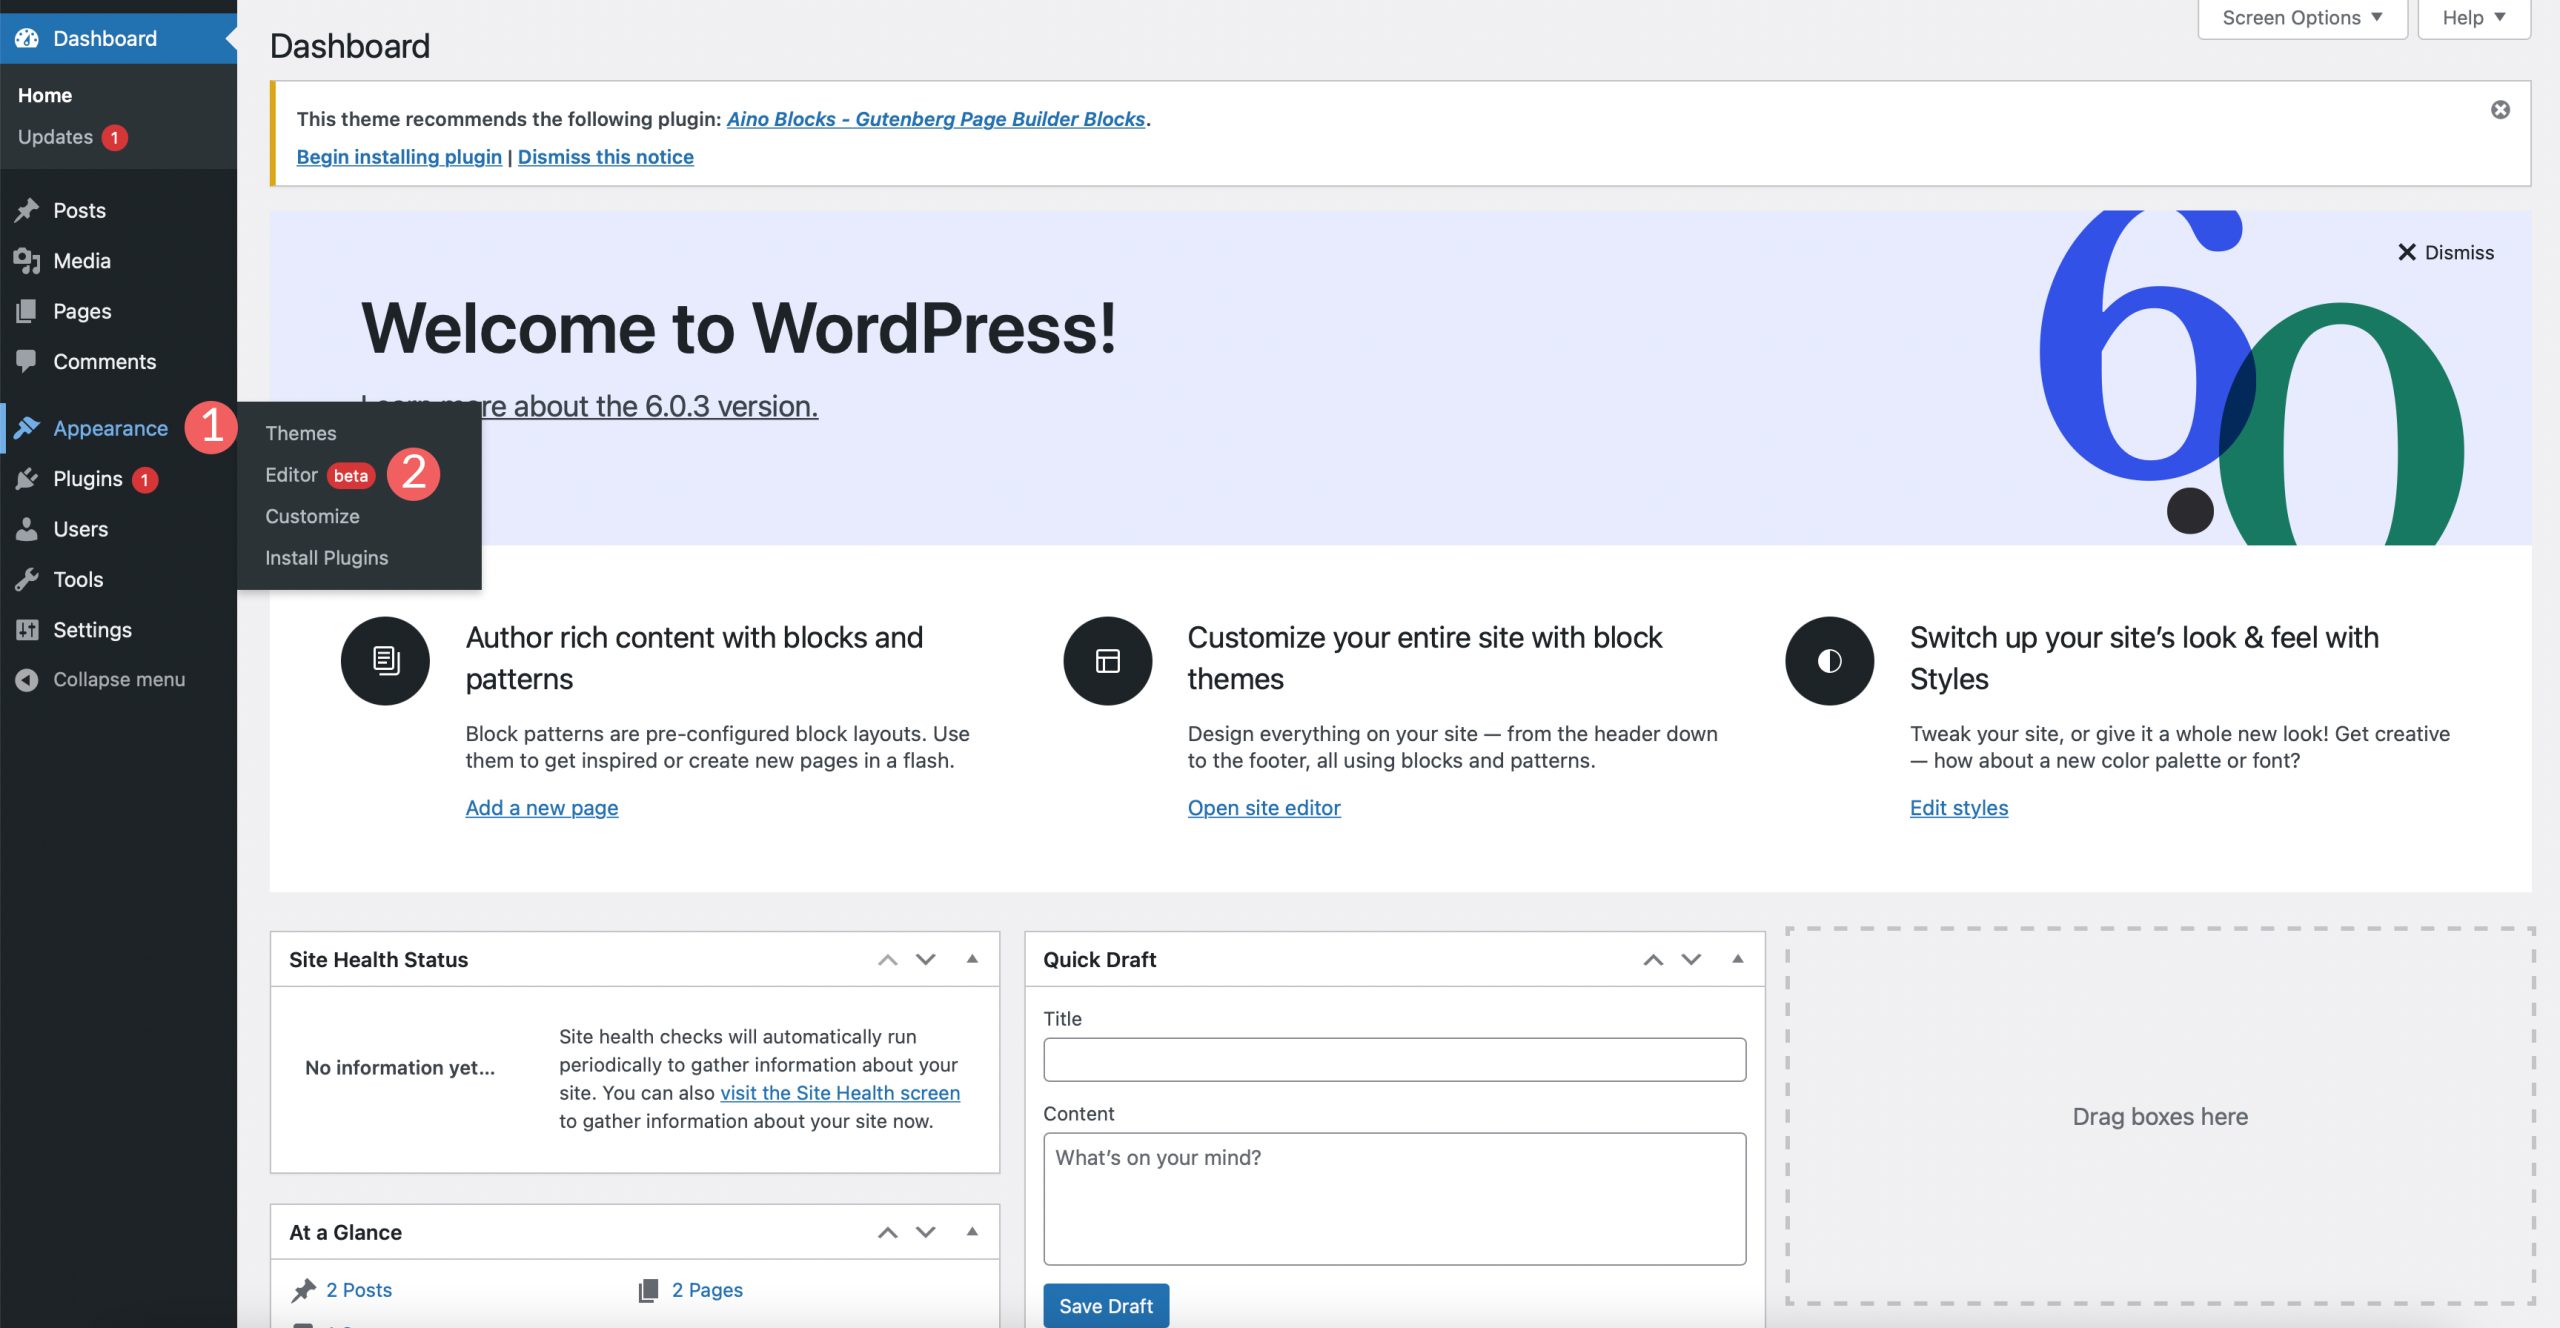
Accessing WordPress Dashboard
Start by logging into your WordPress account. You will see the dashboard. It has many options. The dashboard is where you manage your site. Look for the Appearance tab. It is on the left side. This is where you change how your site looks.
Click on Appearance. A menu will drop down. It has several choices. You can change themes. You can customize your site. Choose the option that fits your need.
Find the Theme Editor in the menu. It lets you edit code. Use it to change fonts. Be careful when you edit. Mistakes can break your site. Always make a backup first.
Using Customizer For Font Changes
The WordPress Customizer is a powerful tool. It helps you change your theme’s look. You can find it in your WordPress dashboard. Click on “Appearance” and then “Customize”. Here, you will see many options. Look for a section called “Typography” or “Fonts”.
This section lets you change font styles. You can choose different fonts for headings or paragraphs. Some themes have more font options. Others might have fewer. It all depends on the theme you use.
After selecting a font, preview the changes. Make sure it looks good on your site. If satisfied, click “Publish” to save. If not, you can choose another font. Changing fonts can make your site look fresh. It can also make it easier to read.
Remember, fonts affect how people see your content. Choose a font that is easy to read. Make sure it matches your site’s style. This helps in keeping your visitors happy.
Credit: www.elegantthemes.com
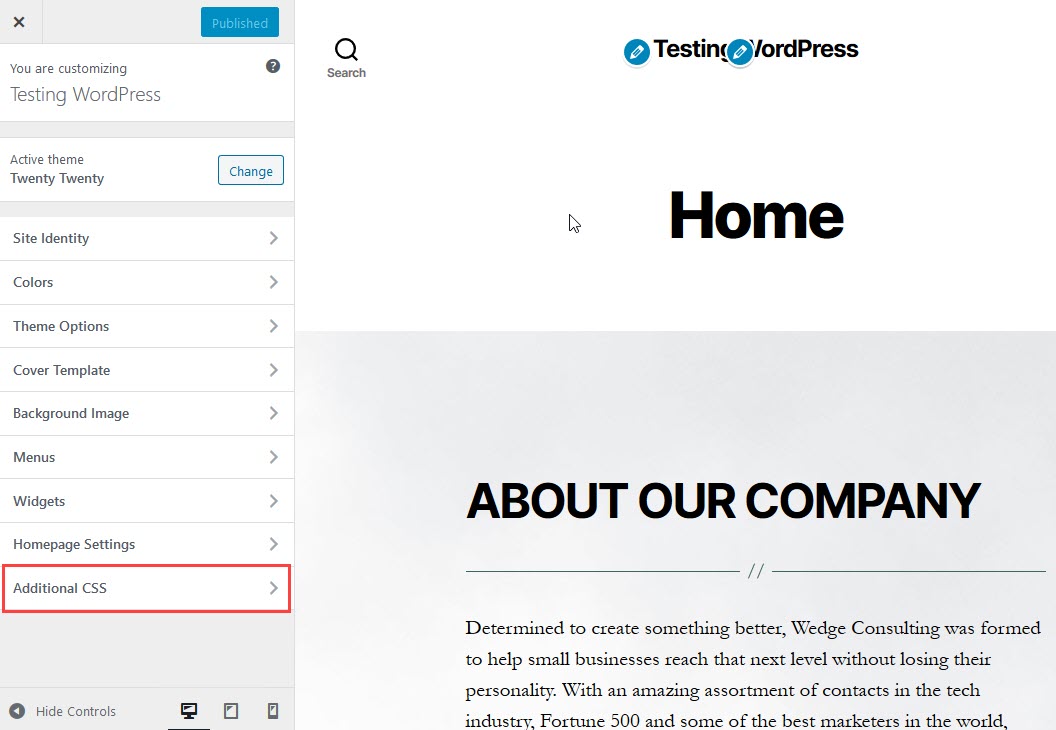
Editing Theme Css
First, open your WordPress dashboard. Go to the Appearance menu. Click on Customize. This will open the theme customizer. Choose the Additional CSS option. You need to find the right CSS selectors. Use the browser’s Inspect Tool. Right-click on the text you want to change. Click Inspect. Look for the CSS class or ID that affects the font.
Once you have the CSS selectors, it’s time to add the font. You can use a Google Font or any other source.
First, copy the font link from Google Fonts. Paste it in the Additional CSS section.
Now, use the CSS selectors you found. Add them before the font code.
Example: h1, h2 { font-family: 'Your Font Name'; }.
This will change the font for headings.
Using Plugins For Font Management
Plugins simplify font changes in WordPress themes. Install a font management plugin to access various styles effortlessly. Customize your site’s look with diverse fonts, enhancing the visual appeal without coding skills.
Popular Font Plugins
Popular plugins help change fonts easily. “Easy Google Fonts” is a favorite. It lets users choose from hundreds of fonts. “Fontsy” is another tool that is user-friendly. It offers font styles and weights. “Typekit” by Adobe provides premium fonts. All these plugins offer simple font management.
Installing And Activating Plugins
Start by going to the WordPress dashboard. Click on “Plugins” and then “Add New”. Search for the plugin name you want. Click “Install Now” to begin. After installation, click “Activate”. The plugin is ready for use. Now, go to its settings. Customize your site’s font styles. It’s simple and quick to change fonts using plugins.
Credit: www.inmotionhosting.com
Testing Font Changes
Fonts can change the look of your site. Use a preview tool in WordPress. This tool shows how fonts will appear. You can see changes before going live. Preview helps you avoid mistakes. It saves time too.
WordPress lets you preview font changes easily. Go to the customizer section. Pick a font. See how it looks on your site. You can try different fonts. Find the best one for your theme. This step is crucial.
Fonts must work on all browsers. Check your site on Chrome, Firefox, and Safari. Each browser may show fonts differently. Ensure your font looks good everywhere. This is important for consistent user experience. Test on mobile too. Many visitors use phones.
Troubleshooting Common Issues
Fonts can sometimes not work well with each other. This can make your website look messy. To fix this, check your CSS files. Make sure the font name is spelled correctly. Sometimes, plugins can cause font conflicts. Try turning off plugins to see if the font issue goes away. If it does, turn them on one by one. This will help you find the problem plugin. Once found, look for another plugin or update it.
Fonts may load slowly or not at all. This can happen due to a slow internet connection. It can also happen if the font file is too big. To fix this, use web-safe fonts. These fonts load faster. Another way is to use a Content Delivery Network (CDN). A CDN helps your website load fonts quickly. Always test your site after making changes. This ensures everything works fine.
Best Practices For Font Selection
Choosing the right font makes your site look good. A nice font also helps people read. It should match the theme’s style.
Fonts show your site’s mood. Some fonts feel serious, others fun. Pick a font that fits your site’s feel. Mix fonts wisely. Use one for titles and another for body text.
Big, clear fonts are easy to read. Small, fancy fonts can be hard for readers. Check if the font looks good on phones and computers.
Accessibility is key for all users. Some users need special fonts. Choose fonts that are clear for everyone. Avoid fonts with tiny letters or odd shapes.
Colors matter too. Ensure strong contrast between text and background. This helps people read easily.
Test your font choice with different users. Make sure it works for everyone. This makes your site friendly and usable.
Frequently Asked Questions
How Can I Change Theme Font In WordPress?
To change the theme font in WordPress, navigate to Appearance > Customize. Look for the Typography or Fonts section. Here, you can select different fonts and adjust their sizes. Always preview changes before publishing to ensure the new fonts fit your design.
Some themes might require additional plugins for font customization.
What Plugin Helps In Changing Fonts?
Use the Easy Google Fonts plugin to change fonts in WordPress. It integrates with the WordPress Customizer and offers a wide range of font choices. You can adjust font styles, sizes, and colors easily. This plugin is user-friendly and requires no coding knowledge, making font customization accessible to everyone.
Can I Use Google Fonts In WordPress?
Yes, you can use Google Fonts in WordPress. Many themes support Google Fonts natively. You can also use plugins like Easy Google Fonts to access a vast collection of fonts. This allows you to enhance your site’s typography without needing to write any code.
Is Coding Necessary To Change WordPress Fonts?
No, coding is not necessary to change fonts in WordPress. Many themes offer built-in customization options. Plugins like Easy Google Fonts also make font changes easy without coding. However, advanced users can tweak styles using custom CSS for more control over typography.
Conclusion
Changing your WordPress theme font is simple and rewarding. First, identify the theme’s font settings. Use WordPress Customizer for easy adjustments. Dive into CSS for more control. Explore plugins if needed. Choose fonts that enhance readability and match your style.
Test changes on different devices. Ensure text looks good everywhere. Remember, fonts set the tone for your site. Stay consistent with your brand. Small changes can make a big impact. Enjoy crafting your site’s unique look. Embrace the creativity. Happy designing!


