
Are you ready to create a stunning website but unsure how to get started with WordPress on GoDaddy? You’re in the right place.
Setting up WordPress on GoDaddy might seem tricky, but it’s actually simpler than you think. Imagine having your own website up and running quickly, without any confusing steps holding you back. In this guide, you’ll discover easy, clear instructions to add WordPress to your GoDaddy account.
By the end, you’ll have the confidence to build your site exactly the way you want. Let’s dive in and make your online presence a reality!
Choosing The Right Godaddy Hosting Plan
Choosing the right GoDaddy hosting plan is important for your WordPress site. It affects your website’s speed, security, and ease of use. GoDaddy offers different hosting options. Each plan suits different needs and budgets. Understanding these options helps you make a smart choice.
Shared Hosting Options
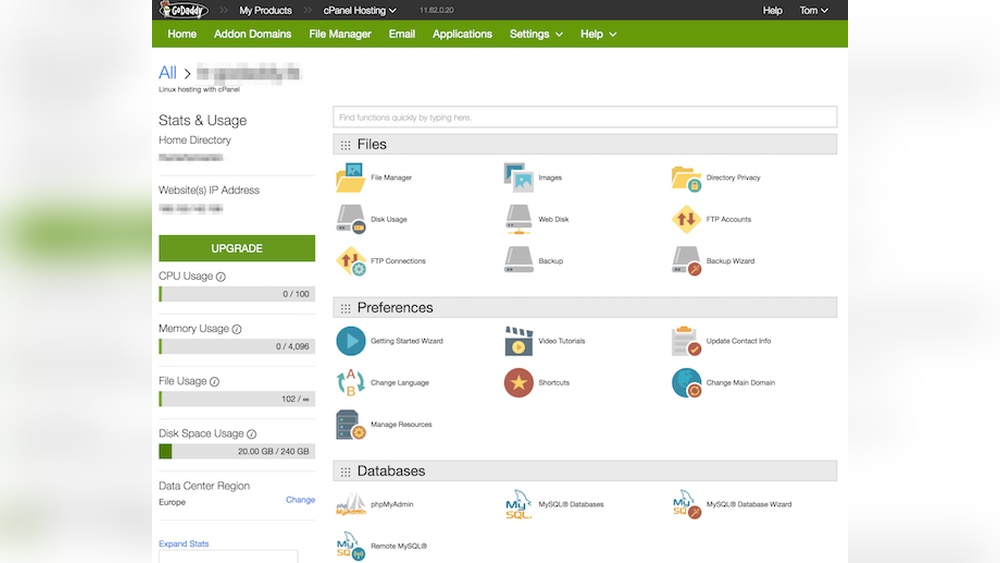
Shared hosting is a basic plan where many websites share one server. This option is affordable and simple. It fits small blogs or new websites. GoDaddy’s shared hosting includes a cPanel to manage files easily. It offers enough resources for low traffic sites. Keep in mind, performance may slow if your site grows fast.
Managed WordPress Hosting Benefits
Managed WordPress hosting is designed for WordPress sites only. GoDaddy handles updates, backups, and security for you. This plan improves site speed and uptime. It reduces technical work on your side. Ideal for those who want a hassle-free experience. The hosting is optimized for WordPress themes and plugins.
Comparing Pricing And Features
Pricing varies between shared and managed plans. Shared hosting costs less but offers fewer features. Managed WordPress hosting costs more but adds value. It includes better support and site optimization. Consider your site’s size, traffic, and technical skills. Choose a plan that fits your budget and needs.
Setting Up Your Godaddy Account
Setting up your GoDaddy account is the first step to adding WordPress to your hosting. This process is simple and takes just a few minutes. A well-organized account helps you manage your website and services easily.
Start by creating your account. Then, explore the dashboard to find all the tools you need. Keep track of your payments and services under billing and subscriptions.
Creating A New Account
Visit the GoDaddy homepage and click on the “Sign Up” button. Enter your email address and create a strong password. Fill in your personal details like name and phone number. Confirm your email to activate the account. Now you have access to GoDaddy’s services.
Navigating The Godaddy Dashboard
After logging in, the dashboard shows all your products and services. Use the menu to find hosting, domains, and WordPress options. The dashboard also offers quick links for support and settings. It is easy to find what you need here.
Managing Billing And Subscriptions
Go to the billing section in your dashboard to see your payment methods. Review invoices and set up automatic payments if preferred. You can also update or cancel subscriptions anytime. Keeping billing information current avoids service interruptions.
Installing WordPress On Godaddy
Installing WordPress on GoDaddy is a simple process. It lets you create a website quickly. You can choose between an automatic or manual setup. Both methods are easy to follow. This guide will help you install WordPress without stress.
Using The One-click Installer
GoDaddy offers a one-click installer for WordPress. This tool sets up WordPress automatically. Start by logging into your GoDaddy account. Find the “My Products” section and select your hosting plan. Click on “Manage” next to your hosting. Look for the WordPress one-click install option. Click on it and follow the prompts. Enter your site name and admin details. The installer does the rest. It creates your database and configures files. Within minutes, WordPress is ready to use.
Manual WordPress Installation
Manual installation gives more control over setup. First, download the latest WordPress package from wordpress.org. Next, log in to your GoDaddy hosting control panel. Use the File Manager or FTP to upload WordPress files. Place them in your website’s root folder. Create a MySQL database and user via cPanel. Note the database name, user, and password. Open your website URL to start installation. Fill in the database info when asked. Complete the setup by entering site and admin details. This method takes more time but is flexible.
Configuring Basic Settings
After installation, adjust WordPress settings for your site. Log in to the WordPress dashboard. Go to “Settings” and then “General.” Set your site title and tagline. Check the email address for admin notifications. Under “Permalinks,” choose a URL structure. The “Post name” option is SEO-friendly. Save your changes to apply them. These steps help your website run smoothly. They improve site usability and search visibility.
Credit: codup.co
Connecting Your Domain To WordPress
Connecting your domain to WordPress is a crucial step to make your website live. It links your website address to the WordPress hosting. This lets visitors find your site easily. The process involves a few simple steps within GoDaddy and WordPress settings.
This section explains how to assign your domain to hosting, update DNS settings, and verify the connection. Follow these steps to ensure your domain points correctly to your WordPress site.
Assigning Domain To Hosting
Log in to your GoDaddy account. Go to the “My Products” section. Find the domain you want to use. Click on “Manage” next to it.
Look for the option “Assign to Hosting.” Select your WordPress hosting plan from the list. Confirm the assignment to link your domain with your hosting. This step tells GoDaddy to connect your domain to your WordPress server.
Updating Dns Settings
Access the DNS management page for your domain. You need to update the nameservers. Change them to the ones provided by your WordPress hosting provider.
Save the changes. DNS updates can take some time to spread across the internet. Usually, it takes a few minutes to a few hours. This change directs your domain traffic to your WordPress site.
Verifying Domain Connection
After updating DNS, check if your domain points to your WordPress site. Open a browser and type your domain name.
Your WordPress site should load. If it does, the connection is successful. If not, double-check the DNS settings and domain assignment in GoDaddy.
Customizing Your WordPress Site
Customizing your WordPress site helps create a unique space on the internet. It reflects your style and meets your visitors’ needs. Simple changes can make a big difference in user experience and site appeal.
Focus on design, content, and speed to keep visitors interested. This section guides you through key steps to personalize your WordPress site using GoDaddy.
Choosing Themes And Plugins
Themes control how your site looks. Pick one that fits your style and purpose. Many free and paid themes are easy to install and customize.
Plugins add new features to your site. They can improve security, add contact forms, or boost SEO. Install only the plugins you need to keep your site fast.
Setting Up Essential Pages
Create pages like Home, About, and Contact. These pages help visitors learn about you and reach out. Use clear titles and simple language on each page.
Make sure your pages are easy to find in your menu. A clean menu helps visitors move around your site easily.
Optimizing Site Performance
Speed matters. Visitors leave slow sites quickly. Use caching plugins to load pages faster. Compress images before uploading them.
Choose a reliable hosting plan with GoDaddy to keep your site running smoothly. Regularly update WordPress, themes, and plugins for better performance and security.

Credit: www.youtube.com
Managing Security And Backups
Managing security and backups is key for any WordPress site on GoDaddy. Protecting your site keeps data safe and visitors secure. Backups save your work and prevent data loss. This section covers essential steps to keep your WordPress site protected and backed up.
Enabling Ssl Certificates
SSL certificates encrypt data between your website and visitors. This protects sensitive information like passwords and payments. GoDaddy offers free SSL certificates for many plans. Enabling SSL improves trust and boosts search engine rankings. Activate SSL in your GoDaddy account dashboard. After activation, your site URL changes to “https.” Always check the SSL status to ensure it works properly.
Setting Up Regular Backups
Regular backups store copies of your website files and database. They help restore your site if anything breaks or is hacked. GoDaddy provides automatic backup options for WordPress sites. Set backups to run daily or weekly, based on your site activity. Store backups in a secure location outside your hosting server. Test your backups regularly to confirm they work well.
Implementing Security Plugins
Security plugins add extra protection layers to your WordPress site. They block malware, limit login attempts, and scan for threats. Popular plugins like Wordfence and Sucuri work well with GoDaddy hosting. Install and activate a trusted security plugin right after setup. Configure settings to get alerts on suspicious activity. Keep plugins updated to maintain strong defense.
Troubleshooting Common Issues
Troubleshooting common issues during WordPress installation on GoDaddy can save time. Many users face small errors that block progress. Knowing how to fix these problems helps keep your website setup smooth.
Issues often arise from installation steps, domain settings, or account details. This guide covers simple fixes for common problems. It also explains when to reach out to GoDaddy support for help.
Resolving Installation Errors
Errors during WordPress installation often occur due to server settings. Check if your hosting plan supports WordPress. Clear your browser cache before trying again. Use the one-click WordPress installer in the GoDaddy dashboard. Watch for error messages and note their codes. These details help find the right solution faster.
Fixing Domain Connection Problems
Domain connection issues usually happen when DNS settings are incorrect. Ensure your domain points to GoDaddy’s nameservers. Verify the domain is active and not expired. Update DNS records if you recently moved the domain. Allow up to 48 hours for DNS changes to take effect. Use online tools to check domain status quickly.
Contacting Godaddy Support
Contact GoDaddy support if problems persist after basic fixes. Use live chat or phone support for faster responses. Have your account details and error messages ready. Explain the issue clearly and mention steps you already tried. Support agents can guide you through advanced troubleshooting.

Credit: onesmartsheep.com
Frequently Asked Questions
How Do I Install WordPress On Godaddy Hosting?
Log in to your GoDaddy account and access your hosting dashboard. Use the one-click WordPress installer under “Web Applications. ” Follow the prompts to set your site name, admin username, and password. The installation completes within minutes, making WordPress ready to use.
Can I Use Godaddy’s Domain With WordPress?
Yes, you can connect your GoDaddy domain to your WordPress site. During setup, select your domain from the GoDaddy account. Update DNS settings if needed, ensuring your domain points to your WordPress hosting. This link helps your site appear under your preferred web address.
Is Godaddy Reliable For WordPress Hosting?
GoDaddy offers reliable WordPress hosting with good uptime and support. It provides managed services, security features, and automatic updates. However, performance may vary by plan. It suits beginners and small businesses wanting easy WordPress setup and maintenance.
How To Access WordPress Dashboard On Godaddy?
Access your WordPress dashboard by logging into GoDaddy and opening your hosting panel. Click “Manage” beside your WordPress installation, then select “WP Admin. ” This redirects to the WordPress login page, where you enter your admin credentials to manage your website.
Conclusion
Adding WordPress to GoDaddy is simple and fast. Follow each step carefully. You can create a website without coding skills. Choose a good domain and hosting plan first. Use GoDaddy’s tools to install WordPress easily. After installation, customize your site to fit your needs.
Keep your site updated for better security and performance. Start building your online presence today with confidence. This guide helps beginners take the first step. No need to wait or feel confused. Your website journey begins here.


