
Want to make your WordPress site more eye-catching? Adding text over images is a simple trick that can instantly grab your visitors’ attention.
Whether you want to highlight a special offer, share a quote, or make your photos more informative, placing text on images helps you communicate clearly and creatively. In this guide, you’ll learn easy steps to add text over images in WordPress—no coding skills needed.
Keep reading, and you’ll discover how to make your website stand out and keep your audience hooked.
Choosing The Right Image
Choosing the right image is key to making your text stand out. The image sets the mood and draws attention. It must match the message your text conveys. The right picture makes your content clear and attractive. Poor choices can distract or confuse visitors. Focus on images that support your words and invite readers to engage.
Selecting High-quality Images
Pick images that look sharp and clear on all devices. Blurry or pixelated pictures reduce your site’s professionalism. Use photos with good lighting and balanced colors. Avoid overly busy images. Simple backgrounds help your text remain readable. Choose images that fit your blog topic and style. This builds trust and keeps visitors interested.
Optimizing Image Size
Large images slow down your website speed. Slow pages frustrate visitors and hurt SEO. Resize photos to fit your layout before uploading. Use formats like JPEG or WebP for smaller file sizes. Compress images without losing quality. This keeps your site fast and smooth. Fast websites improve user experience and ranking.
Credit: www.webnots.com
Using The WordPress Block Editor
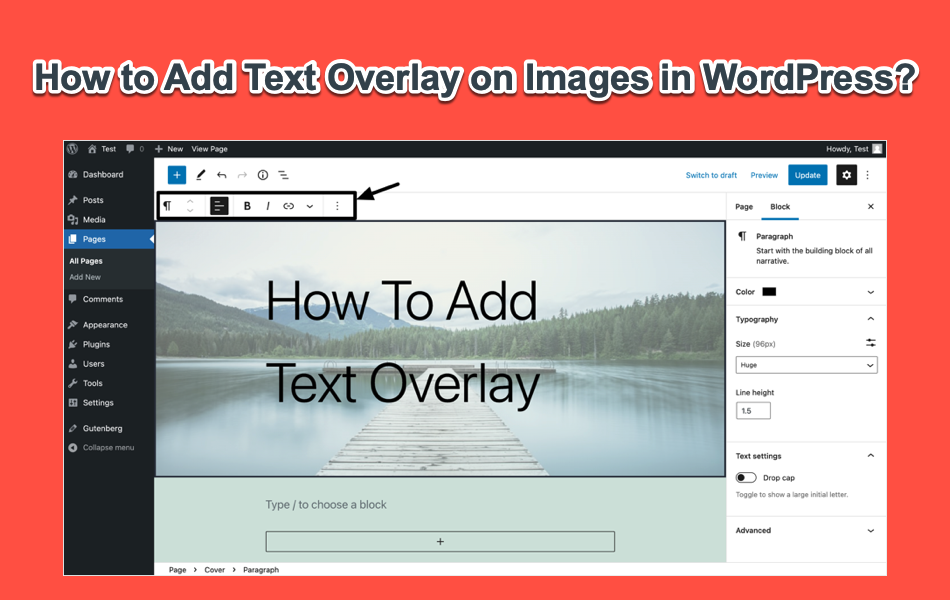
The WordPress Block Editor makes it simple to add text over images. It uses blocks to build content. Each block holds one type of content, like an image or text. You can combine blocks to create layered designs. This method works well for adding captions or titles on images. The editor is user-friendly and does not need coding skills.
Adding An Image Block
First, open your post or page in the WordPress editor. Click the plus (+) sign to add a new block. Choose the “Image” block from the list. Upload a new image or select one from your media library. The image will appear in your content area. You can resize it by dragging the corners. This step sets the base for your text overlay.
Inserting Text Over The Image
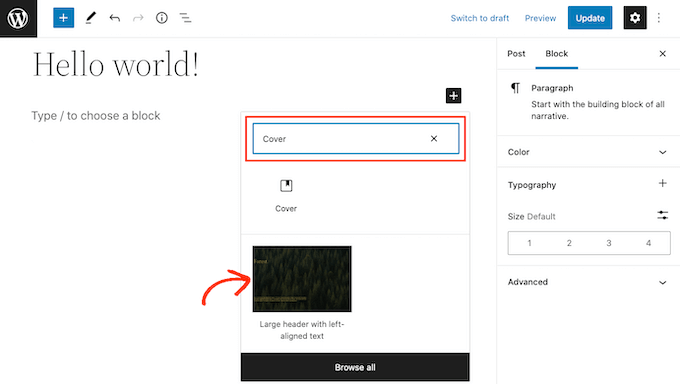
Next, add a “Group” or “Cover” block above the image block. The Cover block allows text on top of images directly. Select the Cover block and upload your image there, or choose one from the library. Click inside the block to add a “Paragraph” block. Type your text. This text will appear over the image. You can move the text block to adjust its position.
Customizing Text Appearance
Highlight the text to open the formatting toolbar. Change the font size, color, or style to improve readability. Use contrasting colors to make text stand out. Align the text left, center, or right based on your design. Adjust padding or margins in the block settings for better spacing. These tweaks ensure your text is clear and attractive.
Using Plugins For Text Overlay
Adding text over images can make your WordPress site more attractive and clear. Plugins offer a simple way to do this without coding. They help you place and style text easily on any image.
Using plugins saves time and gives you more design options. You can choose fonts, colors, and animation effects. This method fits well for beginners and busy site owners.
Top Plugins For Image Text Overlay
Several plugins work well for adding text over images. “Image Hover Effects” offers stylish overlays and animation. “WP Image Overlay” provides simple text placement with color controls. “Easy Image Overlay” lets you add captions and customize fonts easily.
Each plugin has unique features. You can pick one based on your design needs. Check user ratings and update frequency for better reliability.
Installing And Activating Plugins
Go to your WordPress dashboard. Click on “Plugins” then “Add New.” Enter the plugin name in the search box. Click “Install Now” on the plugin you want. After installation, click “Activate” to enable it on your site.
Activated plugins appear in your dashboard menu. You can access their settings to start adding text overlays. Installation takes only a few minutes.
Configuring Plugin Settings
Open the plugin settings from your dashboard. You will find options to add images and text. Upload your image and enter the desired text. Adjust font size, color, and position as needed.
Many plugins let you preview changes before saving. Experiment with styles to fit your site’s look. Save your settings and check the results on your page.
Credit: www.wpbeginner.com
Applying Custom Css For Text Overlay
Applying custom CSS for text overlay lets you place text exactly where you want on an image. It gives you control over the style and position of the text. This method works well for WordPress users who want a simple, clean design without extra plugins.
With CSS, you can create overlays that improve readability and look great on all devices. Custom styles help your text stand out while keeping the image visible. Let’s explore how to write basic CSS for positioning text and how to add it to your WordPress site.
Writing Basic Css For Text Positioning
Start by setting the container of your image to position: relative;. This ensures the text stays inside the image area. Next, add a text element inside the container with position: absolute;. This allows you to place the text anywhere over the image.
Use CSS properties like top, left, right, and bottom to adjust the text position. For example, top: 20px; left: 20px; moves the text 20 pixels from the top and left edges.
Control the text color and background for better contrast. Try color: white; and background-color: rgba(0, 0, 0, 0.5); for a semi-transparent black background behind the text. This makes the text easier to read.
Adding Css To Your WordPress Site
To add custom CSS, go to your WordPress dashboard. Navigate to Appearance and then Customize. Find the Additional CSS section. Paste your CSS code here and save the changes.
You can also add CSS in your child theme’s stylesheet or a custom CSS plugin. This keeps your styles safe during theme updates. Always preview your site after adding CSS to check the overlay looks correct on all devices.
Tips For Stunning Text Over Image
Adding text over images can make your WordPress site look more attractive and professional. It helps highlight important messages or calls to action. Follow these tips to create stunning text overlays that catch attention and look great.
Focus on font styles, colors, readability, and balance. These factors work together to create a clear and appealing design. Let’s explore each one in detail.
Choosing Font Styles And Colors
Select fonts that match your website’s style. Use simple, easy-to-read fonts for better clarity. Avoid overly decorative fonts that distract readers.
Choose colors that stand out against the image. Light text works well on dark backgrounds. Dark text looks good on light backgrounds. Use contrasting colors for best results.
Ensuring Text Readability
Text must be easy to read over the image. Use shadows or outlines to make the text pop. Add a semi-transparent overlay behind the text for better contrast.
Keep the text size large enough to be clear. Avoid placing text on busy or cluttered parts of the image. Clear, simple backgrounds help the text stand out.
Balancing Text And Image Elements
Balance text size and image details to avoid clutter. Don’t let the text cover important parts of the image. Place text in empty spaces or areas with little detail.
Use spacing to separate text from other image elements. Keep the layout clean and organized. A balanced design looks professional and is easy to understand.
Credit: themelooks.com
Frequently Asked Questions
How Can I Add Text Over An Image In WordPress?
To add text over an image, use the WordPress block editor. Insert an image block, then add a text block on top using a cover block or custom CSS.
Which WordPress Block Is Best For Overlay Text?
The Cover block is ideal for overlay text. It combines images with editable text, allowing easy customization and responsive design.
Can I Customize Text Style Over Images In WordPress?
Yes, WordPress lets you change font size, color, and alignment. Use the block settings or custom CSS for advanced styling.
Is Adding Text Over Images Mobile-friendly In WordPress?
Yes, using the Cover block or responsive CSS ensures text over images adapts well to all screen sizes.
Conclusion
Adding text over images in WordPress is simple and effective. You can make your site more attractive and clear. Use the built-in tools or plugins to place your text exactly where you want. Keep your text short and easy to read.
Practice a bit, and you will get better fast. This small skill helps your website stand out and share your message well. Try it today and see the difference on your pages.


