
Are you concerned about your website’s security and credibility? Adding an SSL certificate is a crucial step to protect your site and reassure your visitors.
If you’re using Namecheap as your domain provider, you’re in luck. This guide will show you exactly how to add an SSL certificate to your website using Namecheap, ensuring your data is safe and your visitors feel confident. Imagine unlocking a new level of trust and professionalism with just a few clicks.
You’ll discover that it’s easier than you might think, and the benefits are undeniable. Dive in, and let’s make your site more secure together!

Credit: www.youtube.com
Choosing The Right Ssl Certificate
Selecting an SSL certificate from Namecheap enhances website security and trust. Follow their straightforward steps to install the certificate. It’s crucial for safeguarding data and boosting user confidence.
Choosing the right SSL certificate is crucial for your website’s security and credibility. With numerous options available, you might wonder which one best suits your needs. Whether you’re safeguarding a simple blog or a bustling e-commerce site, understanding what each SSL certificate offers can make all the difference.Understanding Ssl Certificate Types
SSL certificates come in various types, each serving different purposes. Domain Validated (DV) certificates are perfect for personal websites and blogs, offering basic encryption. If you run a business, consider Organization Validated (OV) certificates, providing a higher level of assurance with company verification. For top-tier security, Extended Validation (EV) certificates are ideal, showcasing your verified identity in the browser bar.Assessing Your Website’s Needs
Think about your website’s primary function. Is it a simple blog where you share personal stories, or an online shop handling customer transactions? The more sensitive the data, the more robust your SSL certificate should be. A personal blog might only need a DV certificate, while a business site handling payments should look at OV or EV options.Considering Future Growth
Are you planning to expand your website’s functionalities? If you foresee adding features like user accounts or online payments, it might be wise to invest in a more comprehensive SSL certificate from the start. This can save you the hassle of upgrading later and ensures your site remains secure as it grows.Budgeting For Ssl Certificates
SSL certificates come in a range of prices. A DV certificate is usually more affordable, while EV certificates can be pricier due to their stringent validation process. Consider what fits your budget, but remember, investing in a higher level of security can pay off in customer trust and data protection.Evaluating Customer Trust
Have you ever hesitated to enter personal information on a website lacking visible security features? Your visitors are no different. An EV certificate can boost customer confidence, showing them your commitment to safeguarding their data. This can lead to more conversions and repeat visits, vital for any business. Choosing the right SSL certificate might seem daunting, but it’s a step worth taking. By assessing your website’s needs and future plans, you can select an SSL certificate that not only secures your site but also instills trust in your visitors. So, which SSL certificate will you choose to protect your online presence?Step-by-step Installation Process
Installing an SSL certificate from Namecheap is crucial for website security. This process ensures your data remains encrypted and safe from threats. Here’s a simple step-by-step guide to help you install the SSL certificate.
Step 1: Purchase Your Ssl Certificate
Log into your Namecheap account. Go to the SSL certificates section. Choose and purchase the SSL certificate that suits your needs. After purchase, it appears in your account dashboard.
Step 2: Generate A Csr
CSR stands for Certificate Signing Request. You need to generate it from your hosting server. This step is crucial for the SSL installation. Ensure you have the correct domain name and contact details.
Step 3: Activate Your Ssl Certificate
Return to Namecheap and find your SSL certificate in your dashboard. Click on the ‘Activate’ button. Enter the CSR you generated earlier. Choose the correct server type for your hosting.
Step 4: Validate The Domain
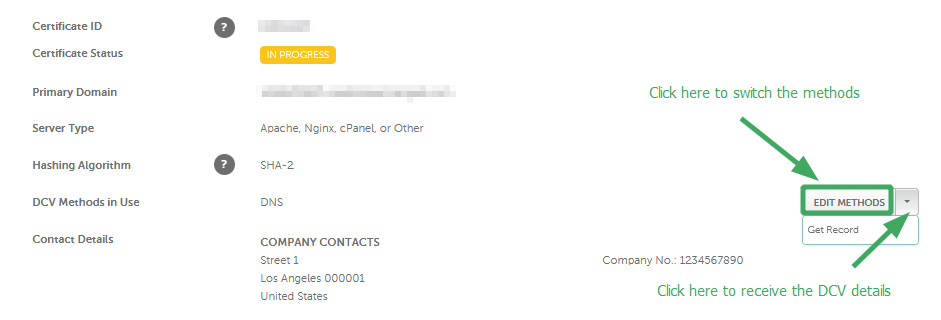
Namecheap provides multiple validation methods. You can choose email validation, DNS-based validation, or HTTP-based validation. Follow the instructions carefully to complete this step.
Step 5: Install The Ssl Certificate On Your Server
Once validated, download the SSL certificate files. Log into your hosting server’s control panel. Upload and install the SSL certificate files there. Ensure all files are placed in the correct directories.
Step 6: Test Your Ssl Installation
After installation, test your SSL certificate. Use online SSL tools to verify its status. Ensure your website displays the secure padlock icon in browsers. This confirms the SSL is working correctly.
Verifying Ssl Certificate Setup
Verifying the SSL Certificate setup is crucial for website security. It ensures data encryption between the server and visitors. With Namecheap, this process is streamlined yet vital. Proper verification can prevent security breaches and instill trust among users. Let’s explore the necessary steps to confirm your SSL Certificate setup effectively.
Checking Ssl Certificate Installation
First, ensure the SSL certificate is installed correctly. Use online tools to check installation status. Namecheap offers a free SSL Checker tool. Enter your domain to verify the setup. This tool provides instant feedback.
Testing Domain Name Resolution
After installation, test if the domain resolves securely. Use a browser to visit your site. Look for a padlock symbol in the URL bar. This indicates a secure connection. If absent, double-check your certificate settings.
Validating Certificate Details
Inspect your SSL certificate details for accuracy. Click on the padlock icon in the browser. Review the certificate issuer and expiration date. Ensure these match your Namecheap records. Correct any discrepancies immediately.
Confirming Server Configuration
Server configuration is key to SSL functionality. Check your server settings for SSL/TLS compatibility. Adjust configurations if your server doesn’t support SSL. Namecheap provides support for server-specific queries.
Monitoring Ssl Certificate Expiration
SSL certificates have an expiration date. Regularly check this to avoid disruptions. Set reminders for renewal through Namecheap. Keep your SSL certificate active for continuous security.
Credit: www.namecheap.com

Credit: webmasters.stackexchange.com
Frequently Asked Questions
How To Add An Ssl Certificate In Namecheap?
Log in to your Namecheap account. Go to “Dashboard” and select “SSL Certificates. ” Click “Activate” next to your SSL. Follow the instructions to generate a CSR code, verify your domain, and complete the installation. Your SSL certificate is now active.
How Do I Add An Ssl Certificate To My Domain?
Purchase an SSL certificate from a trusted provider. Access your hosting control panel. Locate the SSL/TLS section. Upload your SSL certificate files. Apply the certificate to your domain. Ensure the installation is successful by checking for the padlock symbol in the browser.
How To Update Ssl Certificate Namecheap?
Log in to your Namecheap account. Navigate to the SSL Certificates section. Select the certificate to update. Follow on-screen instructions to complete the renewal or reissue process. Ensure domain validation is current. Confirm the certificate installation on your server for security.
Is An Ssl Certificate Free On Namecheap?
Namecheap offers free SSL certificates for one year with specific hosting plans. After that, renewal fees apply.
Conclusion
Securing your website with an SSL certificate is crucial. It builds trust. Visitors feel safe knowing their data is protected. Namecheap makes this process simple and affordable. Follow the steps carefully. Your website will soon display that secure lock symbol.
This small effort can improve your site’s credibility. Plus, it can enhance your search engine ranking. Don’t delay in securing your site today. Your visitors will appreciate the peace of mind. Remember, a secure site is a successful site. Happy securing!


