
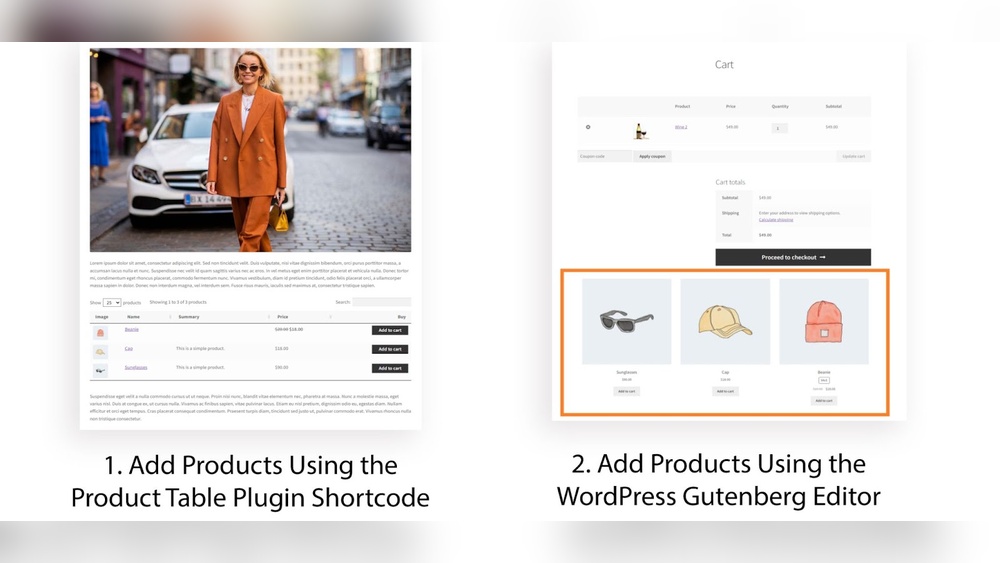
Adding products to your WordPress website can feel tricky if you’re new to it. But what if you could set up your online store quickly and easily, without needing to be a tech expert?
This guide will walk you through every simple step to get your products live, attract customers, and boost your sales. By the end, you’ll have the confidence to manage your store like a pro. Ready to transform your site into a powerful selling machine?
Let’s dive in!
Credit: www.wpzoom.com
Setting Up Woocommerce
Setting up WooCommerce is the first step to sell products on your WordPress site. This plugin turns your website into an online store. It is free and simple to install. You can customize it to fit your business needs. Let’s explore the basics of getting WooCommerce ready.
Installing The Plugin
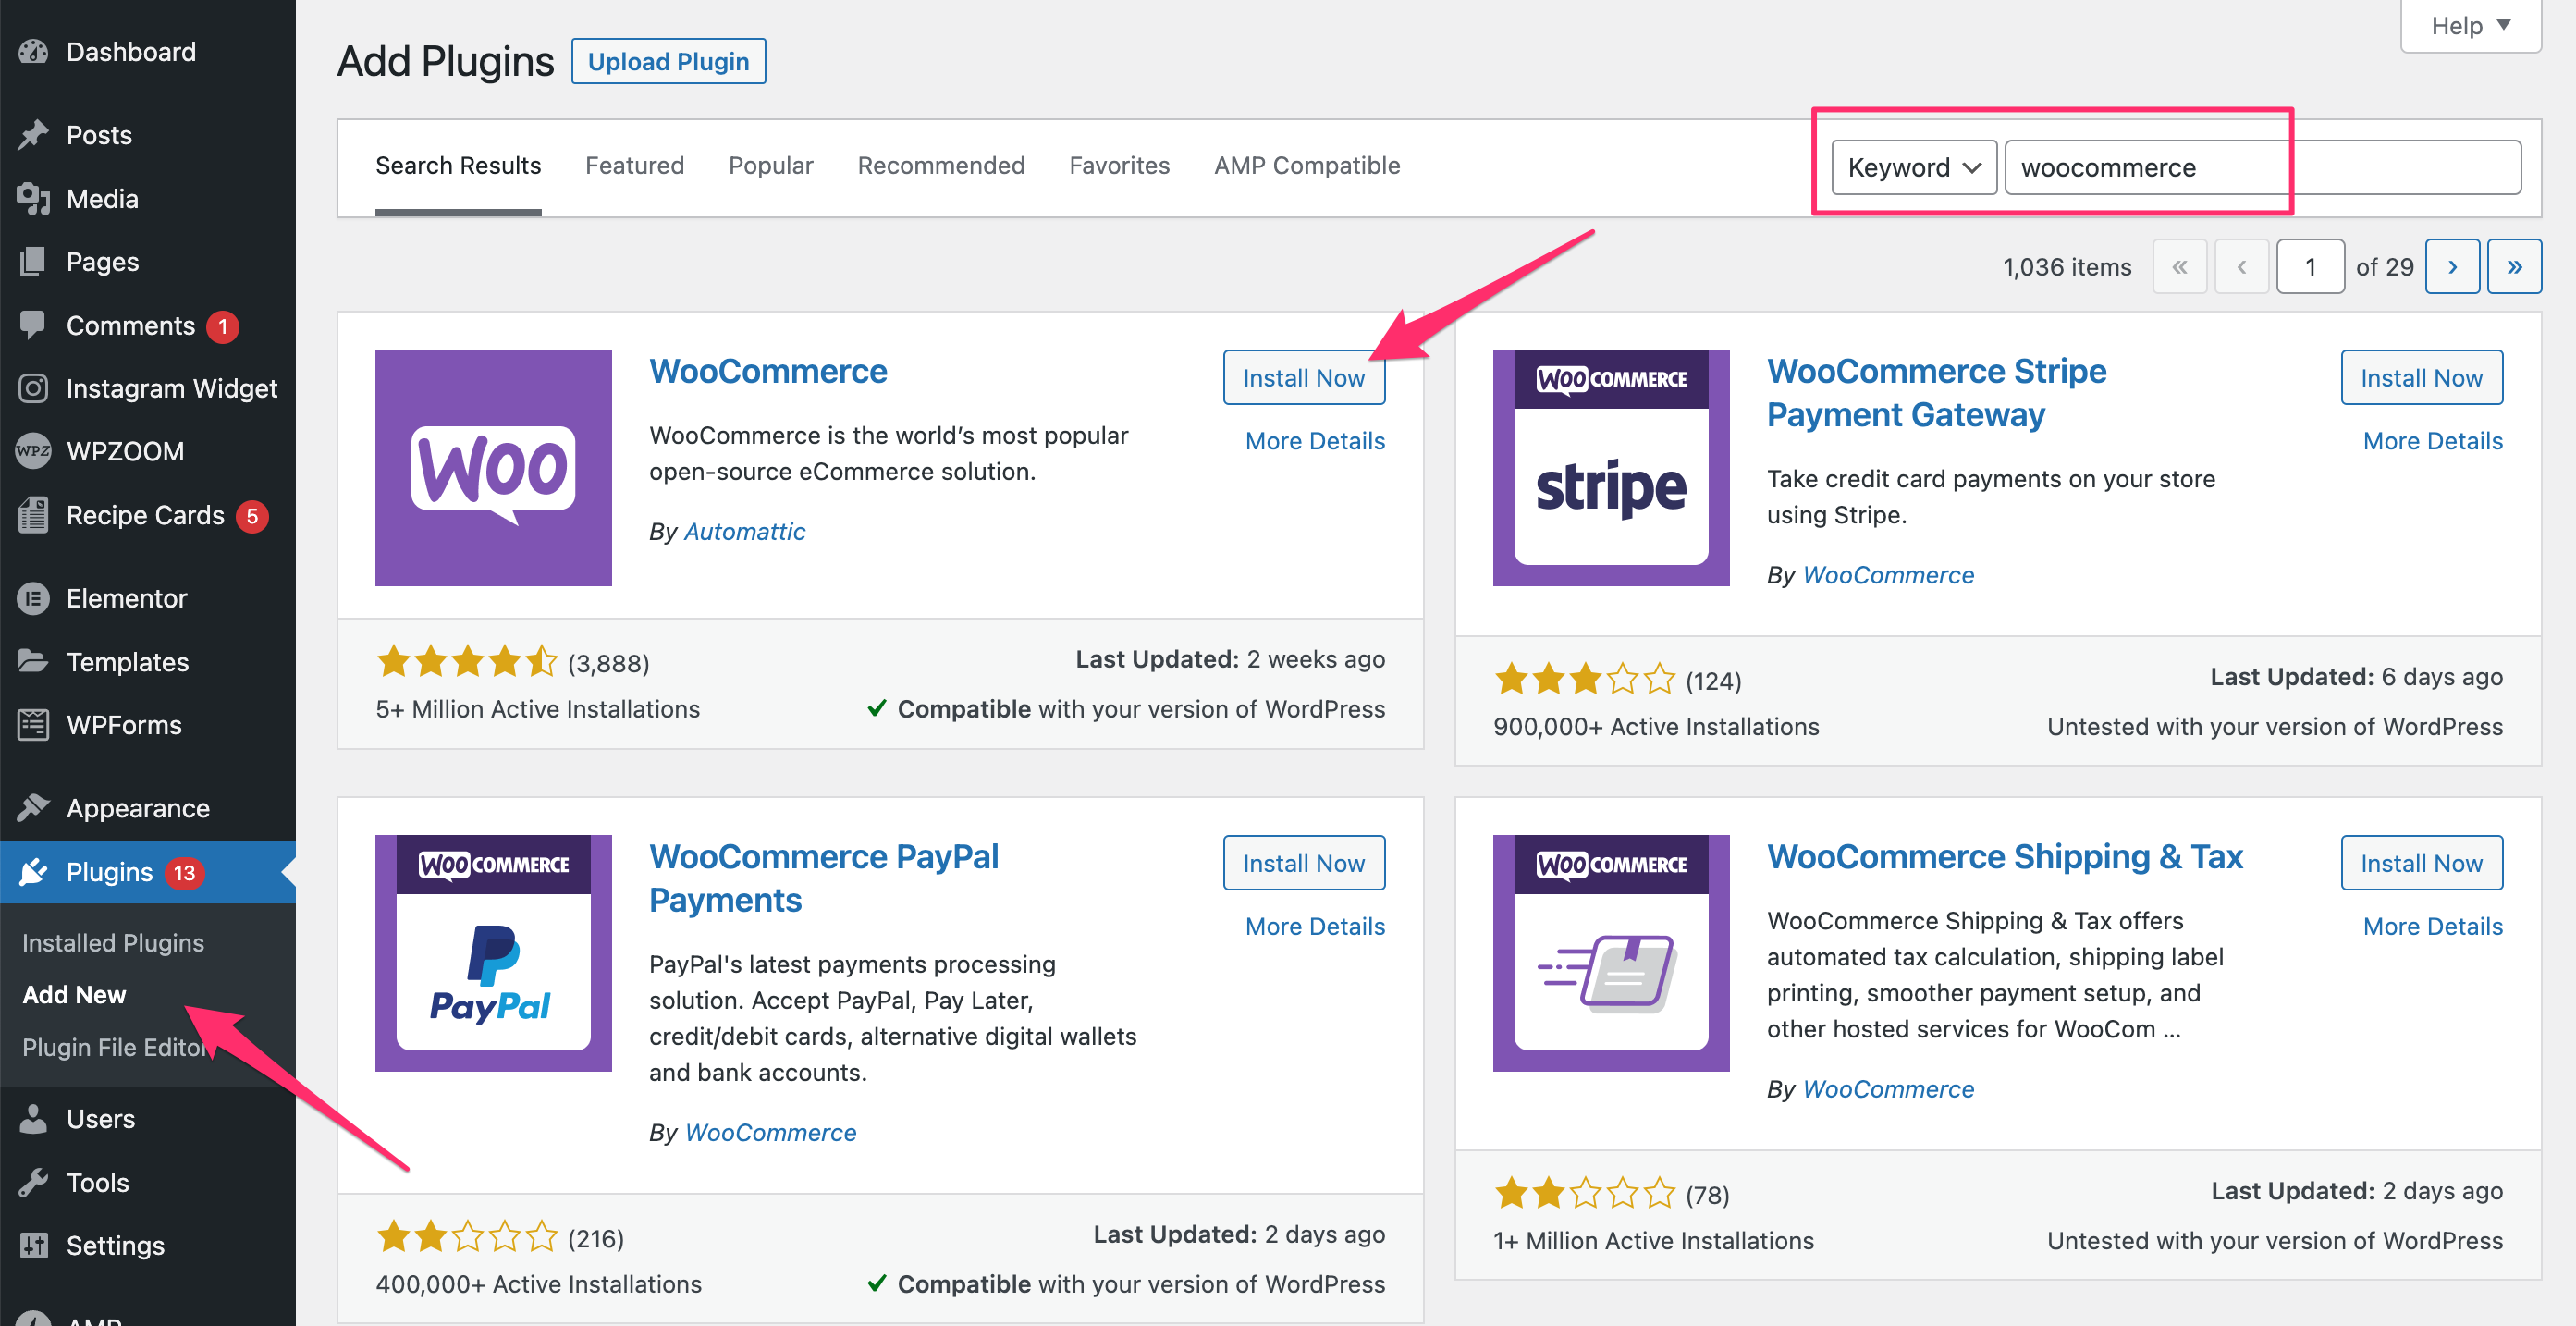
Log in to your WordPress dashboard. Go to the Plugins menu and click “Add New.” Type “WooCommerce” in the search box. Find the WooCommerce plugin by Automattic. Click “Install Now” and wait a few seconds. Then press “Activate” to enable the plugin on your site.
WooCommerce will start a setup wizard. You can skip it or follow the steps to set up your store quickly.
Configuring Basic Settings
Open WooCommerce in your dashboard. Click on “Settings” to access the main options. Set your store location and currency. Choose the payment methods you want to offer. Enable shipping options if you plan to send physical products.
Check the tax settings and adjust them for your region. Save changes to apply your setup. These basic settings help WooCommerce work smoothly and fit your store’s needs.
Credit: www.greengeeks.com
Creating Product Categories
Creating product categories helps keep your store neat and easy to explore. Categories group similar products together. This makes it faster for visitors to find what they want.
Well-organized categories improve user experience and boost sales. They also help search engines understand your site better. This can improve your site’s ranking on search results.
Organizing Your Products
Start by thinking about your products. Group them by type, use, or style. For example, clothes can be divided into shirts, pants, and jackets.
Keep categories simple and clear. Avoid too many similar categories. This avoids confusion for your customers.
Use categories to guide visitors through your store. Good organization helps them find products faster.
Adding New Categories
Go to your WordPress dashboard. Select “Products” and then “Categories.”
Enter the category name. Add a short description if needed. Choose a parent category if this is a subcategory.
Click “Add New Category” to save it. Your new category appears on the product page. Now, assign products to this category easily.
Adding A Simple Product
Adding a simple product to your WordPress website is a basic task for any online store. This process involves inputting clear details, setting prices, managing stock, and uploading images. Each step helps customers understand what you sell and encourages them to buy.
Entering Product Details
Start by giving your product a clear name. Use simple words that describe the item well. Next, add a short description. This should explain what the product is and its main features. Use easy sentences to help visitors quickly learn about the product. Include any important information that might affect a buyer’s choice.
Setting Prices And Inventory
Set a price that matches the product’s value. Enter the regular price first. If you want to offer a discount, add a sale price. Manage your stock by entering the number of items available. This keeps your store updated and prevents selling products that are out of stock. Turn on stock management to track inventory automatically.
Uploading Product Images
Images help customers see what they will get. Choose clear photos that show the product well. Upload at least one main image. Add extra pictures to show different angles or uses. Make sure all images are sharp and not too large. This keeps your website fast and user-friendly.
Adding Variable Products
Adding variable products to your WordPress website lets you offer different options for one product. Customers can choose sizes, colors, or other features. This makes your store more flexible and user-friendly. Variable products help showcase many choices without creating separate listings.
Setting up these products needs two key steps: managing attributes and creating product variations. Attributes define the options. Variations combine these options into different product versions. Both parts work together to build a complete variable product.
Creating Product Variations
Start by opening your product editor in WordPress. Select the “Variable product” option from the product type dropdown. Scroll to the “Variations” tab. Here, you can add new variations manually or create all variations at once.
Each variation can have its own price, stock, image, and SKU. Enter details carefully to match what customers will see. Save changes after adding all variations. This step lets shoppers pick the exact product they want.
Managing Attributes
Attributes are the building blocks for variations. Go to the “Attributes” section in the product editor. Add new attributes like color, size, or material. For each attribute, list all possible options separated by a vertical bar (|).
Check the box to use the attribute for variations. Save the attributes before moving to variations. Clear and accurate attributes make variation creation easier and faster. They help organize your product options well.
Optimizing Product Pages
Optimizing product pages is key to improving sales and user experience. Clear, well-structured pages help customers find important details fast. Each product page should attract buyers and guide them to purchase. Focus on writing strong descriptions and using SEO techniques. These steps boost visibility and make your products stand out.
Writing Compelling Descriptions
Write descriptions that explain what the product does and why it matters. Use simple words and short sentences. Highlight features and benefits clearly. Avoid technical jargon or long paragraphs. Break information into bullet points if possible. Describe the product’s use, size, and any unique qualities. Help shoppers imagine owning the product. Strong descriptions build trust and encourage buying.
Using Seo Best Practices
Use relevant keywords naturally in titles, descriptions, and image tags. Keywords should match what customers search for. Add clear product names and categories. Use alt text for images to describe them well. Keep URLs short and descriptive. Include meta descriptions that summarize the product page. Fast loading times and mobile-friendly design improve rankings. SEO helps your products reach more people online.

Credit: www.youtube.com
Managing Shipping And Taxes
Managing shipping and taxes is a key step in adding products to your WordPress website. It affects customer experience and your store’s compliance. Setting these correctly avoids confusion and extra costs later. This section explains how to set up shipping options and tax rules clearly.
Setting Shipping Options
Start by opening your WordPress dashboard. Go to the shipping settings in your e-commerce plugin. Choose the shipping zones based on where you want to deliver products. You can set different prices for each zone. Add shipping methods like flat rate, free shipping, or local pickup. Define costs clearly for each method. This helps customers understand their shipping charges before buying.
Configuring Tax Rules
Next, open the tax settings in your plugin. Enter the tax rates according to your country or region. You can add multiple tax classes for different products. Set rules for including or excluding tax in prices. Make sure tax calculations follow local laws. Accurate tax setup keeps your store legal and builds trust with buyers.
Testing The Product Checkout
Testing the product checkout is a key step after adding products to your WordPress website. It ensures customers can buy items smoothly. This process helps find any errors before your site goes live. Checking the checkout flow builds trust and improves user experience.
Previewing The Product Page
Start by previewing your product page on WordPress. Check the product title, price, and description. Make sure the images load correctly. Verify the “Add to Cart” button works well. The page should look clean and easy to read on all devices.
Look for any broken links or missing details. Previewing helps spot small issues early. A clear and simple product page encourages buyers to continue.
Simulating A Purchase
Next, simulate a purchase to test the checkout process. Add the product to your cart and go to checkout. Enter dummy information like name, address, and payment details. This step checks if the payment system works properly.
Watch for errors during payment or order confirmation. Confirm you receive the order notification email. Simulating a purchase ensures the entire buying journey is smooth and error-free.
Troubleshooting Common Issues
Adding products to a WordPress website can sometimes cause issues. These problems may stop your site from working well. Troubleshooting helps fix these common problems quickly. This section covers two main issues: display problems and payment errors. Follow these tips to solve them and keep your store running smoothly.
Fixing Display Problems
Products not showing correctly can hurt sales. Check if your theme supports WooCommerce or your product plugin. Sometimes, outdated themes cause display errors. Update your theme and plugins regularly for best results. Clear your site cache to see recent changes. Broken images? Upload them again with proper size and format. Use simple product titles and descriptions to avoid clutter. Test your site on different devices to check responsiveness. Fixing display issues makes your site look professional and trustworthy.
Resolving Payment Errors
Payment problems stop customers from completing orders. Confirm your payment gateway is set up correctly. Check API keys and credentials for any typos or missing info. Make sure your SSL certificate is active for secure payments. Test payment methods in sandbox mode before going live. Keep your payment plugins updated to avoid compatibility issues. If errors persist, contact your payment provider for support. Clear instructions and smooth checkout build customer confidence.
Frequently Asked Questions
How Do I Add A Product To My WordPress Site?
To add a product, install WooCommerce, go to Products > Add New, then enter product details and publish. WooCommerce simplifies product management with user-friendly options.
Can I Add Different Product Types In WordPress?
Yes, WordPress with WooCommerce supports simple, variable, grouped, and external products. Choose the type when adding a new product to customize options.
How To Optimize Product Listings For Seo In WordPress?
Use clear titles, detailed descriptions, and relevant keywords. Add alt text to images and use SEO plugins like Yoast to boost product visibility.
What Images Should I Use For WordPress Products?
Use high-quality, clear images showing the product from multiple angles. Optimize image size for fast loading and add descriptive alt text for SEO benefits.
Conclusion
Adding products to your WordPress website is simple and quick. Just follow the steps carefully to ensure each product looks great. Use clear images and detailed descriptions to attract buyers. Keep your product list organized for easy browsing. Regularly update your products to keep your site fresh.
With these tips, your online store will run smoothly. Now, you can confidently add products and grow your website. Give it a try and see the difference yourself.


