
Are you looking to make your WordPress site easier to navigate and boost your sales? Adding product categories to your menu is a smart way to help your visitors find exactly what they want quickly.
But if you’re unsure how to do it, don’t worry—you’re in the right place. This guide will walk you through simple steps to add product categories to your menu, so your site looks professional and works better. Keep reading, and you’ll have a clear, organized menu that your customers will love.
Credit: io.bikegremlin.com
Accessing WordPress Menus
To add product categories to your WordPress menu, start by accessing the menu settings. This step lets you control how your website’s navigation looks. Menus organize your products and pages for visitors.
Finding the menu area is simple. Follow clear steps to reach the menu editor. This guide helps you do it quickly and without confusion.
Login To WordPress Dashboard
First, open your website’s login page. Enter your username and password carefully. After this, you will see the WordPress dashboard. This is the control center of your website.
On the dashboard, you can manage posts, pages, and menus. It shows all important tools in one place. Make sure you have the right access level to edit menus.
Navigate To Menus Section
In the dashboard, find the “Appearance” menu on the left side. Click on it to open a list of options. Choose “Menus” from this list to open the menu editor.
The menu editor shows your current menus and lets you create new ones. You can add items like pages, posts, and product categories here. This is where you build your website’s navigation.

Credit: crocoblock.com
Creating Product Categories
Creating product categories helps organize your online store. It makes browsing easy for customers. Clear categories improve user experience and boost sales. Start by setting up your product categories in WordPress. This step is simple and fast.
Open Product Categories Page
Login to your WordPress dashboard. Look for the “Products” menu on the left side. Click on “Categories” under the Products menu. The product categories page will open. Here, you can see all existing categories. This page lets you manage and add new categories easily.
Add New Category
On the product categories page, find the “Add New Category” section. Enter a name for your new category. Use a simple, clear name that matches your products. Optionally, add a description to explain the category. You can also set a parent category if needed. Click the “Add New Category” button to save. Your new category will appear in the list on the right side.
Adding Categories To Menu
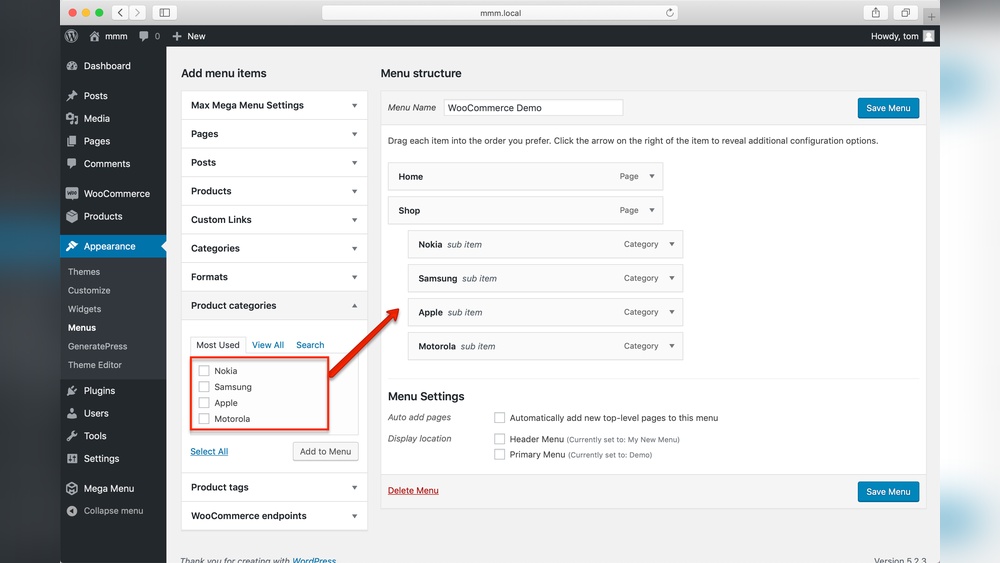
Adding product categories to your WordPress menu helps visitors find items easily. It creates a clear path to explore your products. This guide shows simple steps to add categories to your menu.
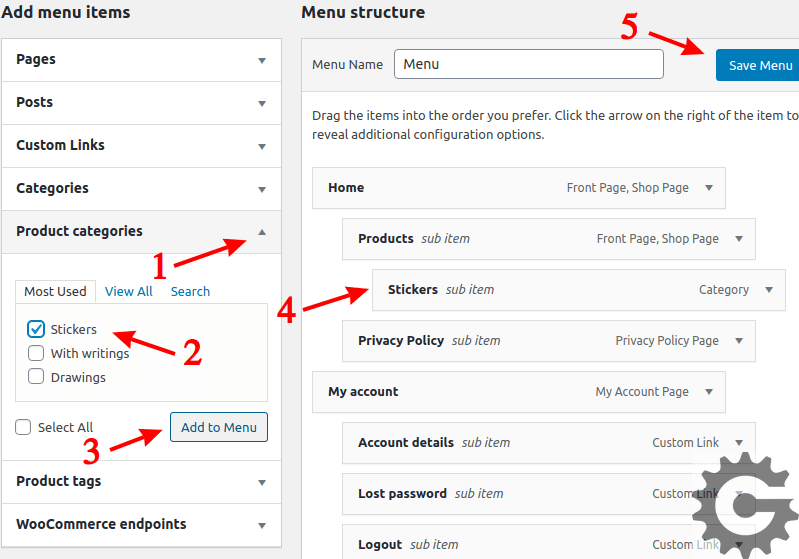
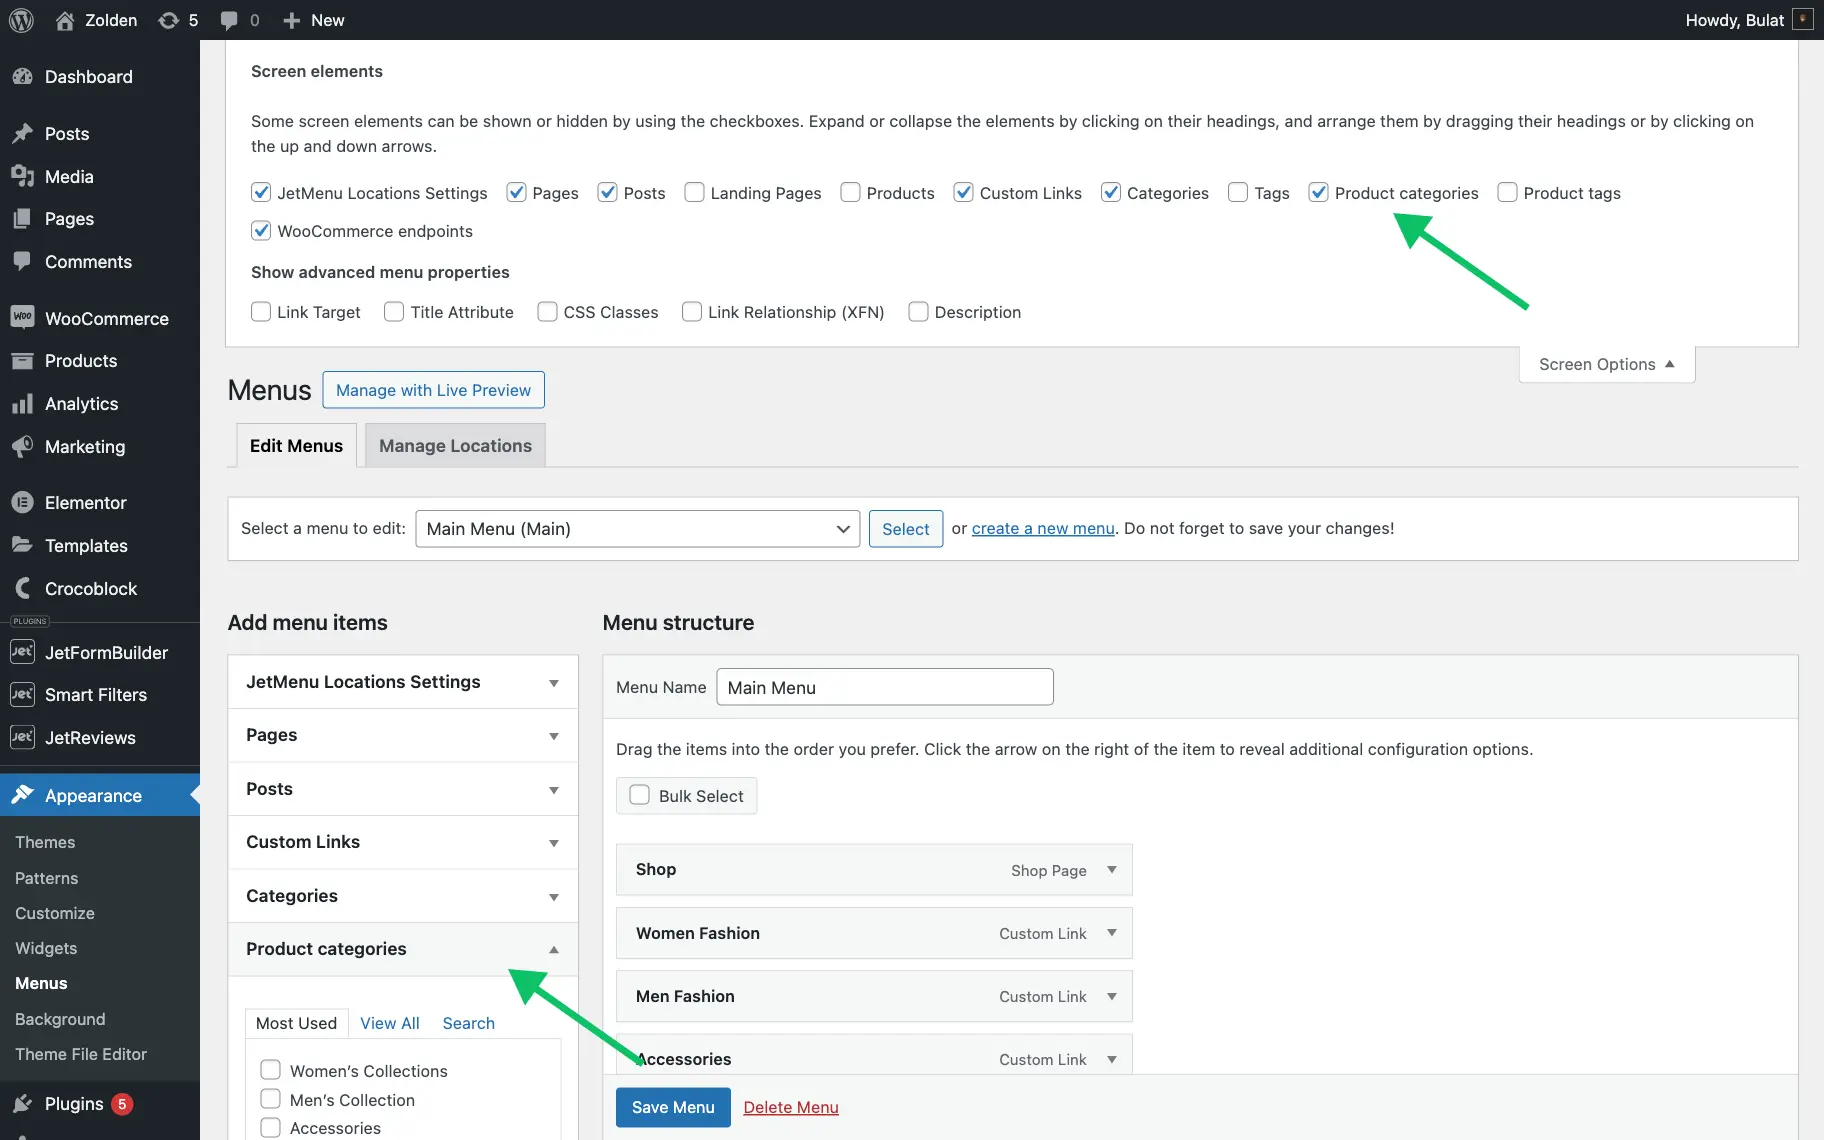
Select Categories For Menu
Start by logging into your WordPress dashboard. Go to the Appearance section and click on Menus. On the left side, find the Categories box. If you do not see it, click on Screen Options at the top and check Categories. Browse the list and check the boxes next to the categories you want to add.
Add To Menu List
After selecting categories, click the Add to Menu button. The categories will appear in the Menu Structure on the right side. You can drag and drop them to reorder. Once you are happy with the menu order, click Save Menu. Your product categories now show in your site’s menu.
Organizing Menu Items
Organizing menu items in WordPress helps visitors find products quickly. A well-structured menu improves user experience and site navigation. It also makes your online store look professional and easy to use.
Rearranging Menu Order
You can change the order of menu items easily. Just drag and drop items to the position you want. This way, the most important categories appear first. The order you set will show on your website menu. Keep your main categories visible and easy to reach.
Creating Submenus
Submenus group related categories under one main menu item. To create a submenu, drag a menu item slightly to the right under another item. This creates a drop-down effect on your site. Submenus help keep the menu clean and organized. Visitors can explore product categories without feeling lost.
Saving And Previewing Menu
After adding product categories to your WordPress menu, it is important to save your changes. Saving ensures your new menu structure stays intact. Without saving, all your work can be lost.
Previewing your menu lets you see how it looks on your live site. This step helps check if everything appears correctly. You can confirm the menu is easy to use and links work well.
Save Menu Changes
Click the “Save Menu” button at the top or bottom of the menu editor. This action stores your menu updates in WordPress. Wait for the confirmation message that says your menu is saved. Avoid closing the page before saving to prevent losing edits.
Preview On Website
Visit your website’s homepage or any page where the menu shows. Refresh the page to see the latest menu version. Check if product categories are listed properly. Test the links by clicking each category. This preview helps spot any errors or missing items.
Credit: crocoblock.com
Troubleshooting Common Issues
Troubleshooting common issues helps keep your WordPress menu working well. Sometimes product categories do not show or links do not work. These problems can stop visitors from finding products easily. Fixing these issues improves user experience and site navigation.
Menu Not Showing Categories
Check if the product categories are published. Draft or private categories will not appear in menus. Go to Products > Categories and confirm each category is visible.
Look at the menu settings. Open Appearance > Menus and ensure the correct menu is selected. Sometimes the wrong menu is active.
Clear your site cache. Caching plugins or server cache may show an old version of the menu. Clear cache and refresh your page to see changes.
Category Link Errors
Verify the URL of each category link in the menu. Wrong URLs cause broken links or 404 errors. Edit the menu and fix any incorrect URLs.
Permalink settings affect category links. Go to Settings > Permalinks and save changes to refresh permalink structure.
Disable plugins that might conflict. Some plugins change URL behavior. Turn off plugins one by one to find any causing link errors.
Frequently Asked Questions
How Do I Add Product Categories To WordPress Menu?
Go to Appearance > Menus in your dashboard. Select product categories from the left panel. Check desired categories and click “Add to Menu. ” Arrange them as needed and save the menu to display product categories.
Can I Customize Product Categories In The WordPress Menu?
Yes, you can customize labels and order. Use drag-and-drop to reorder categories. Rename menu items by clicking the arrow next to each. Customization helps improve navigation and user experience on your site.
Why Add Product Categories To My WordPress Menu?
Adding product categories improves site navigation. It helps customers find products quickly. This boosts user experience and can increase sales by guiding visitors directly to relevant products.
What If Product Categories Don’t Show In Menu Options?
Ensure “Product Categories” is enabled in Screen Options on the menu page. If still missing, check your theme supports WooCommerce menus. Refresh or update plugins and themes to resolve common issues.
Conclusion
Adding product categories to your WordPress menu helps visitors find items fast. It organizes your site and makes shopping easier. Just follow the steps carefully, and you will see clear results. Keep your menu simple and updated for the best user experience.
This small change can improve your site’s navigation a lot. Try it today and watch your online store become more user-friendly.


