Are you ready to make your WordPress posts more eye-catching and engaging? Adding pictures is one of the easiest ways to grab your readers’ attention and keep them interested.
But if you’re not sure how to do it, don’t worry—you’re in the right place. You’ll discover simple, step-by-step instructions to add pictures to your WordPress posts quickly and effortlessly. By the end, you’ll know exactly how to make your content stand out with the perfect images.
Let’s get started!
Credit: www.ipage.com
Choosing The Right Images
Choosing the right images is key to making your WordPress post stand out. Good pictures catch readers’ eyes and explain your message better. They also help your post look professional and trustworthy.
Picking images that match your content is important. The images should be clear and relevant. Avoid blurry or unrelated photos. This keeps readers interested and improves your post’s quality.
Sources For High-quality Pictures
Use trusted websites to find high-quality images. Free sites like Unsplash, Pexels, and Pixabay offer many good options. These pictures are safe to use and often do not need attribution.
Stock photo sites like Shutterstock and Adobe Stock provide professional images. These usually require payment but have a wider selection. Choose images that fit your post’s topic closely.
Image Formats And Sizes
Choose the right format for your images. JPEG is good for photos with many colors. PNG works well for images with text or transparent backgrounds. WebP offers smaller file sizes with good quality.
Keep your images small in size to help your page load faster. Large images slow down your website and hurt user experience. Resize images to fit the space you need in your post.
Optimizing Images For Web
Compress your images before uploading them to WordPress. Use tools like TinyPNG or ImageOptim to reduce file size. Smaller files load faster and save bandwidth.
Use descriptive file names with keywords. This helps search engines understand your images. Add alt text to describe each image clearly for better SEO and accessibility.
Uploading Images To WordPress
Uploading images to WordPress makes your posts more attractive and clear. Pictures help explain your ideas better and keep readers interested. WordPress offers simple ways to upload images. Choose the method that works best for you.
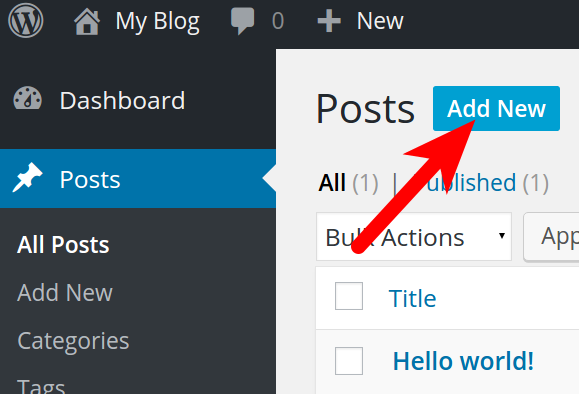
Using The Media Library
The Media Library stores all images and files in WordPress. Click “Add Media” above the editor to open it. Then click “Upload Files” to select images from your computer. After uploading, you can insert images into your post with one click. The Media Library also lets you reuse images from past posts.
Drag And Drop Upload
Drag and drop upload is fast and easy. Open your post editor and open your computer folder with images. Drag the image file and drop it directly into the editor area. WordPress will upload the image automatically. This method saves time and works without extra steps.
Uploading Via Url
You can upload images by using their web address. In the Media Library, select “Add from URL.” Paste the image’s link in the box. WordPress fetches the image and adds it to your library. This is useful when you want to use images from other websites legally.
Inserting Images Into Posts
Adding images to your WordPress posts makes them more interesting. Pictures help explain ideas and catch readers’ eyes. The process is simple and fast. WordPress offers tools to insert images easily. You can choose from two main editors: the Block Editor and the Classic Editor. Each has its own way to add pictures.
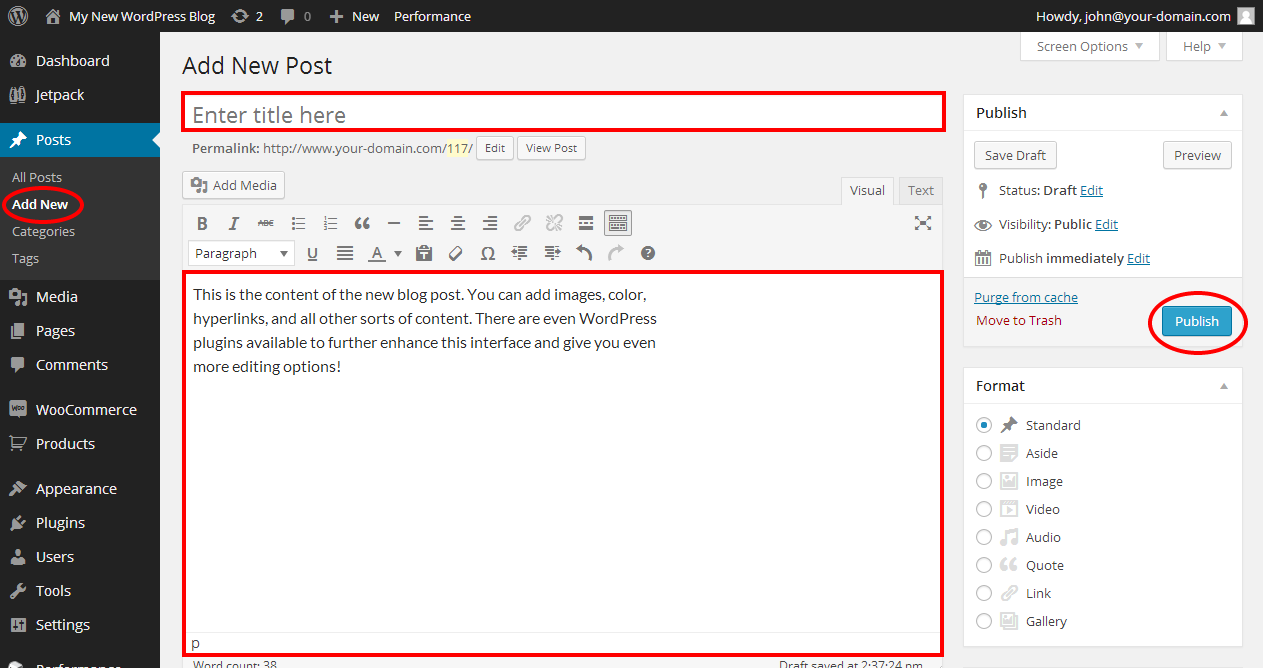
Adding Images With The Block Editor
The Block Editor uses blocks for every content type. To add an image, click the plus (+) button. Select the “Image” block from the menu. You can upload a new photo or pick one from the media library. After inserting, you can add alt text. This improves SEO and accessibility. The Block Editor shows a toolbar for resizing and editing.
Using Classic Editor For Images
The Classic Editor looks like a word processor. To add an image, click the “Add Media” button above the text area. Upload a new file or select one from the media library. Insert it into the post with one click. You can edit the image details in a popup window. This editor suits users who prefer a simple interface.
Positioning And Aligning Images
Positioning images controls how text flows around them. Both editors offer alignment options: left, center, right, or none. Left and right alignments let text wrap beside the image. Center alignment places the image on its own line. Choose the best alignment for your layout. Use spacing to keep the post neat and readable.
Customizing Image Appearance
Customizing the appearance of images in your WordPress posts improves user experience. It also helps your content look more professional and polished. You can change how images display by adding captions, resizing, cropping, and linking them. These simple steps make your posts more attractive and easier to understand.
Adding Captions And Alt Text
Captions provide extra information under images. They explain what the image shows or why it is important. This helps readers understand the content better.
Alt text is a short description added to images. It helps search engines understand the image. It also helps users with disabilities who use screen readers. Always write clear and simple alt text that describes the image well.
Resizing And Cropping Images
Large images can slow down your site. Resize images to fit your post layout. WordPress lets you adjust image size easily in the editor.
Cropping removes unwanted parts of an image. It focuses on the important area. Use the crop tool to make images look cleaner and more balanced.
Applying Image Links
You can link images to other pages or websites. This makes images interactive and useful for navigation.
To add a link, select the image and click the link icon. Enter the URL where you want the image to lead. This helps guide your readers to more content or resources.
Enhancing Visuals With Plugins
Plugins help improve how pictures look on your WordPress posts. They add features that the default editor does not have. Plugins make your images more attractive and your site faster. This keeps visitors interested and lowers bounce rates.
Using plugins for images saves time. You get more control over how pictures display. Some plugins help show many images in one place. Others make pictures load faster or reduce their file size. These tools improve user experience and search rankings.
Gallery Plugins For Multiple Images
Gallery plugins organize many pictures in a clean layout. They create grids, sliders, or mosaics to show images beautifully. Visitors can scroll or click through photos easily. These plugins often include lightbox effects, making images pop up larger.
Some popular gallery plugins let you customize layouts and styles. You can add captions, adjust spacing, and set animation effects. This helps your post look professional and engaging without coding.
Image Optimization Plugins
Image optimization plugins reduce file size without losing quality. Smaller images load faster, improving site speed and SEO. These plugins automatically compress images when you upload them. Some also convert images to modern formats like WebP.
Optimized images save bandwidth and reduce server load. Visitors enjoy quicker page loads, which keeps them on your site longer. These plugins work quietly in the background, making image management simple.
Lazy Loading For Faster Pages
Lazy loading delays loading images until they are visible on screen. This speeds up the initial page load time. Visitors see content faster, especially on pages with many pictures. Lazy loading reduces data use for users on slow connections.
Many lazy load plugins are easy to activate. They improve performance without changing your site design. Fast pages help improve user experience and boost search engine rankings.
Credit: www.inmotionhosting.com
Troubleshooting Common Issues
Adding pictures to your WordPress post should be simple. Sometimes, issues can stop your images from showing properly. Troubleshooting these common problems helps keep your post looking great. This section guides you through fixing broken images, upload errors, and slow image loads. Follow these clear steps to solve these issues fast.
Fixing Broken Images
Broken images appear as empty boxes or error icons. This happens if the image URL is wrong or the file is missing. Check the image link in your post. Make sure the file exists in your media library. Clear your browser cache to update the page. Also, confirm the image file name has no spaces or special characters. Correcting these stops broken images from showing.
Resolving Upload Errors
Upload errors can block adding pictures. Often, file size is too large for your server limits. Try resizing the image before uploading. Check your internet connection for stability. Ensure your WordPress and plugins are up to date. Sometimes, file type restrictions cause errors. Use common formats like JPG, PNG, or GIF. Fixing these steps helps images upload without problems.
Improving Image Load Speed
Slow-loading images hurt user experience and SEO. Use smaller file sizes by compressing images before upload. Choose the right format—JPEG for photos, PNG for graphics. Enable lazy loading to delay off-screen images. Use a caching plugin to speed up image delivery. Optimize your website hosting for faster responses. Fast images keep visitors engaged and improve site ranking.
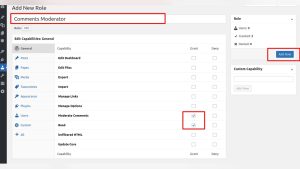
Credit: www.hostinger.com
Frequently Asked Questions
How Do I Upload Pictures To A WordPress Post?
To upload pictures, click “Add Media” above the post editor. Select or upload your image, then click “Insert into post. ” The image will appear in your post content, ready to be resized or aligned as needed.
What Image Formats Are Supported In WordPress Posts?
WordPress supports JPEG, PNG, GIF, and ICO image formats. JPEG is best for photos, PNG for graphics with transparency, and GIF for animations. Using these formats ensures your images display correctly and load quickly on your website.
Can I Resize Images Directly In A WordPress Post?
Yes, WordPress allows resizing images within the post editor. Click the image, drag the corners to adjust size, or use the image settings panel for exact dimensions. This helps optimize visuals and page load speed.
How Do I Add Alt Text To Images In WordPress?
When uploading an image, fill the “Alt Text” field in the media uploader. Alt text improves SEO and accessibility by describing the image to search engines and screen readers.
Conclusion
Adding pictures to your WordPress post makes it more interesting. Images help readers understand your message better. Upload pictures carefully, and place them where they fit well. Use clear, simple captions to explain each image. Don’t forget to check the image size for faster loading.
Practice these steps to improve your posts easily. Soon, adding pictures will feel natural and quick. Keep your blog attractive and easy to read with good images.