
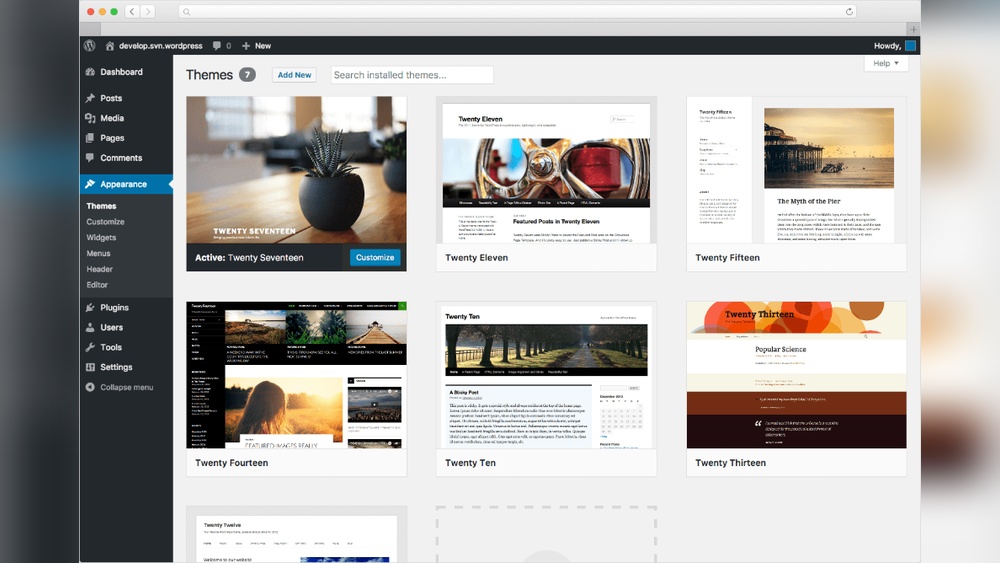
Are you looking to make your WordPress website more engaging and visually appealing? Adding images is one of the easiest and most effective ways to do just that.
But if you’re not sure where to start or feel overwhelmed by the process, don’t worry—this guide is made just for you. By the end of this article, you’ll know exactly how to add images to your WordPress site quickly and effortlessly, boosting your site’s look and keeping your visitors interested.
Ready to transform your website? Let’s dive in.

Credit: learn.wordpress.org
Choosing The Right Images
Choosing the right images is key to making your WordPress website look great. Good images catch the eye and help explain your message clearly. They also make your site more interesting to visitors. Picking images that fit your content and style is important. This helps your site feel professional and trustworthy.
Sources For High-quality Images
Find images from reliable websites that offer high quality photos. Some sites provide free images you can use without cost. Others sell photos for a small fee. Pick images that match your website theme and topic. Avoid blurry or low-resolution pictures. Clear images keep your site looking sharp and appealing.
Optimizing Images For Web
Large image files can slow down your website. Slow sites lose visitors and rank lower in search results. Resize images to smaller dimensions without losing quality. Use tools to compress images before uploading them. Save images in web-friendly formats like JPEG or PNG. Fast loading images improve user experience and SEO.
Legal Considerations And Copyright
Do not use images without permission. Copyright rules protect most photos on the internet. Use images labeled for reuse or those you own. Check licenses carefully to avoid legal problems. Giving credit to the image creator is good practice. Respect copyright laws to keep your website safe and legal.

Credit: www.youtube.com
Uploading Images To WordPress
Uploading images to your WordPress website is simple and quick. Images make your content more attractive and help visitors understand your message better. WordPress offers several ways to upload images, each suited to different needs.
Using The Media Library
The Media Library stores all your images and files in one place. To add an image, go to your WordPress dashboard and click on “Media.” Then choose “Add New.” You can select files from your computer and upload them here. Once uploaded, you can edit image details like title, caption, and alt text. The Media Library keeps your images organized and easy to find.
Drag And Drop Upload
Drag and drop upload is a fast way to add images. Open the Media Library or the post editor. Simply drag your image file from your computer and drop it into the upload area. WordPress will automatically upload and save the image. This method saves time and works well for multiple files at once.
Uploading Via Post Editor
You can upload images directly while writing a post or page. In the post editor, click the “Add Media” button above the text box. A window will open where you can upload new images or select from the Media Library. After uploading, you can insert the image into your content with one click. This method helps place images exactly where you want them.
Inserting Images Into Posts And Pages
Adding images to posts and pages enhances your content. Images attract readers and make your message clear. WordPress offers simple ways to insert pictures. This guide explains how to add images using different editors. You will also learn how to align and resize images for a better look.
Adding Images With The Block Editor
The Block Editor makes adding images easy. Click the plus (+) icon to add a new block. Choose the “Image” block from the menu. You can upload a new image or select one from the Media Library. After inserting, add alt text for SEO and accessibility. The editor allows you to add captions below the image. This block also supports drag-and-drop to reorder images.
Using Classic Editor For Images
The Classic Editor uses a toolbar for image insertion. Click the “Add Media” button above the text box. Upload your image or pick one from the Media Library. Insert the image into the post or page. You can edit the image details like title and alt text here. The Classic Editor is familiar and simple for many users.
Aligning And Resizing Images
Align images to the left, center, or right to fit your layout. Both editors offer alignment options near the image. Resize images by dragging corners or setting exact dimensions. Proper image size improves page speed and design. Always preview your post to check image placement and size.
Credit: www.seedprod.com
Enhancing Images With WordPress Features
Images make your WordPress site more attractive and engaging. Using built-in WordPress features helps improve how images look and perform. These features also help with SEO and user experience. Below are key ways to enhance images on your site.
Adding Alt Text And Captions
Alt text describes images for search engines and screen readers. It helps improve your site’s SEO and accessibility. Write clear, simple descriptions that explain the image’s content. Captions give visitors extra information and can draw attention. Use captions to add context or highlight details.
Creating Image Galleries
Image galleries display multiple photos in one place. WordPress makes it easy to create galleries without plugins. Galleries keep your pages organized and visually appealing. Choose grid or slideshow layouts to match your style. Galleries help visitors explore related images quickly.
Using Featured Images
Featured images represent your posts or pages. They show up on blog lists and social media shares. Set a clear, high-quality featured image for each post. This helps attract clicks and improves the look of your site. Featured images give a consistent visual theme across your content.
Optimizing Images For Performance
Optimizing images for performance helps your website load faster. Fast sites keep visitors happy and improve search rankings. Large image files slow your pages. Optimized images use less space but look good. This section covers ways to optimize images effectively.
Image Compression Plugins
Image compression plugins reduce file size without losing quality. They automatically shrink images when you upload them. Plugins like Smush, ShortPixel, and EWWW Image Optimizer work well. They save storage space and speed up page loading. Smaller images mean faster websites and better user experience.
Lazy Loading Techniques
Lazy loading delays image loading until the user scrolls to them. This saves bandwidth and speeds up the initial page load. WordPress has built-in lazy loading support for images. Plugins like Lazy Load by WP Rocket add extra features. Lazy loading improves performance, especially on pages with many images.
Choosing The Right File Format
Select the best file format for each image. JPEG suits photos with many colors and details. PNG works well for images with text or transparency. WebP offers good quality and smaller file sizes. Using the right format reduces file size and keeps images clear. This helps your site load quickly and look sharp.
Troubleshooting Common Issues
Troubleshooting image issues on your WordPress website can save time and reduce frustration. Problems with uploading or displaying images are common but fixable. Understanding typical errors helps keep your site running smoothly. Below are simple solutions to common image problems.
Fixing Image Upload Errors
Image upload errors often happen due to file size or format. WordPress supports JPG, PNG, and GIF files best. Large files may fail to upload. Try resizing images before uploading. Check your internet connection for stability. Sometimes, plugins or server limits block uploads. Disable plugins one by one to find conflicts. Contact your host if upload limits are too low. Clear browser cache to fix temporary glitches.
Resolving Image Display Problems
Images not showing on pages frustrate visitors. Broken image links cause this issue. Check the image URL to make sure it is correct. Missing files in your media library may cause errors. Replace missing images with new uploads. Sometimes, theme or plugin conflicts hide images. Switch to a default theme to test. Clear your website cache to refresh content. Use the browser’s inspect tool to find errors.
Managing Image Seo
Optimizing images improves your site’s search ranking. Always add descriptive alt text to every image. Use keywords naturally in alt text for better SEO. Name image files with relevant words before uploading. Compress images to improve page load speed. Use a plugin to automate SEO tasks for images. Proper image SEO brings more visitors to your site.
Frequently Asked Questions
How Do I Upload Images To WordPress?
To upload images, go to your WordPress dashboard, select Media > Add New, and drag your images there. You can also upload images directly when editing posts or pages using the “Add Media” button.
What Image Formats Does WordPress Support?
WordPress supports JPEG, PNG, GIF, WebP, and ICO image formats. JPEG is best for photos, PNG for graphics, and WebP offers better compression with quality.
How Can I Optimize Images For WordPress?
Optimize images by resizing them before upload and compressing file sizes using tools. Use plugins like Smush or EWWW Image Optimizer for automatic optimization in WordPress.
Where Do Images Appear On A WordPress Website?
Images appear inside posts, pages, featured images, sliders, and galleries. Proper placement enhances visual appeal and user engagement on your WordPress site.
Conclusion
Adding images to your WordPress site makes it more attractive. It helps visitors understand your content better. Use clear and relevant pictures for best results. Always check image size to keep your site fast. Remember to add alt text for better SEO.
Practice these simple steps to improve your website. Enjoy creating a site that looks great and works well. Keep updating images to keep your content fresh. Your visitors will appreciate the effort you put in.


