
Want to add an HTML page to your WordPress site but don’t know where to start? You’re in the right place.
Whether you built a custom HTML page or downloaded one, integrating it into WordPress can feel tricky. But it doesn’t have to be. You’ll discover simple, step-by-step methods to add your HTML page quickly and easily. By the end, you’ll have a seamless webpage ready to impress your visitors.
Let’s dive in and make your website even better!
Credit: www.inmotionhosting.com
Prepare Your Html Files
Preparing your HTML files is the first step to add an HTML page to WordPress. It helps your page work correctly and look good. Taking time to organize and check your files saves problems later.
Proper preparation makes the integration smooth. It also keeps your website clean and fast. Follow these steps to get your files ready.
Organize Html, Css, And Javascript
Keep your HTML, CSS, and JavaScript files in separate folders. This makes your project easy to manage. For example, place HTML files in the root or a main folder. Store CSS files in a folder named “css” or “styles.” Put JavaScript files in a folder called “js” or “scripts.”
Use clear and simple file names. Avoid spaces and special characters. Use lowercase letters and hyphens instead of underscores. This helps avoid errors and confusion.
Check File Paths And Links
Make sure all file paths in your HTML are correct. Check links to CSS and JavaScript files carefully. Use relative paths to keep files linked no matter where you move them.
Test all images and links inside your HTML page. Broken links can cause your page to look bad or not work. Fix any incorrect paths before uploading your files to WordPress.
Access WordPress Dashboard
Accessing the WordPress dashboard is the first step to add an HTML page. It gives you full control over your website. The dashboard is the central hub for managing content, themes, and settings. Understanding how to reach and use it makes the process easier.
Login To Admin Panel
Start by opening your website’s login page. Usually, it is yoursite.com/wp-admin. Enter your username and password. Click the “Log In” button. You will see the WordPress dashboard after a successful login. Keep your login details safe and private.
Navigate To Theme Editor
On the left sidebar, find the “Appearance” menu. Click on it to expand the options. Select “Theme Editor” from the list. The editor allows you to modify theme files directly. Be careful when editing files here. Always back up your site before making changes.
Create A New Page Template
Creating a new page template in WordPress helps you use custom HTML pages easily. This method lets you add unique designs without changing your theme.
You can build a template file that WordPress recognizes. Then, assign it to any page from the dashboard. This process gives you full control over the page layout.
Add A Php Template File
First, open your theme folder in the WordPress directory. Create a new file and name it clearly, like custom-page.php. This file will hold your custom code.
Start the file with a PHP comment to declare it as a template. For example:
php / Template Name: Custom Page / ? This tag tells WordPress your file is a page template. Save the file and upload it to your theme folder if editing locally.
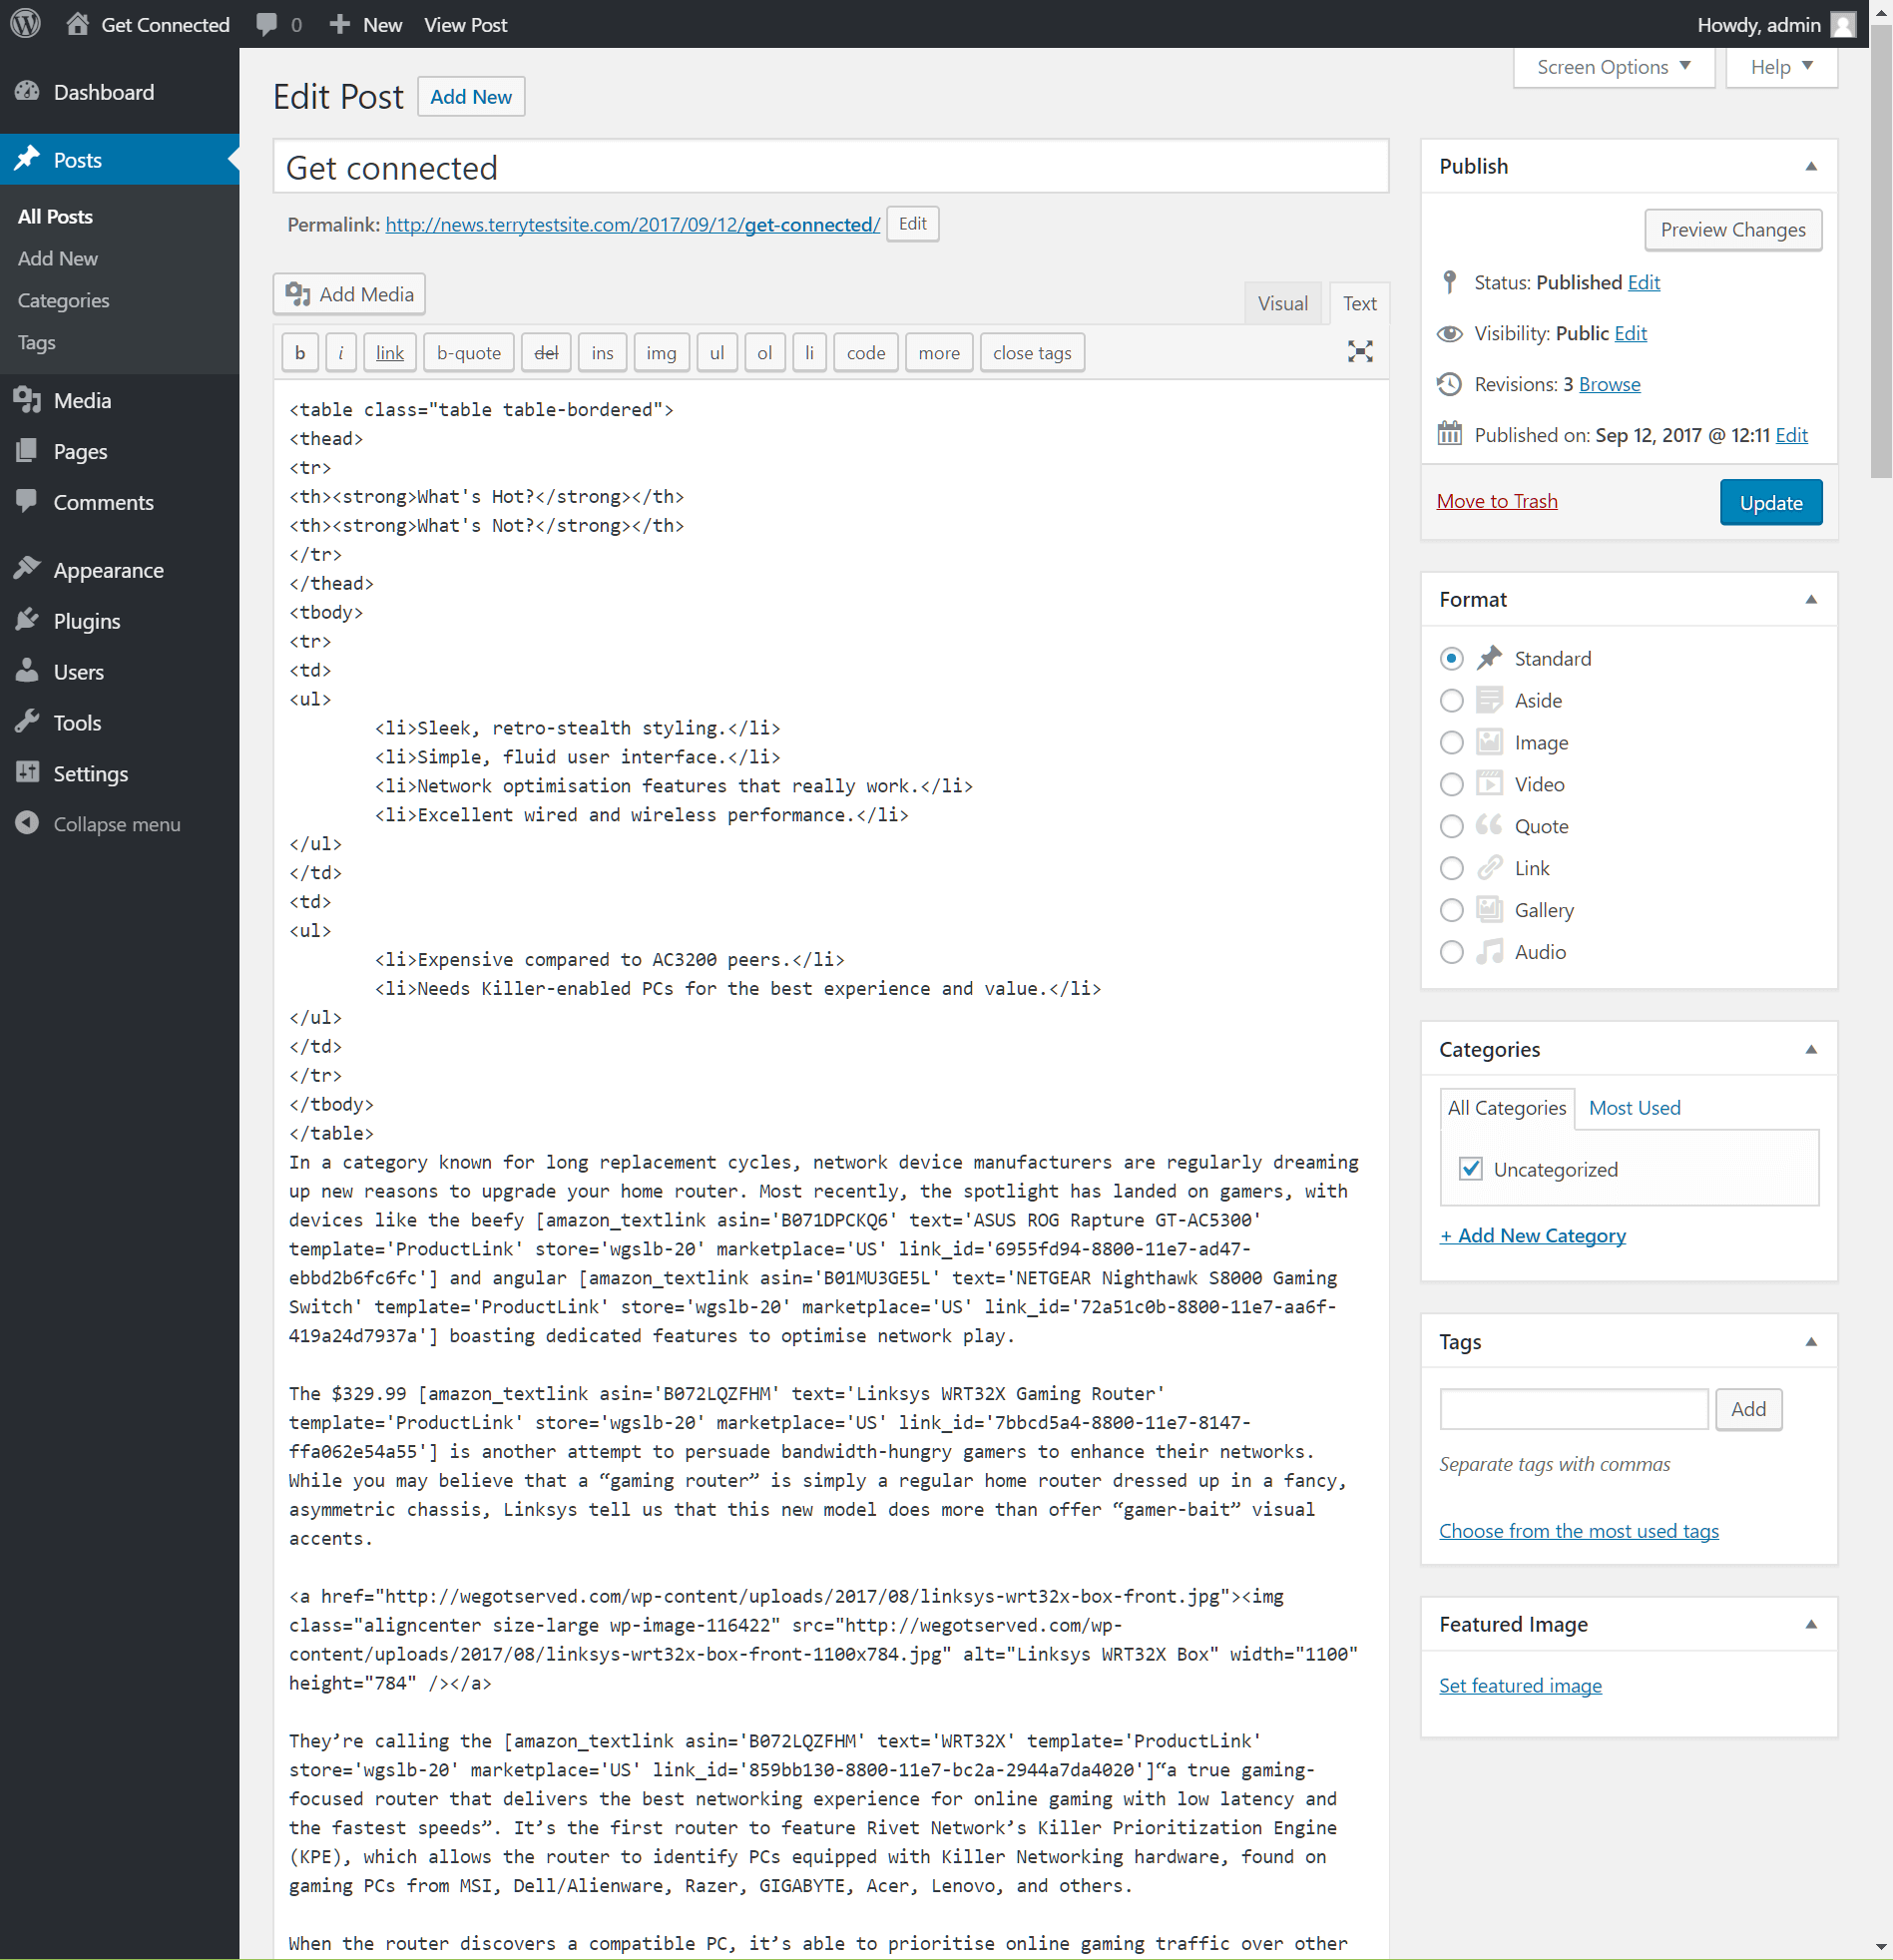
Insert Html Code Into Template
Inside your new PHP file, add the HTML structure you want to use. Include all the tags you need for your page design.
Make sure to add WordPress functions like get_header() and get_footer() for theme consistency. Example:
php get_header(); ? Welcome to My Custom Page
This is a sample HTML content inside the template.
php get_footer(); ? Save your changes. Now, you can select this template when creating or editing a page in WordPress.

Credit: www.interserver.net
Upload Assets To WordPress
Uploading assets is a key step in adding an HTML page to WordPress. Assets include images, stylesheets, and scripts. These files help your page look good and work properly. WordPress offers tools to upload and manage these assets easily. Follow the steps below to handle your files correctly and keep your site organized.
Use Media Library For Images
The WordPress Media Library is perfect for image files. It stores and organizes all your pictures in one place. To upload images, go to the Media section in your WordPress dashboard. Click “Add New” and select the images from your computer. WordPress will upload and optimize them automatically.
After uploading, you can insert images into your HTML page. Use the image URL from the Media Library inside your HTML code. This method keeps your images safe and fast to load.
Upload Css And Js Files Via Ftp
Stylesheets (CSS) and JavaScript (JS) files cannot be uploaded via the Media Library. Use an FTP client instead. FTP stands for File Transfer Protocol. It allows you to connect directly to your WordPress server.
Open your FTP client and log in with your hosting details. Navigate to the /wp-content/themes/your-theme-folder/ directory. Upload your CSS and JS files here. This location ensures WordPress can load your styles and scripts properly.
After uploading, link these files in your HTML page. Use the correct path to avoid broken links. This step makes your page look and work as expected.
Assign Template To A WordPress Page
Assigning a template to a WordPress page helps control how the page looks. Templates change the layout and design without coding. This method works well for custom HTML pages added to WordPress. Follow simple steps to pick the right template for your new page.
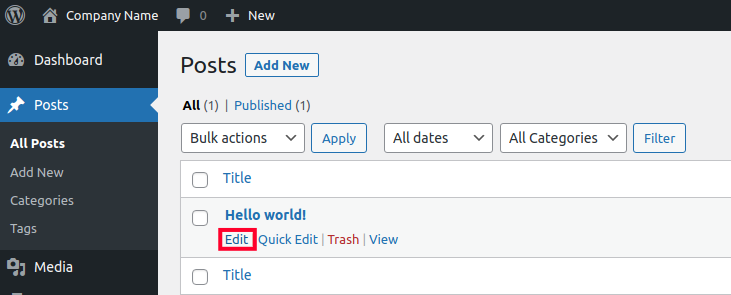
Create A New Page
Start by opening your WordPress dashboard. Click on “Pages” and then “Add New.” Give your page a clear, simple title. This title helps visitors and search engines understand your content. After naming, look for the “Page Attributes” box on the right side.
Inside “Page Attributes,” you will find a “Template” dropdown menu. This is where you select your custom template. Do not publish the page yet. Save it as a draft to check the template next.
Select Custom Template
Click on the “Template” dropdown menu. Find your custom template from the list. This list shows templates available in your theme folder. Choose the one that matches your HTML page design.
After selecting the template, click “Publish” or “Update.” View the page on your site to see the new layout. The custom template will make your HTML page look unique and professional.
Test And Troubleshoot
Testing and troubleshooting your HTML page in WordPress is important. It ensures your page works well and looks right. This step saves time and prevents problems for visitors.
Preview The Page
Preview the HTML page before making it live. Use WordPress’s preview option to see how it looks. Check the layout, images, and links. Make sure everything appears as expected on desktop and mobile devices.
Look for any broken links or missing images. Confirm that the page loads quickly. Slow loading can affect user experience and search ranking.
Fix Common Issues
Check for common problems like broken links or incorrect formatting. Use the browser’s developer tools to find errors. Fix any missing image paths or wrong URLs.
Ensure your HTML code follows proper syntax. Validate your HTML to avoid errors. Clear your website cache if changes do not show up. This refreshes the page content.
Test the page on different browsers. Some browsers may display your page differently. Fix any display issues to make your page consistent everywhere.
Alternative Methods
Adding an HTML page to WordPress can be done in several ways. Besides the manual method, some alternatives make the process simple and fast. These methods suit users with different skill levels and needs.
Using plugins or page builders can help import or embed HTML code. These tools save time and avoid errors. They also offer more control over how the HTML content appears on your site.
Use Plugins For Html Import
Plugins let you upload HTML files directly into WordPress. They convert the HTML into a format WordPress can use. This way, you avoid editing theme files or coding.
Many plugins offer easy interfaces. You just select the HTML file, and the plugin handles the rest. Some plugins also support CSS and JavaScript files.
These tools keep your HTML content organized. They also help keep your site secure by managing code properly.
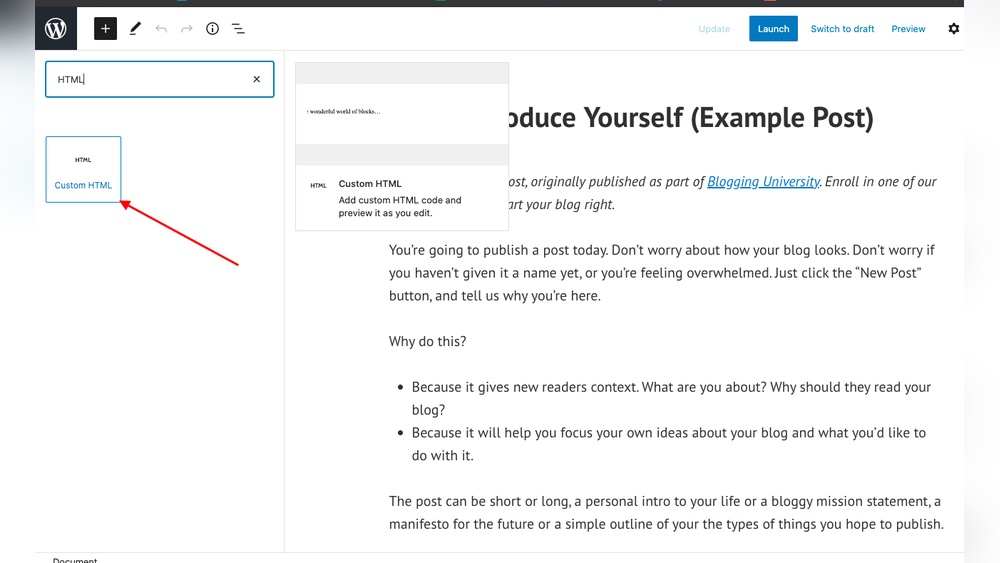
Embed Html With Page Builders
Page builders allow you to add HTML code directly into pages or posts. They provide blocks or modules for custom HTML.
With these builders, you can place the HTML exactly where you want. The interface is visual and user-friendly. You see the changes as you make them.
This method works well for small HTML snippets or widgets. It does not require uploading files or changing site structure.
Credit: www.hostpapa.com
Frequently Asked Questions
How Do I Upload An Html Page To WordPress?
To upload an HTML page, use an FTP client or your hosting file manager. Place the file in your WordPress directory. Then, link to it from your site menu or posts for easy access.
Can I Convert Html Pages Into WordPress Pages?
Yes, you can convert HTML to WordPress by creating a new page. Copy your HTML content into the WordPress editor. Use page builders or custom templates for better formatting.
Is It Possible To Keep Html And WordPress Pages Separate?
Yes, keep HTML files in a subfolder or outside the WordPress theme folder. This separation avoids conflicts and keeps your custom HTML pages intact alongside WordPress pages.
Do I Need Plugins To Add Html Pages In WordPress?
Plugins are not necessary to add HTML pages. Upload files manually and link them. However, plugins can help embed or manage HTML content more efficiently if needed.
Conclusion
Adding an HTML page to WordPress is simple and quick. You just need to follow a few clear steps. Upload your HTML file, link it properly, and check it works well. This helps you keep your site organized and easy to use.
Practice a couple of times to feel more confident. Now, your WordPress site can have custom pages with ease.


