

Are you struggling to make your WordPress site look professional and inviting? Adding a header is one of the easiest ways to give your website a clear identity and improve user experience.
Imagine your visitors landing on your page and immediately recognizing your brand—this starts with a strong, well-designed header. In this guide, you’ll learn exactly how to add a header to your WordPress site, step-by-step, without any confusion or technical jargon.
Keep reading, and you’ll have a polished header up and running in no time.
Choosing The Right Header Style
Choosing the right header style is important for your WordPress site. The header is the first thing visitors see. It sets the tone and helps guide users. A good header improves user experience and reflects your brand well. Take time to pick a style that fits your site’s purpose and audience.
Types Of Headers In WordPress
WordPress offers many header types. Some are simple with just a logo and menu. Others include images, sliders, or search bars. Sticky headers stay visible while scrolling. Transparent headers show the background behind the text. Choose a type that fits your site’s layout and content.
Matching Header With Your Brand
Your header should match your brand’s look and feel. Use colors and fonts that reflect your style. The logo should be clear and easy to see. A well-matched header builds trust and helps visitors remember your site. Keep it clean and organized to avoid confusion.
Credit: www.greengeeks.com
Using The WordPress Customizer
The WordPress Customizer lets you change your site’s header easily. It shows a live preview of your changes. This tool helps you see how your header looks before saving it. You can edit many parts of the header here without touching any code.
Accessing The Customizer
Start by logging into your WordPress dashboard. Find the “Appearance” menu on the left side. Click on “Customize” to open the Customizer. This opens a new panel with live preview on the right. The Customizer shows all the options you can change.
Editing Header Elements
Inside the Customizer, find the section labeled “Header” or “Site Identity.” You can change the site title, tagline, and logo here. Some themes allow editing the header layout or colors. Use the available options to adjust your header’s look. Make changes by typing or uploading images.
Previewing Changes
The Customizer updates the preview instantly. Watch how your header changes on the right side. Check your site on different screen sizes by clicking the device icons. This helps ensure your header looks good on phones and tablets. When satisfied, click “Publish” to save your changes.
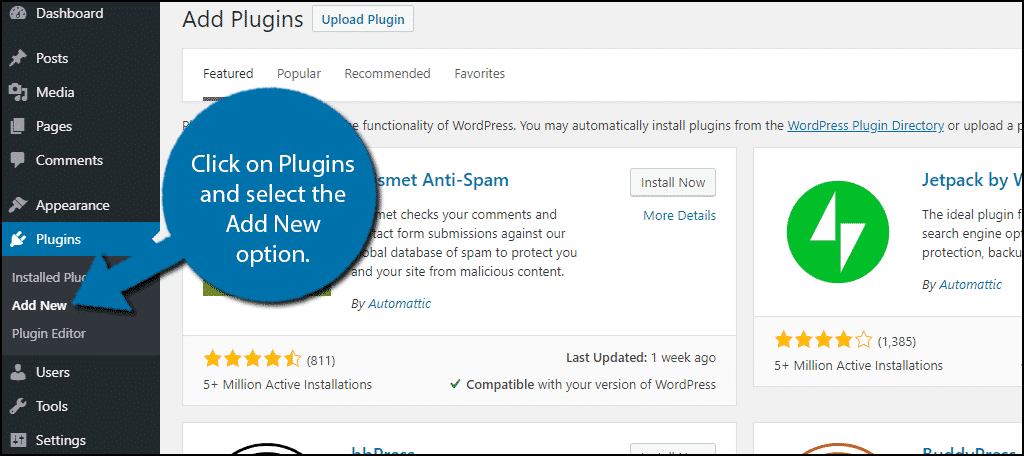
Adding A Header Via Theme Settings
Adding a header via theme settings is the easiest way to customize your WordPress site. Most themes have built-in options to change header elements. You can upload logos, adjust layouts, and change colors without coding. This method keeps your site looking professional and unique. Let’s explore how to find and use these settings.
Locating Theme Header Options
Start by logging into your WordPress dashboard. Go to Appearance and click on Customize. This opens the theme customizer panel. Look for a section named Header, Site Identity, or similar. Each theme labels it differently, but the header controls are inside. Click on it to see all header options available for your theme.
Uploading Custom Logo And Images
Inside the header options, find the place to upload your logo or header image. Click the Upload button to select a file from your computer. Use a clear, simple logo that fits your site size. After uploading, you can crop or adjust the image. Save your changes to show the new logo on your site.
Adjusting Header Layout
Header layout controls let you choose how your header looks. Options may include logo position, menu placement, and header height. Pick a layout that fits your site’s style and content. Preview changes live to ensure everything looks balanced. Save your settings once you are happy with the design.
Credit: www.greengeeks.com
Creating Headers With Page Builders
Creating headers with page builders gives you control and creativity. You can make unique headers without coding. Page builders offer drag-and-drop tools for easy design. They help craft headers that fit your site’s style and needs.
Popular Page Builder Plugins
Several page builder plugins work well with WordPress. Elementor is widely used for its user-friendly interface. Beaver Builder offers strong design features for beginners and pros. Divi Builder includes many pre-made layouts and customization options. These plugins simplify header creation and save time.
Designing Headers From Scratch
Start with a blank section for full control. Add elements like logos, menus, and text blocks. Adjust colors, fonts, and spacing to match your brand. Use rows and columns to organize content neatly. Preview often to see how the header looks on different devices.
Adding Interactive Elements
Interactive headers engage visitors and improve usability. Add buttons for calls to action or contact links. Use hover effects to highlight menu items. Include search bars for easy navigation. Animations can draw attention but keep them subtle to avoid distraction.
Using Custom Code For Headers
Using custom code to add a header in WordPress gives you full control over your site’s look. You can change the header’s layout, colors, and content exactly how you want. This approach suits users who want a unique style or need features not in themes or plugins.
Custom coding requires some basic knowledge of PHP, HTML, and CSS. Editing files carefully is important to avoid errors. Always back up your site before making changes.
Editing Header.php File
The header.php file controls your site’s header structure. Find this file in your theme folder using a file manager or an FTP client. Open it in a code editor to make changes.
Add or modify HTML and PHP code inside header.php to change what appears in the header. Insert logos, menus, or text by editing this file. Save your changes and refresh your site to see them.
Inserting Custom Css
Custom CSS styles your header’s appearance. Use the WordPress Customizer or a child theme’s style.css file to add CSS rules. Change colors, fonts, sizes, and spacing easily.
Write clear CSS selectors targeting header elements. For example, style the header background or link colors. This method keeps your design consistent and clean.
Ensuring Mobile Responsiveness
Mobile responsiveness ensures your header looks good on phones and tablets. Use CSS media queries to adjust header layout based on screen size. Resize logos and menus for smaller screens.
Test your header on different devices. Make sure text is readable and navigation is easy. Responsive headers improve user experience and help your SEO.
Optimizing Header For Performance
Optimizing the header for performance improves your website’s speed and user experience. A fast-loading header keeps visitors engaged and lowers bounce rates. The header often contains images and scripts that can slow down your site. Careful optimization helps your WordPress site run smoothly and look professional.
Image Compression Tips
Large images increase your header load time. Compress images before uploading to reduce file size. Use tools like TinyPNG or ImageOptim for simple compression. Choose the right format: JPEG for photos, PNG for graphics with few colors. Avoid using uncompressed images that slow your site.
Minimizing Header Load Time
Limit the number of scripts and styles in your header. Remove unnecessary plugins that add extra code. Use caching plugins to speed up your site loading. Combine CSS and JavaScript files to reduce server requests. Keep your header clean and lightweight for faster loading.
Enhancing Header With Plugins
Plugins make WordPress headers more flexible and stylish. They add new features without coding. Enhancing headers with plugins helps create a better user experience. It also improves your site’s look and navigation.
Header-specific Plugins
Some plugins focus only on header design and function. They let you customize header layouts easily. You can change colors, fonts, and add logos quickly. These plugins offer drag-and-drop tools for easy setup. They work well for beginners and experts alike.
Adding Sticky And Transparent Headers
Sticky headers stay visible while you scroll down. This keeps navigation easy on long pages. Transparent headers blend with the background for a modern look. Plugins allow you to add sticky or transparent effects fast. Adjust settings to match your site style perfectly.

Credit: kinsta.com
Troubleshooting Common Header Issues
Headers are key parts of any WordPress site. They give your visitors a clear idea about your brand and page structure. But sometimes, header issues can appear. These problems may confuse visitors or harm your site’s look.
Fixing common header issues is simple with the right steps. This section shows how to solve two usual problems: alignment and display errors. Clear headers help your site look neat and professional.
Fixing Header Alignment Problems
Misaligned headers spoil your site’s style. First, check your theme’s settings. Many themes allow you to set header alignment easily. Use the WordPress Customizer to adjust text and logo position.
Another cause can be custom CSS code. If you use CSS, check for errors or conflicts. Remove or correct wrong codes. Clear cache to see changes.
Also, check your header image size. Large or small images can shift your header. Resize images to fit well. Use tools like Photoshop or free online editors.
Resolving Display Errors
Display errors make headers look broken or missing. Start by disabling all plugins. Sometimes plugins conflict with your theme and cause errors. Enable plugins one by one to find the problem.
Update WordPress, theme, and plugins regularly. Outdated files can cause display issues. Use the latest versions to keep your site smooth.
Check your browser console for error messages. These messages help find coding problems. Fix or ask a developer for help.
Frequently Asked Questions
How Do I Add A Custom Header In WordPress?
To add a custom header, go to Appearance > Customize > Header. Upload your image or choose a design. Save changes to apply the header on your site.
Can I Use Plugins To Create WordPress Headers?
Yes, plugins like Elementor or Header Footer Builder help design custom headers easily. They offer drag-and-drop features and advanced styling options.
How To Make A WordPress Header Mobile-friendly?
Ensure your header design is responsive. Use flexible images and menu layouts that adjust to screen size for better mobile viewing.
What Size Should My WordPress Header Image Be?
Recommended header image size varies by theme but 1200×400 pixels is common. Check your theme’s documentation for optimal dimensions.
Conclusion
Adding a header to your WordPress site is simple and useful. It helps visitors know your site’s purpose quickly. You can choose from many styles to fit your brand. Changing the header does not take much time or skill. Keep your site clear and easy to navigate.
Try different options to see what looks best. A good header makes your website look more professional. Start adding your header today and improve your site’s look.


