
Want to make your WordPress site more lively and engaging? Adding a GIF can instantly catch your visitors’ attention and make your content pop.
But if you’re using Elementor, you might wonder how to do it quickly and without hassle. This guide will show you exactly how to add a GIF in WordPress Elementor step-by-step. By the end, you’ll know how to bring your pages to life and keep your audience hooked.
Ready to transform your site with eye-catching animations? Let’s dive in!
Credit: elementor.com
Benefits Of Using Gifs
Using GIFs on your WordPress site with Elementor brings several benefits. GIFs are short, looping animations. They catch the eye and convey messages quickly. These moving images make your pages more lively and fun. They also help explain ideas better than static pictures. Adding GIFs can improve how visitors interact with your site. This can lead to longer visits and more shares.
Boosting Visitor Engagement
GIFs grab attention faster than plain text or images. They create a sense of motion that draws visitors in. Animated content makes users curious and interested. Visitors spend more time watching GIFs. This increases the chance they will explore your site more. Engaged visitors are more likely to return and recommend your site.
Enhancing Visual Appeal
GIFs add color and life to your pages. They break up long text blocks and make reading easier. Animated images make your site look modern and creative. This helps your brand stand out from competitors. GIFs can also show product features or tutorials clearly. A visually appealing site keeps visitors coming back for more.
Preparing Your Gif
Preparing your GIF is an important step before adding it to Elementor in WordPress. A well-prepared GIF looks good and loads quickly on your website. It helps keep visitors interested and improves your site’s performance. Follow these tips to get your GIF ready.
Choosing The Right Gif
Select a GIF that matches your content and style. Use clear, simple animations that support your message. Avoid overly busy or fast-moving GIFs. Make sure the colors and size fit your website’s design. Pick a GIF that adds value and keeps visitors engaged.
Optimizing File Size
Large GIF files can slow down your website. Reduce the file size without losing quality. Use tools to compress your GIF before uploading. Aim for a balance between image clarity and file size. Smaller files load faster and improve user experience.
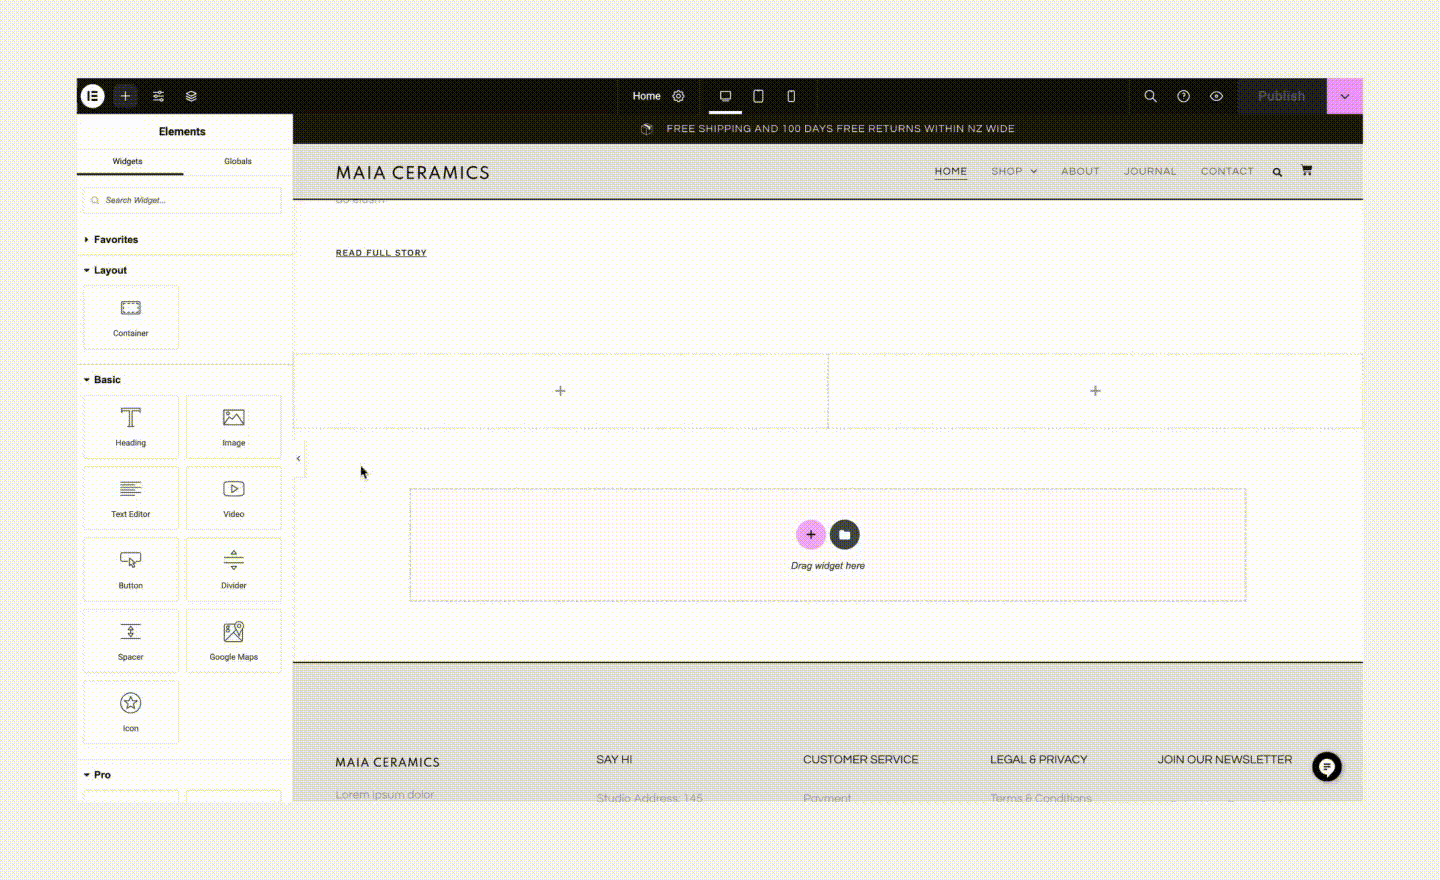
Adding Gif Via Elementor Image Widget
Adding a GIF to your WordPress site using Elementor is simple and quick. The Elementor Image Widget lets you place animated GIFs easily on any page. This method keeps your site looking lively and engaging without any coding knowledge.
The process involves uploading the GIF file and adjusting basic settings to fit your design. Follow the steps below to add GIFs smoothly using the Image Widget.
Uploading The Gif
Open the Elementor editor on your page. Drag the Image Widget to the spot you want the GIF.
Click on the widget to open its settings panel. Choose the “Choose Image” button.
Upload your GIF file from your computer or select one from the media library. Make sure the file size is optimized for fast loading.
After uploading, click “Insert Media” to add the GIF to the widget.
Adjusting Image Settings
Once the GIF is in place, adjust its size using the “Image Size” dropdown. Choose a size that fits your layout well.
Use the “Alignment” options to position the GIF left, center, or right.
Set the “Caption” if you want text below the GIF. Leave it blank to keep it clean.
Check how the GIF looks on different devices using Elementor’s responsive mode. Make changes if the GIF looks too big or small on phones or tablets.
Embedding Gif With Elementor Html Widget
Embedding GIFs in WordPress using Elementor is simple and effective. The HTML widget in Elementor allows you to insert GIFs by adding custom HTML code. This method gives you control over how the GIF appears on your page.
You can use GIF URLs to embed images from any source. The HTML widget also lets you customize the display to fit your design needs. This makes your website more dynamic and engaging.
Using Gif Urls
Start by copying the URL of the GIF you want to add. Make sure the URL ends with .gif to ensure it is a valid GIF file. Open Elementor and drag the HTML widget to your desired section.
Paste the following code inside the HTML widget:

Replace GIF-URL with the actual link. Add a short description in the alt attribute for accessibility. The GIF will load directly from the URL.
Customizing Display
You can adjust the size of your GIF using simple HTML attributes. Add width and height to control the dimensions:
Change the numbers to fit your layout. You can also add inline CSS styles for borders or margins:
This helps the GIF blend well with your page design. The HTML widget offers full flexibility to style your GIF as needed.
Using Plugins To Add Gifs
Using plugins to add GIFs in WordPress Elementor is a simple and effective method. Plugins help you insert GIFs without needing to code. They also offer extra features like searching GIFs or customizing display settings. This approach saves time and improves your site’s design.
Popular Gif Plugins
Several plugins work well for adding GIFs in Elementor. “WP GIF Player” lets you control GIF playback easily. “Giphy Press” connects your site to a large GIF library. “GIF Animation Preview” shows animated previews in the editor. These plugins offer user-friendly options for GIF use.
Plugin Installation Steps
Go to your WordPress dashboard and click on “Plugins.” Select “Add New” and type the plugin name in the search box. Click “Install Now” next to the plugin you want. After installation, click “Activate” to enable it on your site. Follow any setup instructions the plugin provides. Once ready, use the plugin’s options to add GIFs in Elementor.
Credit: qodeinteractive.com
Tips For Effective Gif Use
GIFs can make your WordPress Elementor site more lively and fun. Using them well keeps visitors interested without slowing your site down. Follow these tips for effective GIF use that enhances your content and user experience.
Avoiding Overuse
Use GIFs sparingly to keep your site clean. Too many GIFs distract visitors from your main message. Choose GIFs that add real value or explain your point. One or two GIFs per page work best. This keeps your site professional and easy to read.
Ensuring Fast Load Times
Large GIF files can slow your website. Compress GIFs before uploading to reduce file size. Use tools like EZGIF or online compressors. Keep GIF dimensions small, especially on mobile devices. Faster loading improves user experience and SEO rankings.

Credit: www.youtube.com
Frequently Asked Questions
How Do I Insert A Gif In Elementor?
To insert a GIF in Elementor, add an Image widget. Upload your GIF file or paste its URL. Elementor supports GIFs natively, so it will animate automatically when placed on the page.
Can I Optimize Gifs For Faster Loading In Elementor?
Yes, optimize GIFs by reducing file size before uploading. Use tools like EZGIF or Photoshop. Smaller GIFs ensure faster page loading and better user experience in Elementor-built sites.
Does Elementor Support Gifs From External Urls?
Elementor supports GIFs from external URLs. Use the Image widget and paste the GIF’s direct link. Ensure the URL is accessible and the GIF is optimized for web use.
Will Adding Gifs Affect My Website Speed?
Adding large or multiple GIFs can slow your website. Optimize GIF size and limit their use. Proper optimization helps maintain fast loading times in Elementor websites.
Conclusion
Adding a GIF in WordPress Elementor is simple and fast. You just upload the file or use a URL. Then, place it where you want on your page. GIFs make your site more lively and fun. They catch visitors’ eyes and keep them interested.
Try adding GIFs to show your message clearly. Now, your site can look more dynamic and engaging. Give it a try today!


