
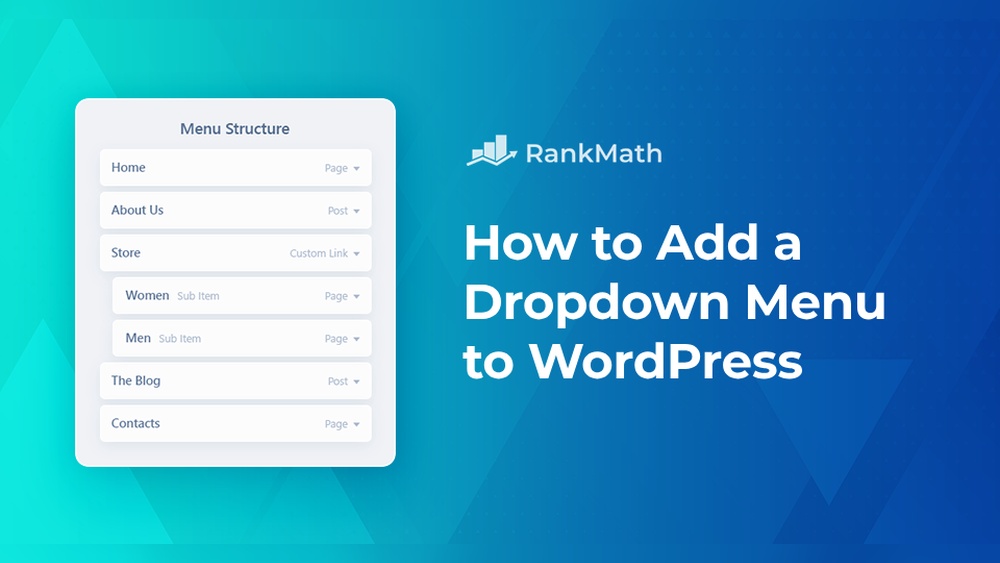
Are you looking to make your WordPress site easier to navigate? Adding a drop-down menu can help you organize your pages and give your visitors a smoother experience.
If you’ve ever wondered how to add a drop-down menu in a WordPress page, you’re in the right place. This guide will show you simple steps to create a clean, professional menu that keeps your site tidy and your visitors engaged.
Keep reading, and you’ll have your drop-down menu set up in no time!
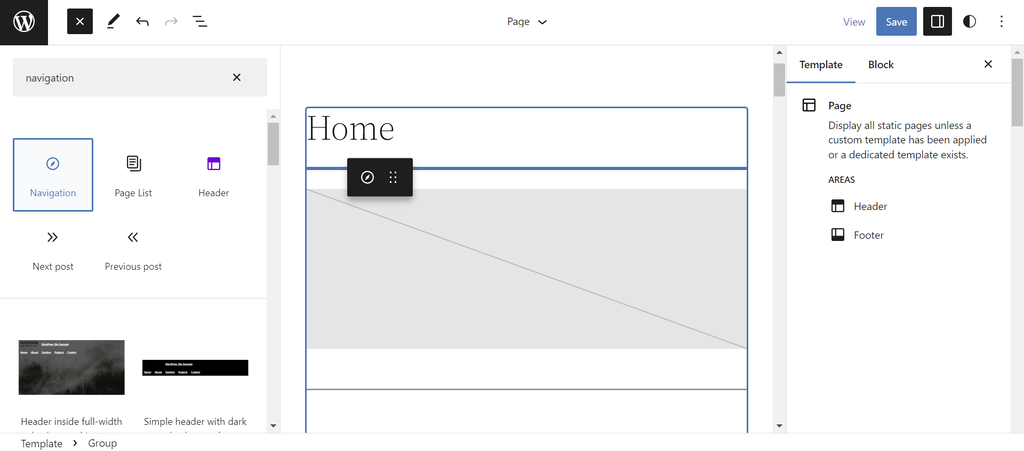
Credit: www.hostinger.com
Choose The Right Menu Location
Choosing the right menu location is key to a good website design. The menu helps visitors find pages fast. Placing it in the best spot improves user experience. It also makes your site look neat and professional.
WordPress offers different menu locations. Each theme has its own menu spots. Some themes have top menus, side menus, or footer menus. Pick the spot that fits your site’s style and content.
Main Navigation Menu
This menu usually appears at the top of the page. Visitors see it first. It works well for important pages like Home, About, and Services. Drop down menus here help organize many links.
Footer Menu
The footer menu shows at the bottom of the page. It’s good for extra links. Use it for privacy policy, terms, or contact pages. Drop down menus in the footer keep it clean.
Sidebar Menu
Sidebar menus appear on the side of pages. They suit blogs or sites with many categories. Drop down menus help group topics clearly. Sidebars stay visible while scrolling.
Credit: cyberchimps.com
Create A New Menu
Creating a new menu in WordPress is the first step to add a dropdown menu to your page. It helps organize your links clearly. This makes your website easier to use. Follow simple steps to create a new menu quickly.
Menus let visitors find pages or posts fast. You can add many items and arrange them as you want. WordPress makes it simple to build and manage menus from the dashboard.
Create Your Menu Name
Go to the WordPress dashboard. Click on “Appearance” and then “Menus.” Enter a name for your new menu. Choose something easy to remember. This name is for your use only. Click “Create Menu” to start.
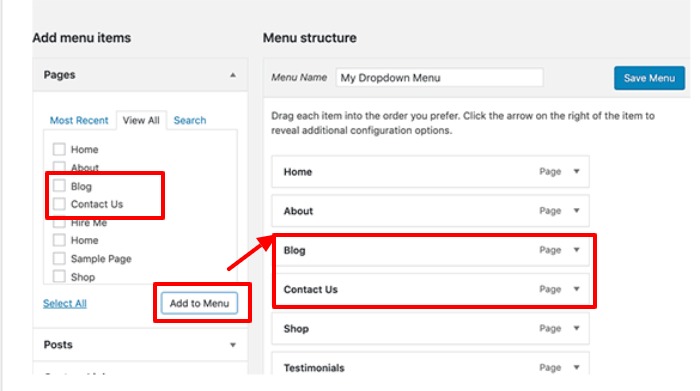
After creating the menu, add links to it. You can add pages, posts, custom links, or categories. Check the box next to each item you want. Click “Add to Menu” to include them.
Arrange Menu Items
Drag and drop menu items to reorder them. Place the most important links at the top. To create a dropdown, drag one item slightly to the right below another. This makes it a submenu.
Save Your Menu
Once your menu looks good, click the “Save Menu” button. Your new menu is now ready to use. You can assign it to a menu location in your theme.
Add Menu Items
Adding menu items is a key step to build a clear and easy-to-use drop down menu. These items help visitors find pages or links quickly. Each item can be a page, a custom link, or a category. Organizing these items well improves your website’s navigation and user experience.
Add Pages And Links
Start by choosing pages from your WordPress site. You see a list of your published pages on the menu screen. Tick the boxes next to pages you want in the menu. Click “Add to Menu” to place them in your menu structure.
To add links outside your site, use the “Custom Links” option. Enter the URL and link text. Then click “Add to Menu.” These links can point to social media, other websites, or special pages.
Organize Items Hierarchically
Drag menu items to arrange their order. Place important pages at the top. To create drop down menus, drag items slightly to the right under a main item. This makes them sub-items.
Sub-items appear in a drop down below the main menu item. This hierarchy helps visitors see related pages together. It keeps your menu tidy and easy to navigate.
Enable Dropdown Functionality
Enabling dropdown functionality on a WordPress page makes navigation easier. Visitors can find subpages without leaving the main menu. This feature improves user experience and keeps your site organized. It involves setting up submenu items and ensuring your theme supports dropdowns.
Arrange Submenu Items
First, go to the WordPress dashboard and open the Menus section. Drag and drop menu items to create a hierarchy. Place submenu items slightly to the right under the main menu. This indentation signals WordPress to treat these as dropdown options. Save the menu after arranging the items.
Check Theme Compatibility
Not all WordPress themes support dropdown menus by default. Test your theme by previewing the menu on your site. If dropdowns do not appear, check the theme settings for menu options. Consider switching to a theme that supports dropdowns or use a plugin for added functionality.
Customize Menu Appearance
Customizing the menu appearance helps match your website style. It improves user experience and makes navigation clear. Simple changes can create a professional look. Two main ways to customize menus include theme settings and custom CSS. Both methods allow control over colors, fonts, and layout.
Use Theme Settings
Most WordPress themes offer menu customization options. Access them through the WordPress dashboard under Appearance > Customize. You can change menu colors, font size, and spacing here. Some themes allow hover effects and submenu styles. Changes apply instantly, so you see results in real-time. This method is easy and requires no coding skills.
Apply Custom Css
Custom CSS gives full control over menu style. Add CSS code in the Customizer under Additional CSS. You can adjust background colors, borders, and animation effects. Custom CSS can fix theme limitations and create unique looks. Use simple CSS rules for dropdown menus. It requires basic knowledge but offers powerful design options.
Save And Publish Menu
Saving and publishing your menu is the last step after creating a drop-down menu in WordPress. This action makes your menu live on your website. Without saving, all your work will be lost. Publishing confirms the menu appears on the site as you designed it.
Take a moment to review your menu items. Make sure each dropdown works correctly. Check the order and labels of the menu items. Confirm the parent and child items are set properly for the dropdown effect.
How To Save Your Menu
Locate the “Save Menu” button at the bottom or top right of the menu editor. Click it once you finish arranging your menu. WordPress saves all the changes immediately. Avoid closing the page before saving to keep your work safe.
Publishing The Menu To Your Site
After saving, assign your menu to a theme location. Find the “Menu Settings” section below the menu structure. Select where the menu should appear, like the primary or footer menu. Click “Save Menu” again to publish your menu live.
Check Your Live Menu
Visit your website’s front end to see your menu. Hover over the parent items to test dropdowns. Make sure all links work and the menu looks good on different devices. Adjust if anything does not appear as expected.
Test Dropdown On Different Devices
Testing your dropdown menu on different devices is important. This step ensures your menu works well for all visitors. A dropdown that looks good on a computer may not work on a phone or tablet. Testing helps find and fix these issues early.
Check how your dropdown reacts to touch and clicks. Make sure it opens easily and closes properly. The text should be easy to read and links easy to tap.
Testing Dropdown On Desktop
Use popular browsers like Chrome, Firefox, and Edge. Check the dropdown’s appearance and functionality. Look for any alignment or styling problems. Try resizing the window to see if the menu adapts.
Testing Dropdown On Mobile Devices
Test on both Android and iOS phones. Tap the dropdown to see if it opens smoothly. Ensure the menu items are big enough to select. Check if scrolling works without hiding the menu.
Testing Dropdown On Tablets
Tablets have different screen sizes and orientations. Test your dropdown in both portrait and landscape modes. Verify the menu’s touch response and visibility. Ensure no part of the menu is cut off.
Troubleshoot Common Issues
Troubleshooting common issues helps ensure your dropdown menu works smoothly. Problems like missing dropdowns or styling conflicts often block a good user experience. Fixing these issues keeps your WordPress page clean and functional.
Fix Missing Dropdowns
Missing dropdown menus usually happen due to incorrect menu setup. Check your WordPress menu settings first. Make sure submenu items are properly nested under the main menu item.
Clear your browser cache to load the latest changes. Sometimes, old files hide updates. Disable plugins one by one to find conflicts stopping dropdowns from showing.
Resolve Styling Conflicts
Styling conflicts often cause dropdowns to look broken or not appear correctly. Custom themes or plugins may override default styles. Use browser developer tools to inspect dropdown elements and find conflicting CSS.
Add custom CSS in your theme’s style sheet to fix appearance problems. Keep styles simple and avoid complex code. Test on different devices to confirm the dropdown displays well everywhere.

Credit: www.hostinger.com
Frequently Asked Questions
How Do I Create A Drop Down Menu In WordPress?
To create a drop down menu in WordPress, go to Appearance > Menus. Add main items and drag sub-items slightly right under them. Save the menu and assign it to your theme’s menu location to display the drop down.
Can I Add A Drop Down Menu Without A Plugin?
Yes, WordPress has a built-in menu system that supports drop down menus. You just need to organize menu items hierarchically in Appearance > Menus. No plugin is required for basic drop down functionality.
How To Customize Drop Down Menu Style In WordPress?
You can customize drop down styles using custom CSS or your theme’s built-in options. Some themes offer color, font, and animation settings. For advanced control, add CSS code to your child theme or use the WordPress Customizer.
Why Is My WordPress Drop Down Menu Not Working?
A drop down menu may not work due to theme conflicts, JavaScript errors, or incorrect menu setup. Check if your theme supports drop downs, clear caches, and ensure sub-menu items are properly nested under parent items.
Conclusion
Adding a drop-down menu to your WordPress page is simple and useful. It helps visitors find information quickly and keeps your site neat. Use clear labels and organize menu items well. Test the menu on different devices to ensure it works smoothly.
Regular updates keep your site fresh and easy to use. Try these steps today to improve your website’s navigation and user experience.


