
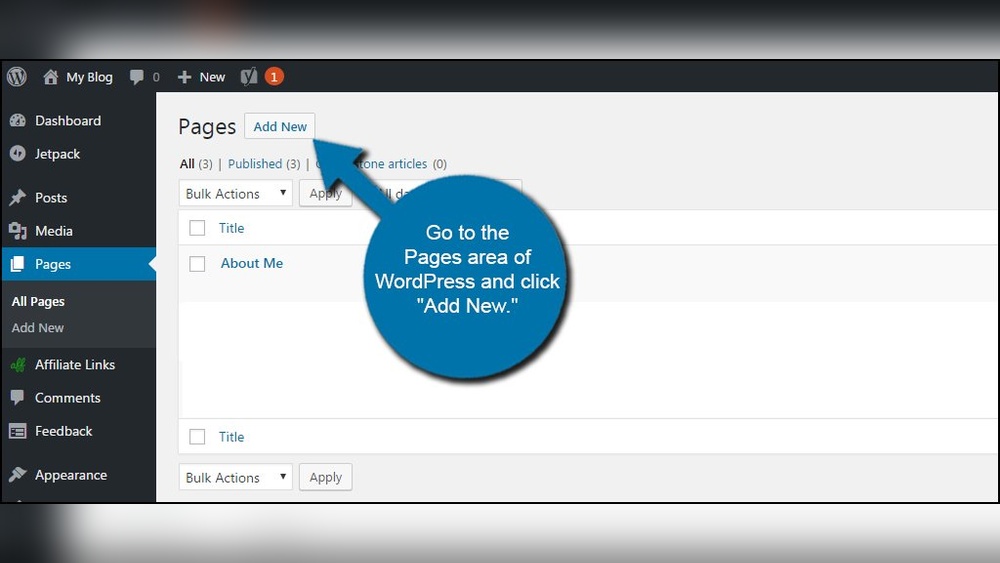
Are you looking to add an email address to your WordPress site but don’t know where to start? You’re in the right place.
Having an email address on your site is key to staying connected with your visitors and growing your audience. In this guide, you’ll learn simple, step-by-step instructions to add your email address quickly and easily. By the end, you’ll have a professional way for people to reach you—no technical skills needed.
Keep reading, and let’s make your site more engaging and trustworthy together.

Credit: visualmodo.com
Email Setup Basics
Setting up an email address in WordPress is essential for website communication. It helps with sending notifications, receiving messages, and managing contacts. Understanding the basics makes the process easier and faster.
Choosing the correct email setup improves your site’s professionalism and user trust. It also ensures emails do not end up in spam folders. Below, learn about the types of email addresses and how to select the best service for your needs.
Types Of Email Addresses In WordPress
WordPress supports different email address types. The most common are:
- Admin Email: Used for website notifications and alerts.
- Contact Email: Shared with visitors to reach your team.
- Custom Domain Email: Uses your website’s domain name (e.g., you@yourdomain.com).
Admin and contact emails can be standard free emails like Gmail or Yahoo. Custom domain emails look more professional and build trust.
Choosing The Right Email Service
Select an email service that fits your needs and budget. Free options like Gmail work well for small sites and beginners. Paid services offer more features and better reliability.
Look for services that provide easy integration with WordPress. Check if they support custom domain emails. Reliable email delivery and spam protection are important too.
Popular email services include Google Workspace, Microsoft 365, and Zoho Mail. Each has strengths, so pick based on your website’s size and goals.

Credit: wordpress.com
Adding Email Through Hosting
Adding an email address through your hosting provider gives you a professional email linked to your domain. This method lets you create email accounts that match your website address. You can manage these emails directly from your hosting control panel. It keeps your communication organized and reliable.
Accessing Your Hosting Control Panel
Start by logging into your hosting account. Look for the control panel, often called cPanel or similar. This panel holds all tools for managing your website and emails. Find the section labeled “Email” or “Email Accounts.” This is where you will create and manage your email addresses.
Creating A New Email Account
In the Email Accounts section, select “Create” or “Add Email.” Enter the name you want before the @ symbol. Choose a strong password for security. Set the mailbox quota if your host allows. Click the button to create the account. Your new email address is ready to use.
Configuring Email Settings
After creating the email, configure the settings. Set up incoming and outgoing mail servers using the details from your host. Use IMAP or POP3 for incoming mail. SMTP is for outgoing mail. Save the settings in your email client or app. This setup helps you send and receive emails smoothly.
Using WordPress Plugins
Using WordPress plugins is a simple way to add an email address to your website. Plugins help you manage emails without coding. They make the process fast and smooth.
Many plugins offer extra features like contact forms and email notifications. These tools improve how visitors communicate with you. Plugins also help keep your email organized and professional.
Popular Email Plugins
Several plugins work well for adding email addresses. Contact Form 7 is one popular choice. It lets you create custom email forms easily. WPForms offers drag-and-drop form building. It suits beginners and experts alike. Another option is Ninja Forms, known for flexibility and user-friendly design.
Installing And Activating Plugins
Go to your WordPress dashboard and find “Plugins” in the menu. Click “Add New” and search for your chosen plugin. Click “Install Now” to start the installation. After that, press “Activate” to enable the plugin on your site.
Once activated, the plugin will appear in your dashboard menu. This allows you to access settings and customize your email forms.
Setting Up Email Addresses With Plugins
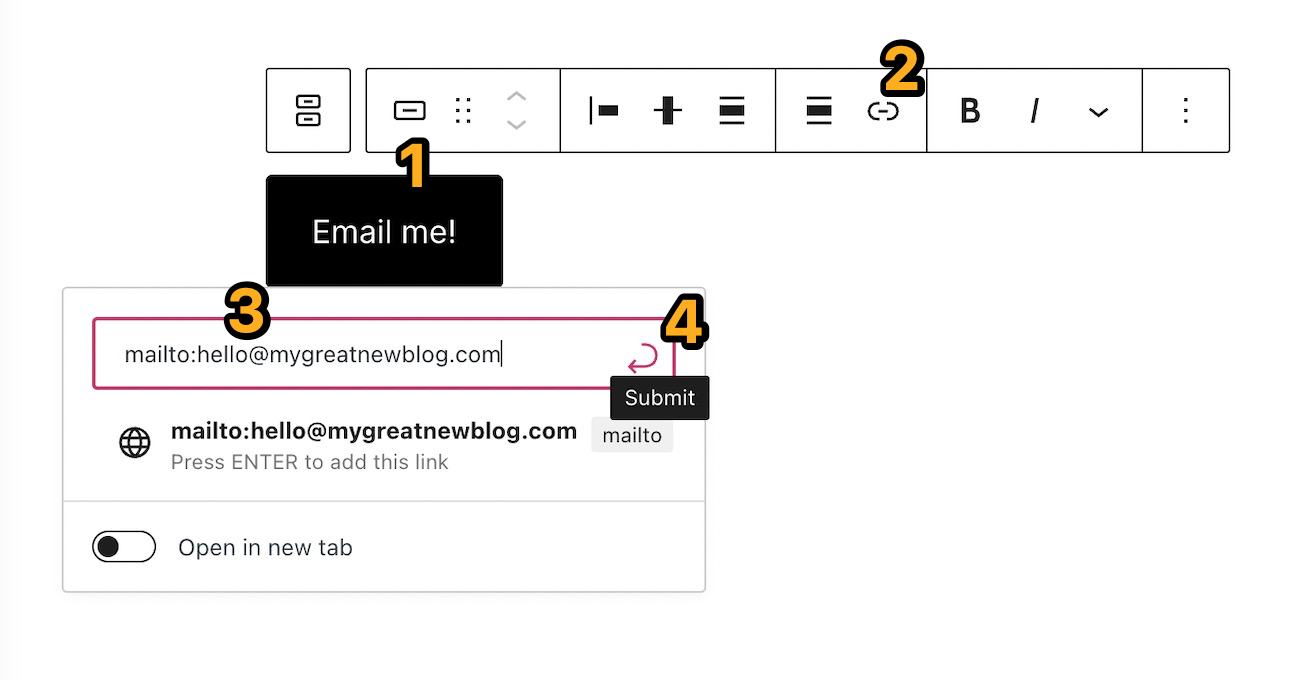
Open the plugin’s settings page from the dashboard. Create a new form or email setup. Enter the email address you want to use for receiving messages. Customize fields like name, subject, and message area.
Save your settings and place the form on a page or post. Visitors can now send emails directly through your website. Check your email inbox to ensure messages arrive correctly.
Credit: wordpress.com
Connecting Email To WordPress
Connecting your email to WordPress is essential for smooth communication. It helps you send notifications, receive messages, and manage user interactions. Setting up your email correctly ensures your messages reach the inbox, not the spam folder. Follow simple steps to link your email address to WordPress and keep your site professional.
Updating WordPress Email Settings
Start by logging into your WordPress dashboard. Go to Settings and select General. Find the Email Address field and enter your new email. Save the changes to update your contact email.
Next, configure your email sending method. Use a plugin like WP Mail SMTP for better control. This plugin connects your email service with WordPress securely. Enter your SMTP details or API keys provided by your email provider. This step improves email delivery and reduces errors.
Testing Your Email Configuration
After updating settings, test if your email works correctly. Use the test email feature in your SMTP plugin. Send a test message to your email address. Check your inbox to confirm the message arrived.
If the test fails, review your SMTP settings. Check your username, password, server, and port details. Correct any mistakes and try sending the test email again. Repeat until your test email comes through successfully.
Managing Multiple Email Addresses
Managing multiple email addresses in WordPress helps keep your communication organized. It allows you to separate different types of messages. For example, support emails can go to one address, and sales emails to another. This setup improves response time and professionalism.
WordPress supports adding more than one email address. You can use different emails for various purposes. This flexibility is useful for businesses and personal websites alike.
Adding Additional Emails
To add more email addresses, start by accessing your WordPress dashboard. Then, go to the settings section and select the email options. Here, you can enter new email addresses. Save the changes to activate these emails. Make sure each email is valid and monitored regularly.
Setting Default Sender Address
You can choose a default sender address for your outgoing emails. This address appears in the “From” field when users receive messages. Setting a clear and recognizable sender helps build trust. It also reduces the chance of your emails going to spam. Change the default sender in your WordPress email settings easily.
Troubleshooting Email Issues
Sometimes, WordPress email does not work as expected. Emails may not send or reach the inbox. Troubleshooting email issues helps fix these problems. It improves communication with your visitors and customers.
Common Problems And Fixes
Emails not sending is a common issue. Check your email settings first. Make sure the email address is correct. Use a plugin like WP Mail SMTP to fix sending problems. It connects your site to a real email service.
Another problem is emails landing in spam. Avoid using words that trigger spam filters. Make sure your WordPress site has an SSL certificate. This builds trust with email providers.
Sometimes, the hosting server blocks email sending. Contact your hosting provider to check this. Using third-party email services can bypass server limits.
Improving Email Deliverability
Good email deliverability means your emails reach the inbox. Use authenticated email methods like SPF, DKIM, and DMARC. These records prove your email is safe and real.
Set up these records in your domain’s DNS settings. Many email plugins help with this setup. Regularly test your emails using online tools to check deliverability.
Keep your email list clean. Remove invalid or inactive addresses. This lowers bounce rates and improves your sender reputation.
Frequently Asked Questions
How Do I Add A New Email Address In WordPress?
To add a new email address, go to WordPress dashboard > Settings > General. Enter your desired email in the “Email Address” field and save changes. This updates the admin email for notifications and communications.
Can I Use A Custom Email With My WordPress Site?
Yes, you can use a custom email by setting up your domain’s email service. Then, add it in WordPress settings or through plugins for contact forms and notifications.
How To Change The Admin Email In WordPress?
Navigate to Settings > General in your WordPress dashboard. Update the “Email Address” field with the new admin email and save changes. A confirmation will be sent to verify the new address.
Is It Necessary To Verify Email After Adding In WordPress?
Yes, WordPress sends a confirmation email to verify the new address. You must click the confirmation link to activate the updated email settings.
Conclusion
Adding an email address in WordPress is simple and quick. You just need to follow a few clear steps. This helps visitors contact you easily. A visible email can improve your website’s trust. Keep your contact details updated for best results.
Try adding your email today and see the difference. It’s a small change with a useful impact.


