
Are you tired of the same old fonts on your WordPress site? Changing your font can make your website stand out and better reflect your style.
But how do you add a new font to WordPress without any hassle? In this guide, you’ll discover simple steps to give your site a fresh, unique look. By the end, you’ll have the confidence to customize your fonts like a pro—making your content more engaging and easier to read.
Ready to transform your website’s appearance? Let’s get started!
Choosing The Right Font
Choosing the right font for your WordPress site shapes how visitors feel and interact. The font reflects your brand’s personality and affects the site’s clarity. Picking the wrong font can confuse readers or make your content hard to read. Careful font selection supports your message and builds trust. Think about your audience and the tone you want to set. A suitable font helps your site look professional and inviting.
Popular Font Sources
Several trusted places offer fonts for WordPress sites. Google Fonts is free and has many styles. Adobe Fonts provides high-quality fonts but needs a subscription. Fontsquirrel offers free fonts with commercial licenses. These sources make it easy to find fonts that fit different needs. You can download or link fonts directly to WordPress.
Matching Fonts To Brand Style
Fonts must fit your brand’s look and feel. A serious business needs clean, simple fonts. Creative brands might use unique or playful fonts. Match font style with your brand colors and images. Consistent font use strengthens your brand identity. Avoid using too many fonts; stick to one or two types.
Considering Readability And Accessibility
Choose fonts that are easy to read on all devices. Avoid fonts that are too thin or fancy. Make sure text size and spacing help readers scan content quickly. Good readability keeps visitors longer on your site. Also, check fonts work well for people with vision issues. Accessibility means everyone can enjoy your content without trouble.
Credit: www.hostinger.com
Using Google Fonts In WordPress
Using Google Fonts in WordPress is a simple way to improve your site’s look. Google Fonts offers many free fonts that load fast and look great on all devices. You can easily add these fonts to your WordPress site without coding knowledge.
This section explains two ways to add Google Fonts: using a plugin and manual CSS. You will also learn how to change font styles and weights to fit your design.
Installing A Google Fonts Plugin
One easy method is to use a Google Fonts plugin. These plugins connect your site to Google Fonts with just a few clicks. You pick the font you want and apply it to your text.
To start, go to your WordPress dashboard. Search for “Google Fonts” in the plugin section. Install and activate a plugin with good reviews.
After activation, access the plugin settings. Choose your font family and assign it to headings, paragraphs, or other text. Save changes and see your new font live.
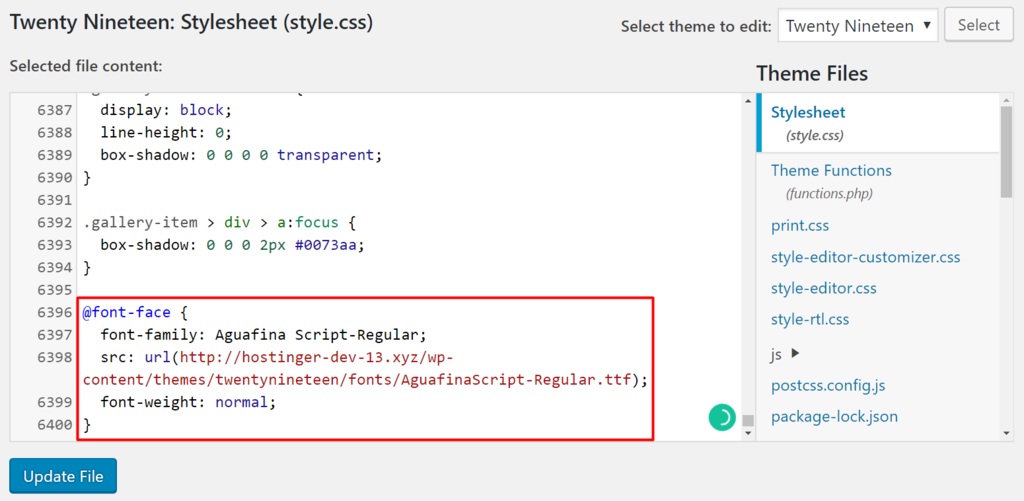
Manually Adding Google Fonts Via Css
You can also add Google Fonts by editing your theme’s CSS. First, go to Google Fonts website and select a font. Copy the provided embed link or import code.
Next, open your WordPress theme editor or use a child theme. Paste the link inside the
section of your site’s header.php or enqueue it in functions.php.Then, add CSS rules to apply the font to your site’s elements. For example, use font-family: 'Roboto', sans-serif; in your style.css file. This method gives more control but needs basic coding skills.
Customizing Font Styles And Weights
Google Fonts offers different styles and weights for each font. You can select regular, bold, italic, or light versions depending on your design.
Using a plugin, you can usually pick these options in the settings. Manually, add the font weights in the embed link and use CSS to apply them. For example, font-weight: 700; makes the text bold.
Changing styles and weights helps create a clear hierarchy and improves readability. Test various combinations to find what suits your site best.
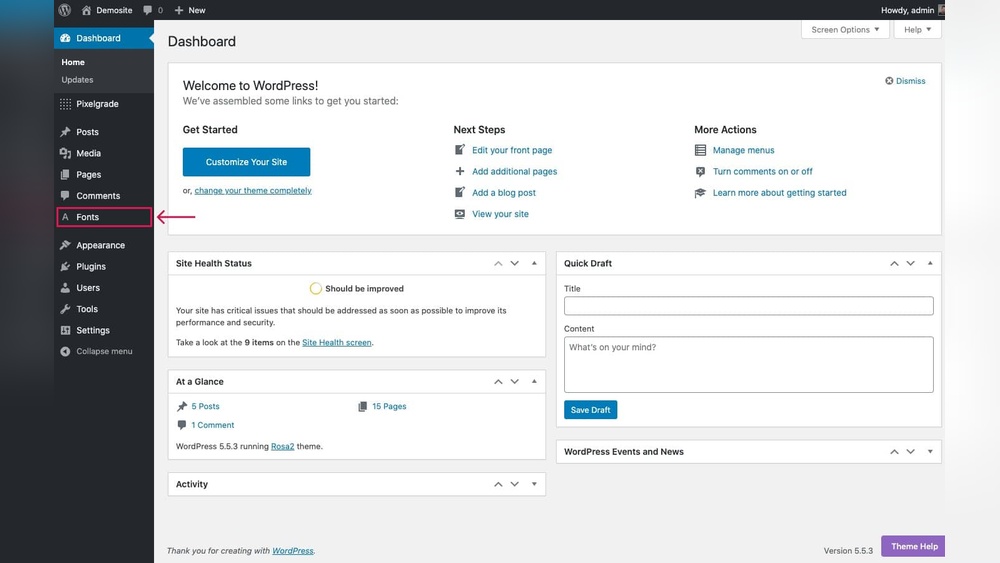
Uploading Custom Fonts
Uploading custom fonts to WordPress lets you use unique typography on your site. It helps your website stand out and match your brand style. This process requires a few clear steps. Preparing font files correctly is the first important part. Then, you upload the fonts using your theme or a plugin. Finally, you add the custom fonts using CSS for full control over your site’s look.
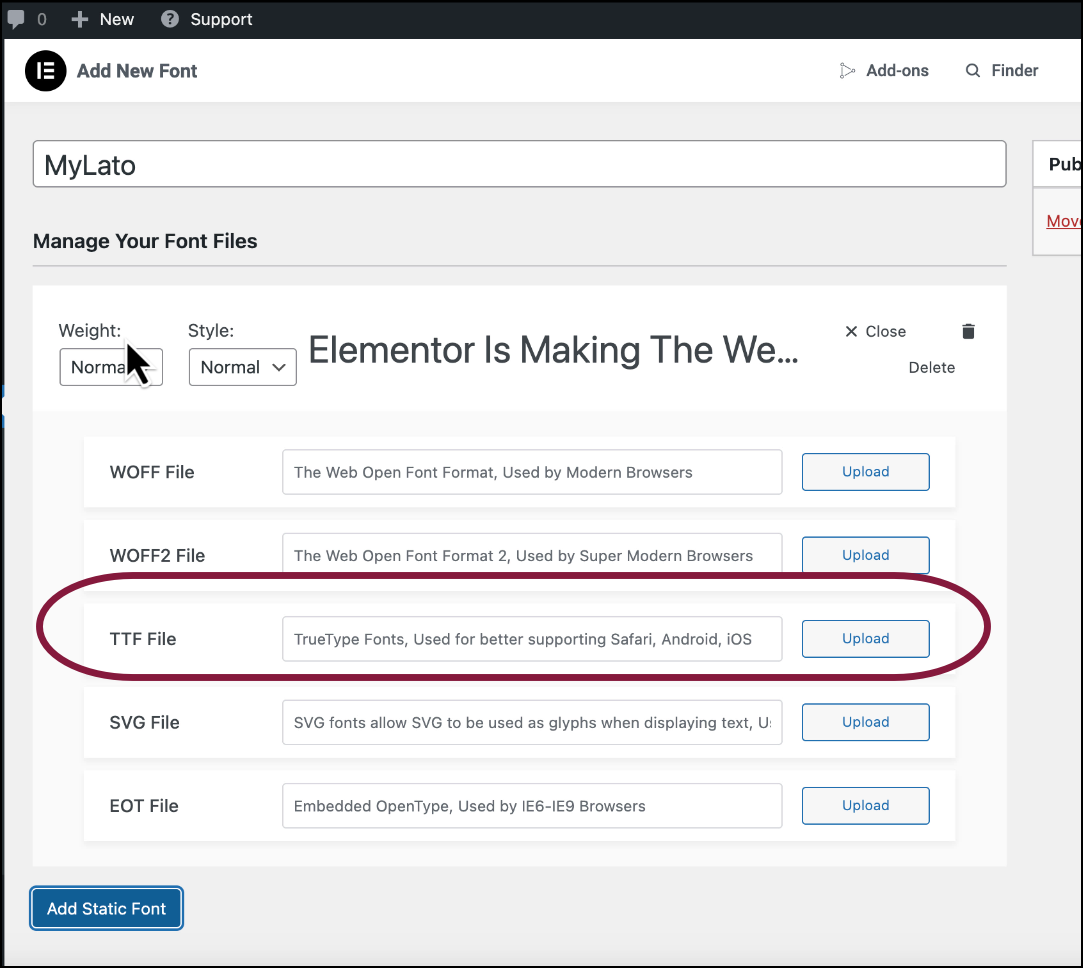
Preparing Font Files
Start by getting the font files you want to use. The most common formats are .woff, .woff2, .ttf, and .otf. Make sure your font files are web-friendly and optimized for fast loading. Check if the font license allows web use. Rename the files with simple names. This makes managing them easier later.
Uploading Fonts Via Theme Or Plugin
Some WordPress themes let you upload fonts directly in their settings. Look for a “Custom Fonts” or “Typography” option in your theme panel. If your theme does not support this, use a font plugin. Plugins like “Use Any Font” or “Custom Fonts” make uploading easy. Upload your font files through the plugin interface. Save your changes and clear your cache to see results.
Adding Custom Fonts With Css
To use the uploaded fonts, add CSS code to your site. Use the @font-face rule to define your custom font. Specify the font name and file path clearly. Then apply the font to elements like body, headings, or paragraphs. For example: body { font-family: ‘YourFontName’, sans-serif; }. Use a child theme or a custom CSS plugin to add this code safely.
Using Page Builders And Theme Options
Adding a new font to WordPress can be simple using page builders and theme options. These tools often include easy settings to change fonts without coding. They let you select fonts for your whole site or just parts of it. This approach saves time and keeps your site looking consistent.
Font Settings In Popular Page Builders
Page builders like Elementor, Beaver Builder, and Divi have built-in font controls. You can pick fonts from a list or upload custom ones. Adjust font size, style, and weight with a few clicks. Changes show instantly in the builder preview. This makes it easy to see how your text looks.
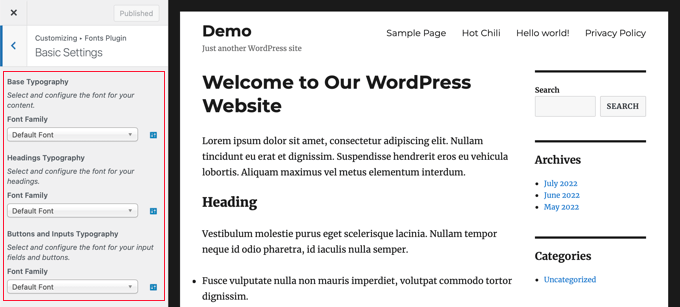
Accessing Theme Typography Options
Most WordPress themes include typography settings in the Customizer. Go to Appearance > Customize > Typography or Fonts. Here, you can change the font family and style. Some themes let you upload new fonts or link Google Fonts. These options apply across your entire website.
Applying Fonts Site-wide Or To Specific Sections
You can apply fonts to your whole site or just parts. Site-wide changes affect headings, paragraphs, and menus everywhere. Section-specific fonts work for headers, footers, or special content blocks. Use page builders or theme options to target these areas. This helps keep your design clean and easy to read.
Optimizing Font Performance
Optimizing font performance improves your website speed and user experience. Fonts can slow down pages if not managed well. Small changes make a big difference in loading times. Good font performance helps visitors stay longer on your site.
Reducing Font File Sizes
Large font files take longer to load. Use font formats like WOFF2 for better compression. Remove unused characters to shrink font files. Tools like Font Squirrel help create smaller font versions. Smaller files mean faster page loading and better performance.
Using Font Display Strategies
Fonts may delay text rendering if loaded slowly. Use the CSS property font-display to control this. The swap value shows system fonts first, then swaps with your font. This avoids invisible text and improves user experience. It keeps your site readable during font loading.
Caching And Loading Fonts Efficiently
Browsers store fonts in cache for reuse. Set proper cache headers to extend font storage. Use asynchronous loading to prevent blocking page content. Tools like preload help load fonts early. Efficient loading reduces wait time and improves page speed.
Credit: elementor.com
Troubleshooting Common Issues
Adding a new font to WordPress can sometimes cause issues. Troubleshooting helps fix these problems quickly. This section covers common font issues and how to solve them. Follow these tips to make your fonts work well on your site.
Fonts Not Displaying Correctly
Fonts may not show as expected on your website. This happens if the font files are missing or linked wrong. Check the font URL in your CSS code. Make sure the font files are uploaded to the correct folder. Clear your browser cache to see updates. Use a web-safe fallback font to avoid blank text.
Handling Browser Compatibility
Different browsers support fonts in different ways. Some fonts work on Chrome but fail on Firefox or Safari. Use standard font formats like WOFF or TTF. Test your website on multiple browsers to spot issues early. Add multiple font formats in your CSS for better support. Keep your WordPress and browser updated for best results.
Fixing Css Conflicts
Sometimes CSS rules clash and block fonts from showing. Other styles may override your font settings. Inspect your site’s CSS using browser developer tools. Look for conflicting font-family rules or !important tags. Use more specific CSS selectors to apply your font. Avoid duplicate font declarations to keep styles clean and clear.
Credit: www.wpbeginner.com
Frequently Asked Questions
How Do I Upload A New Font To WordPress?
To upload a new font, use a plugin like “Use Any Font” or add custom fonts via your theme’s customizer or CSS. Upload the font file, assign it to elements, and save changes to apply the new font site-wide.
Can I Use Google Fonts On My WordPress Site?
Yes, Google Fonts can be easily added through plugins or by embedding code in your theme. This method offers a wide variety of free, web-optimized fonts that enhance your site’s design and performance.
What File Formats Are Supported For WordPress Fonts?
WordPress supports common font formats like TTF, OTF, WOFF, and WOFF2. WOFF and WOFF2 are preferred for web use due to better compression and faster loading times.
Will Adding Custom Fonts Slow Down My WordPress Site?
Adding custom fonts can slightly impact load time, but optimizing font files and using web-friendly formats minimize delays. Choose only necessary fonts and use caching for better performance.
Conclusion
Adding a new font to WordPress can change your website’s look. It helps your text stand out and feel unique. You only need a few simple steps to do it right. Choose the font, upload it, and apply it through your theme or plugins.
Make sure the font works well on all devices. This small change can improve your site’s style and user experience. Keep experimenting with fonts to find the best fit for your content. Simple, easy, and effective.


