
Are you looking to make your WordPress site more engaging and visually appealing? Adding a gallery is one of the best ways to showcase your photos, products, or artwork in a clean and organized way.
But if you’re not sure where to start or worried it might be too complicated, don’t worry. This guide will walk you through simple steps to add a stunning gallery to your WordPress site—no tech skills needed. By the end, you’ll have a beautiful gallery that keeps visitors interested and coming back for more.
Let’s dive in and transform your website together!
Choosing The Right Gallery Plugin
Choosing the right gallery plugin is key to creating a great photo display on WordPress. A good plugin makes your images look good and works well on your site. It should be simple to use and match your website’s style. This helps visitors enjoy your photos and stay longer on your page.
Popular Gallery Plugins
Several gallery plugins are popular among WordPress users. NextGEN Gallery offers many display options and easy image management. Envira Gallery is known for its fast loading and mobile-friendly design. FooGallery provides customizable templates and drag-and-drop features. These plugins have large user bases and good support.
Plugin Features To Consider
Look for a plugin with features that fit your needs. A good gallery plugin should support multiple layouts like grids or slideshows. It should allow easy image uploading and organization. Check if it offers lightbox effects for better viewing. Fast loading speed is important to keep visitors happy. Also, consider plugins with SEO options to help your images rank in search results.
Compatibility With Themes
Not all plugins work well with every theme. Choose a gallery plugin that fits your WordPress theme’s design and code. This prevents broken layouts and style issues. Test the plugin on your site before final use. A compatible plugin blends seamlessly and keeps your site professional. It also reduces the chance of conflicts with other plugins or tools.
Credit: www.seedprod.com
Preparing Your Images
Preparing your images is a key step before adding a gallery to WordPress. Good preparation makes your gallery load faster. It also keeps your website looking neat and professional. Taking time to optimize and organize images helps improve user experience. It also boosts your site’s search engine rankings.
Optimizing Image Size
Large images slow down your website. Resize images to a smaller width and height. Aim for a balance between quality and file size. Use tools like Photoshop or free online compressors. Smaller files load faster and save bandwidth. Keep image dimensions consistent for a uniform gallery look.
Choosing Image Formats
Pick the right format for your images. JPEG works well for photos with many colors. PNG is better for images needing transparency. WebP offers smaller files with good quality. Avoid using BMP or TIFF as they are large. Use formats supported by all browsers for best results.
Organizing Images For Upload
Sort your images into folders by topic or date. Name files clearly and avoid spaces or special characters. Use simple, descriptive names to help with SEO. Grouping images makes uploading easier and faster. It also helps keep your media library tidy and manageable.
Creating A Gallery Using The Block Editor
Creating a gallery using the WordPress Block Editor is simple and fast. This method lets you add multiple images in a clean, organized way. It works well for blogs, portfolios, and stores. The Block Editor gives you control over how your images show up on the page.
Follow the steps below to create a gallery that fits your style. You do not need extra plugins or tools. Just use the built-in blocks and settings.
Adding The Gallery Block
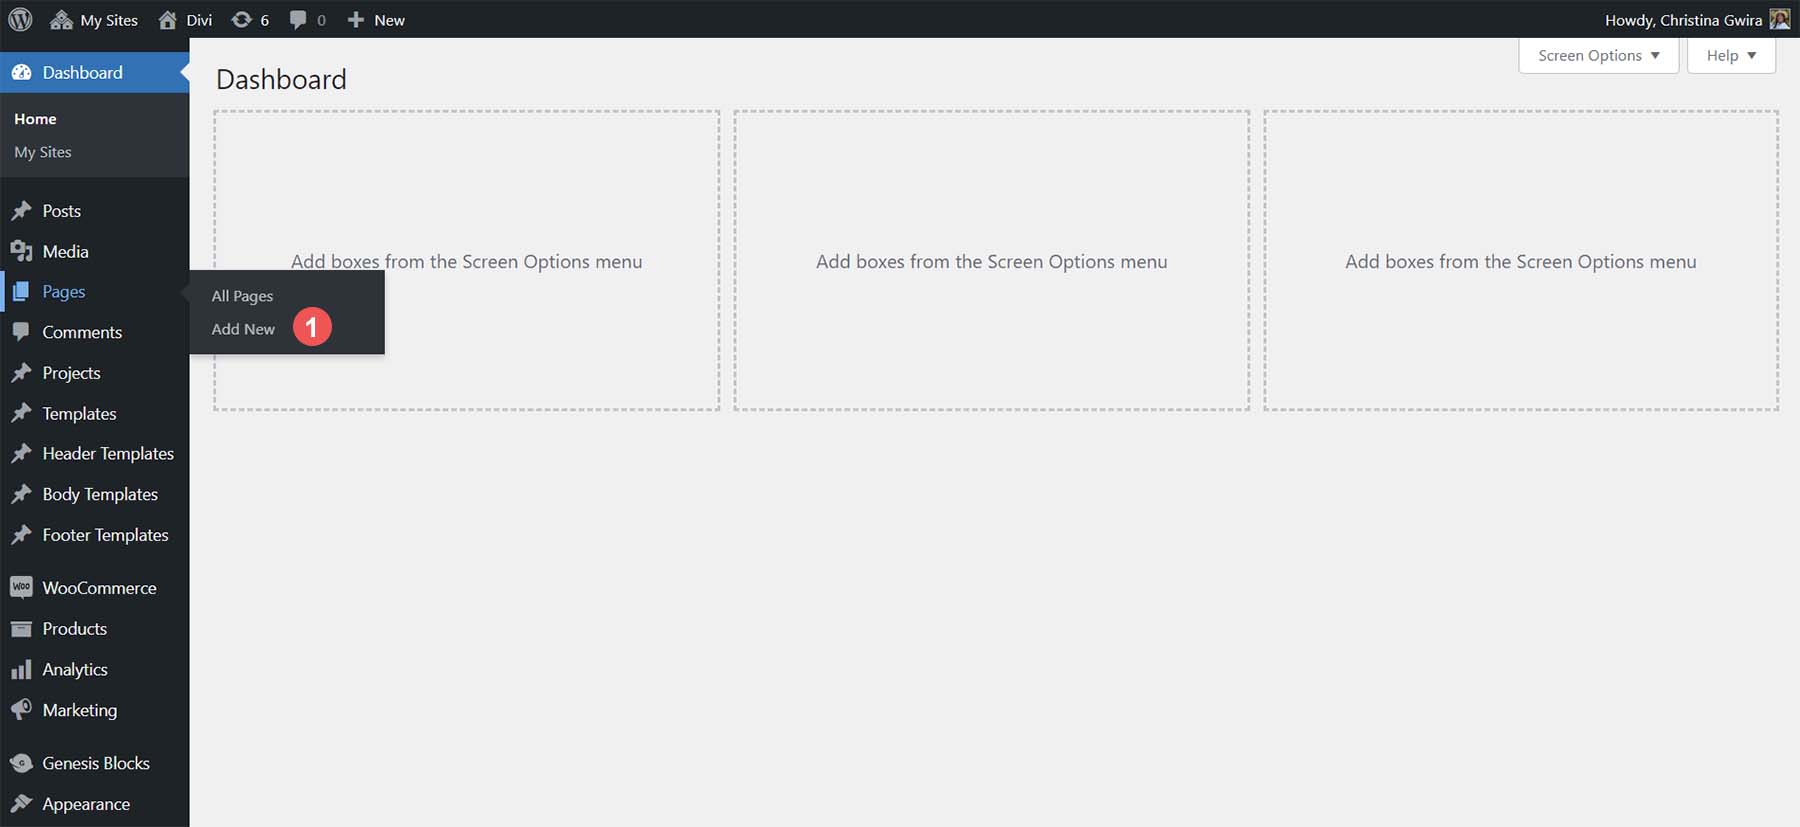
Start by opening the post or page where you want the gallery. Click the plus (+) icon to add a new block. Scroll or search for the “Gallery” block. Click it to add the block to your content.
The Gallery block creates a space for your images. You can add images right away or choose them later. It is easy to move this block around your page.
Uploading And Selecting Images
Click “Upload” to add new images from your computer. Select multiple images to upload at once. To use images already in your Media Library, click “Media Library.”
Select the images you want by clicking on them. You can add captions under each image if you want. Press “Create a new gallery” then click “Insert gallery.”
You can also drag and drop images inside the block to reorder them. This helps you arrange pictures the way you like.
Customizing Gallery Layout
The Block Editor lets you change how your gallery looks. Use the right sidebar to find layout options. You can set the number of columns to show images side by side.
Choose between square or rectangular crop styles. Adjust image size to small, medium, or large. Enable or disable image linking to attachment pages.
These settings help your gallery fit well with your website’s design. Preview your page to see how the gallery looks before publishing.
Setting Up Galleries With Plugins
Setting up galleries with plugins is a simple way to create beautiful photo displays on WordPress. Plugins add extra features that the default gallery does not offer. This helps you customize your galleries easily. You can manage images, layouts, and styles without any coding knowledge.
Many plugins are free and easy to install. They offer various options to fit your website’s style. Let’s explore how to set up galleries using a plugin step by step.
Installing And Activating The Plugin
First, log in to your WordPress dashboard. Go to the “Plugins” section and click “Add New.”
Type “gallery” in the search bar to find popular gallery plugins. Choose one with good ratings and reviews.
Click “Install Now” next to your chosen plugin. After installation, click “Activate.” The plugin is now ready to use.
Creating Your First Gallery
After activation, look for the plugin’s menu in your dashboard. Click on it to start creating a gallery.
Click “Add New Gallery” or a similar button. Upload your images or select them from the media library.
Arrange your photos by dragging and dropping. Save the gallery when you finish organizing.
Adjusting Gallery Settings
Open the gallery settings to customize its look and behavior. Choose the layout style such as grid, slider, or masonry.
Set the number of columns and spacing between images. You can also add captions and link images to larger views.
Preview your gallery before saving the settings. Make changes until it fits your website’s design perfectly.
Embedding Galleries In Posts And Pages
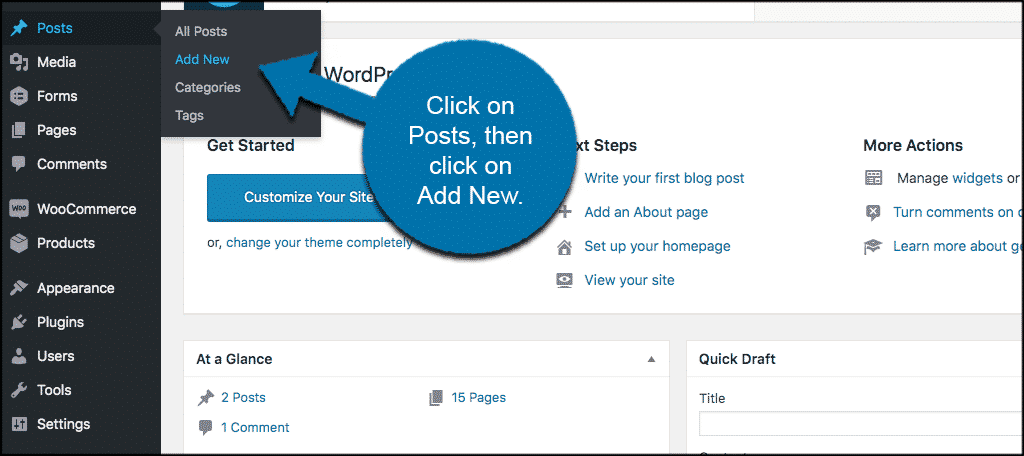
Embedding galleries in posts and pages makes your WordPress site more visual. It helps show photos clearly and attract visitors. You can add galleries in several easy ways. Each method fits different needs and skills.
Using Shortcodes
Shortcodes are simple codes that add galleries to your content. You write a small code block inside your post or page. WordPress then turns the code into a gallery display. It works well for custom galleries or plugins. You can control the number of columns and image size.
Example shortcode: . Replace the numbers with your image IDs. Shortcodes keep your page clean and load images fast. They are great if you prefer typing or using classic editor.
Inserting Via Gutenberg Blocks
Gutenberg blocks let you add galleries visually. Click the + icon and select the gallery block. Upload or choose images from your media library. You see a live preview while editing. You can drag images to reorder or remove them easily.
This method is user-friendly and fits the new WordPress editor style. It allows quick changes without any coding. You can also adjust layout settings like columns and image cropping.
Embedding With Widgets
Widgets add galleries to sidebars or footers, not just posts or pages. Go to Appearance > Widgets and add a gallery widget. Pick images or an existing gallery to show. This method keeps galleries visible site-wide or on specific pages.
Widgets are good for showing featured photos or portfolios. Visitors see your gallery even if they don’t open a post. It adds visual interest to your whole website.
Credit: www.greengeeks.com
Enhancing Gallery Appearance
Enhancing the appearance of your WordPress gallery makes it more attractive. A well-designed gallery holds visitors’ attention. It also helps your images tell a story. Simple changes can improve how your gallery looks and works.
Choosing Layout Styles
Selecting the right layout style changes how images appear. Grid layouts show photos in rows and columns. Masonry layouts arrange images in a flowing style with different heights. Slider layouts let visitors scroll through images one by one. Each style fits different types of content and websites.
Adding Captions And Descriptions
Captions give each image a short explanation. Descriptions provide more details and context. Both help visitors understand the image better. They also improve SEO by adding keywords to your gallery. Keep captions clear and brief for easy reading.
Applying Lightbox Effects
Lightbox effects open images in a larger view when clicked. This effect keeps visitors on the same page. It dims the background to focus on the image. Lightboxes make your gallery feel professional and user-friendly. Many WordPress plugins offer easy ways to add this feature.
Improving Gallery Performance
Improving gallery performance is key for a smooth user experience. Fast-loading images keep visitors engaged and reduce bounce rates. Optimizing your gallery ensures pages load quickly on all devices. Simple steps can boost speed without complex tools.
Lazy Loading Images
Lazy loading delays image loading until needed. Only images in the visible area load first. This reduces initial page load time. Visitors see content faster and stay longer. Many WordPress plugins support lazy loading easily. It saves bandwidth and improves performance on slow connections.
Using Cdn For Faster Delivery
A Content Delivery Network (CDN) stores images on servers worldwide. It delivers images from the nearest server to the visitor. This reduces image load time significantly. CDNs also reduce the load on your main server. Popular CDNs integrate well with WordPress galleries.
Caching Strategies
Caching saves copies of gallery images and pages. It allows browsers to load content faster on repeat visits. Using caching plugins improves gallery speed without extra effort. Server-side caching also helps handle more visitors. Proper caching reduces delays and enhances user experience.
Credit: www.elegantthemes.com
Troubleshooting Common Issues
Troubleshooting common issues with WordPress galleries helps keep your site looking great. Problems can stop images from showing or make galleries slow. Fixing these issues improves visitor experience and keeps your site professional.
Below are simple ways to solve frequent gallery problems. Follow these steps to get your gallery working smoothly.
Fixing Image Display Problems
Images may not show due to wrong file paths or broken links. Check the image URL in your gallery settings. Make sure images upload correctly and are not deleted from the media library.
Clear your browser cache. Sometimes old data blocks new images. Use a different browser to see if the problem continues. Resize large images to reduce loading errors.
Resolving Plugin Conflicts
Plugins can clash and stop your gallery from working. Deactivate other plugins one by one. Test your gallery after each deactivation to find the conflict.
Update all plugins and WordPress to the latest versions. Older versions may cause issues. Use plugins from trusted sources only.
Handling Slow Gallery Loading
Slow galleries frustrate visitors. Optimize images by compressing them before upload. Use caching plugins to speed up page loading.
Limit the number of images per gallery. Too many images slow down the site. Choose a fast, reliable hosting service for better performance.
Frequently Asked Questions
How Do I Create A Gallery In WordPress?
To create a gallery, go to your post or page editor. Click “Add Media,” select “Create Gallery,” choose images, and insert it. Customize layout and settings as needed for a polished look.
Can I Add A Gallery Without Plugins?
Yes, WordPress has a built-in gallery feature. Use the block editor’s “Gallery” block to upload or select images. It’s simple and requires no additional plugins.
How To Customize Gallery Layout In WordPress?
After adding a gallery, use block settings to change columns, image size, and cropping. Adjust spacing and order for a unique design that fits your site’s style.
Are There Seo Benefits To Adding Galleries?
Yes, galleries improve user engagement and reduce bounce rates. Optimize image alt texts with keywords to enhance search engine visibility and drive more traffic.
Conclusion
Adding a gallery to WordPress makes your site more visual and appealing. You can showcase photos or products easily. Use built-in tools or simple plugins for quick setup. Keep your gallery organized and update it often. This helps visitors stay interested and explore more.
A clear, attractive gallery improves user experience and site value. Try different layouts to find what fits your style best. Start adding your gallery today and watch your site come alive. Simple steps, big impact.


