
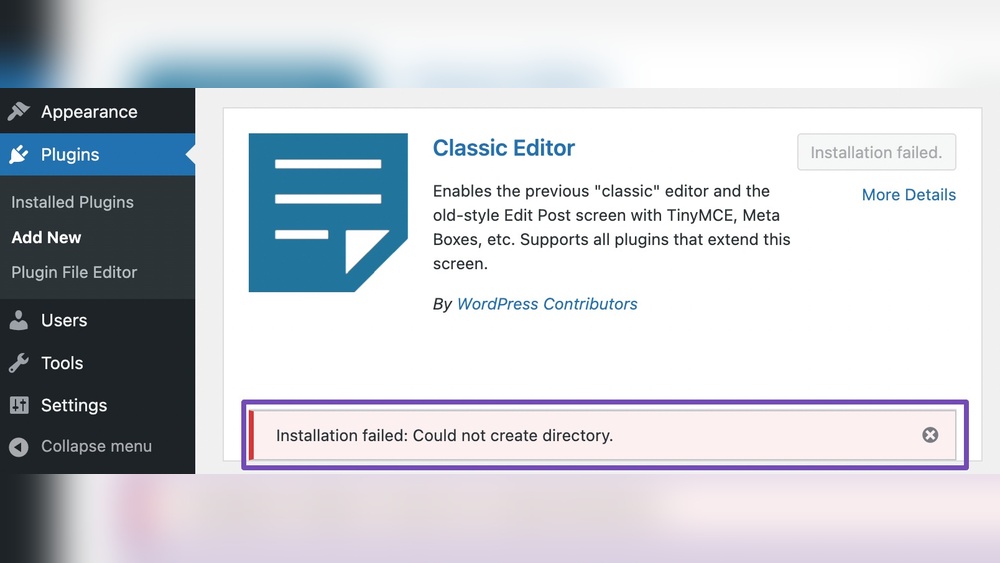
Are you struggling with the frustrating “Could Not Create Directory” error when trying to install a WordPress plugin? You’re not alone.
This common issue can stop you from adding new features to your site and slow down your progress. But don’t worry—there are simple steps you can take right now to fix this problem and get back on track. Keep reading to discover easy solutions that anyone can follow, even if you’re not a tech expert.
Your website deserves to work smoothly, and we’re here to help you make that happen.

Credit: stackoverflow.com
Common Causes
Many WordPress users face the “Could Not Create Directory” error while installing plugins. This issue stops plugins from saving files properly. Understanding common causes helps fix the problem fast. Below are the main reasons behind this error.
File Permission Issues
File permissions control who can read, write, or execute files on your server. Incorrect permissions block WordPress from creating folders. The typical permission setting for folders is 755. Setting permissions too strict or too loose causes errors.
Incorrect Ownership
File ownership means which user controls the files and folders. If the web server user does not own the WordPress files, it cannot create new directories. This often happens after migrating sites or changing hosting providers.
Server Configuration Limits
Servers have limits on file creation and upload sizes. These limits stop WordPress from making new directories. Low memory or disk space can also cause the issue. Adjusting server settings may be necessary to fix it.
Plugin Conflicts
Sometimes, other plugins interfere with the new plugin’s installation. Conflicts can block directory creation. Deactivating conflicting plugins or testing one by one helps find the problem. Keeping plugins updated reduces conflicts.
Checking File Permissions
Checking file permissions is essential when WordPress cannot create a directory for a plugin. Permissions control who can read, write, or execute files and folders on your server. Incorrect permissions often block WordPress from adding new folders or files. This step helps identify if file permissions cause the plugin issue.
Understanding how to view and change permissions can fix the problem quickly. The process is simple, even for beginners. Follow these steps carefully to avoid damaging your site.
Using Ftp Or File Manager
Access your website files using an FTP client or your hosting control panel’s file manager. FTP software like FileZilla connects you to your server. File Manager is a tool inside your hosting dashboard. Both let you browse folders and files easily. Locate the WordPress root folder, usually named “public_html” or “www.”
Find the “wp-content” folder next. This is where plugins and uploads are stored. Right-click on the folder or file and select “File Permissions” or “Change Permissions.” You will see a set of numbers or checkboxes representing permissions.
Correct Permission Settings
WordPress recommends 755 for folders and 644 for files. The number 755 means the owner can read, write, and execute. Others can read and execute only. The number 644 means the owner can read and write. Others can read but cannot write or execute.
These settings keep your site secure and functional. Setting permissions higher than 755 or 644 risks security issues. Lower settings may stop WordPress from creating folders or files. Check that “wp-content” and its subfolders have 755 permissions. Files inside should have 644.
Changing Permissions Safely
Change permissions one folder or file at a time. Avoid changing the entire WordPress folder at once. This prevents accidental permission errors. Use your FTP client or File Manager to update permissions. Enter 755 for folders and 644 for files.
After changing permissions, try installing the plugin again. If the problem persists, check other folders or consult your hosting provider. Always back up your website before making permission changes. This keeps your data safe if errors occur.
Adjusting Ownership Settings
Adjusting ownership settings can fix the “Could Not Create Directory” error in WordPress plugins. This issue happens when your server does not allow WordPress to write files. Changing who owns the files and folders can solve this problem. It helps WordPress get the right access to create and modify files.
Identifying Correct User
You must know which user runs your web server. This user owns the WordPress files and folders. Common users are “www-data”, “apache”, or “nginx”. Use commands like ps aux | grep apache or ps aux | grep nginx to find the user. Knowing the correct user helps you set the right ownership.
Updating Ownership Via Ssh
Access your server using SSH to change ownership. Use the chown command to update the user and group. For example, run sudo chown -R www-data:www-data /path/to/wordpress. This command changes ownership for all files and folders inside WordPress. Make sure to replace “www-data” and the path with your server’s details.
When To Contact Hosting Support
Contact hosting support if you cannot find the correct user. Or if you do not have SSH access to your server. Support can check server settings and fix ownership problems. They help keep your website secure while fixing permission issues.

Credit: www.cloudways.com
Modifying Server Configurations
Modifying server configurations can solve the “Could Not Create Directory” error in WordPress plugins. This error often happens due to server limits or security settings. Adjusting these settings helps WordPress write files properly. Below are key steps to change server configurations safely.
Increasing Php Limits
PHP controls many WordPress functions. Low PHP limits can stop file creation. Increase limits like upload_max_filesize and post_max_size. Also, raise memory_limit to give PHP more room to work. Edit the php.ini file or add rules to .htaccess. Restart the server after changes for effects to apply.
Adjusting Apache/nginx Settings
Web servers like Apache or Nginx manage file permissions and access. Incorrect settings block directory creation. Check configuration files like apache2.conf or nginx.conf. Ensure folder permissions allow WordPress to write. Increase limits such as client_max_body_size for Nginx or LimitRequestBody for Apache. Save changes and reload the server.
Disabling Security Modules Temporarily
Security modules may block file creation to protect the server. Modules like mod_security can cause issues. Temporarily disable these modules to test if they cause the error. Use commands or control panel settings to turn them off. Remember to enable the security modules after testing. This step isolates the problem without risking long-term security.
Resolving Plugin Conflicts
Resolving plugin conflicts is key to fixing the “Could Not Create Directory” error in WordPress. Conflicts occur when two or more plugins try to do the same task or affect the same files. This can stop your site from working properly or block plugin updates and uploads.
Finding the conflicting plugin helps keep your site running smooth. The process is simple but requires patience. Follow these steps carefully to identify and solve plugin issues.
Deactivating All Plugins
Start by deactivating all plugins on your WordPress site. This clears any active conflicts. Go to the Plugins page in your dashboard. Select all plugins and choose “Deactivate” from the bulk actions menu. This step ensures no plugin is blocking directory creation.
Reactivating Plugins One By One
Next, reactivate each plugin one at a time. After activating a plugin, try the action that caused the error. This method helps spot which plugin triggers the problem. Take notes on which plugin causes the issue to reappear.
Identifying Problematic Plugins
Once you find the plugin causing the error, keep it deactivated. Check the plugin’s support page or contact the developer for help. You can also look for updates or alternatives. Avoid using plugins that cause directory creation errors to keep your site stable.
Alternative Workarounds
Facing the “Could Not Create Directory” error in WordPress can stop your plugin installation. This problem happens when WordPress cannot make a new folder for the plugin files. Fixing this issue is possible with some alternative methods. These methods do not need complex coding or deep technical skills. They help you keep your site safe and running smoothly.
Manual Plugin Installation
Manual plugin installation lets you bypass WordPress file system limits. Download the plugin as a ZIP file from a trusted source. Extract the ZIP file on your computer. Use an FTP client like FileZilla to connect to your website. Upload the extracted plugin folder to the /wp-content/plugins/ directory. After uploading, go to your WordPress dashboard. Activate the plugin from the Plugins menu. This method avoids directory creation errors during upload.
Using Different File Upload Methods
Change your file upload method to fix directory creation issues. Some hosts restrict PHP file uploads, causing errors. Try using cPanel’s File Manager to upload plugin files. You can also use an FTP client for direct uploads. These methods often bypass restrictions set by your host. Upload the plugin files to the correct folder manually. Activate the plugin from your dashboard once uploaded. These steps reduce the chance of the error appearing.
Switching To A Default Theme Temporarily
Sometimes themes cause conflicts that block plugin installation. Switch to a default WordPress theme like Twenty Twenty-Three. This step ensures no theme conflicts affect directory creation. Go to Appearance > Themes and activate the default theme. Try installing your plugin again while the default theme is active. If the error disappears, the theme caused the problem. Later, switch back to your original theme after installation.
Preventive Measures
Preventive measures help avoid the “Could Not Create Directory” error in WordPress plugins. Taking simple steps keeps your site stable and secure. These actions reduce risks and save time on fixing problems later.
Regular Backup Practices
Backups protect your site data from loss. Schedule backups weekly or after major changes. Use reliable backup plugins or hosting services. Store backups in safe locations outside your server. This ensures you can restore your site fast if issues occur.
Keeping WordPress Updated
Update WordPress core, themes, and plugins regularly. Updates fix bugs and improve security. Running the latest version prevents compatibility issues. Avoid running outdated software that may cause directory errors. Always test updates on a staging site first.
Monitoring Server Health
Check your server’s storage space and permissions often. Low disk space can block new directories. Incorrect permissions stop WordPress from creating folders. Use tools or hosting dashboards to monitor server status. Act quickly to fix any server problems found.
Credit: rankmath.com
Frequently Asked Questions
Why Does WordPress Say “could Not Create Directory”?
This error usually occurs due to incorrect folder permissions or ownership. WordPress cannot write files without proper access rights, preventing plugin installation or updates.
How To Fix Directory Creation Errors In WordPress Plugins?
Check and update folder permissions to 755 or 775. Also, ensure the web server user owns the WordPress directories. Using FTP or hosting control panel helps manage these settings.
Can Insufficient Disk Space Cause This WordPress Plugin Error?
Yes, if your server runs out of disk space, WordPress can’t create new directories. Freeing up space or upgrading your hosting plan resolves the issue.
Does A Corrupted .htaccess File Affect Plugin Directory Creation?
A corrupted. htaccess file can disrupt WordPress operations, including directory creation. Resetting or regenerating the. htaccess file often fixes the problem.
Conclusion
Fixing the “Could Not Create Directory” error improves your WordPress experience. Check file permissions and server limits first. Clear cache and update plugins regularly. Small steps prevent big problems later. Stay patient and follow simple fixes carefully. Your site will run smoother and faster.
Keep learning and troubleshooting as you go. Don’t let errors stop your progress.


