

Want to make your WordPress site more powerful and user-friendly? Adding widget code is one of the easiest ways to do that.
Whether you want to display social media feeds, custom ads, or useful tools, knowing how to add widget code puts you in control. In this guide, you’ll discover simple, step-by-step instructions that anyone can follow—even if you’re not tech-savvy. Stick with me, and by the end, you’ll have the skills to customize your site exactly how you want.
Ready to unlock your site’s full potential? Let’s get started!
Credit: bytescout.com
Choose The Right Widget
Choosing the right widget is important for your WordPress site. The right widget helps your visitors find what they need. It also makes your site look neat and professional.
Think about what your site needs most. Some widgets show recent posts, while others display social media links. Pick one that fits your site’s goals and style.
Understand Your Site’s Purpose
Know what your website is about. A blog needs widgets for recent posts or categories. An online store may need a widget for product filters or sales. This helps you choose widgets that support your main content.
Consider Your Audience
Think about your visitors. What do they want to see or use? If they like reading articles, a popular posts widget can help. If they want to contact you, a contact form widget is useful. Choose widgets that make the user experience better.
Check Widget Compatibility
Not all widgets work well with every theme or plugin. Make sure the widget you choose fits your WordPress theme. It should also not slow down your site. Test the widget on your site before you add it for good.
Keep It Simple
Don’t add too many widgets. Too many can make your site look cluttered. Choose only the most useful widgets. This keeps your site clean and easy to navigate.
Credit: www.wpbeginner.com
Access The WordPress Dashboard
Accessing the WordPress Dashboard is the first step to adding widget code. The dashboard is the control panel of your website. It helps you manage everything easily.
From here, you can add widgets, change settings, and customize your site. Understanding how to get to the dashboard saves time and avoids confusion.
Open Your Web Browser
Start by opening your favorite web browser. This can be Chrome, Firefox, Safari, or any other browser.
Type your website’s address in the address bar. Add “/wp-admin” at the end of your URL.
Enter Your Login Details
You will see the WordPress login page. Enter your username and password carefully.
Click the “Log In” button to access the dashboard. Keep your login details safe and private.
Navigate The Dashboard Interface
Once logged in, the dashboard appears with many options on the left side. This is called the admin menu.
Look for the “Appearance” section to add widgets. The dashboard is simple and easy to use.
Navigate To The Widgets Section
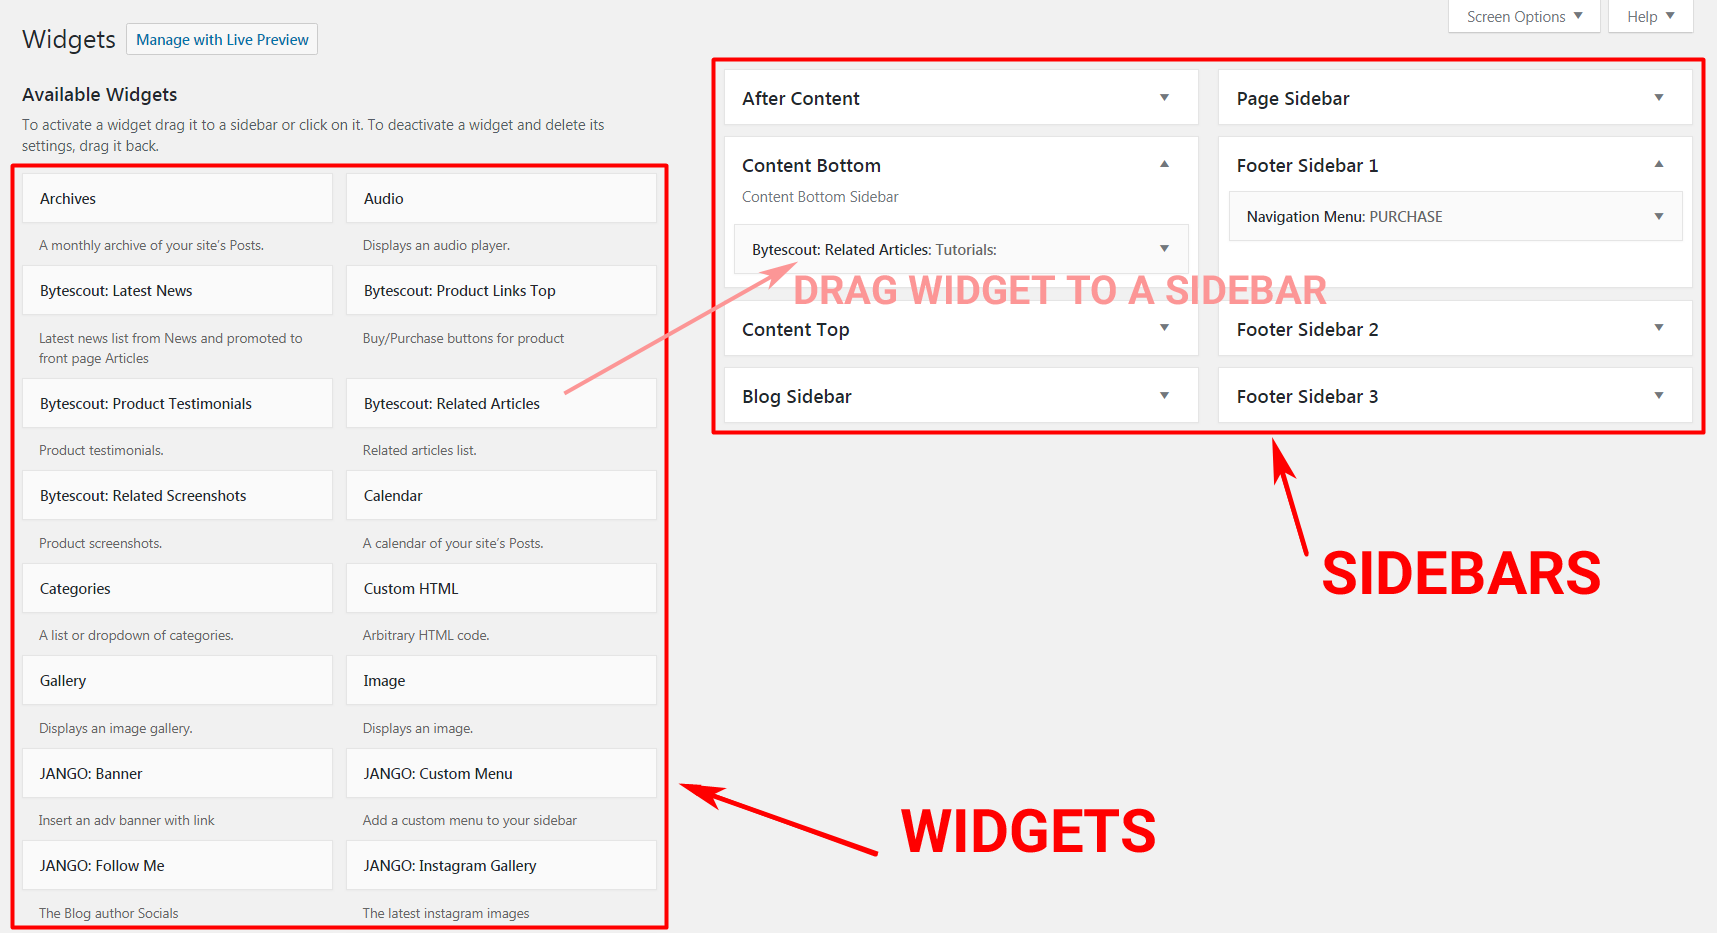
To add widget code in WordPress, first find the Widgets section. This area controls where widgets appear on your site. It allows you to place content blocks in sidebars, footers, and other widget-ready spots.
Accessing this section is simple. It only takes a few clicks in your WordPress dashboard. Knowing how to navigate here speeds up the widget setup process.
Start by logging into your WordPress dashboard. Use your admin username and password. The dashboard is the control center for your website.
Locate The Appearance Menu
In the dashboard sidebar, find the “Appearance” menu. Click it to open more options. This menu controls your site’s look and layout.
Select The Widgets Option
Under Appearance, click “Widgets.” This opens the Widgets screen. Here, you see all available widget areas and tools.
Add A Custom Html Widget
Adding a Custom HTML widget lets you place any code snippet on your WordPress site. This widget is perfect for custom scripts, ads, or special content. You control exactly what appears in your sidebar or footer.
Using a Custom HTML widget is simple. It does not need plugins or advanced skills. Just paste your code and save. The widget shows your code in the chosen widget area immediately.
Add A Custom Html Widget To Your Site
Go to the WordPress dashboard. Find the Appearance menu and click Widgets. Locate the Custom HTML widget from the list. Drag it to the widget area you want. Sidebar, footer, or other areas work well.
Insert Your Html Code
Click the Custom HTML widget you placed. A box opens for your code. Paste your HTML code snippet here. Make sure the code is clean and correct. Errors can cause display problems.
Save And Preview Your Widget
After pasting your code, click Save. Visit your website to see the widget live. Check if the code displays as expected. Adjust the code if it looks wrong or breaks layout.
Insert Your Widget Code
Adding widget code in WordPress is simple and quick. Use the widget area in your dashboard to paste the code. This lets you show extra features on your site easily.
Start by logging into your WordPress dashboard. This is the main control panel for your site. You need to be an admin or have permissions to add widgets.
Once logged in, look for the “Appearance” menu on the left side. Click on it to see more options.
Navigate To Widgets Section
Under “Appearance,” click on “Widgets.” This page shows all available widget areas on your site. These areas are spots where you can place your widget code.
Find the widget area where you want to insert your code. Common areas include sidebars and footers.
Use A Custom Html Widget
Drag the “Custom HTML” widget to your chosen widget area. This widget lets you paste any HTML or JavaScript code safely.
Click on the widget to open it. You will see a text box where you can enter your widget code.
Paste Your Widget Code
Copy your widget code from the source. Paste it into the Custom HTML widget’s text box carefully. Make sure you paste all code without changes.
Check the code for any errors or missing parts. Even a small mistake can break the widget.
Save And Preview The Widget
After pasting the code, click the “Save” button inside the widget. This action will add the widget to your site.
Visit your website to see how the widget looks. Refresh the page to ensure the widget works properly.
Save And Preview Changes
Saving and previewing changes is an important step after adding widget code in WordPress. This step helps you check if the widget looks right on your site. It also ensures the code works without errors. Taking time to save and preview saves you from problems later.
Always save your work before leaving the widget area. WordPress lets you see how the widget will appear on your live site. This way, you can fix any issues right away. The preview shows the exact placement and style of the widget.
How To Save Widget Code
After pasting the widget code, look for the “Save” or “Done” button. Click it to keep your changes. Without saving, the widget will not appear on your site. WordPress confirms the save with a message or visual cue. Make sure to wait until the save finishes.
Steps To Preview Widget On Your Site
Go to the “Customize” section in WordPress. Click “Preview” to see your site with the new widget. Check the widget’s position and how it looks on different devices. Test its functionality to confirm it works well. Close preview mode to return to editing.
What To Do If Widget Does Not Show Correctly
Clear your browser cache and refresh the preview. Check the widget code for any errors or missing tags. Try disabling other plugins that might block the widget. Review your theme’s widget areas for compatibility. Repeat saving and previewing until it works.
Troubleshooting Common Issues
Adding widget code to WordPress can sometimes cause issues. These problems stop the widget from showing or working correctly. Knowing how to fix these issues saves time and frustration.
This section explains common problems and quick fixes. Clear steps help you solve widget code errors easily.
Incorrect Code Placement
Placing widget code in the wrong area breaks the widget. Always add code in the correct widget or theme section. For example, use the “Custom HTML” widget for HTML code. Avoid pasting code directly into the post editor.
Code Conflicts With Themes Or Plugins
Some themes or plugins block widget code. This causes widgets not to appear or work. Try disabling other plugins to find conflicts. Switch to a default theme to check if the theme causes issues.
Missing Closing Tags Or Syntax Errors
Widget code must have correct syntax. Missing closing tags or wrong characters stop the widget. Use a code editor or online validator to check the code before adding it.
Javascript Not Loading Properly
Many widgets use JavaScript. If scripts don’t load, widgets fail to work. Check if your site blocks scripts or if the script URL is wrong. Clear your browser cache and reload the page.
Cache Problems
Caching plugins or server cache may show old widget versions. Clear all caches after adding or updating widget code. This ensures visitors see the latest changes immediately.

Credit: wordpress.org
Using Plugins For Widget Management
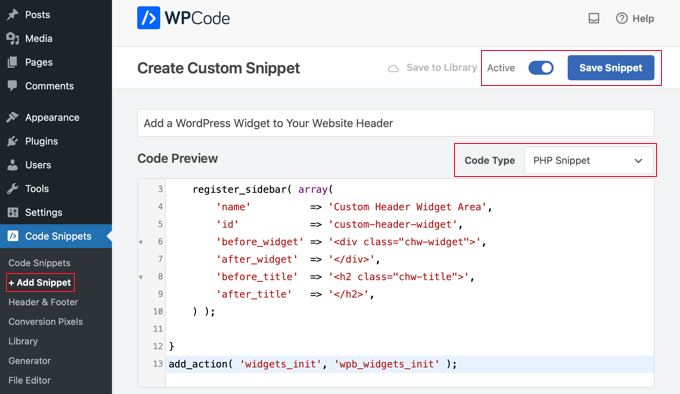
Plugins help manage widgets easily in WordPress. They allow you to add, edit, and control widget code without touching the theme files. Using plugins saves time and reduces errors. It also gives more options to customize widgets.
Many plugins provide drag-and-drop interfaces. This makes widget placement simple, even for beginners. Some plugins also support custom code snippets. This is useful for adding special features or scripts.
Choosing The Right Widget Plugin
Select a plugin that fits your needs. Check user ratings and reviews. Look for one that is regularly updated. This ensures compatibility with the latest WordPress version. Also, pick plugins that have clear instructions and good support.
Installing And Activating The Plugin
Go to your WordPress dashboard. Click on “Plugins” and then “Add New.” Search for the plugin by name. Click “Install Now” and wait for it to finish. Activate the plugin by clicking “Activate” after installation.
Adding Widget Code Using Plugins
Open the plugin’s widget management area. Use the provided interface to add new widgets. Paste your widget code or select the widget type. Customize the widget settings as needed. Save changes to apply the widget on your site.
Managing Widgets With Plugin Features
Plugins often allow easy widget reordering. Drag widgets to new positions in sidebars. Some plugins let you show or hide widgets on certain pages. Use these features to improve your site layout and user experience.
Frequently Asked Questions
How Do I Add Widget Code In WordPress?
To add widget code, go to Appearance > Widgets in your WordPress dashboard. Drag a Custom HTML widget to your sidebar or footer. Paste your widget code into the content box, then save. Your widget will appear where you placed it on your site.
Can I Add Javascript Widget Code In WordPress?
Yes, you can add JavaScript widget code using a Custom HTML widget. WordPress allows script tags inside this widget. However, make sure your theme supports JavaScript in widgets and your code is secure to avoid conflicts or security issues.
Where Do I Paste Widget Code In WordPress?
Paste widget code inside a Custom HTML widget found under Appearance > Widgets. Choose the widget area, like sidebar or footer, and paste your code. Save the widget to display the content or functionality on your site.
Is It Safe To Add Third-party Widget Code In WordPress?
Adding third-party widget code is safe if it’s from a trusted source. Always check the code for malicious scripts. Use plugins or child themes to test widgets before adding them live on your WordPress site.
Conclusion
Adding widget code in WordPress is simple and quick. Just follow the clear steps shown above. Widgets help make your site more useful and fun. You can add calendars, menus, or social links easily. Keep your code neat and test it well.
This way, your site looks good and works right. Try adding different widgets to see what fits best. Small changes can make a big difference for visitors. Now, you can update your WordPress site with new tools anytime.


