
Are you looking to add a document to your WordPress site but don’t know where to start? You’re in the right place.
Adding documents like PDFs, Word files, or spreadsheets can make your website more informative and useful for your visitors. Imagine your readers easily accessing important files without any hassle—that’s exactly what you’ll learn here. By the end of this post, you’ll have simple, step-by-step instructions to upload and share documents on your WordPress site with confidence.
Ready to make your content more engaging and professional? Let’s dive in!
Prepare Your Document
Before adding a document to WordPress, you must prepare it properly. Preparation ensures the upload process runs smoothly. It also helps visitors access your document easily. Follow simple steps to get your file ready.
Supported File Formats
WordPress supports many file types for documents. Common formats include PDF, DOC, DOCX, PPT, PPTX, XLS, and XLSX. Using these formats guarantees your document opens correctly. Avoid unusual file types that WordPress may not accept. Stick to standard formats for best results.
File Size Limits
WordPress limits file sizes for uploads. The default limit varies by hosting but is often between 2MB and 10MB. Large files may fail to upload or slow down your site. Compress files or reduce their size before uploading. This ensures faster loading and better user experience.
Document Naming Tips
Choose clear and simple names for your documents. Use only letters, numbers, and hyphens or underscores. Avoid spaces and special characters. Short, descriptive names help with SEO and user understanding. For example, use “monthly-report-2024.pdf” instead of “report final (version 2).pdf”.
Credit: embedpress.com
Access WordPress Dashboard
Accessing the WordPress dashboard is the first step to add any document. This area controls your entire website. It lets you upload files, create posts, and manage settings easily.
Knowing how to get there fast saves time. You will use it often for website tasks. The dashboard is user-friendly and straightforward to navigate.
Login Steps
Open your web browser and go to your website URL. Add /wp-admin at the end of the URL. For example, www.yoursite.com/wp-admin.
Enter your username or email in the first box. Then, type your password in the second box. Click the “Log In” button to enter your dashboard.
Check your credentials carefully to avoid login errors. Use the “Remember Me” option for faster login next time.
Navigating To Media Library
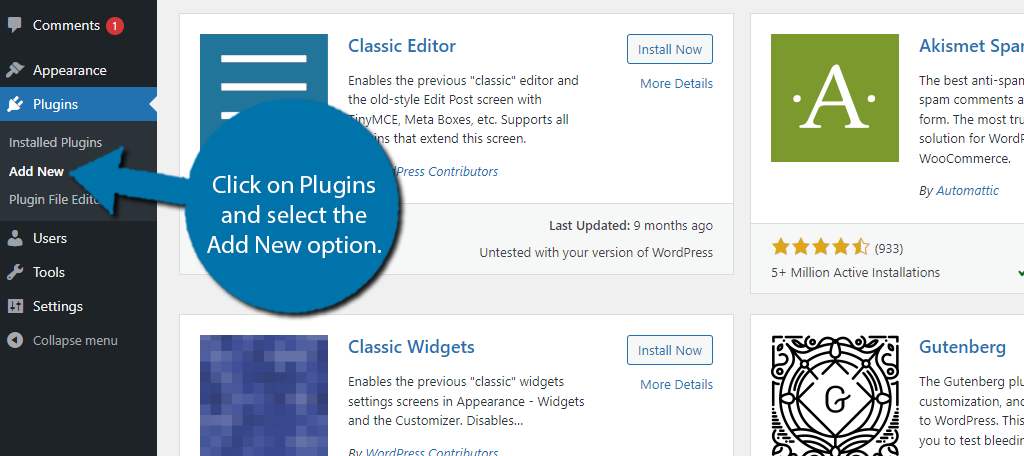
Once logged in, look at the left sidebar menu. Find and click on “Media.” This opens the Media Library.
The Media Library shows all your uploaded files. You can add new documents by clicking the “Add New” button at the top.
This section lets you organize and manage your files easily. It is the central place for all media content on your site.
Upload Document To Media Library
Uploading a document to the WordPress Media Library is simple and fast. This step stores your file safely on the site. You can then use the document anywhere on your pages or posts. Two easy ways let you add files quickly. Choose the best method for your comfort.
Drag And Drop Method
Open the WordPress dashboard. Go to Media > Library. The screen shows a big upload area. Drag your document file from your computer. Drop it inside the upload box. WordPress starts uploading automatically. Wait until the progress bar finishes. Your document now appears in the Media Library list.
Using Upload Button
Go to Media > Library in the dashboard. Click the “Add New” button at the top. A file selector window will pop up. Find the document on your computer. Select the file and click “Open.” WordPress uploads the document instantly. It appears in the Media Library ready to use.
Insert Document Into Posts Or Pages
Inserting a document into your WordPress posts or pages helps share important files with your readers. This feature makes your content more useful and interactive. You can add PDFs, Word files, or other document types directly into your content area. WordPress offers simple ways to do this through its editors.
Using Gutenberg Editor
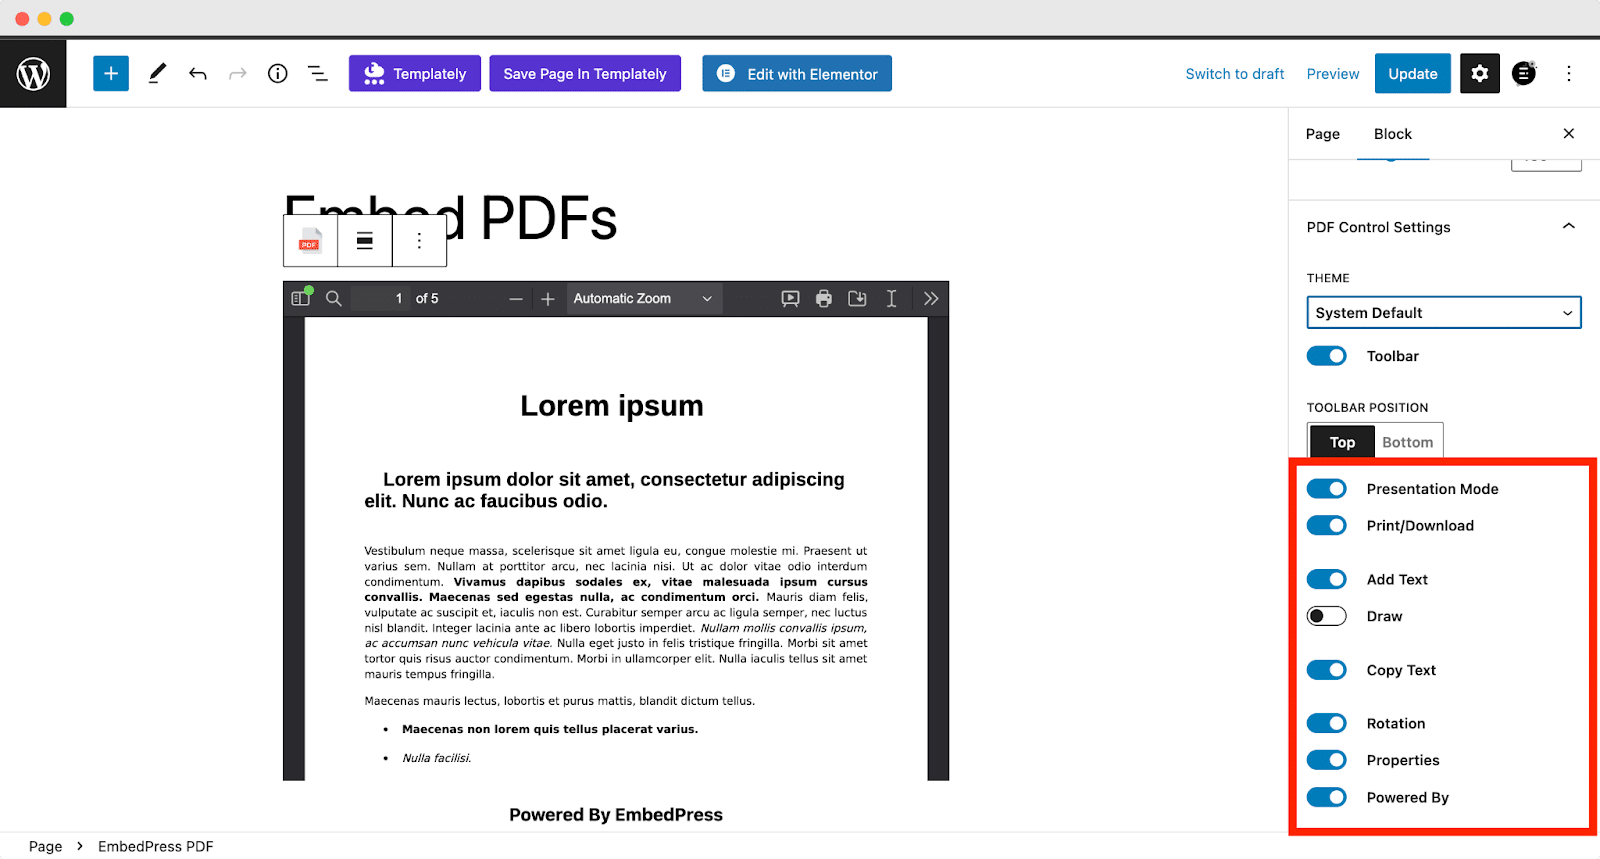
Open the post or page where you want to insert the document. Click the plus (+) icon to add a new block. Select the “File” block from the block menu. Upload your document or choose one from the media library. Once added, WordPress shows a download button for visitors. You can also add a title or description for the document. Adjust settings like opening the file in a new tab if needed. This method is quick and works well with modern WordPress versions.
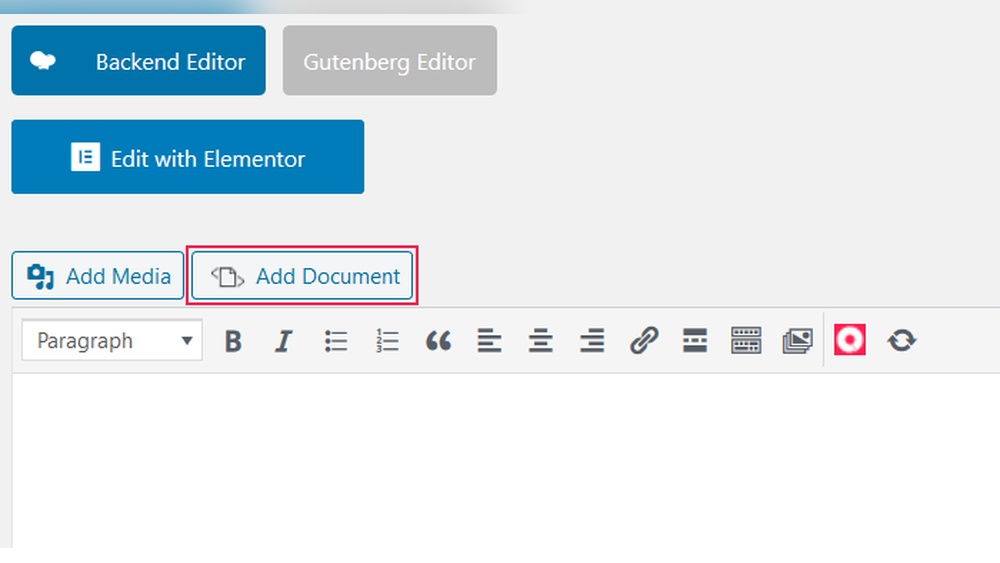
Using Classic Editor
Go to the post or page editor using the Classic Editor. Place the cursor where the document link should appear. Click the “Add Media” button above the toolbar. Upload your document or select one from the media library. Click the “Insert into post” button to add the file link. The editor will show the document as a clickable link. Visitors can download the document by clicking this link. This method suits users who prefer the old WordPress editor style.
Linking To Documents
Linking to documents in WordPress lets visitors access files easily. You can link to PDFs, Word files, or other documents. This helps share important information or resources directly on your site.
Adding links is simple and improves user experience. Visitors can download files or view them without leaving the page. Follow these tips to create effective document links.
Creating Download Links
To create a download link, upload your document to the WordPress media library. Copy the file URL after uploading. Next, highlight the text where you want the link. Click the link icon and paste the URL.
Visitors will click the text to download the file. Use clear text like “Download PDF” or “Get Document.” This tells users exactly what they will get.
Opening Documents In New Tabs
Opening documents in new tabs keeps visitors on your site. It lets users view files without losing their place. To do this, select the link text and open the link settings.
Check the option to open the link in a new tab. This adds a small attribute to the link code. Users click the link, and the document opens separately.
Credit: www.greengeeks.com
Manage Uploaded Documents
Managing uploaded documents in WordPress keeps your files organized and easy to find. It helps maintain your website’s speed and usability. Regularly checking your documents ensures everything is up to date. It also removes clutter and unused files that take space.
Editing Document Details
Edit document titles and descriptions to improve clarity. Use clear, simple titles so visitors find files quickly. Update descriptions with useful information about the document. This helps search engines understand your content better. Changing details is easy through the WordPress media library. Select the document, then edit its information on the right side. Save changes to keep your site neat and user-friendly.
Deleting Unused Files
Remove files that you no longer need to save space. Unused documents can slow down your website. Go to the media library and find files not linked to posts or pages. Delete them to free storage and improve site speed. Always double-check before deleting to avoid removing important files. Keeping only necessary documents helps your site run smoothly.
Troubleshooting Upload Issues
Uploading documents to WordPress can sometimes cause errors. These problems stop you from adding files easily. Troubleshooting upload issues helps fix common problems fast. This saves time and avoids frustration. Understanding typical errors and file permissions is key to smooth uploads.
Common Errors
Many users face upload errors in WordPress. One common error is the “file too large” message. WordPress limits file size by default. Another error is unsupported file type. WordPress blocks certain file formats for security. Sometimes, uploads fail due to server timeouts. Slow internet or large files cause this. Also, memory limits on the server can stop uploads.
Fixing File Permission Problems
File permissions control access to WordPress folders. Incorrect permissions can block uploads. The “wp-content/uploads” folder must be writable. Set folder permissions to 755 or 775 for best results. Files inside should be 644. You can change permissions using an FTP client or hosting control panel. Always back up before changing permissions. Proper permissions ensure WordPress can save your documents without errors.

Credit: kaydee.net
Frequently Asked Questions
How Do I Upload A Document To WordPress?
To upload a document, go to your WordPress dashboard. Click on Media > Add New. Select your file and upload it. After uploading, copy the file URL to use in posts or pages.
Can I Add Pdfs Directly To WordPress Posts?
Yes, WordPress allows you to upload PDFs directly. Use the Add Media button in the post editor. Upload your PDF and insert it as a clickable link for visitors to download or view.
What File Types Can I Add To WordPress Documents?
WordPress supports various file types like PDF, DOCX, PPT, and TXT. Ensure your theme or plugins support these formats. Upload files through the media library for easy management.
How Do I Link A Document In A WordPress Page?
Upload the document via the media library first. In the page editor, highlight the text or image to link. Click the link icon and paste the document URL. Save and publish your page.
Conclusion
Adding a document to WordPress is simple and quick. Just follow the steps clearly. Upload your file, add a link, and publish your post. This helps visitors find important info easily. Keep your site organized by adding documents often. Practice these steps to feel confident.
Your website will look professional and useful. Start adding documents today to share your content better.


