
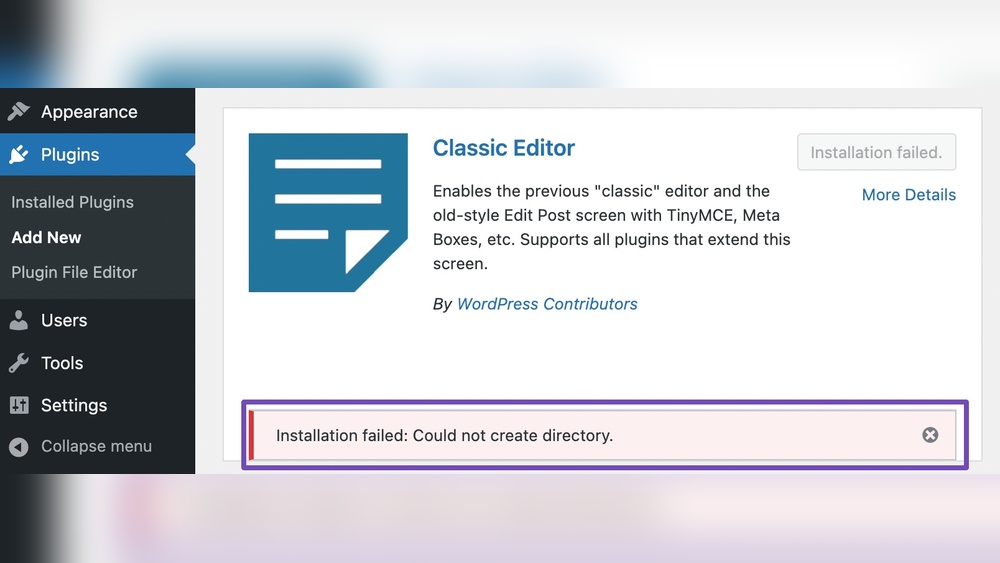
Are you struggling with the frustrating “Could Not Create Directory” error while trying to install a WordPress theme? You’re not alone.
This common issue can stop you dead in your tracks, leaving you stuck and unsure of what to do next. But don’t worry—understanding why this happens and how to fix it is easier than you think. Keep reading, and you’ll discover simple, effective solutions that will get your theme installed and your website looking just the way you want.
Don’t let this error slow you down—let’s solve it together.
Common Causes Of Directory Creation Errors
Directory creation errors in WordPress themes happen often. These errors stop WordPress from making new folders needed for themes or plugins. Understanding common causes helps fix these problems fast. This section explains the main reasons why WordPress cannot create directories.
File Permission Issues
File permissions control who can read or write files on your server. Wrong permissions block WordPress from making new directories. WordPress usually needs permission to write in the wp-content folder. If permissions are too strict, directory creation fails. Setting correct permissions solves this problem quickly.
Incorrect File Paths
WordPress uses specific paths to save files and folders. If the path is wrong or missing, WordPress cannot find where to create directories. This error happens often after site moves or changes in configuration. Checking and fixing file paths in WordPress settings is essential to avoid errors.
Server Configuration Limits
Servers have limits on resources like memory and file creation. Low resource limits can stop WordPress from creating new directories. Shared hosting environments often have these restrictions. Increasing server limits or upgrading hosting plans helps solve this issue.
Ownership Conflicts
File ownership means which user controls files on the server. Ownership conflicts occur when WordPress runs under a different user than the file owner. This mismatch blocks WordPress from creating directories. Correcting ownership settings lets WordPress manage files properly.

Credit: www.cloudways.com
Checking And Changing File Permissions
Checking and changing file permissions is a key step to fix the “Could Not Create Directory” error in WordPress themes. File permissions control who can read, write, or execute files and folders on your server. Incorrect permissions block WordPress from creating new directories needed for themes and plugins. Adjusting these permissions helps WordPress work smoothly and avoids errors.
Using Ftp Clients
FTP clients allow you to connect to your website files remotely. Use an FTP program like FileZilla or Cyberduck. Connect using your FTP username and password. Right-click the folder with issues, usually the “wp-content” folder. Select “File Permissions” or “Permissions”. Change the numeric value to 755 for folders. For files, use 644. Apply changes recursively to all subfolders and files. This ensures WordPress can write to the folders it needs.
Accessing File Manager In Hosting Panel
Your hosting control panel often has a File Manager tool. Log into your hosting account. Find the File Manager in the dashboard. Navigate to the WordPress installation folder. Right-click the folder causing trouble. Choose “Change Permissions” or “Permissions”. Set folder permissions to 755 and file permissions to 644. Save the changes and check your site again. This method is simple and does not require extra software.
Recommended Permission Settings
Folders should usually have 755 permissions. This means the owner can read, write, and execute. Others can only read and execute. Files should have 644 permissions. The owner can read and write. Others only read. Avoid using 777 permissions as it risks security. Correct permissions keep your site safe and functional. Always back up before making changes.
Verifying And Correcting File Paths
Verifying and correcting file paths is essential to fix the “Could Not Create Directory” error in WordPress themes. Wrong paths stop WordPress from saving files properly. This issue often happens when WordPress tries to save uploads or theme files to the wrong place. Checking the file paths makes sure WordPress knows exactly where to store files.
Correct file paths help WordPress write data without permission errors. Fixing these paths prevents upload failures and broken themes. The process involves editing core files and updating folder locations. Below are simple steps to verify and correct file paths in WordPress.
Editing Wp-config.php
The wp-config.php file controls many WordPress settings, including file paths. Open this file in your site’s root folder using a text editor. Add or update the following line:
define('UPLOADS', 'wp-content/uploads');This sets the upload folder path manually. Change the path if your uploads folder is in a different location. Save the file and upload it back to your server. This change tells WordPress exactly where to create new directories. It often fixes the directory creation error.
Updating Uploads Folder Path
Sometimes, the uploads folder path stored in the database is wrong. Check it in your WordPress admin dashboard under Settings > Media. If the path looks incorrect, update it to the correct folder. The default path is usually “wp-content/uploads”.
Use an FTP client or file manager to confirm the uploads folder exists and has proper permissions. The folder should have 755 permissions. Correcting the folder path and permissions lets WordPress create new directories without problems. This step ensures file uploads work smoothly.
Adjusting Server Settings
Adjusting server settings can fix the “Could Not Create Directory” error in WordPress themes. This error often happens due to server restrictions. Changing some settings helps WordPress create folders and save files properly.
These changes do not need advanced skills. Simple edits in server files can make a big difference. Below are key ways to adjust server settings for this issue.
Modifying Php Settings
PHP controls many WordPress functions. Sometimes, the default PHP settings limit folder creation. You can change these settings in the php.ini file.
Increase values like max_execution_time and max_input_time. These allow PHP to run longer and handle more data. Also, check file_uploads and ensure it is set to “On”. This lets WordPress upload files without issues.
Increasing Memory Limits
Low memory limits cause WordPress to stop creating directories. Increase the memory limit by editing the wp-config.php file. Add this line:
define('WP_MEMORY_LIMIT', '256M');This change gives WordPress more memory to work with. It helps avoid memory-related errors during theme setup or updates.
Configuring .htaccess File
The .htaccess file manages server rules for your site. Incorrect rules can block directory creation. Check this file for any restrictions on file permissions or uploads.
Add or update these lines to improve folder and file handling:
php_value upload_max_filesize 64M php_value post_max_size 64M php_value max_execution_time 300 php_value max_input_time 300These settings give more space and time for files to upload and save correctly.
Fixing Ownership Issues
Fixing ownership issues is key to solving the “Could Not Create Directory” error in WordPress themes. Ownership problems stop WordPress from creating new folders. It happens when the web server does not have the right user permissions. Fixing this helps WordPress write files and folders properly.
Below are simple steps to find and fix ownership problems using SSH. This way, you can get your WordPress theme working smoothly again.
Identifying Ownership Problems
Check which user owns your WordPress files. Use the command ls -l in your WordPress folder. Look for the owner and group of files and folders. Usually, the owner should match the web server user, like www-data or apache. If owners differ, WordPress cannot create directories.
Check the folder where WordPress tries to create the directory. If ownership is wrong, errors occur. Also, check permissions, but ownership is the main cause. Fixing ownership solves most directory creation issues.
Using Ssh To Change Ownership
Log in to your server using SSH. Navigate to your WordPress root folder. Use chown to change ownership. The command looks like this:
sudo chown -R www-data:www-data /path/to/wordpressReplace www-data with your web server user. Replace /path/to/wordpress with your actual path.
The -R option changes ownership for all files and folders inside. This lets WordPress write and create new directories without errors. After changing ownership, try uploading your theme again.
Alternative Solutions And Plugins
Facing the “Could Not Create Directory” error in WordPress can block your theme installation. Alternative solutions and plugins offer simple ways to fix this. These methods help manage files and reset settings without complex steps.
Using File Manager Plugins
File manager plugins let you handle website files directly from the dashboard. They give control over folder creation and file permissions. This helps bypass server restrictions causing directory errors.
Popular plugins like File Manager or WP File Manager provide easy access. You can check if the theme folder exists or create it yourself. Adjusting permissions through these plugins often solves the problem fast.
Resetting Theme And Upload Settings
Resetting theme and upload settings can clear hidden errors. Go to WordPress settings and restore default upload paths. This fixes incorrect folder paths that stop directory creation.
Also, try switching to a default WordPress theme temporarily. This tests if the issue relates to your current theme’s files or settings. Resetting these options often resolves directory creation problems effectively.
Preventing Future Directory Errors
Preventing future directory errors in WordPress is key to keeping your site running smoothly. These errors often occur because of permission issues or conflicts during updates. Taking steps to avoid them saves time and stress. Regular care and smart habits help maintain your website’s health.
Regular Backup Practices
Backups protect your website from data loss and errors. Create backups often, especially before making changes. Use trusted backup plugins or your hosting service’s backup tools. Store backups in a safe place, like cloud storage or an external drive. This ensures you can restore your site quickly if an error happens.
Safe Theme And Plugin Updates
Updating themes and plugins keeps your site secure and error-free. Update one item at a time to spot problems early. Use updates from official sources only. Avoid installing too many plugins; extra plugins increase the risk of conflicts. Test updates on a staging site before applying them to your live site.
Credit: kinsta.com
Credit: rankmath.com
Frequently Asked Questions
Why Does WordPress Show “could Not Create Directory”?
This error usually occurs due to incorrect folder permissions or ownership on your server. WordPress cannot write files without proper access rights.
How To Fix “could Not Create Directory” In WordPress?
Check and update folder permissions to 755 or 775. Ensure the server user owns the WordPress directories for proper writing access.
Can Disk Space Cause “could Not Create Directory”?
Yes, insufficient disk space can prevent WordPress from creating new directories. Always ensure your hosting account has enough free storage.
Does Changing Ftp Settings Solve This Error?
Sometimes, incorrect FTP credentials or settings cause this issue. Verify your FTP details in WordPress or wp-config. php to fix it.
Conclusion
Fixing the “Could Not Create Directory” error in WordPress takes patience. Check your folder permissions first. Make sure your server allows writing to the directory. Clear any plugin conflicts that might block theme installation. Small changes often solve this problem quickly.
Keep your WordPress and plugins updated for better stability. A smooth theme setup improves your website’s look and feel. Don’t let technical issues slow your progress. Stay calm and follow simple steps. Your WordPress site will work just right soon.


