
Are you looking to give someone special access to your WordPress site without handing over full control? Adding a new user role can be the perfect solution.
It lets you customize exactly what your team members or contributors can do, keeping your site secure and organized. In this guide, you’ll learn simple steps to create a new user role tailored to your needs. By the end, you’ll feel confident managing users like a pro—so keep reading to unlock this powerful WordPress feature!

Credit: wedevs.com
WordPress User Roles Basics
WordPress uses user roles to control what users can do on a website. Each role has specific permissions. This system helps keep your site safe and organized. Understanding these roles is important before adding new ones.
By knowing the basics, you can manage users better. You decide what each user can access and change. This control improves teamwork and site security.
Default User Roles
WordPress comes with five main user roles. They are Administrator, Editor, Author, Contributor, and Subscriber. Each role has different access levels. The Administrator has full control over the site.
Editors can manage content from all users. Authors can create and publish their own posts. Contributors can write but cannot publish posts. Subscribers can only manage their profiles.
Role Capabilities Explained
Capabilities are the specific tasks a user can do. For example, editing posts or installing plugins. Each role has a set of capabilities. These capabilities define the power of the role.
Administrators have all capabilities. Editors can edit and publish posts from others. Authors focus on creating and publishing their own posts. Contributors write but need approval to publish. Subscribers have very limited abilities, mostly reading content.
Reasons To Add Custom Roles
Adding custom user roles in WordPress helps control what users can do. It improves security and makes site management easier. Custom roles fit your site’s unique needs. They stop users from seeing or changing things they should not access.
Tailoring Permissions
Custom roles allow you to set exact permissions for each user. You can give access to certain pages or tools only. This stops accidental changes or mistakes. Tailored permissions keep your site safe and organized.
Improving Site Management
Custom roles make managing many users simple. You assign tasks based on each user’s role. It helps your team work smoothly without confusion. Site owners save time by limiting what users can do.
Methods To Add New User Role
Adding a new user role in WordPress can help manage site access and permissions. WordPress offers two main methods to create custom user roles. Each method suits different skill levels and needs. Choose the best way that fits your comfort with coding or plugins.
Using Code Snippets
Code snippets allow precise control over user roles. You can add custom roles by writing PHP code. This method requires editing your theme’s functions.php file or a site-specific plugin.
Use the add_role() function to create a new role. Define the role name, display name, and capabilities. Capabilities control what users can and cannot do.
This method is lightweight and does not rely on extra plugins. It is perfect for developers or users familiar with WordPress coding. Always back up your site before adding code.
Using Plugins
Plugins offer a simple way to add new user roles without coding. Many plugins provide a user-friendly interface for role management. You can easily create, edit, and delete roles with a few clicks.
Popular plugins like “User Role Editor” allow you to customize capabilities for each role. This method is ideal for beginners or site owners who prefer graphical tools. It saves time and reduces the risk of errors.
Choose a trusted plugin with good reviews and regular updates. Keep your plugins updated to maintain security and compatibility.
Credit: wedevs.com
Adding Roles With Code
Adding new user roles by code in WordPress gives you full control. You can create roles that fit your site’s needs. This method is simple and fast for developers and site admins alike.
It requires editing a core theme file and writing a bit of code. The process allows you to assign specific capabilities to each role. This way, users get exactly the permissions they need.
Accessing Functions.php
First, open your WordPress theme folder. Find the file named functions.php. This file controls many theme functions.
Use a code editor or WordPress theme editor to open it. Always back up this file before changes. One small mistake can break your site.
Writing The Add_role Function
Use the add_role() function to create a new role. This function needs three parts: role ID, display name, and capabilities array.
Example: add_role('custom_role', 'Custom Role', array()); This adds a role called “Custom Role”.
Assigning Capabilities
Capabilities define what the role can do. You list them as key-value pairs in the third argument.
For instance, to allow reading posts, add 'read' => true. To deny editing posts, use 'edit_posts' => false.
Choose capabilities carefully. Too many permissions can cause security risks. Too few can limit user tasks.
Adding Roles With Plugins
Adding new user roles in WordPress is simple with plugins. Plugins help you create and manage roles without coding. They offer easy controls and save time. This makes managing your website users smooth and efficient.
Choosing The Right Plugin
Select a plugin that fits your needs. Look for good reviews and recent updates. Check if it supports role creation and permission control. User Role Editor and Members are popular choices. Pick one with a clear interface and reliable support.
Step-by-step Plugin Setup
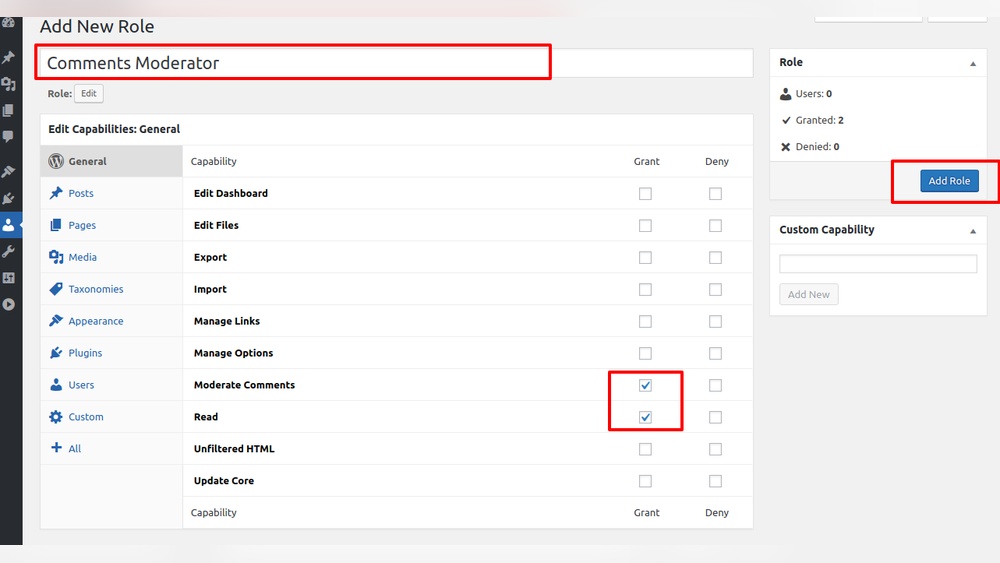
Install the plugin from the WordPress dashboard. Activate it and find its settings menu. Create a new role by entering a name. Assign capabilities by checking the boxes. Save your changes and test the role with a test user.
Managing Roles With Plugins
Plugins let you edit, delete, or duplicate roles easily. Change permissions anytime without coding. Assign roles to users from the dashboard quickly. Keep your user management organized and flexible. Regularly review roles to maintain site security and function.
Credit: www.inmotionhosting.com
Testing New User Roles
Testing new user roles ensures they work correctly before full use. It helps catch errors and prevents security issues. Testing shows if permissions match the role’s purpose. This step saves time and improves site safety.
Creating A Test User
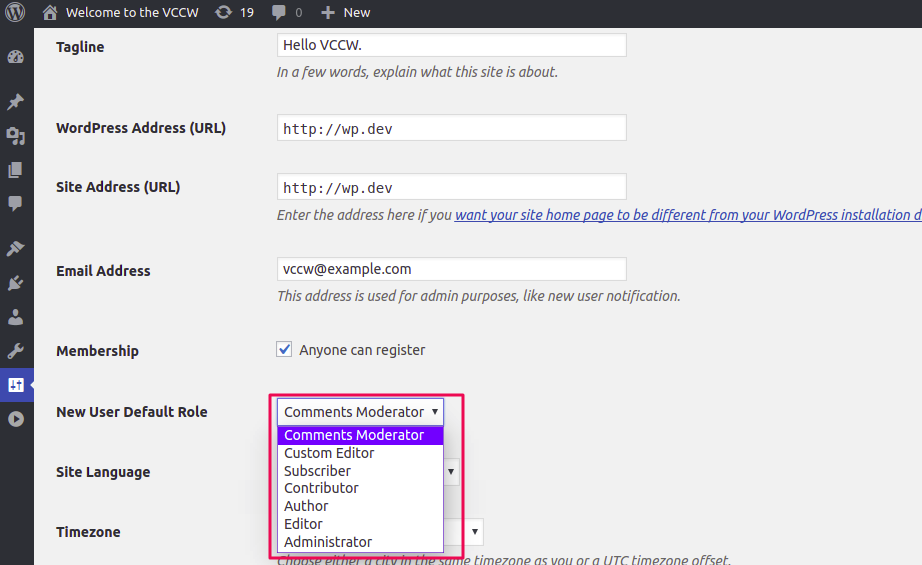
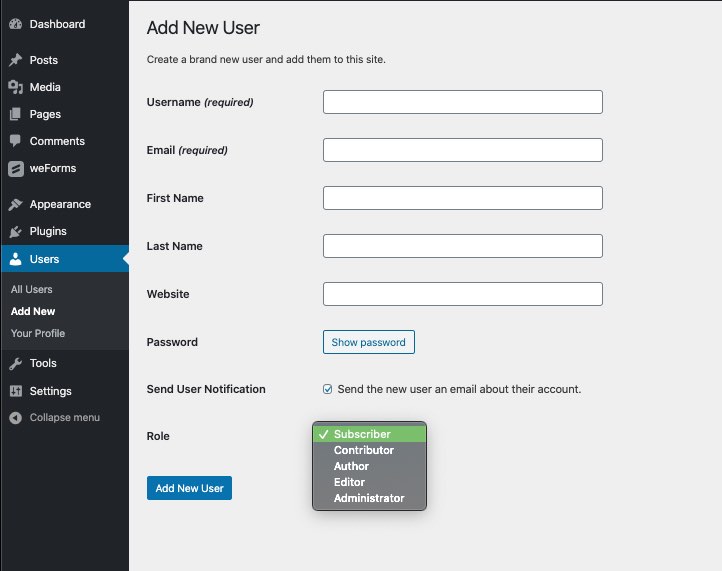
Start by adding a new user in WordPress. Assign the new user role you created. Use a unique email and username for this test user. This keeps testing separate from real users. Make sure the test user is active and ready to use.
Verifying Permissions
Log in as the test user to check access. Try to perform tasks allowed for the role. Check if the user can see the right menus and pages. Test forbidden actions to confirm restrictions work. Adjust role settings if permissions are incorrect.
Editing Or Removing Custom Roles
Editing or removing custom user roles in WordPress helps keep your site organized. Custom roles may need changes as your site grows. You can update what users can do or delete roles you no longer need. This keeps your user management clean and efficient.
Modifying Role Capabilities
To change a role’s capabilities, use a plugin or code. Plugins like User Role Editor let you add or remove permissions. You can allow users to publish posts, edit pages, or manage comments. Adjust roles carefully to avoid giving too much power. Save changes and test the role by logging in as that user.
Deleting Unused Roles
Remove roles that are no longer useful. Unused roles can clutter your WordPress site. Use a plugin or custom code to delete these roles safely. Deleting prevents confusion and potential security risks. Always back up your site before deleting roles.
Best Practices For Role Management
Managing user roles in WordPress is key to keeping your site safe and organized. Clear roles help control who can do what. This reduces mistakes and security risks. Following best practices makes role management easier and more effective.
Security Considerations
Give users only the permissions they need. Avoid giving admin rights to everyone. Limit access to sensitive areas. Use strong passwords and change them regularly. Monitor user activity to spot unusual actions fast. Keep WordPress and plugins updated for security patches.
Regular Role Audits
Check user roles often. Remove old or unused accounts. Verify that permissions match user tasks. Fix any wrong or extra privileges quickly. Use audit logs to track changes. Regular reviews keep your site clean and secure.
Frequently Asked Questions
What Is A User Role In WordPress?
A user role defines permissions for accessing and managing a WordPress site. It controls what users can and cannot do within the dashboard.
How To Add A New User Role In WordPress?
Use a plugin like “User Role Editor” or add custom code to your theme’s functions. php to create new roles with specific capabilities.
Can I Customize Existing WordPress User Roles?
Yes, you can modify existing roles by adding or removing capabilities using plugins or custom code to fit your site’s needs.
Why Create Custom User Roles In WordPress?
Custom roles help tailor access and permissions, improving security and workflow by assigning specific tasks to different users.
Conclusion
Adding a new user role in WordPress helps manage your site better. You control what users can see and do. This keeps your website safe and organized. The process is simple and quick to follow. Try creating roles that fit your site’s needs.
This way, you keep things clear for everyone involved. Keep your site running smoothly with the right user roles. You have the power to customize user access. Start managing your WordPress users more effectively today.


