

Are you looking to make it easier for visitors to reach you directly from your website? Adding a contact form to your WordPress footer is a smart way to do just that.
It keeps your site clean while giving your audience a simple, quick way to get in touch anytime. In this guide, you’ll learn exactly how to add a contact form to your footer, step by step—no complicated coding needed. Stick with me, and by the end, your website will be more user-friendly and ready to capture every potential lead.
Let’s get started!
Credit: wpforms.com
Choosing The Right Contact Form Plugin
Choosing the right contact form plugin is important for your WordPress site. It affects how visitors communicate with you. A good plugin is easy to use and fits your needs. It should work well with your theme and not slow down your site. This section helps you find the best plugin for your footer.
Popular Plugins For WordPress
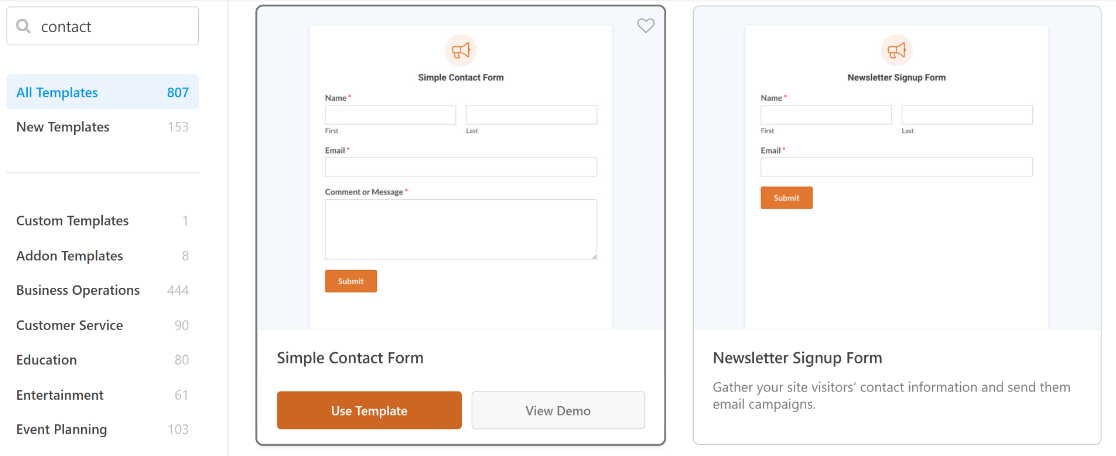
Many contact form plugins exist for WordPress. Some are simple, others have many features. Contact Form 7 is free and very popular. It offers basic forms and is easy to set up. WPForms has a drag-and-drop builder. It is good for beginners and offers templates. Ninja Forms is flexible and allows customizations. Gravity Forms is powerful but requires a paid license. Each plugin serves different needs and budgets.
Criteria For Selection
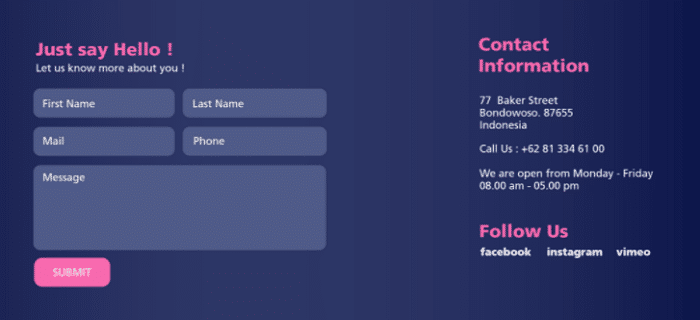
Choose a plugin that is easy to use and set up. Check if it works well with your WordPress version. It should support spam protection like CAPTCHA. Look for mobile-friendly forms. Your visitors must use the form on phones and tablets. Consider plugins that offer customization options. The form should match your site’s design. Speed is crucial; avoid plugins that slow your site. Finally, select plugins with good support and updates.
Credit: formidableforms.com
Installing And Activating The Plugin
Installing and activating a plugin is the first step to add a contact form in your WordPress footer. This process allows you to use ready-made tools without coding. It is simple and can be done in minutes.
Accessing The WordPress Dashboard
Start by logging into your WordPress dashboard. This is the control panel for your website. Use your username and password to enter. Once inside, you will see the main menu on the left side.
Searching And Installing The Plugin
Find the “Plugins” option in the menu and click on it. Then, click “Add New” at the top. Use the search bar to type “contact form.” A list of plugins will appear. Choose a popular one with good ratings. Click the “Install Now” button next to it.
Activating The Plugin
After installation, the button will change to “Activate.” Click it to start using the plugin. Activation allows the plugin to work on your site. You will see a new menu or settings option for the plugin. Now, you can create and place your contact form in the footer.
Creating A Contact Form
Creating a contact form is a key step to connect with your website visitors. It allows users to send messages easily without leaving the page. The form should be simple, clear, and user-friendly. This helps increase interaction and improves communication.
Follow these steps to create a contact form that fits well in your WordPress footer. Customize it to match your site style and meet your needs.
Setting Up Form Fields
Start by choosing the fields you want in the form. Common fields include name, email, and message. Add more fields if needed, such as phone number or subject. Keep the form short to avoid overwhelming visitors.
Make sure each field has a clear label. Use simple words that everyone understands. Set required fields so users must fill them before submitting.
Customizing The Form Appearance
Adjust the form’s colors, fonts, and size to match your site design. Use the form builder’s style options or add custom CSS. Ensure the text is easy to read on any device.
Place the form neatly in the footer area. Check the spacing and alignment to keep the footer clean. A well-designed form invites more users to contact you.
Configuring Notifications
Set up notifications to get emails when someone submits the form. Enter the email address that should receive the messages. Test the notification to confirm it works properly.
You can also customize the confirmation message users see after submitting. Use a polite note to thank them for reaching out. Clear feedback improves user experience and trust.
Adding The Contact Form To The Footer
Adding a contact form to your website footer helps visitors reach you easily. It creates a consistent way for users to get in touch. The footer is visible on every page, making it a smart place for a contact form. This section explains three simple methods to add a form to your footer in WordPress.
Using Widgets To Place The Form
WordPress widgets offer a quick way to add a contact form. Go to Appearance > Widgets in your dashboard. Find the Footer widget area. Drag and drop a Text or Custom HTML widget there. Paste your contact form shortcode or HTML code inside the widget. Save your changes. This method works well for themes with widget-ready footers. It requires no coding skills and updates instantly.
Embedding Shortcodes In Footer
Shortcodes let you embed contact forms created by plugins. Copy the shortcode from your form plugin. Navigate to Appearance > Customize > Widgets or Footer settings. Paste the shortcode in the footer widget or footer text area. Save and publish the changes. The form will appear at the footer on all pages. This method is simple and flexible for many WordPress themes.
Editing Footer.php For Custom Placement
For full control, edit the footer.php file in your theme. Use a child theme to avoid losing changes after updates. Access the file via Appearance > Theme Editor or FTP. Insert your contact form shortcode or HTML code where you want the form. Save the file and check your site footer. This method requires basic PHP and WordPress knowledge. It offers the most precise form placement.
Testing The Contact Form
Testing the contact form is an important step after adding it to your WordPress footer. It ensures the form works correctly and messages reach you. A well-tested form improves user experience and trust. This section explains how to test the form and fix common problems.
Submitting Test Entries
Start by filling out the form with sample data. Use different names and email addresses. Submit the form to check if it sends messages properly. Watch for confirmation messages on the screen. Check your email inbox for the test entry. Verify all fields display correct information. Repeat this process several times to ensure consistency. Testing helps find errors before users encounter them.
Troubleshooting Common Issues
Sometimes, forms do not send emails. Check your spam or junk folder first. Ensure your email address is correct in form settings. Disable any caching plugins that might block form submissions. Make sure your WordPress and plugins are up to date. Test with a simple default theme to rule out theme conflicts. Use SMTP plugins to improve email delivery. Clear your site cache and try again. These steps fix most common problems with contact forms.
Enhancing Form Functionality
Enhancing the functionality of your contact form in the footer boosts user experience. It makes the form more secure, smart, and easy to use. Good form features help visitors send messages without trouble. This section covers key ways to improve your contact form.
Integrating Spam Protection
Spam can fill your inbox with unwanted messages. Adding spam protection stops fake entries. Use tools like Google reCAPTCHA or simple math questions. These keep bots away but let real users submit forms easily. Spam protection saves time and keeps your site clean.
Adding Conditional Logic
Conditional logic shows or hides form fields based on user choices. This makes the form shorter and less confusing. For example, ask for phone number only if the user selects “Call me.” It creates a smooth and personalized experience for visitors.
Improving Mobile Responsiveness
Many users visit sites on phones or tablets. Your form must look good and work well on small screens. Use themes or plugins that support mobile-friendly design. Check that buttons are easy to tap and text is readable. A responsive form keeps visitors engaged and ready to contact you.
Credit: wpforms.com
Frequently Asked Questions
How To Add A Contact Form To WordPress Footer?
To add a contact form in your WordPress footer, use a plugin like Contact Form 7 or WPForms. Create the form, then insert its shortcode into your footer widget or theme’s footer. php file for easy display.
Which Plugins Work Best For Footer Contact Forms?
Popular plugins like Contact Form 7, WPForms, and Ninja Forms work well. They offer easy shortcode integration and customization for footer placement on any WordPress theme.
Can I Customize The Footer Contact Form’s Design?
Yes, most contact form plugins allow design customization. You can change colors, fonts, and layout to match your site’s footer style using plugin settings or custom CSS.
Is It Possible To Add Multiple Contact Forms In The Footer?
Yes, you can add multiple forms by placing different shortcodes in separate footer widgets or areas. This helps target different inquiries directly from the footer section.
Conclusion
Adding a contact form to your WordPress footer helps visitors reach you easily. It improves user experience and keeps your site organized. Follow simple steps, and you will see quick results. No coding skills are needed to complete this task.
Keep your form clear and easy to use. This small change can make a big difference for your site. Try it today and watch how it helps your communication grow. Simple, useful, and effective.


