
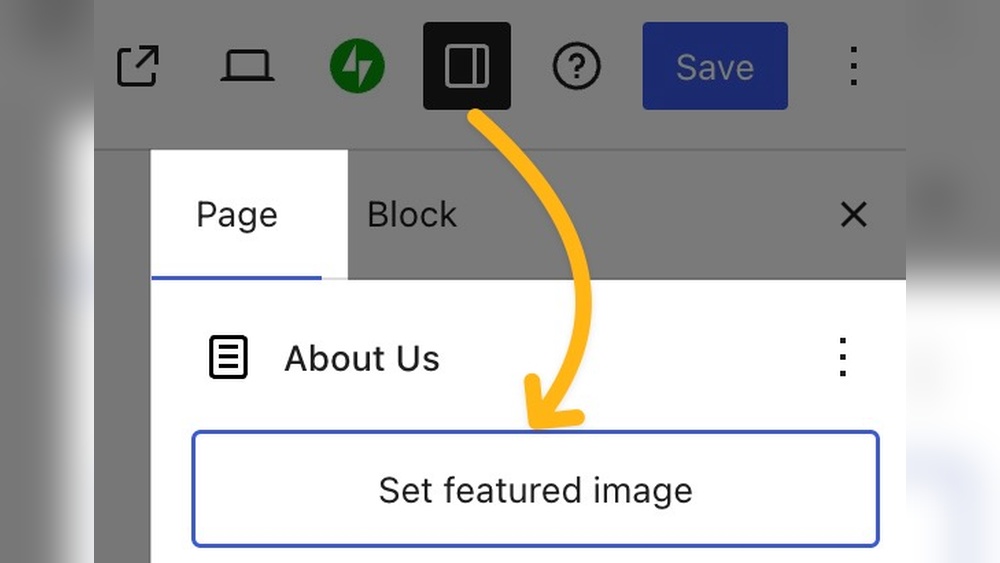
Are you looking to make your WordPress posts stand out instantly? Adding a featured image is one of the easiest ways to grab your readers’ attention and give your content a professional touch.
But if you’re unsure how to do it, don’t worry—you’re in the right place. You’ll discover simple, step-by-step instructions to add a featured image to your WordPress posts quickly and effectively. By the end, your posts will look more attractive, helping you draw in more visitors and keep them engaged.
Ready to boost your blog’s appeal? Let’s dive in!
Credit: www.hostinger.com
Why Featured Images Matter
Featured images play an important role in WordPress posts. They catch the reader’s eye and make the post more attractive. A good image can explain the post’s topic without words. It helps readers decide if they want to read more.
Search engines also notice featured images. These images can improve your post’s ranking. They help your content show up in image searches. This brings more visitors to your site.
Boosts Visual Appeal
People are drawn to pictures. A featured image makes your post stand out. It adds color and interest to your page. Posts with images look more professional and inviting.
Improves Social Media Sharing
Social media platforms use featured images. They show the image when your post is shared. This makes the post more clickable. A strong image can increase your shares and likes.
Enhances User Experience
Images help explain complex ideas quickly. They break up text and make reading easier. A featured image guides the reader’s focus. It keeps visitors engaged longer on your site.
Supports Seo Efforts
Search engines rank posts with images higher. Alt text on featured images adds keywords. This helps your post get found online. Proper images make your content SEO-friendly.
Preparing Your Image
Preparing your image before adding it as a featured image is important. It helps your post look good and load fast. A well-prepared image improves user experience and SEO. Follow simple steps to get your image ready.
Choosing The Right Size
Select an image size that fits your theme’s featured image space. Too large images slow down your site. Too small images look blurry or pixelated. A common size is 1200 by 628 pixels. This size works well for most WordPress themes and social sharing.
Optimizing For Web
Reduce the image file size without losing quality. Use tools like TinyPNG or ImageOptim to compress images. Smaller files load faster and save bandwidth. Optimized images improve your page speed score. Fast loading pages keep visitors on your site longer.
Selecting Image Format
Choose the right format for your image type. Use JPEG for photos with many colors. PNG works well for images with text or transparency. WebP is a modern format that offers good quality and small size. Check if your WordPress host supports WebP for better performance.
Accessing The WordPress Editor
Accessing the WordPress editor is the first step to adding a featured image to your post. The editor is where you write and format your content. It also allows you to set images, links, and other important elements for your post.
There are two main WordPress editors: the Classic Editor and the Block Editor (Gutenberg). Both provide easy ways to access your posts and add images. Knowing how to open the editor saves time and helps you work efficiently.
Accessing The Editor From The Dashboard
Log in to your WordPress dashboard. Look for the “Posts” menu on the left side. Click on “All Posts” to see the list of your posts. Find the post you want to edit. Click the post title or the “Edit” link below it. This opens the editor for that post.
Opening The Editor For A New Post
From the dashboard, click “Posts.” Then click the “Add New” button at the top. This opens a blank editor screen. You can start writing your post here. Later, you can add a featured image before publishing.
Switching Between Classic And Block Editors
Some sites use the Classic Editor plugin. Others use the default Block Editor. You can switch editors by installing or disabling plugins. Check your WordPress settings under “Writing.” Choose the editor that suits your needs. Both editors let you add featured images easily.
Credit: themesdna.com
Adding A Featured Image In Classic Editor
Adding a featured image to your WordPress post helps catch readers’ attention. The Classic Editor makes this process simple. You can quickly set an image that shows up as a thumbnail on your blog. This section explains how to add a featured image step-by-step in the Classic Editor.
Locating The Featured Image Box
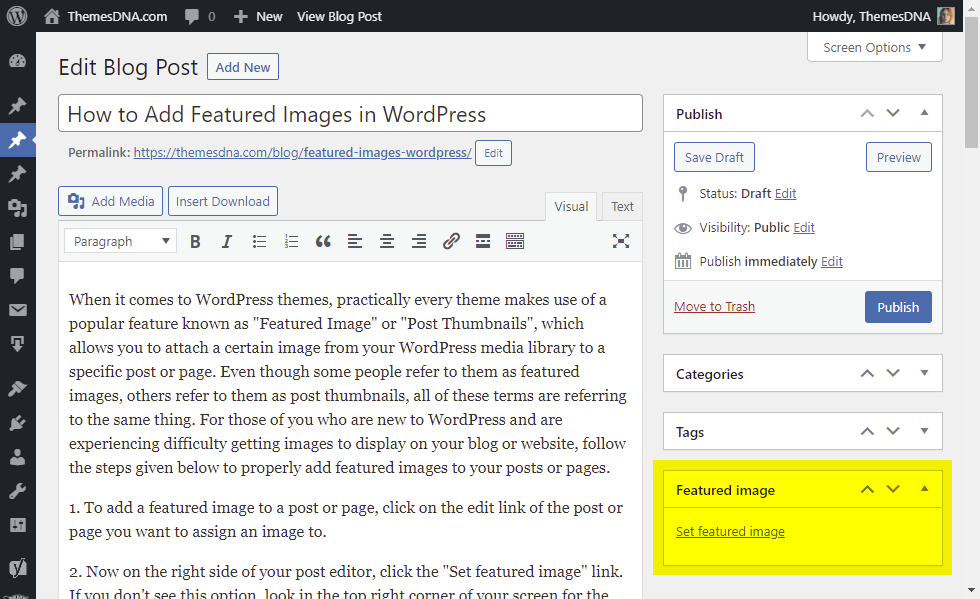
First, open your post in the Classic Editor. Scroll down the right sidebar. Look for the box labeled “Featured Image.” This box is where you will add your main image. If you don’t see it, check the “Screen Options” tab at the top right. Make sure “Featured Image” is checked.
Uploading Or Selecting An Image
Click the “Set featured image” link inside the box. This opens the WordPress media library. You can choose an image you already uploaded. Or click “Upload Files” to add a new picture from your computer. Select the image that best fits your post. Then click the “Set featured image” button.
Setting The Featured Image
After selecting the image, it appears in the Featured Image box. You can remove or change it by clicking the link below the picture. The image will now show on your post and homepage previews. Make sure to update or publish your post to save the changes.
Adding A Featured Image In Block Editor
Adding a featured image in the WordPress block editor helps your post stand out. It sets the tone and draws readers’ attention. The process is simple and quick. Follow the steps below to add a featured image easily.
Finding The Featured Image Panel
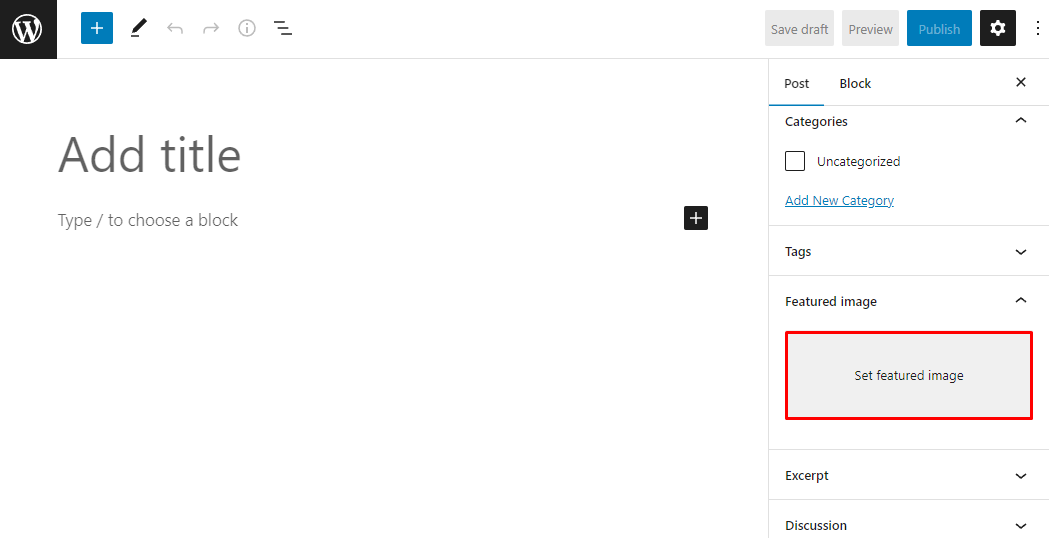
Start by opening your post in the block editor. Look to the right side of the screen. Scroll down until you see the “Featured Image” panel. If you do not see it, click the gear icon to open the settings. This panel is where you add your image.
Uploading Or Choosing An Image
Click the “Set featured image” button inside the panel. You can upload a new image from your computer. Or select one from your media library. Choose an image that matches your post topic. The right picture makes your post more attractive.
Confirming The Selection
After picking your image, click the “Set featured image” button. This confirms your choice and closes the media window. The image will now appear in the featured image panel. Check that it looks right and fits your post style.
Troubleshooting Common Issues
Troubleshooting common issues with featured images in WordPress helps keep your posts visually appealing. Problems can stop images from showing or cause confusion while editing. Fixing these issues ensures your site looks professional and works smoothly. Here are some common problems and how to solve them.
Featured Image Box Missing
The featured image box may not appear in the post editor. This happens if the option is disabled in screen settings. Click the “Screen Options” tab at the top right of the editor screen. Check the box for “Featured Image” to make it visible. Sometimes, a theme or plugin hides this box. Try switching to a default theme to test. If it shows up, the theme may need adjustment.
Image Not Displaying Correctly
Images might upload but not display properly on the post or homepage. Clear your browser cache to see changes. Check the image file size; large files can load slowly or fail. Resize images to reduce file size. Some themes require specific image dimensions. Follow the theme’s recommended size for best results. Also, check your site’s media settings for image quality options.
Plugin Conflicts
Plugins can interfere with featured images. Disable all plugins except the essential ones for testing. If the featured image works, reactivate plugins one by one. This helps find the plugin causing the conflict. Update all plugins and WordPress to their latest versions. Outdated software often causes compatibility problems. Use plugins from trusted sources only to avoid issues.
Best Practices For Featured Images
Featured images play a key role in making your WordPress posts attractive. They catch the reader’s eye and set the tone for your content. Following best practices for featured images helps your blog look professional and improves user experience. Here are some important tips to keep in mind.
Consistent Image Style
Use images with a similar style across all posts. This creates a unified and clean look for your website. Choose a color scheme and stick to it. Avoid mixing cartoonish and realistic photos in the same blog. Consistency builds trust and recognition.
Using Captivating Visuals
Select images that clearly relate to your post topic. Choose high-quality pictures that grab attention quickly. Avoid blurry or pixelated images. Bright and clear photos work best. Think about what will make readers want to click and read more.
Seo Considerations
Optimize your featured images for search engines. Use descriptive file names with keywords. Add alt text that explains the image briefly. This helps search engines understand your content better. It also improves accessibility for users with disabilities.
Credit: www.hostinger.com
Frequently Asked Questions
How Do I Set A Featured Image In WordPress?
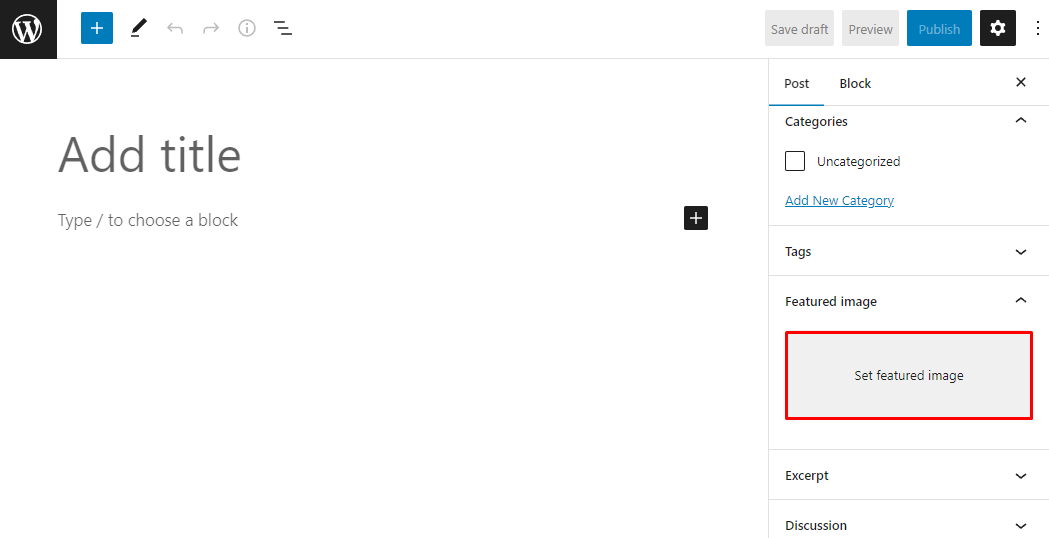
To set a featured image, open your post editor. Find the “Featured Image” box on the right sidebar. Click “Set featured image,” select or upload an image, then click “Set featured image. ” Finally, update or publish your post to save changes.
Why Is A Featured Image Important For WordPress Posts?
Featured images attract attention and improve post visibility. They enhance your website’s design and aid social media sharing. Also, featured images boost SEO by helping search engines understand your content better.
Can I Change The Featured Image After Publishing?
Yes, you can change the featured image anytime. Open the post editor, go to the “Featured Image” box, click “Remove featured image,” then add a new one. Update the post to apply the change immediately.
What Size Should A WordPress Featured Image Be?
Use images at least 1200×628 pixels for best results. This size ensures good display on most themes and social platforms. Check your theme’s documentation for specific featured image size recommendations.
Conclusion
Adding a featured image makes your WordPress post stand out. It helps readers see what your content is about. The process is simple and quick to learn. Choose a good image that fits your topic. Always add the image before publishing your post.
This small step improves your site’s look and feel. Keep practicing to get better at it. Your posts will look more professional and inviting. Try adding featured images to all your future posts. It’s a small change with a big impact.


