
Are you finding it challenging to set up email for your domain on Namecheap? You’re not alone.
Many users face hurdles when it comes to adding MX records, which are crucial for directing email messages to your domain’s mail server. But don’t worry; you’re in the right place. By mastering the simple steps outlined here, you’ll ensure your emails flow smoothly and efficiently.
This guide will walk you through the process, empowering you to manage your domain with confidence. Keep reading to discover how you can effortlessly add MX records to your Namecheap account and streamline your email communication.
Understanding Mx Records
Adding MX records in Namecheap is simple. Begin by accessing your Namecheap account dashboard. Navigate to the ‘Advanced DNS’ tab and select ‘Add New Record. ‘ Input the priority and mail server details. Save your changes and verify the setup.
Understanding MX Records is essential for anyone managing emails for their domain. MX, or Mail Exchange, records are a type of DNS record that directs email to a mail server. They play a crucial role in ensuring your emails reach their intended destination without any hiccups. If you’re using Namecheap and need to add an MX record, understanding what these records do can make the process much smoother. ###What Are Mx Records?
MX records specify the mail server responsible for receiving emails on behalf of a domain. They tell the world which server should accept your domain’s email. Each MX record has a priority value, indicating the order in which servers should be used. A lower number means higher priority. This hierarchy ensures that if one server fails, another can take over. ###Why Are Mx Records Important?
MX records ensure that your emails find their way to your inbox. Without them, your emails could get lost in cyberspace. When I first set up my domain, I overlooked MX records. It led to a chaotic day of missed emails. Understanding their importance saved me from future headaches. ###How Do Mx Records Work?
MX records work by pointing to the mail server that should handle your emails. When someone sends an email to your domain, their server checks your MX records to find out where to deliver the message. Imagine you’re mailing a letter; the MX record is like the postal address for your email. It’s crucial to ensure these records are accurate, or your emails might end up in the wrong place. ###Common Mistakes With Mx Records
One common mistake is setting incorrect priority values. This can lead to emails being routed inefficiently. Another pitfall is using outdated mail server addresses. If you recently switched email providers, double-check your MX records. Your emails depend on it. Have you ever experienced missed emails because of incorrect settings? ###How To Check Your Mx Records
You can check your MX records using DNS lookup tools online. These tools allow you to see where your domain’s emails are being directed. They help verify that your settings are correct. It’s a simple way to ensure your emails are on the right track. Have you verified your records recently? ###Practical Tips For Managing Mx Records
Regularly review your MX records, especially if you change email providers. Keep your priority numbers consistent and logical. Document any changes you make for future reference. This practice can save you a lot of troubleshooting time. What steps have you taken to manage your MX records effectively? By understanding MX records, you can confidently manage your email settings on Namecheap. This knowledge not only ensures the smooth delivery of your emails but also empowers you to troubleshoot issues effectively.Accessing Your Namecheap Account
To add an MX record in your Namecheap account, first log in to your dashboard. Navigate to the ‘Domain List’, then click ‘Manage’. Under the ‘Advanced DNS’ tab, you can add your MX record by selecting ‘Add New Record’. Save changes to update your domain settings.
Accessing your Namecheap account is the first step in managing your domain settings, including adding MX records for email configuration. Whether you’re setting up a new email system or tweaking your current settings, getting into your account is essential. This process is straightforward, but having a clear path makes it quicker and hassle-free.Step 1: Login To Your Namecheap Account
Start by navigating to the Namecheap website. You can do this on your computer or mobile device. Once there, click the “Login” button located at the top right corner of the homepage. Enter your username and password. If you’ve forgotten your password, use the “Forgot Password” link to reset it.Step 2: Access Your Dashboard
After logging in, you’ll be directed to your account dashboard. Here, you can see an overview of your domains and services. Take a moment to familiarize yourself with the layout. Knowing where everything is can save you time later.Step 3: Navigate To Domain List
On your dashboard, click on the “Domain List” tab. This is usually on the left-hand side. You’ll see a list of domains you own. Select the domain for which you want to add or update MX records. Clicking on the domain name will take you to its management page.Step 4: Explore The Advanced Dns Settings
On the domain management page, find the “Advanced DNS” tab. Here, you can manage DNS settings, including MX records. Use this section to view, add, or edit your domain’s MX records. — Remember, accessing your account is just the beginning. Have you found any tips or shortcuts in your Namecheap experience? Share your thoughts and help others streamline their process!Navigating To Domain List
Access the Domain List in Namecheap to manage MX records easily. Locate your domain and select “Manage” to proceed. Then, navigate to the “Advanced DNS” tab to add MX records efficiently.
Navigating to the Domain List in Namecheap can seem like a small step in the process of adding an MX record, but it’s a crucial one. Imagine you’re setting the foundation for your email setup. Without this step, you’re like a traveler without a map. So, let’s make sure you’re on the right path. ### First things first, you’ll need to log in to your Namecheap account. Head over to the Namecheap website and enter your login details. If you’ve ever forgotten a password, you know how frustrating it can be. Ensure your credentials are handy to avoid any delays. ###Finding The Dashboard
Once inside, you’ll see your dashboard. It’s like your control center, displaying all your domains and services. Look for the “Domain List” section—it’s usually on the left-hand side of the dashboard. Think of this as the main directory where all your domain activities begin. It’s always good practice to familiarize yourself with this area. ###Selecting The Right Domain
In the Domain List, you’ll find all the domains you own. Click on the “Manage” button next to the domain you want to add an MX record to. Choosing the right domain is crucial. Imagine sending your mail to the wrong house. Double-check to ensure you’re working with the correct domain. ###Exploring The Domain’s Management Page
After selecting “Manage,” you’ll be taken to the domain’s management page. Here, you have a plethora of options related to your domain. This is where the magic happens. Navigate to the “Advanced DNS” tab, where you’ll find the settings to add your MX record. This tab is your gateway to advanced domain configurations. ###Understanding The Importance Of Mx Records
Before diving into adding records, it’s essential to understand their role. MX records direct email to your mail server. Without them, emails won’t reach their destination. Have you ever wondered why some emails get lost? Incorrect MX records could be the culprit. Ensuring they’re set up correctly is vital for seamless email communication. ###Ensuring Accuracy In Every Step
Accuracy is key. Each click and entry needs precision. A minor error can lead to major email disruptions. Remember a time when a tiny typo caused a big problem? The same principle applies here. Double-check each step to save yourself from potential headaches later. Navigating Namecheap’s Domain List is more than just a step—it’s the foundation of your email setup. Each action, from logging in to selecting the correct domain, ensures your MX records are set accurately and effectively. Keep these insights handy, and you’ll navigate this process like a pro!Selecting Domain For Mx Record Update
Choosing the right domain for MX record updates on Namecheap involves simple steps. Access the Namecheap dashboard, select your domain, and navigate to the DNS settings. Add the MX record correctly to ensure smooth email delivery.
Selecting the right domain for your MX record update in Namecheap is a crucial step that ensures your emails are directed correctly. This process can seem daunting, but breaking it down into manageable steps makes it easier. Let’s walk through the essentials to make your email setup seamless and stress-free. ###Selecting The Right Domain
Before you add an MX record, you must choose the domain that needs updating. This step is crucial because each domain can have different email settings. Carefully select the domain you want to modify to avoid any mix-ups. ### Log into your Namecheap account with your credentials. Navigate to the “Domain List” on the dashboard. Here, you’ll see all your domains listed. ###Identifying The Domain For Mx Record Update
Scroll through your domain list to find the one you need to update. If you manage multiple domains, use the search bar to quickly locate the specific domain. This ensures you don’t accidentally modify the wrong domain. ###Practical Tips For Domain Selection
Double-check the domain name to confirm it’s the correct one. Ensure your domain is registered with Namecheap to perform the update. If you have a personal story of selecting the wrong domain, remember that learning from mistakes is part of the process. ###Why Domain Selection Matters
Choosing the right domain affects email deliverability. Selecting the wrong one can lead to lost emails and communication issues. Ask yourself: is this the domain I actively use for email communications? Updating MX records requires precision and attention to detail. By following these steps, you ensure your domain selection is accurate, paving the way for successful email management. How do you plan to keep track of your domains to avoid similar issues in the future?Accessing Advanced Dns Settings
Accessing advanced DNS settings on Namecheap allows you to manage domain records. This is crucial for configuring email services, including adding MX records. By understanding how to navigate these settings, you can ensure your domain functions efficiently. Let’s explore how to access these settings and add MX records.
Start by logging into your Namecheap account. Use your username and password. Navigate to the dashboard, where your domains are listed. Select the domain you want to modify. This is your entry point to advanced DNS options.
Locating Domain List
Once logged in, find the “Domain List” tab. This tab displays all your registered domains. Click on the domain needing MX record changes. This action leads you to domain-specific settings.
Entering Advanced Dns Settings
After selecting the domain, look for the “Advanced DNS” tab. This section contains all DNS-related configurations. Click to enter. You’ll find options for different types of DNS records. MX records are among these options.
Understanding Dns Records
DNS records define how your domain behaves online. They manage website and email functions. MX records specifically direct email traffic. Configuring them correctly ensures emails reach the right destination.
Adding Mx Records
In the “Advanced DNS” section, locate MX records. Click “Add New Record.” Fill in the necessary details. Ensure priority and destination are correct. Save changes to finalize the setup. Your domain is now ready to handle emails properly.

Credit: support.titan.email
Locating Mx Record Section
Discover how to find the MX Record section in Namecheap settings. This area allows users to manage email routing. Easily add or update MX records to improve email delivery.
Locating the MX record section in your Namecheap account might seem daunting at first. However, with a bit of guidance, you’ll find it’s a straightforward process. Imagine being able to manage your email settings with ease, knowing exactly where to go and what to do.Step 1: Logging Into Your Namecheap Account
First, make sure you’re logged into your Namecheap account. Use your username and password to access your dashboard. If you don’t remember your login details, consider resetting your password to avoid any delays.Step 2: Navigating To The Domain List
Once logged in, head over to the Domain List section, which is typically found in the left-hand menu. This is where you can manage all your registered domains. Do you see your domain listed? Click on ‘Manage’ beside the domain you wish to edit.Step 3: Accessing The Advanced Dns Settings
After selecting ‘Manage,’ you’ll be taken to a page with multiple tabs. Click on the ‘Advanced DNS’ tab. This is where you’ll find a variety of DNS settings, including the MX records. It’s like opening a toolbox with all the tools you need to manage your domain.Step 4: Locating The Mx Record Section
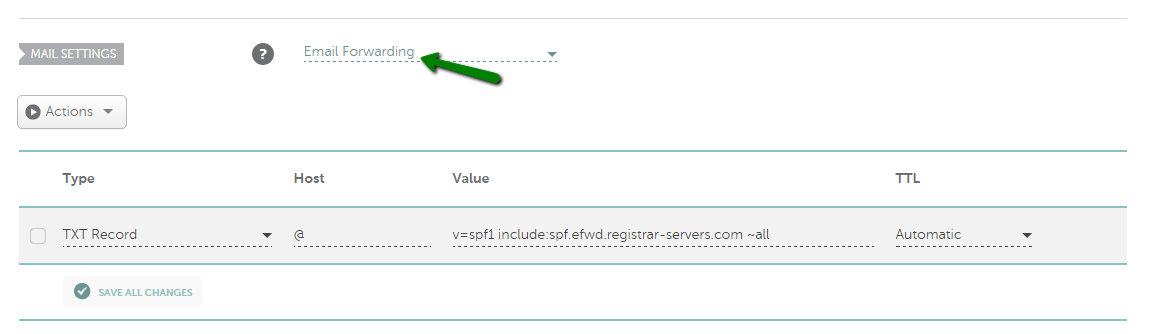
Scroll down to find the ‘Mail Settings’ or ‘Mail Servers’ section. This is where your MX records are stored. If you’re unsure what to look for, MX records typically have a priority number and a mail server name.Step 5: Adding Or Editing Mx Records
In the MX record section, you can add a new record or edit existing ones. Click ‘Add New Record’ and select ‘MX Record’ from the dropdown. Enter the details provided by your email service provider, ensuring accuracy to avoid email delivery issues.Step 6: Saving Your Changes
Once you’ve added or edited your MX records, don’t forget to save your changes. A simple click on ‘Save All Changes’ ensures that your updates are applied. It’s like hitting ‘send’ on an email, ensuring your message reaches its destination. Locating the MX record section might initially require a few clicks, but it’s a skill you’ll appreciate having. Have you ever faced challenges managing MX records? Knowing where to find and edit these settings can save you from potential email disruptions.Adding New Mx Record
Navigating Namecheap settings to add a new MX record is straightforward. Access your domain’s DNS settings, locate the MX record section, then input the required mail server details. Save changes to ensure proper email routing.
Adding new MX records in Namecheap is crucial for directing your email messages properly. Have you ever missed an important email because your MX records were not set up correctly? Ensuring these settings are correct can make a significant difference in your email communication. Let’s dive into the specifics of adding a new MX record to your Namecheap account.Entering Mx Record Details
Log into your Namecheap account and navigate to the Domain List. Here, select the domain you want to modify. Under the domain, find the Advanced DNS tab. Now, add the new MX record by selecting “Add New Record.” Choose “MX” from the dropdown menu. Enter the mail server details your email provider has given you. Ensure that the domain field is left blank or use the “@” symbol to represent the root domain. The mail server should be entered precisely as provided by your email host.Setting Priority For Mx Record
Setting the priority for your MX record is like assigning a rank to your mail servers. The lower the number, the higher the priority. This means email servers will attempt to send mail to the server with the lowest number first. Consider if you have multiple mail servers. Assigning different priorities ensures emails still reach you if one server fails. This redundancy can be a lifesaver for your communication. Have you thought about what priority numbers to use? Typically, primary servers have a priority of 10, and backup servers might use 20 or 30. Adjust these according to your setup needs. Adding an MX record in Namecheap isn’t just about entering data. It’s about ensuring reliable communication for your business or personal needs. By following these steps, you ensure your emails are directed correctly, helping you stay connected.Verifying Mx Record Changes
After adding an MX record in Namecheap, verifying changes is crucial. This ensures your email services work correctly. Changes might take time to update globally. It’s essential to confirm the new settings are active and effective. This process involves a few steps, such as checking DNS propagation and testing email functionality.
Checking Dns Propagation
DNS propagation can take up to 48 hours. Use online tools to check propagation status. These tools show if changes have spread across global servers. Enter your domain and select the MX record type. The results will indicate if the new settings are visible worldwide. Patience is key during this waiting period.
Testing Email Functionality
Once propagation is complete, test your email functionality. Send a test email to your address. Check if it arrives without issues. Also, send an email from your address to another account. This ensures outgoing emails function properly. If problems arise, review your MX settings. Ensure they match your email provider’s specifications.
Troubleshooting Common Issues
Troubleshooting common issues with MX records can be challenging. Many users face problems during setup on Namecheap. Proper guidance can simplify this task. This section offers solutions to frequent obstacles. Focus on resolving DNS propagation delays and addressing incorrect MX entries. Simplified steps ensure successful email setup.
Resolving Dns Propagation Delays
DNS propagation can take up to 48 hours. Delays cause emails to malfunction. Be patient and check your settings. Use online tools to monitor DNS status. Ensure all details match Namecheap’s requirements. Double-check your DNS settings. Verify your domain’s nameservers. They should point to Namecheap.
Addressing Incorrect Mx Entries
Incorrect MX entries lead to email delivery issues. Verify your entries twice. Ensure they match your email provider’s settings. Small errors can cause big issues. Use Namecheap’s DNS management tool. It helps in correcting entries. Enter the correct priority and destination. Save changes and wait for propagation.
Credit: www.namecheap.com
Tips For Managing Mx Records
Adding MX records on Namecheap requires accessing the DNS settings. Identify the mail server and enter its address. Confirm changes to ensure email delivery functions smoothly. Proper setup is crucial for directing emails correctly.
Managing MX records on Namecheap is crucial for ensuring your emails reach their destination without a hitch. Whether you’re a business owner or a hobbyist, knowing how to effectively manage these records can make all the difference in communication reliability. Let’s dive into some practical tips that can streamline your email management process and enhance security.Regularly Updating Records
Keeping your MX records up-to-date is like tuning a car; it ensures everything runs smoothly. New updates from your email provider can optimize performance and enhance security. Schedule regular checks to see if your email provider has made any changes or improvements. Consider setting reminders to verify your MX records quarterly. This proactive approach can prevent unexpected email disruptions.Ensuring Email Security
Email security should be a top priority for anyone managing MX records. An unsecured email system is an open invitation for hackers. Using strong passwords and enabling two-factor authentication adds layers of protection. Think about the last time you had a security scare. How did it impact your workflow? Regularly reviewing your security settings can prevent such stressful situations. Consider using encryption tools if your emails contain sensitive information. Protecting your data is not just about peace of mind; it’s about safeguarding your reputation. Have you ever thought about the consequences of a breached email system? It’s not just about lost messages—it’s about trust. Managing MX records efficiently requires diligence and foresight. Regular updates and strong security measures can transform your email management from a chore to a seamless experience. The effort you put into managing these records is a direct investment in your communication success. Can you afford to overlook these essential practices?
Credit: www.lemwarm.com
Frequently Asked Questions
Where To Add Mx Records In Namecheap?
Log in to your Namecheap account. Go to the “Domain List” tab. Click “Manage” next to your domain. Select the “Advanced DNS” tab. Scroll to “Mail Settings” and choose “Custom MX”. Add your MX records and save changes.
How Do I Add A Mx Record To My Domain?
Log in to your domain provider’s dashboard. Locate DNS settings. Click “Add Record,” select MX type, and enter details. Save changes.
How To Add A Dns Record On Namecheap?
Log in to Namecheap and navigate to “Domain List”. Select your domain, click “Manage”, then “Advanced DNS”. Add or edit records under “Host Records”. Save changes.
How To Add Spf Record In Namecheap?
Log in to Namecheap and navigate to the “Domain List. ” Click “Manage” next to your domain. Select “Advanced DNS,” then “Add New Record. ” Choose “TXT Record” and enter your SPF details. Save changes.
Conclusion
Adding an MX record in Namecheap is simple. Follow the steps carefully. Ensure every detail is correct. This process helps direct your email. Proper setup prevents issues. Always double-check your entries. Mistakes can cause mail problems. Namecheap’s interface is user-friendly.
You can easily manage DNS settings. Don’t rush the process. Accuracy is key for smooth email delivery. If you face challenges, consult Namecheap support. They offer useful guidance. With correct settings, email functions seamlessly. Your communication stays efficient and reliable.
Understanding MX records enhances your email handling skills. Keep this guide handy for future reference.


