
If you’ve ever dreamed of creating your own train platform, you’re in the right place. Whether you’re building a model railway or planning a DIY project, knowing how to make a train platform can transform your setup from ordinary to impressive.
You might wonder what materials work best or how tall your platform should be for the perfect look and function. This guide will walk you through every step, using simple tools and easy techniques you can follow right now. Ready to build a platform that stands out and brings your trains to life?
Let’s dive in and make your project a success!
Choosing Materials
Choosing the right materials is key to making a strong train platform. The materials affect the platform’s look, feel, and how long it lasts. Pick materials that match your skill level and the tools you have. Some materials work better for indoor use, while others handle outdoor conditions well. This guide shows different material options for building your platform.
Wood Options
Wood is a popular choice for train platforms. It is easy to cut, shape, and paint. Plywood and pine are common types. Plywood is strong and smooth, ideal for a clean surface. Pine is soft and easy to work with but may need sealing. Wood can be heavy but offers a natural look. Use wood glue and nails to join pieces firmly. Sand the edges for a neat finish.
Cardboard And Foam
Cardboard and foam are light and cheap materials. They are good for quick projects or small models. Foam board can be cut with a knife and shaped easily. Cardboard is best for simple designs but may not last long. Both materials need paint or coating to protect them. Avoid water or heavy pressure, as these can damage the platform. These materials suit beginners and kids well.
Metal And Plastic
Metal and plastic offer durability and a modern look. Thin sheets of aluminum or steel can be used for strong platforms. Plastic sheets like acrylic or PVC are lightweight and easy to clean. These materials require special tools like metal cutters or plastic glue. They resist weather better than wood or foam. Metal and plastic are good for outdoor or long-lasting platforms.
Platform Height And Size
Platform height and size are key for a realistic train platform. The right height lets trains and passengers connect smoothly. Size affects how many passengers the platform can hold and how it fits into your layout. Understanding these details helps create a believable scene.
Standard Platform Heights
Most real train platforms have a height between 30 and 48 inches. This range fits most passenger trains for easy boarding. Heights vary by country and train type. For example, commuter trains use lower platforms, while high-speed trains have higher ones. Knowing these standards helps you pick the right height for your model.
Measuring For Scale Models
Scale model platforms shrink real sizes to fit your layout. Use the scale ratio to calculate the platform height and length. For HO scale, divide real measurements by 87. For N scale, divide by 160. Measure carefully to keep proportions right. Accurate size makes your model look correct and neat.
Adjusting For Realism
Adjust platform height slightly to match your specific train models. Some models may need a bit higher or lower platforms for better fit. Add small details like edge markings or ramps to improve realism. Also, consider platform width for passenger space. These tweaks give your train platform a more authentic feel.
Tools And Supplies
Creating a train platform requires the right tools and supplies. Gathering these items before starting saves time. Each tool plays a key role in building a sturdy platform. Understanding their use helps in working efficiently and safely.
Basic Hand Tools
Hand tools are essential for precise work. A hammer drives nails into wood. Screwdrivers help fasten screws tightly. A measuring tape ensures correct dimensions. A handsaw cuts wood pieces accurately. Pliers hold small parts firmly. A carpenter’s square checks right angles.
Power Tools
Power tools speed up the building process. A drill makes holes quickly and easily. A jigsaw cuts curved and straight lines. A circular saw handles large wood pieces. A sander smooths rough surfaces perfectly. These tools require safety gear and careful handling.
Adhesives And Fasteners
Strong adhesives keep parts stuck together. Wood glue bonds wooden pieces firmly. Nails and screws hold structures in place. Use screws for stronger, lasting joints. Choose fasteners based on material thickness. Proper fastening ensures platform stability and durability.

Credit: www.youtube.com
Designing Your Platform
Designing your train platform sets the foundation for a realistic model. Careful planning helps create a functional and appealing space. This section guides you through key design steps. Focus on layout, curves, and fine details to bring your platform to life.
Layout Planning
Start by deciding the platform’s size and shape. Consider how many tracks it will serve. Leave space for passengers and accessories. Use graph paper or digital tools to sketch your ideas. Plan easy access points and safe walking areas. Keep proportions realistic to enhance the model’s look.
Incorporating Curves
Curves add visual interest and realism to your platform. Use flexible materials to shape smooth bends. Mark the curve radius carefully to fit your train tracks. Avoid sharp angles that look unnatural or block trains. Test the curve with your model trains before fixing it permanently.
Adding Details
Details bring your platform to life. Add benches, signs, and lighting for authenticity. Use paint and textures to mimic concrete or wood. Include small elements like trash cans and ticket booths. These touches make the scene inviting and believable. Keep details balanced to avoid clutter.
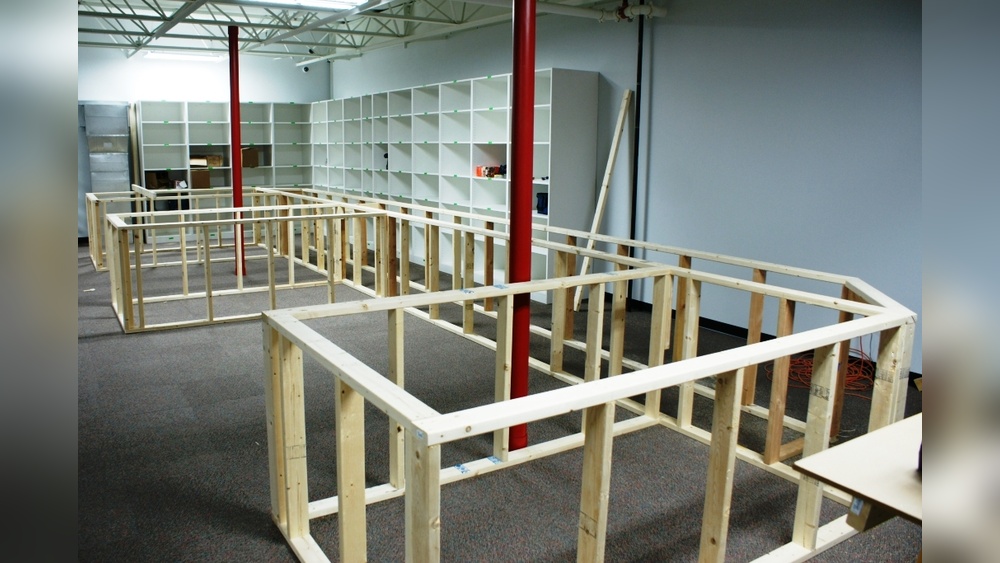
Building The Base
Building the base is the first step in creating a sturdy train platform. A strong base supports the entire structure and keeps it stable. Careful planning and precise work help ensure the platform lasts long.
Start with simple materials and tools. Focus on making clean cuts and solid connections. Preparing the surface well will give the platform a smooth and realistic look.
Cutting And Shaping
Begin by measuring the wood or material for your base. Use a saw to cut pieces to the correct size. Keep edges straight and smooth for a neat fit. Sand rough areas to avoid splinters and gaps. Accurate cutting ensures the frame fits together tightly.
Assembling The Frame
Join the cut pieces to form a strong frame. Use screws or nails to secure joints firmly. Check that corners are square with a carpenter’s square. Add extra supports if needed to prevent wobbling. A well-built frame holds the platform steady under weight.
Surface Preparation
Cover the frame with plywood or a flat board for the platform surface. Attach it firmly with screws or nails. Sand the surface smooth to remove bumps and rough spots. Clean the surface of dust and debris before painting or adding details. A smooth surface improves the look and feel of the platform.

Credit: www.reddit.com
Constructing The Platform Surface
Constructing the platform surface is a key step in building a train platform. It creates the flat area where trains stop and passengers board. A smooth and sturdy surface improves the platform’s look and function. Follow a simple process to build a strong, realistic surface.
Layering Materials
Start by laying a base layer of plywood or foam board. This gives a solid foundation. Add a layer of thin wood or cardboard on top for detail. Use glue to fix each layer firmly. Layering materials builds strength and adds depth to the platform.
Sanding And Smoothing
Once the layers dry, sand the surface carefully. Use fine sandpaper to smooth rough edges and bumps. Sanding creates an even surface for painting. Check for uneven spots and sand until the platform feels smooth to touch.
Painting And Finishing
Choose paint colors that match real train platforms. Apply a base coat evenly using a brush or spray. Add details like lines or signs after the base dries. Seal the paint with a clear finish to protect the surface. This step gives the platform a polished, realistic look.
Adding Station Features
Adding station features improves the look and use of your train platform. These details make the platform more comfortable and safer. They also help passengers find their way. Focus on key elements like seating, lighting, and signs. Each feature plays a role in a smooth station experience.
Benches And Shelters
Benches give passengers a place to rest while waiting. Choose sturdy, weather-resistant materials for durability. Place benches in shaded or covered spots. Shelters protect from rain and sun. Design shelters with open sides for airflow and good visibility. These features keep travelers comfortable and safe.
Lighting Options
Good lighting improves safety and visibility at the station. Use LED lights for energy savings and bright illumination. Position lights near benches, walkways, and platform edges. Consider motion sensors to save power during low traffic times. Proper lighting helps passengers feel secure, especially at night.
Signage And Accessories
Clear signs guide passengers to the right train and exits. Use large, simple fonts and high-contrast colors for easy reading. Include maps, schedules, and safety instructions. Add accessories like trash bins and bike racks to keep the area clean and organized. These small touches improve the overall station experience.
Integrating With Train Tracks
Integrating a train platform with the train tracks is a key step in building a functional railway setup. Proper integration ensures safety, smooth train operations, and a realistic appearance. This process involves careful measurement and secure attachment to the track base.
The platform must align perfectly with the train tracks. Any misalignment can cause accidents or damage to trains. This section covers how to align platform edges, secure the platform to the track base, and ensure enough clearance for trains.
Aligning Platform Edges
Start by measuring the distance between the rails accurately. The platform edge should run parallel to the tracks. Use a straightedge or level to check alignment. Mark the platform edges clearly before installation. This step prevents gaps or uneven edges near the rails. Keep the platform edge close but not touching the rails to avoid interference with train wheels.
Securing To Track Base
Secure the platform firmly to the track base for stability. Use screws or brackets designed for railway use. Avoid loose fittings as they cause movement during train passage. Check that the platform surface remains level and does not shift under weight. Proper securing also protects the platform from weather damage and vibrations.
Ensuring Train Clearance
Measure the clearance between the platform and train cars carefully. Allow enough space for train doors and overhangs to open safely. Consider the height of the platform to match train floor levels for easy boarding. Avoid narrow gaps that can trap wheels or cause accidents. Consistent clearance improves passenger safety and train operation.
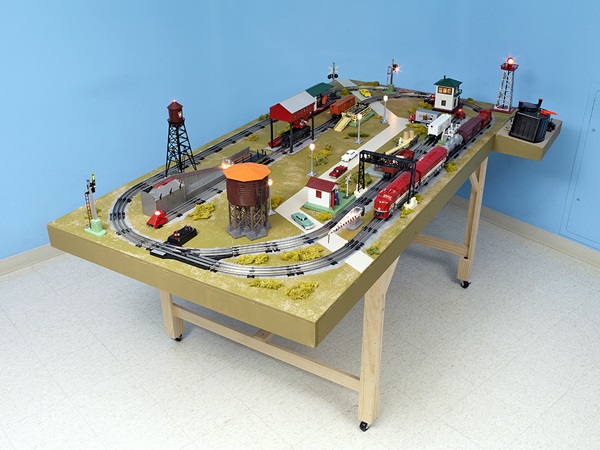
Credit: www.trains.com
Frequently Asked Questions
What Is The Best Material For Model Train Platform?
Wood is the best material for model train platforms due to its durability, ease of shaping, and realistic appearance. Plywood and basswood are popular choices. These woods support painting and detailing well, enhancing the model’s authenticity and longevity.
How Tall Should A Train Platform Be?
A standard train platform height ranges from 760 mm to 1,100 mm (30 to 43 inches) above the rail. This ensures safe, easy boarding and aligns with train doors. Heights vary by country and train type, following local regulations and accessibility standards.
How Much Does It Cost To Build A Train Track?
Building a train track typically costs $1 million to $5 million per mile. Costs vary by terrain, materials, and labor.
How To Make A Train Station Create?
To create a train station, plan the layout, build platforms using wood or sturdy materials, add tracks, and include shelters. Decorate with signs and benches for realism. Ensure platforms match train height for easy boarding. Assemble components securely and test the setup before use.
Conclusion
Building a train platform is simpler than it seems. Start with a clear plan and gather basic materials. Focus on measuring and cutting accurately for a neat finish. Use sturdy wood or cardboard depending on your model type. Take your time assembling each part carefully.
A well-made platform adds charm and realism to your train setup. Enjoy the process and watch your miniature railway come alive! Keep practicing to improve your skills and create even better platforms.


