
Are you looking to spice up your WordPress site with a fresh new theme? Uploading a theme via FTP might sound technical, but it’s a straightforward process that puts you in control.
Imagine transforming your website’s look and feel with just a few clicks. Mastering the FTP method not only helps when themes won’t upload the usual way, but it also empowers you to tackle other technical tasks with confidence. In this guide, you’ll discover how to seamlessly upload your desired theme using FTP, ensuring your site stands out and functions smoothly.
Let’s dive in, and by the end, you’ll be ready to give your WordPress site a stunning makeover.
Credit: www.templatemonster.com
Preparing For The Upload
Start by picking a theme that fits your website. Ensure the theme is compatible with your version of WordPress. Check user reviews and ratings. This helps in picking a reliable theme. Download the theme file to your computer. Usually, it comes as a .zip file.
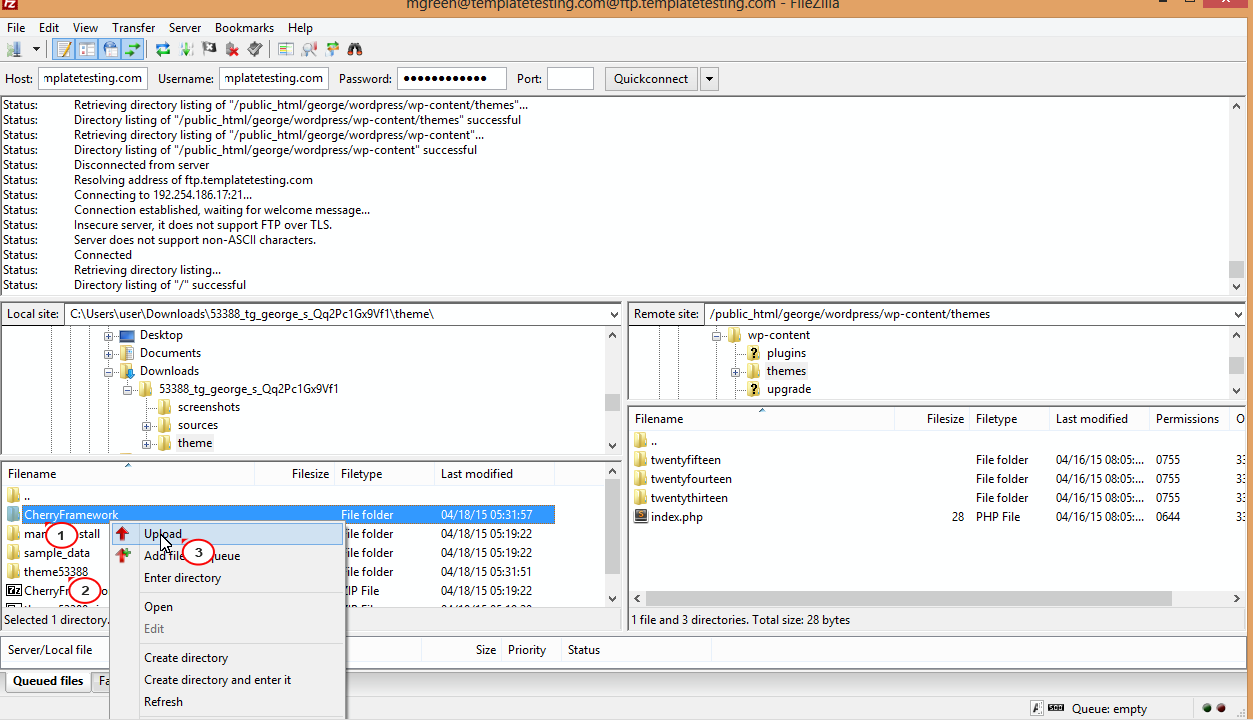
An FTP client helps move files to your website. FileZilla is a popular choice. It’s free and easy to use. Download and install it on your computer. Open the program once installed. Get ready to connect to your website.
You need FTP credentials to connect. These include a host, username, and password. Check your web hosting account for these details. They are often found in the hosting dashboard. Note them down for easy access. You’ll use them to log into the FTP client.
Credit: docs.cmsmasters.net
Connecting To Your Server
Accessing your server via FTP allows you to upload a WordPress theme easily. Start by connecting to your server using an FTP client. Drag and drop the theme files into the WordPress themes directory for installation.
Open Ftp Client
Launch your FTP client on your computer. This software helps you connect to your server. Many people use FileZilla. It’s free and easy to use.
Enter Ftp Credentials
Find your FTP credentials. These are your username, password, and host name. Enter them into the FTP client. This lets you access your server. Be careful with your password. Keep it safe from others.
Navigate To WordPress Directory
Once connected, look for the WordPress directory. It’s usually named “public_html” or “www”. Open this folder. You will see many files and folders. Find the “wp-content” folder. This is where themes are stored. Click it to open.
Uploading The Theme Files
Uploading theme files to WordPress via FTP involves accessing your web hosting account. Locate the theme folder and upload it using an FTP client like FileZilla. Ensure the theme is in ZIP format for a smooth upload process, and place it in the ‘wp-content/themes’ directory.
Access The Themes Folder
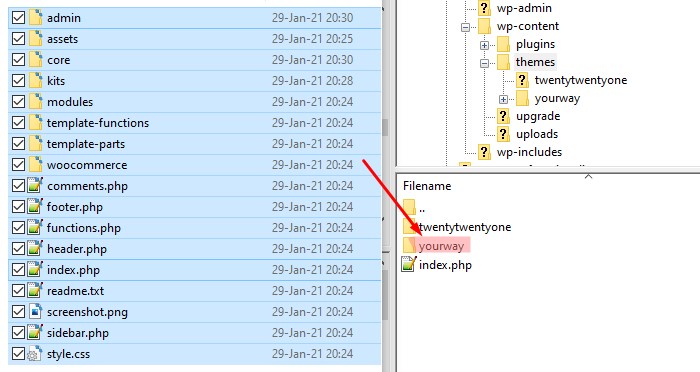
Open your FTP client. Connect it to your website server. Find the wp-content folder. Inside, locate the themes folder. This is where theme files go. Make sure you choose the right folder.
Transfer Theme Files
Select theme files on your computer. Drag them into the themes folder. Watch as the files upload. Do not close the FTP client. Wait till all files transfer. It can take a few minutes.
Verify File Upload
Check the themes folder again. Ensure all files are present. Open your WordPress dashboard. Go to the Appearance section. See if your new theme shows up. Activate it if you see it. Your theme is ready!

Credit: docs.presscustomizr.com
Activating The Theme In WordPress
Uploading a theme to WordPress via FTP involves a few simple steps. First, connect to your server using an FTP client. Then, navigate to the ‘wp-content/themes’ directory and upload your theme files there. After uploading, activate the theme from your WordPress dashboard.
Log Into WordPress Admin
Open your browser. Type your WordPress site URL. Add “/wp-admin” at the end. Enter your username and password. Click “Log In” to access the dashboard. The dashboard is your control center.
Find The Uploaded Theme
In the dashboard, look for “Appearance.” Click on it. A list of themes will appear. Find the theme you uploaded. It should be at the top. Check the name to be sure.
Activate The Theme
Hover over your theme. A button will appear. Click “Activate.” Your new theme is now live. Check your site to see the changes. It should look different. Enjoy your new design!
Troubleshooting Common Issues
Uploading a theme to WordPress via FTP requires understanding a few common issues. Ensure the theme is downloaded and unzipped. Verify FTP credentials are correct to avoid connection problems. If the upload stalls, check the file size and server limits.
Adjust permissions if access errors occur.
Resolve Connection Errors
Connection errors can be frustrating. Check your network settings first. Ensure your internet is stable. Sometimes, firewall settings block FTP access. Adjust your firewall settings if needed. Make sure your FTP credentials are correct. Double-check username and password. Use the right port number for FTP. Commonly, port 21 is used. Verify server address is correct too. Contact hosting support if errors persist.
Fix Incomplete Uploads
Incomplete uploads happen often. Ensure your internet is strong. Weak connections cause interruptions. File size matters too. Try uploading smaller files first. Use FTP software with resume capability. It helps continue broken uploads. Check your storage space on the server. Full storage prevents uploads. Clean up unnecessary files if needed.
Address Compatibility Problems
Compatibility issues can arise. Themes may not fit all WordPress versions. Check theme documentation for compatibility. Ensure your WordPress is up-to-date. Update plugins and themes regularly. Sometimes, plugins conflict with themes. Disable conflicting plugins temporarily. Test theme after each change. Contact theme support for unresolved issues.
Frequently Asked Questions
How Do I Upload A Theme Via Ftp?
To upload a theme via FTP, first download your theme’s ZIP file. Extract it to find the theme folder. Connect to your server using an FTP client, navigate to `wp-content/themes`, and upload the extracted theme folder. Once uploaded, activate the theme in WordPress.
Can I Use Filezilla For Theme Upload?
Yes, FileZilla is a popular FTP client for uploading themes. Download and install FileZilla, connect to your server, navigate to `wp-content/themes`, and upload your theme folder. It’s user-friendly and efficient for managing your site files.
What Should I Do After Uploading A Theme?
After uploading, log into your WordPress dashboard. Go to Appearance > Themes. Locate the uploaded theme and click ‘Activate’. Check your site for any issues or customization needs. Ensure all theme features are functioning properly.
Why Use Ftp Instead Of WordPress Uploader?
Using FTP allows uploading larger themes and bypasses upload limits. It provides direct access to server files, ensuring more control. FTP is useful for troubleshooting and fixing upload issues that may arise within the WordPress uploader.
Conclusion
Uploading a theme via FTP is straightforward. First, find a reliable FTP client. Next, connect it to your WordPress site. Then, locate the theme file on your computer. Upload it to the “themes” folder in the “wp-content” directory. Finally, activate the theme in your WordPress dashboard.
This method offers control and flexibility. Anyone can do it with patience and practice. Explore different themes to enhance your site’s appearance. Remember, a good theme can elevate your website’s user experience. Enjoy customizing your WordPress site!


