
Are you looking to enhance your WordPress site’s navigation? Adding a footer menu might be just what you need.
It’s not only a smart way to improve user experience, but it also keeps your site organized and accessible. Imagine your visitors reaching important pages without hassle, right from the bottom of any page. Sounds great, doesn’t it? In this guide, you’ll discover simple steps to seamlessly integrate a footer menu into your WordPress theme.
By the end, you’ll be able to boost your website’s functionality and keep your audience engaged. Ready to make your site even better? Let’s dive in!
Credit: kinsta.com
Benefits Of A Footer Menu
A footer menu improves website navigation. It helps visitors find important links quickly. Many websites use it for contact information and privacy policies. It also holds links to social media. This menu is usually consistent across pages. This makes it easy for users to find information. It offers a chance to showcase important content. Some websites include a site map in the footer. This helps with SEO and improves user experience.
The footer menu can hold links to popular blog posts. This increases visitor engagement. It also reduces bounce rates. The design should be simple and clear. A good footer makes a website look professional. It gives users a better browsing experience. An effective footer menu is a valuable tool for any website.
Choosing The Right Plugins
Plugins help make a footer menu work well. Many plugins are available. Choose one that fits your needs. Some plugins are free. Others cost money. Free plugins often have fewer features. Paid ones offer more options. Popular plugins include Elementor and Beaver Builder. These are easy to use. They are also very popular. Both plugins are good for beginners. Another plugin is WPBakery. It has many features. You can build nice menus with it. Always check reviews before installing a plugin. Good reviews mean users like it. Bad reviews may mean it has problems. Look for plugins that update often. Regular updates fix bugs. They also add new features. Choose plugins with good support. Good support helps if you have questions.
Accessing The WordPress Dashboard
Begin by logging into your WordPress dashboard. This is the control center of your site. Look for the login page. Enter your username and password. Once logged in, you will see the dashboard. It’s the first screen you see after login. The dashboard has many options and menus. Find the Appearance option in the left sidebar. Click it to see more choices. One of them is Menus. This is where you can manage your menu settings. Make sure you know what you want to change. Planning ahead saves time. Explore the dashboard a bit. Familiarize yourself with the layout and options. It will make future changes easier. Remember, practice makes perfect. Keep experimenting to learn more.
Creating A New Menu
First, go to your WordPress dashboard. Find the Appearance tab. Click on it. Then select Menus. Here, you can make a new menu. Look for the Create a New Menu button. Click it. A new menu form appears.
Give your menu a name. Make it simple. Next, add items to your menu. Choose pages, links, or categories. Tick the boxes you want. Then click Add to Menu. This places them in your menu.
Arrange your menu items. Drag and drop them. Put them in the right order. Save your work by clicking the Save Menu button. Now your menu is ready.
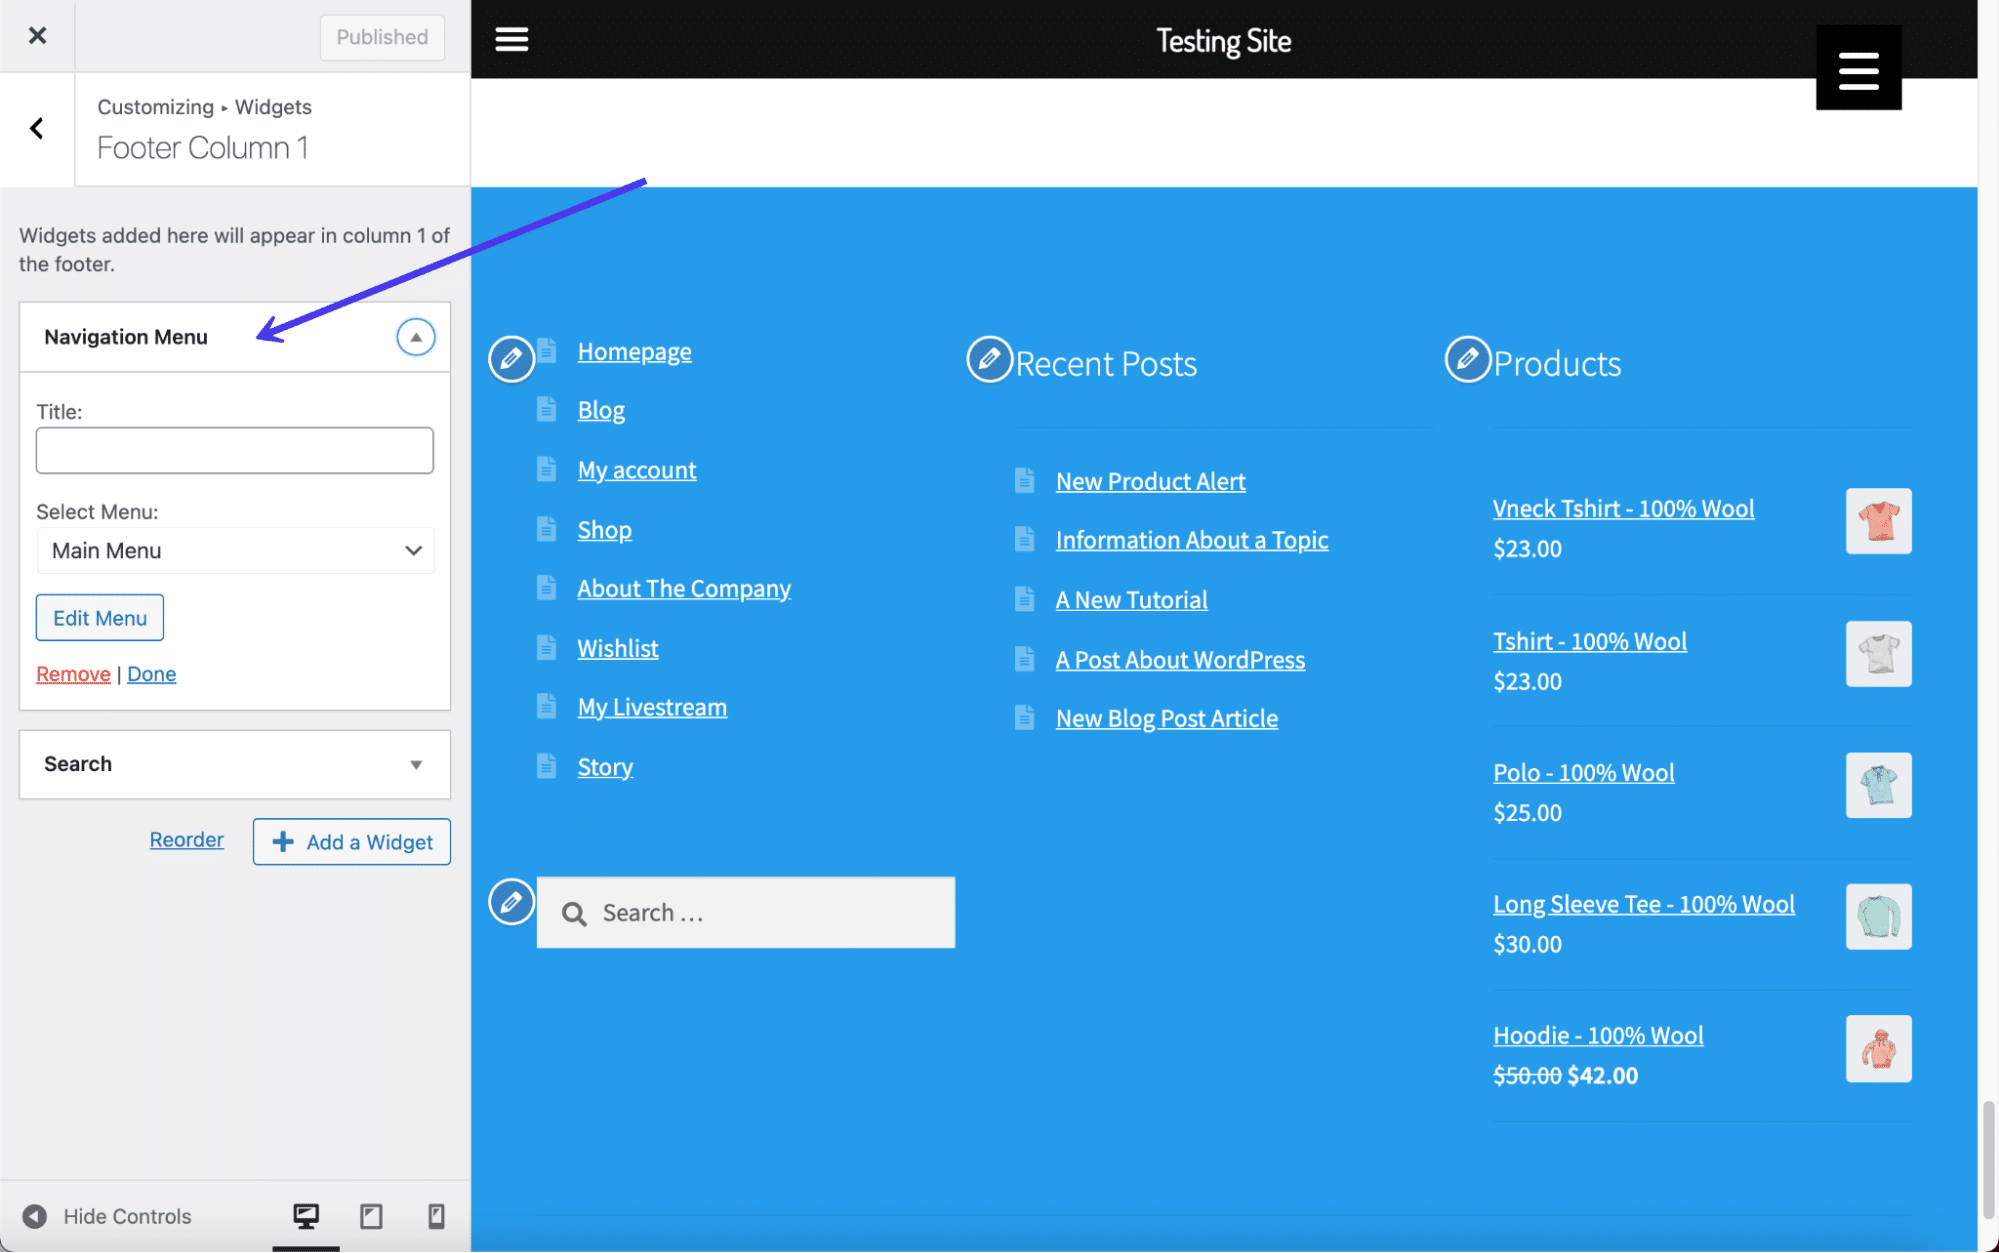
Adding Menu Items
Adding items to your footer menu is easy. First, go to your WordPress dashboard. Look for the Appearance option. Click on Menus. You will see a list of menus. Find your footer menu. Click on it to edit.
Now, you can add items. Check the left side of the screen. You will see pages, posts, and categories. Choose what you want to add. Click the box next to the item. Then, press Add to Menu. Your item will appear on the right.
Organize your menu items. Drag them to change the order. Make sure your menu looks neat. Save your changes. Click the Save Menu button. Your footer menu is ready!
Credit: kinsta.com
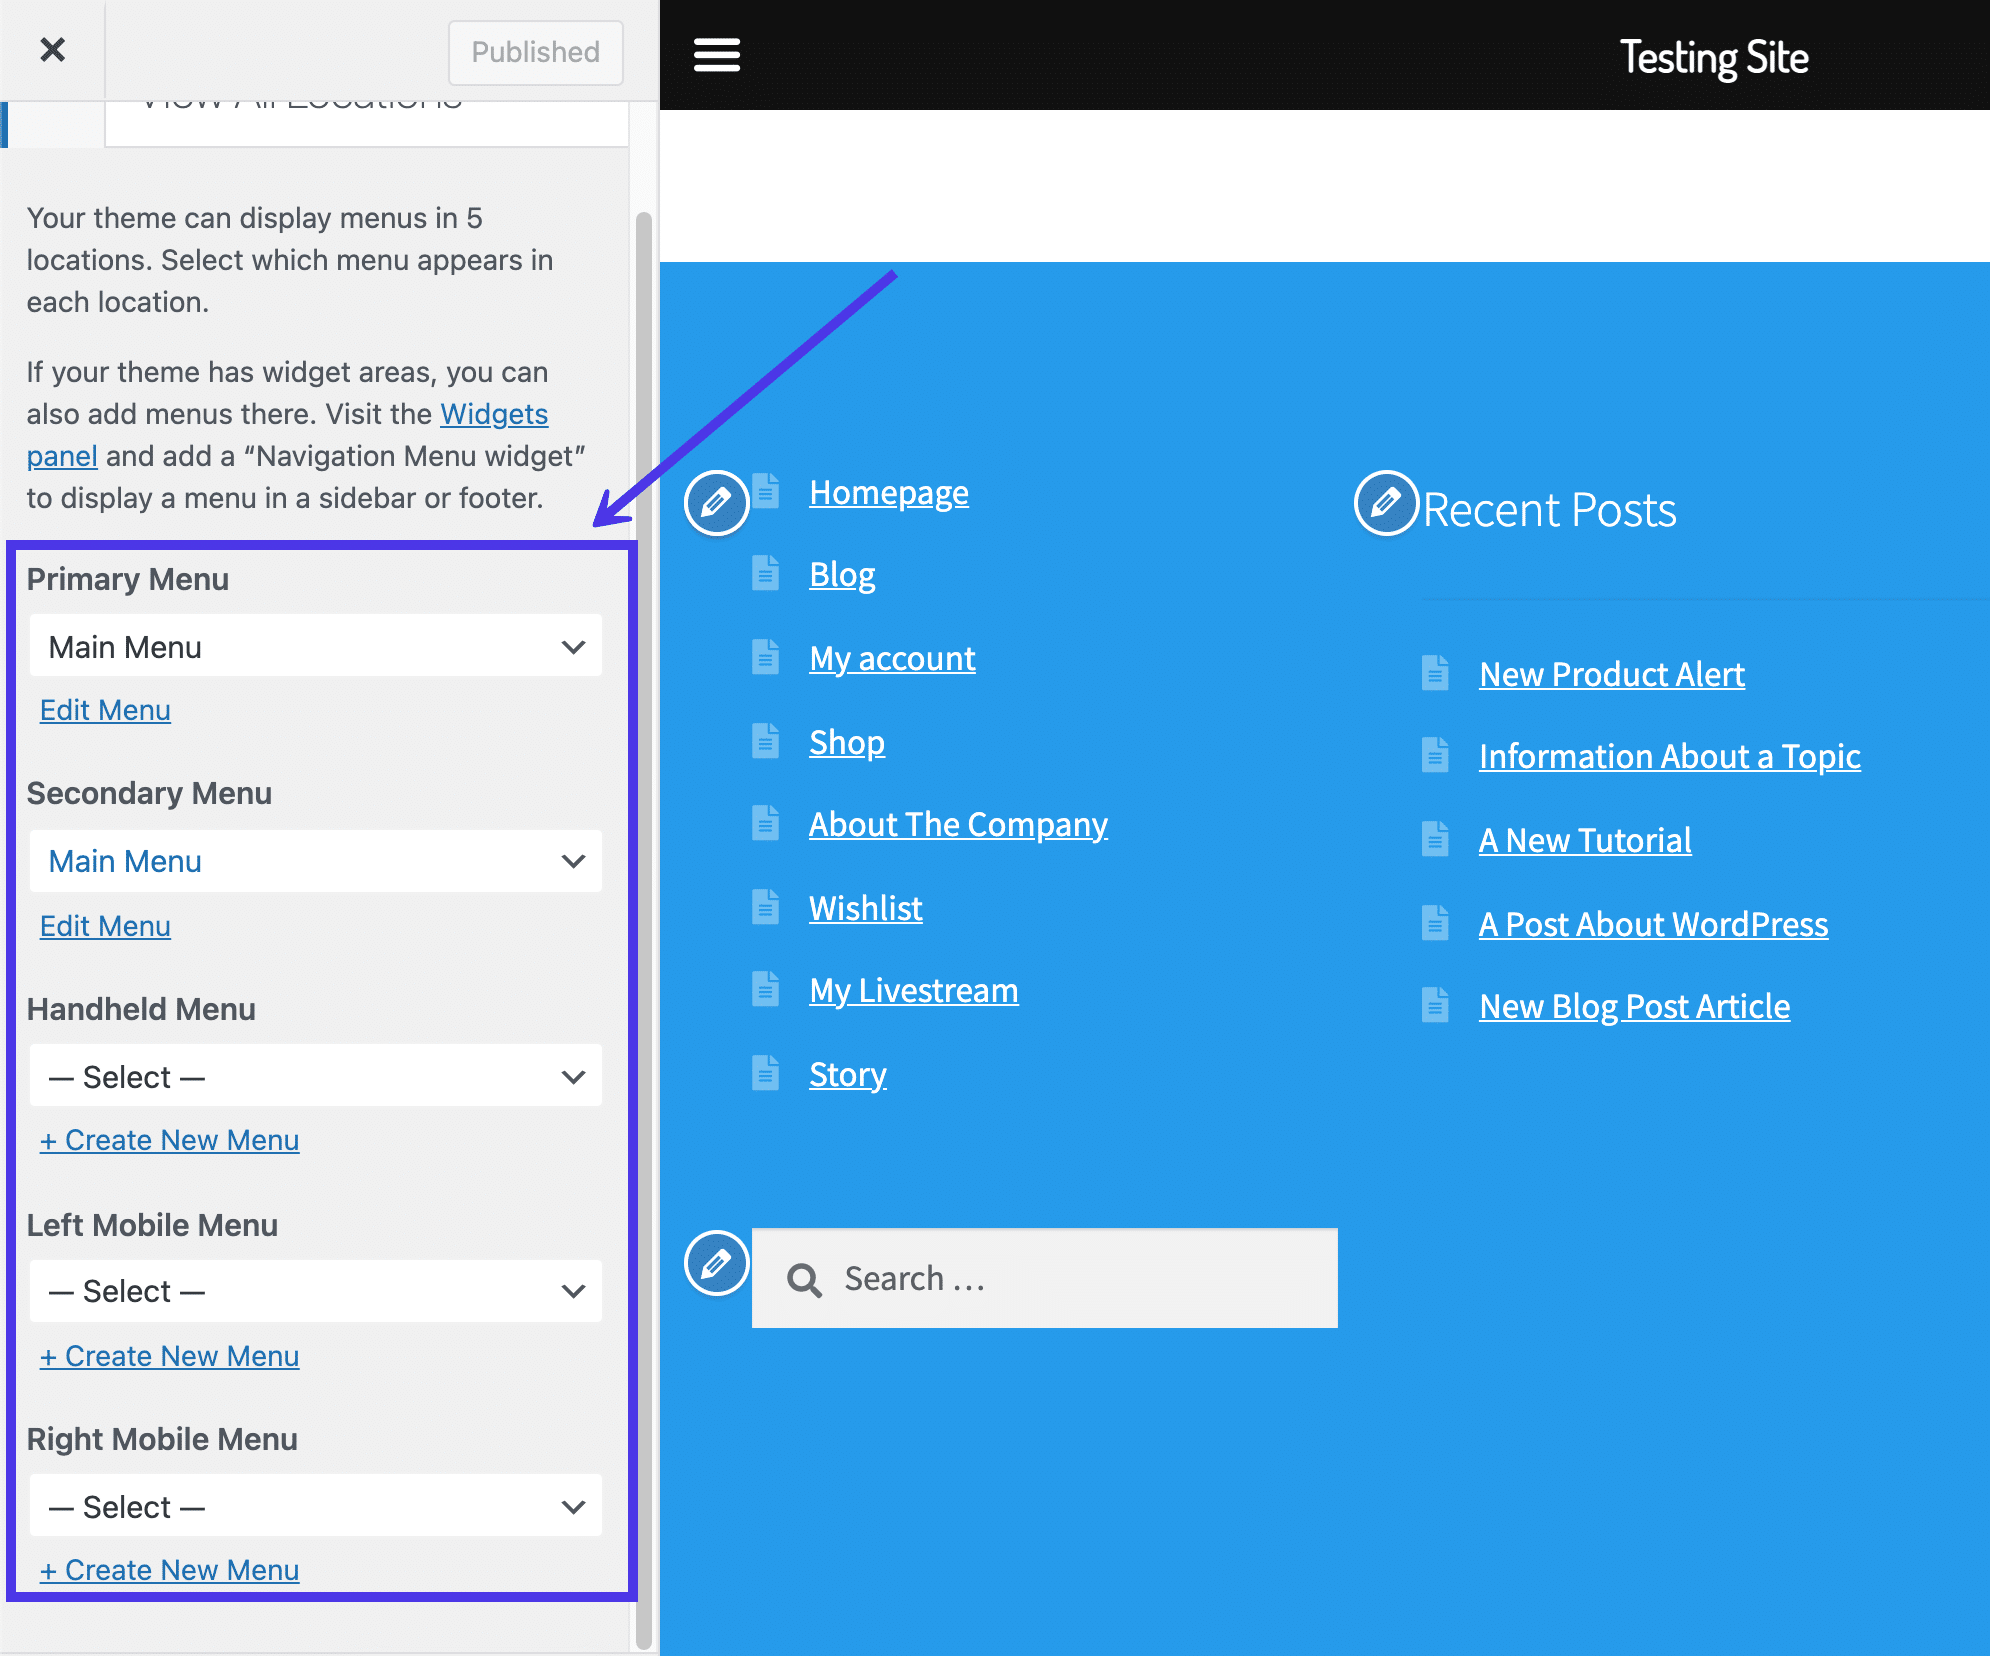
Assigning Menu To Footer
To add a footer menu, first, create a new menu. Go to Appearance and click on Menus. Type the name for your new menu. Press Save Menu.
Next, assign the menu to the footer area. Find the Manage Locations tab. Click on it. You will see different menu locations. Choose Footer from the list. Select your new menu. Press Save Changes.
Your footer menu is now active. Check your website to see the menu. The links should appear at the bottom of the page.
Customizing The Footer Menu
Many themes offer basic styling options. You can change the font size and color. Some themes allow you to adjust the background color. This makes your footer stand out. Choose a style that matches your website. Keep it simple and clean. Users find it easier to navigate.
Use Custom CSS for more control. Add CSS in the WordPress customizer. First, find the customizer in the dashboard. Next, go to the ‘Additional CSS’ section. You can change the menu’s appearance here. Adjust margins, padding, and borders. Make the footer look unique.
Testing The Footer Menu
First, check if the footer menu shows up on your site. Click on different links to see if they work. Make sure all links go to the right page. This ensures a smooth user experience.
Next, check how the menu looks on small screens. Use a phone or tablet for this. The menu should still look good. If not, you may need to adjust settings.
Ask friends or family to test the menu. They might spot things you missed. Feedback from others is very helpful. It helps make the menu better.
Troubleshooting Common Issues
Often, the menu might not show up. It can be frustrating. Check if the menu is enabled in the settings. Sometimes, themes need extra settings to show menus. Verify the menu location. Some themes have specific places for menus. Ensure all plugins are updated. Old plugins can create problems. Clear your browser cache. It might show outdated site views.
Menus might not fit well on small screens. Test your site on different devices. Ensure the theme is responsive. Adjust the menu size in the settings. Sometimes it gets too big. Check CSS styles. They control how the menu looks. Make sure the mobile view is active. Some themes have separate mobile settings.
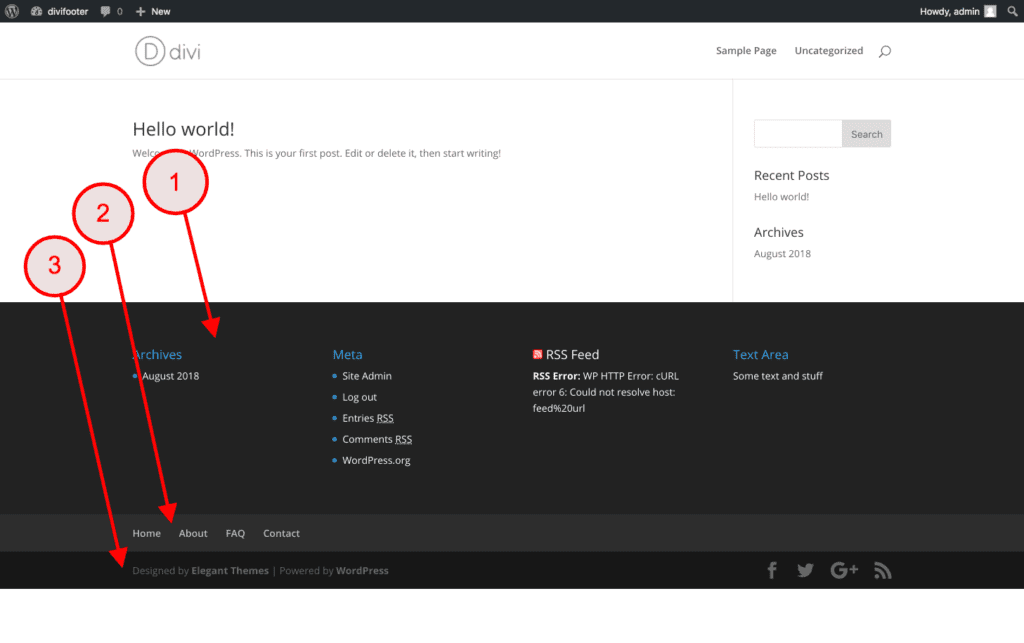
Best Practices For Footer Menus
Every WordPress theme needs a good footer menu. It’s the last thing users see. A well-designed footer menu helps users navigate easily. Important links should be included. Consider adding contact information and privacy policies. They are essential for trust and clarity. Make sure the font size is readable. Users shouldn’t squint to read your menu.
Keep the design simple. Too much clutter confuses visitors. Use clear labels for links. People need to know where each link leads. Group related links together. It makes navigation smooth and logical. Don’t forget to test your menu on mobile devices. Many users browse through phones. Your footer should be easy to use everywhere.
Update your footer regularly. New content might need new links. Keep your menu fresh and relevant. These tips ensure users have a pleasant experience. An effective footer menu enhances your site’s usability.
Credit: www.mrkwp.com
Frequently Asked Questions
How To Customize Footer Menu In WordPress?
To customize the footer menu in WordPress, navigate to ‘Appearance’ and then ‘Menus’. Select the footer menu to edit. Add or remove items as needed and save changes. For advanced customization, use widgets or custom HTML/CSS to enhance the footer’s appearance and functionality.
Can I Add Links To Footer Menu?
Yes, you can add links to the footer menu. Go to ‘Appearance’, then ‘Menus’ and select the footer menu. Add new links by selecting pages, categories, or custom URLs. Arrange the order of links by dragging them. Save changes to update the footer menu.
Is Footer Menu Important For Seo?
Yes, a footer menu is important for SEO. It helps improve site navigation and user experience. Including essential links in the footer menu aids search engines in crawling important pages. Additionally, it can enhance site architecture and provide additional internal linking opportunities.
How To Add Social Media Icons In Footer?
To add social media icons in the footer, use a widget or plugin. Navigate to ‘Appearance’, then ‘Widgets’. Add a ‘Custom HTML’ or ‘Social Icons’ widget to the footer area. Insert the HTML code or select icons to display. Save changes to update the footer.
Conclusion
Adding a footer menu enhances your WordPress site’s navigation. It’s simple and improves user experience. Follow the steps to customize your footer menu easily. Your visitors will appreciate the organized links. A well-structured footer makes information accessible. Try experimenting with different menu designs.
Test various styles for optimal performance. Keep your links relevant and tidy. Regular updates ensure your site remains fresh. Remember to check your theme’s compatibility. This small change can make a big difference. Now, enjoy a more streamlined WordPress site.
Happy designing!


