
Are you looking to enhance your WordPress site with an intuitive menu that guides your visitors seamlessly? Whether you’re a seasoned blogger or a newbie, knowing how to add a menu to your WordPress theme can drastically improve your website’s user experience.
Imagine your website as a well-organized store, where customers can effortlessly find what they need. A well-designed menu serves this purpose, making navigation smooth and engaging. In this guide, you’ll discover step-by-step instructions to create a menu that not only looks great but also boosts your site’s functionality.
By the end of this article, you’ll have the skills to transform your website into an inviting and easy-to-navigate space, keeping your visitors coming back for more. Dive in, and let’s make your WordPress site shine!
Understanding WordPress Themes
Adding a menu to your WordPress theme enhances navigation. Access the WordPress dashboard and select ‘Menus’ under ‘Appearance’. Customize your menu by adding pages, posts, or categories, and arrange them with the drag-and-drop feature for easy user access.
What Is A WordPress Theme?
A WordPress theme changes how your site looks. It controls colors, fonts, and layout. Themes also affect how a site works. They help make a site unique. People use themes for blogs, shops, and more. Some themes are free. Others cost money. Themes can be simple or complex. Choosing the right theme is important. It should fit your site’s purpose.
The Role Of Menus In Themes
Menus help users find pages on a website. They appear at the top or side. Menus are part of a theme. Themes decide where menus show up. Menus can have links to important pages. They make navigation easy. Users can find pages quickly. Menus are key for a good user experience. They help organize content clearly.
Preparing Your WordPress Site
First, you need to log into your WordPress site. Use your username and password. Once logged in, you will see the WordPress Dashboard. This is the control center. From here, you can do many things. You can add new posts, change settings, and much more. The dashboard is simple and easy to use. Take time to look around. Find the menu settings. You will use these later.
It is important to back up your website. This keeps your data safe. Use a backup plugin for this. Many plugins are free. They save your data to a secure place. Backing up helps if something goes wrong. You can restore your site easily. Backups are a good habit. They protect your hard work.
Creating A New Menu
Start by logging into your WordPress Dashboard. Find the Appearance tab on the left. Click on it and choose Menus. This will open the Menu section. You will see options to create or edit menus. It’s easy and clear to follow. Make sure you are on the right page.
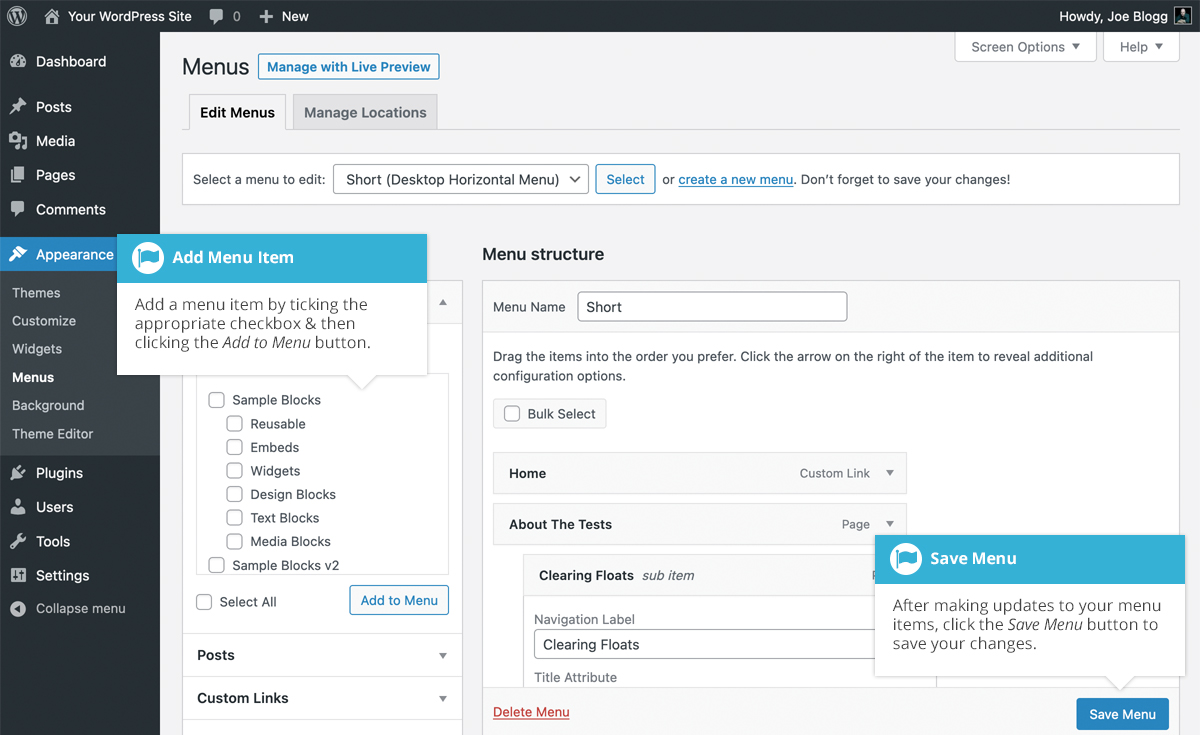
Choose the items you want to add. These can be pages, posts, or links. There is a section on the left for this. Check the boxes next to the items you want. After that, click Add to Menu. The items will appear on the right. Arrange them by dragging them into place. Click Save Menu when you are done. This will update your menu with the new items.
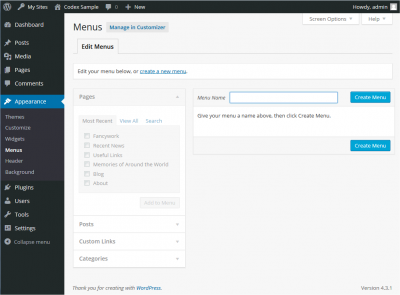
Credit: codex.wordpress.org
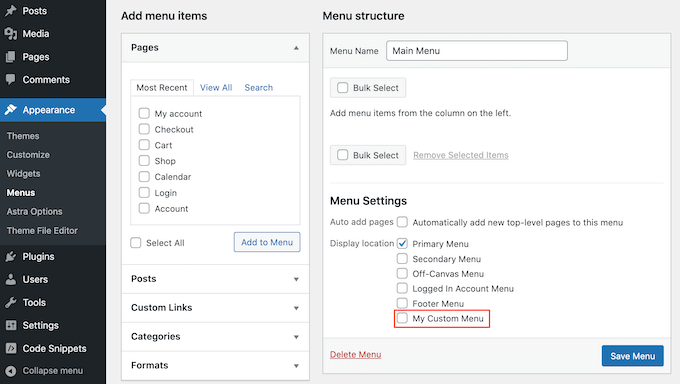
Assigning Menu To A Theme Location
Themes have spots for menus. These spots are called theme locations. Each theme can have many locations. Some themes have a main menu spot. Others might have a footer menu spot. Check your theme to find these spots.
Go to your dashboard. Click on Appearance, then Menus. Choose a menu or create a new one. Look for the Menu Settings area. Check the box next to your desired theme location. Click Save Menu to set it. Now your menu is linked to the spot you chose.
Customizing Menu Appearance
CSS makes menu look better. Color and font can change with CSS. Use CSS to adjust spacing. Make menu items bold or italic. Change background of the menu. Add hover effects for interaction. CSS code is simple. Try small changes first. See how it looks on the site. Keep CSS code clean and neat.
Plugins add features to menus. Many free plugins are available. Some plugins let you drag and drop items. Others give cool animations. A plugin can add icons to menu items. Easy setup for most plugins. Some plugins have extra styles. Check plugin reviews before installing. Ensure plugin is compatible with your theme.
Credit: www.seedprod.com
Testing And Troubleshooting
Adding a menu to your WordPress theme involves testing and troubleshooting. Navigate to “Appearance” then “Menus” to begin. Ensure your theme supports menus and adjust settings for seamless integration.
Checking Menu Functionality
Check the menu after adding it to your WordPress theme. Navigate through each menu item. Ensure all links lead to the correct pages. Click each link to test it. Verify if the menu displays correctly on all devices. Use a phone, tablet, and computer for testing. Make sure the menu is visible and functional on each.
Resolving Common Issues
Menus sometimes don’t appear as expected. This can be frustrating. Start by checking the menu settings. Ensure the menu is set to the correct location. Sometimes, themes have multiple menu spots. Next, look at the theme’s documentation. It often provides solutions to common problems. If issues continue, consider reaching out to support. Theme developers may offer help. Lastly, try deactivating plugins. Some plugins conflict with menus. Reactivate them one by one. Find the problematic plugin and replace it.
Advanced Menu Features
Enhancing your WordPress theme with advanced menu features is simple. Navigate to the ‘Appearance’ tab, select ‘Menus’, and customize your menu layout. Easily add pages, categories, and custom links to improve navigation and user experience.
Creating Dropdown Menus
Dropdown menus help organize your site. They make it easy to find things. To create one, go to your WordPress dashboard. Choose Appearance, then Menus. Click on Create a new menu. Add items by checking the boxes. Drag items under other items to create a dropdown. Save your changes to see the new menu.
Integrating Custom Links
Custom links let you add outside pages. Open the menu page in the dashboard. Click on Custom Links on the left. Type the URL and link text. Click Add to Menu. Drag the link where you want it. Press Save Menu to update.
Credit: easywpguide.com
Frequently Asked Questions
How Do I Add A Menu In WordPress?
To add a menu, go to your WordPress dashboard. Navigate to Appearance > Menus. Click “Create a new menu,” name it, and add desired pages or categories. Save changes and assign the menu to a theme location under “Manage Locations.
” This ensures it displays correctly on your site.
Can I Customize Menu Appearance In WordPress?
Yes, you can customize your menu’s appearance. Go to Appearance > Customize. Here, select “Menus” and choose your menu. You can change its style using CSS or theme options. Some themes offer built-in customization options for colors, fonts, and layouts, enhancing your menu’s design.
What Is A WordPress Theme Menu Location?
A theme menu location is a predefined spot where a menu appears. Themes usually offer multiple locations like header, footer, or sidebar. You can assign menus to these locations under Appearance > Menus > Manage Locations. This ensures your menu displays correctly in your chosen spot.
How Do I Create A Submenu In WordPress?
Creating a submenu is simple. Go to Appearance > Menus. Drag a menu item slightly right under another item to create a hierarchy. This forms a dropdown menu. Save your changes, and the submenu will display when hovering over the parent item on your site.
Conclusion
Adding a menu to your WordPress theme is easy. Follow the steps outlined, and you’ll be set. Choose your menu items carefully. Make navigation simple for your visitors. Use descriptive labels. This improves user experience and helps search engines. Remember to save your changes.
Check your site’s appearance on different devices. Ensure everything looks good and works smoothly. Regular updates can enhance performance. Keep your site fresh and user-friendly. Start today and make your website more engaging. Your audience will appreciate the effort. Happy editing!


