
Are you ready to give your website the protection it deserves? Installing an SSL certificate is a crucial step in securing your online presence, and with Namecheap, the process is straightforward and hassle-free.
In this guide, you’ll discover how to install an SSL certificate on your website using Namecheap, ensuring that your visitors’ data remains safe and secure. By following these simple steps, you’ll boost your site’s trustworthiness, improve your search engine rankings, and provide peace of mind to your users.
Don’t let your website lag behind in security; dive into this guide and make your site a safe haven for everyone who visits.
Choosing The Right Ssl Certificate
Choosing the right SSL certificate is crucial for your website’s security and credibility. It’s not just about protection; it’s about building trust with your visitors. But how do you decide which certificate is best for you? Let’s break it down and make it simple.
Types Of Ssl Certificates
SSL certificates come in different types, each serving distinct needs. Domain Validated (DV) certificates are the most basic, ideal for personal websites or blogs. They offer encryption but minimal identity verification.
Organization Validated (OV) certificates provide a higher level of security and require verification of your business identity. These are perfect for small to medium-sized businesses.
Extended Validation (EV) certificates offer the highest level of trust and require extensive verification. They are best for e-commerce sites or websites handling sensitive data, as they display a green address bar in the browser.
Factors To Consider
Before choosing an SSL certificate, think about your website’s purpose. Is it a simple blog, a business site, or an online store? Your website’s function will dictate the level of security you need.
Consider your budget. While EV certificates offer the highest level of trust, they also come at a higher cost. Make sure the certificate you choose fits within your financial plans.
Think about the level of trust you want to convey. A DV certificate might suffice for a blog, but an EV certificate might be necessary for a financial service website. It’s about aligning your security needs with your audience’s expectations.
Have you ever visited a website and hesitated because it didn’t seem secure? That gut feeling is what you want to avoid for your visitors. Selecting the right SSL certificate can make all the difference. What level of trust do you want to offer your audience? Choose wisely, and you’ll set the stage for a secure online experience.
Purchasing An Ssl Certificate From Namecheap
Purchasing an SSL certificate from Namecheap is a straightforward process. It ensures your website is secure and trustworthy. Namecheap offers a variety of SSL certificates to suit different needs. They provide excellent customer support and competitive pricing. This guide will walk you through the purchase process step-by-step.
Creating A Namecheap Account
First, create an account on Namecheap. Visit their website and click on “Sign Up” at the top right. Fill in your personal information and choose a secure password. Verify your email address to complete the registration. Your account is now ready for purchasing an SSL certificate.
Selecting Your Ssl Certificate
Next, decide which SSL certificate suits your needs. Namecheap offers several types, including Domain Validation (DV), Organization Validation (OV), and Extended Validation (EV). Each type offers different levels of security. Compare the features and select the one that fits your website’s requirements.
After choosing your SSL certificate, add it to your cart. Proceed to checkout and follow the on-screen instructions. You can pay using various methods, including credit cards and PayPal. Once your payment is complete, you’ll receive an email with further instructions.
Preparing Your Domain
Setting up your domain with Namecheap involves installing an SSL certificate for security. First, purchase your SSL through Namecheap. Then, follow step-by-step instructions to install it on your server, ensuring safe and encrypted connections.
Preparing your domain for an SSL certificate installation is a crucial step that ensures your website is secure and trustworthy. By taking the time to set up your domain correctly, you can avoid potential pitfalls and ensure a smooth installation process. Getting the basics right from the start can save you headaches later on. ###Verifying Domain Ownership
Before you can install an SSL certificate, you need to prove that you own the domain. This process is like confirming your identity online. Namecheap provides various ways to verify ownership, such as email verification, DNS record changes, or uploading a file to your website. Choose the method that suits you best. If you have access to your domain’s email, the email method is straightforward. For those who manage DNS settings, adding a TXT record might be more convenient. Whichever method you choose, prompt verification will keep your SSL installation process on track. ###Generating A Csr
A Certificate Signing Request (CSR) is essential for acquiring an SSL certificate. It’s like a request letter to the certificate authority, asking them to issue a certificate for your domain. You can generate a CSR through your hosting provider or server control panel. Ensure that the information you enter is accurate. This includes your domain name, organization name, and location. After generating the CSR, save the key files securely. These files are vital for the SSL installation, so treat them as you would a password or important document. Have you ever generated a CSR and wondered why it’s necessary? It’s a step that ensures the SSL certificate matches your domain, providing security and trust to your visitors. By understanding each step, you take control of your website’s safety. Are you ready to move forward with confidence? Once you’ve verified ownership and generated a CSR, you’re set to proceed with the installation. These foundational steps set the stage for a successful SSL certificate setup.
Credit: www.youtube.com
Installing The Ssl Certificate
Namecheap makes installing an SSL certificate straightforward. Simply log in to your Namecheap account and navigate to the SSL section. Follow the guided steps to secure your website and protect user data efficiently.
Installing an SSL Certificate on your website is essential for enhancing security and building trust with your visitors. It encrypts data between the server and the client, ensuring that sensitive information remains private. Whether you’re running a small blog or an e-commerce site, adding an SSL Certificate can make a noticeable difference in your site’s credibility. Let’s walk through the simple process of installing an SSL Certificate via Namecheap.Accessing Your Namecheap Account
First, log into your Namecheap account. It’s much like entering your digital toolbox. Once inside, navigate to the ‘Dashboard’. This area acts as your control center, where you manage domains, hosting, and SSL Certificates. Locate the ‘SSL Certificates’ section. Here, you’ll find a list of any certificates you’ve purchased. If you haven’t bought one yet, it might be time to consider the added benefits of having an SSL Certificate.Uploading The Ssl Certificate
With your SSL Certificate ready, head to your hosting control panel. It’s akin to opening the hood of a car; you’re about to tweak something crucial. Find the section labeled ‘SSL/TLS’. This is where the magic happens. Upload the certificate files you received from Namecheap. These usually include a certificate file and a private key. Follow the on-screen instructions carefully—like assembling furniture, each piece fits in a specific way. Once uploaded, check for any error messages. A successful upload means your website is now encrypted. Your visitors can browse securely, and you can breathe a sigh of relief knowing their data is protected. How does installing an SSL Certificate impact your site’s trustworthiness in the eyes of your visitors? Have you noticed a difference in your site’s performance or visitor engagement after adding an SSL Certificate?Configuring Your Web Server
Secure your website with Namecheap’s SSL certificate. First, purchase your SSL certificate and follow Namecheap’s guide to install it on your server. Protect user data and enhance trust by configuring your server correctly.
Configuring Your Web Server is a crucial step when installing an SSL certificate with Namecheap. It’s like setting the stage for a secure browsing experience for your visitors. The right configuration ensures your website encrypts data effectively, keeping it safe from prying eyes. Imagine you’ve just purchased an SSL certificate, and now you’re eager to see that little padlock icon next to your URL. You’re not alone—many website owners have been in your shoes, feeling both excited and a bit daunted by the technicalities. Fear not! With some clear steps, you’ll have your web server configured in no time. ###Apache Server Configuration
Configuring an Apache server might seem like a task reserved for tech wizards, but it’s quite manageable with some guidance. Begin by locating your Apache configuration file, often named `httpd.conf` or `apache2.conf`. This file is the command center for your server settings. Once you’ve found the file, open it and look for the section that specifies the “ tags. This is where you’ll add the SSL certificate information. Ensure you include paths to your certificate file (`.crt`), private key file (`.key`), and certificate chain file (`.ca-bundle`). Here’s a simple example of what your configuration might look like: “`plaintext ServerName www.yourdomain.com SSLEngine on SSLCertificateFile /path/to/yourdomain.crt SSLCertificateKeyFile /path/to/yourprivate.key SSLCertificateChainFile /path/to/yourdomain.ca-bundle “` After saving the changes, restart Apache to apply the new settings. Have you double-checked everything? A simple oversight like a typo can cause a lot of headaches, so it’s worth a moment of caution. ###Nginx Server Configuration
Nginx is another popular web server, known for its speed and efficiency. Configuring it for SSL is straightforward if you follow the steps precisely. Locate your Nginx configuration file, typically called `nginx.conf` or located within the `/etc/nginx/sites-available/` directory. In the server block, you’ll need to specify the paths to your SSL certificate and private key. Unlike Apache, Nginx doesn’t require a separate chain file; it’s combined with your certificate file. Here’s a practical example: “`plaintext server { listen 443 ssl; server_name yourdomain.com; ssl_certificate /path/to/yourdomain.crt; ssl_certificate_key /path/to/yourprivate.key; ssl_protocols TLSv1.2 TLSv1.3; } “` Save these settings and restart Nginx to make the changes effective. Did the server restart smoothly? If not, it might be worth checking the Nginx error logs for hints. Configuring your web server can feel like a puzzle, but once completed, it brings immense satisfaction. Your website is now ready to provide a secure experience for users. How does it feel to know you’ve taken a significant step towards better security for your visitors?
Credit: www.youtube.com
Testing Your Ssl Installation
Once you’ve installed your SSL certificate on Namecheap, the next crucial step is testing its installation. This ensures your website’s data is secure and visitors see it as trustworthy. Without proper testing, there might be vulnerabilities that could compromise the safety of your users’ information. In this section, we’ll guide you through a couple of essential methods to verify your SSL installation is correct and effective.
Using Online Ssl Tools
Online SSL tools help verify your SSL certificate’s status. These tools offer a quick check to ensure everything is installed correctly. You can find many free SSL checkers online. Input your website’s URL to get a detailed report. The report shows the certificate’s validity, issuer, and any potential issues. These tools are user-friendly and don’t require technical expertise. Using them ensures your SSL is functioning as expected. You can avoid potential security breaches by addressing any problems they highlight.
Checking Browser Compatibility
After verifying with online tools, check browser compatibility. Different browsers may display SSL certificates differently. Open your website on multiple browsers like Chrome, Firefox, and Safari. Ensure the padlock symbol appears next to your URL. This symbol indicates a secure connection. If the padlock is missing, there might be a problem with your installation. It’s vital to address any compatibility issues promptly. This step ensures all users have a secure browsing experience. Checking compatibility helps maintain trust across all platforms.
Troubleshooting Common Issues
Installing an SSL certificate on Namecheap can sometimes face hiccups. These issues may seem daunting, but they are usually easy to fix. Addressing them ensures your website remains secure and trustworthy for visitors.
Certificate Not Trusted
A common issue is the “Certificate Not Trusted” error. This often occurs due to incorrect installation. Double-check the certificate chain on your server. Ensure all intermediate certificates are installed properly. Missing intermediate certificates lead to trust issues.
Another reason could be outdated browser caches. Encourage users to clear their browser cache. This refreshes the certificate data and often resolves the error.
Mixed Content Warnings
Mixed content warnings appear when both HTTP and HTTPS resources load on a webpage. This weakens the security of your site. Ensure all links and resources use HTTPS.
Use online tools to scan your website for mixed content. These tools highlight non-secure elements. Fixing these elements is crucial for full site security. Replace all HTTP links with HTTPS. This often resolves the mixed content warning swiftly.
Remember, regular checks and updates keep your site secure. Keep your SSL certificate renewed and up-to-date. This helps maintain a secure connection for all users.
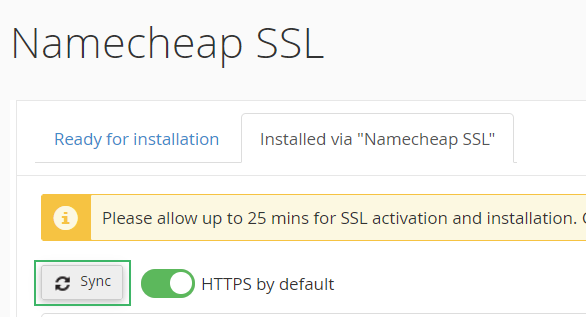
Credit: www.namecheap.com
Renewing Your Ssl Certificate
Renewing your SSL certificate is crucial for website security. Namecheap offers straightforward steps to install your SSL certificate. Follow their guide to ensure your site remains secure and trustworthy.
Renewing your SSL certificate with Namecheap is a crucial step to ensure that your website continues to offer secure and encrypted connections. SSL certificates have a validity period, and renewing them before they expire is vital to maintain trust and security for your visitors. Whether you’re managing a personal blog or a business website, understanding the renewal process can save you from unnecessary headaches and keep your online presence secure.Understanding Renewal Timelines
SSL certificates typically last for one or two years, depending on the type you choose. It’s essential to keep track of your certificate’s expiration date. You don’t want to be caught off guard with an expired certificate, which can lead to warnings for your site visitors. Namecheap usually sends reminders as your renewal date approaches, but setting a personal reminder can be a good backup. Have you checked when yours expires recently?Steps To Renew
Renewing your SSL certificate with Namecheap is straightforward. First, log into your Namecheap account and navigate to the “SSL Certificates” section. You should see an option to renew your certificate. Click on it, and follow the prompts. You’ll be required to verify your domain again, just like you did during the initial setup. This process ensures that you’re still the rightful owner. Once verified, you can choose the renewal period and complete the payment process. Remember, renewing early doesn’t mean you lose any days; the new certificate starts the day your old one expires. Taking these steps not only keeps your site secure but also shows your visitors that their data is a priority for you. Are you ready to renew and keep your site safe?Frequently Asked Questions
How To Activate Ssl Certificate On Namecheap?
Log into your Namecheap account. Navigate to the “SSL Certificates” section. Click “Activate” next to your certificate. Follow the steps to submit your CSR and domain details. Complete the validation process. Once validated, download and install the SSL certificate on your server.
How Do I Manually Install An Ssl Certificate?
To manually install an SSL certificate, access your server or hosting panel. Locate the SSL/TLS settings. Upload the certificate files, including the private key and certificate chain. Save and apply the changes. Verify installation by visiting your website to ensure HTTPS appears in the URL.
How To Update Ssl Certificate Namecheap?
To update your SSL certificate on Namecheap, log into your account. Navigate to the “SSL Certificates” section. Choose the certificate to update, then follow the prompts for renewal or reissuance. Ensure your domain’s DNS settings are correct for the changes to take effect.
How To Install Ssl Certificate In Domain Com?
Install SSL by purchasing a certificate from a trusted provider. Access your domain hosting panel, upload the certificate files, and configure the SSL settings. Verify installation through a browser check and ensure HTTPS is active. Consult hosting support for assistance if needed.
Conclusion
Installing an SSL certificate with Namecheap is straightforward. Follow the steps, and your website will be secure. SSL certificates protect your site’s data and build trust with visitors. They are essential for any website today. With Namecheap’s user-friendly process, you can have SSL set up quickly.
Always remember to check your certificate’s validity regularly. Renew when needed to maintain security. A secure site keeps your visitors happy and protected. Stay proactive about your website’s security. It’s worth the effort for peace of mind. Happy securing!


