
Imagine having a powerful website that showcases your brand and captivates your audience. You might be wondering how to achieve that seamlessly without getting tangled in the web of technical jargon.
With WordPress and Namecheap, you’re closer than you think. You don’t need to be a tech wizard to make it happen. This guide will walk you through the simple steps to set up and optimize your WordPress site using Namecheap, one of the most reliable domain registrars out there.
Whether you’re launching a blog, an online store, or a portfolio, understanding this process will empower you to bring your vision to life. Get ready to explore the easy ways to elevate your online presence and make your website stand out. Dive in and discover how to leverage these tools to your advantage. Your website dreams are about to become a reality.
Credit: www.namecheap.com
Setting Up Your Domain
Setting up your domain is a crucial step in launching a WordPress site. With Namecheap, the process becomes simple and efficient. You can easily secure your online identity by registering a domain. Understanding domain settings will help you manage it effectively.
Registering A Domain With Namecheap
First, visit the Namecheap website. Search for available domain names. Pick a name that represents your brand or idea. Add it to your cart and proceed to checkout. Complete the payment to register your domain. Namecheap offers competitive pricing and free privacy protection.
Understanding Domain Settings
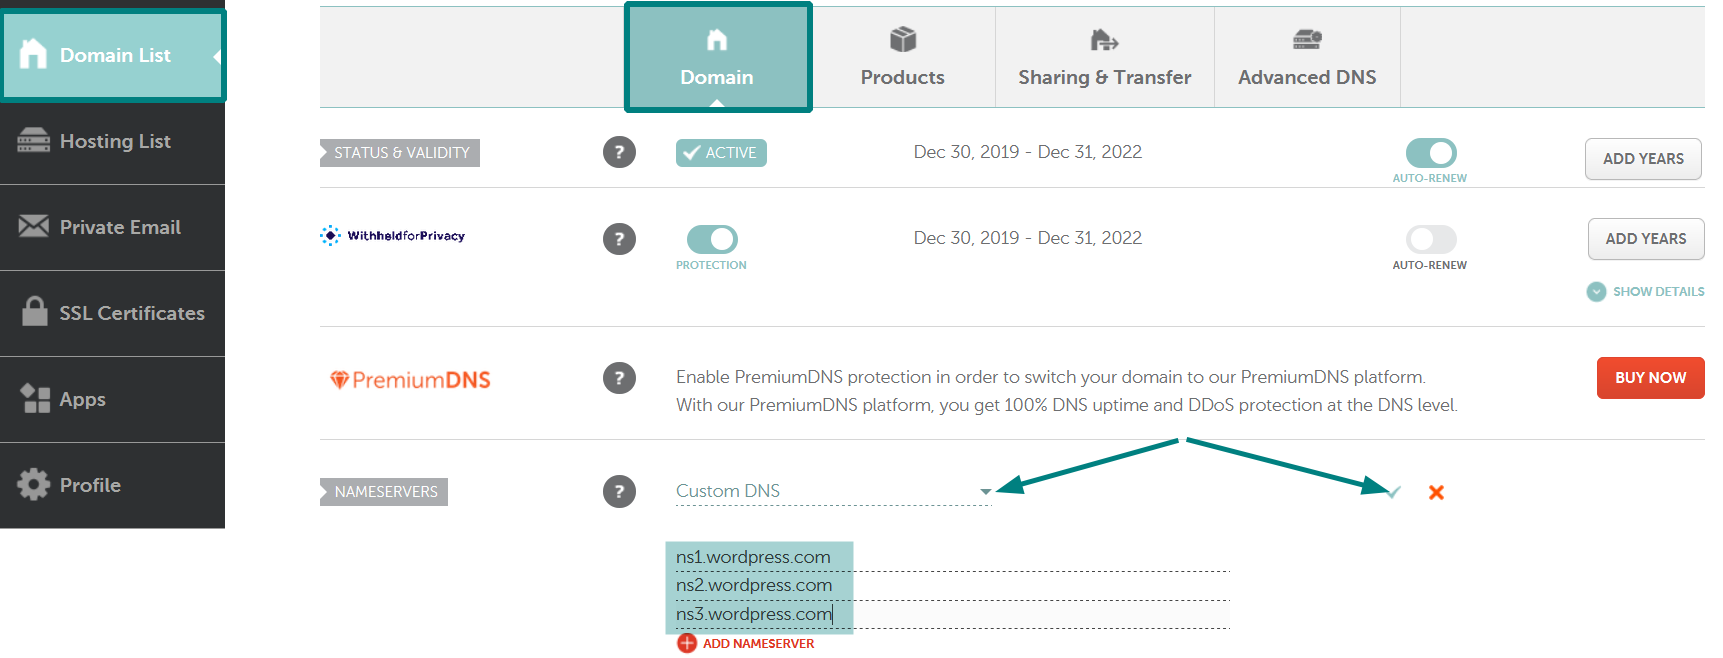
Once registered, log into your Namecheap account. Go to the “Domain List” section. Click on “Manage” next to your domain. Here, you will find various settings. DNS settings allow you to connect your domain to your hosting provider. You can update nameservers for website hosting. Redirects can be set up for your domain. Custom email addresses can be created. Familiarize yourself with these settings for efficient management.
Credit: www.namecheap.com
Choosing A Hosting Plan
Choosing the right hosting plan is crucial when you’re setting up WordPress with Namecheap. It determines how smoothly your website will run and how well it can handle traffic. Without the right plan, you might face slow loading times or even downtime. So, how do you choose the perfect plan for your needs? Let’s dive into the options available and how to select the most suitable one.
Types Of Hosting Available
When you start exploring hosting plans, you’ll notice several types available. Namecheap offers shared hosting, VPS hosting, and dedicated servers. Each comes with its own pros and cons.
- Shared Hosting: This is the most cost-effective option. You share server resources with other websites. It’s great for beginners or small sites with low traffic.
- VPS Hosting: Offers more control and resources than shared hosting. You get a virtual private server, which provides better performance for medium-sized sites.
- Dedicated Servers: This is for large sites with heavy traffic. You get an entire server to yourself, ensuring maximum performance and security.
Selecting The Right Plan For Your Needs
How do you decide which hosting plan is right for you? It depends on your website’s purpose and expected traffic. If you’re launching a personal blog, shared hosting might suffice. But if you’re running an online store, consider VPS or dedicated options.
Evaluate your technical skills too. Shared hosting simplifies management, while VPS and dedicated require more technical know-how. Namecheap’s customer service can assist, but some hands-on work is needed.
Budget is another factor. Shared hosting is wallet-friendly, but spending more on VPS can provide better performance. Think about future growth. Will your site expand? If yes, investing in VPS or dedicated might save hassle later.
Have you ever underestimated the traffic your site would get? I once did and had to upgrade my plan quickly. Consider your site’s potential to avoid surprises.
What are your website goals? Reflect on them, and let those guide your decision. Which hosting plan aligns with your vision for your site?
Installing WordPress
Installing WordPress on your Namecheap-hosted website is straightforward. You have two main options: using Namecheap’s one-click installer or opting for manual installation. Both methods are effective and cater to different user preferences. Below, we explore each method in detail to help you get started.
Using Namecheap’s One-click Installer
Namecheap provides a handy one-click installer. This makes setting up WordPress quick and simple. Log into your Namecheap account. Go to your cPanel. Look for the Softaculous Apps Installer. It’s usually under the “Exclusive for Namecheap Customers” section. Click on it. Choose WordPress from the list of applications. Click “Install Now.” Follow the prompts. Enter your site name, description, and admin credentials. Confirm your settings and click “Install.” In minutes, your WordPress site will be ready.
Manual Installation Process
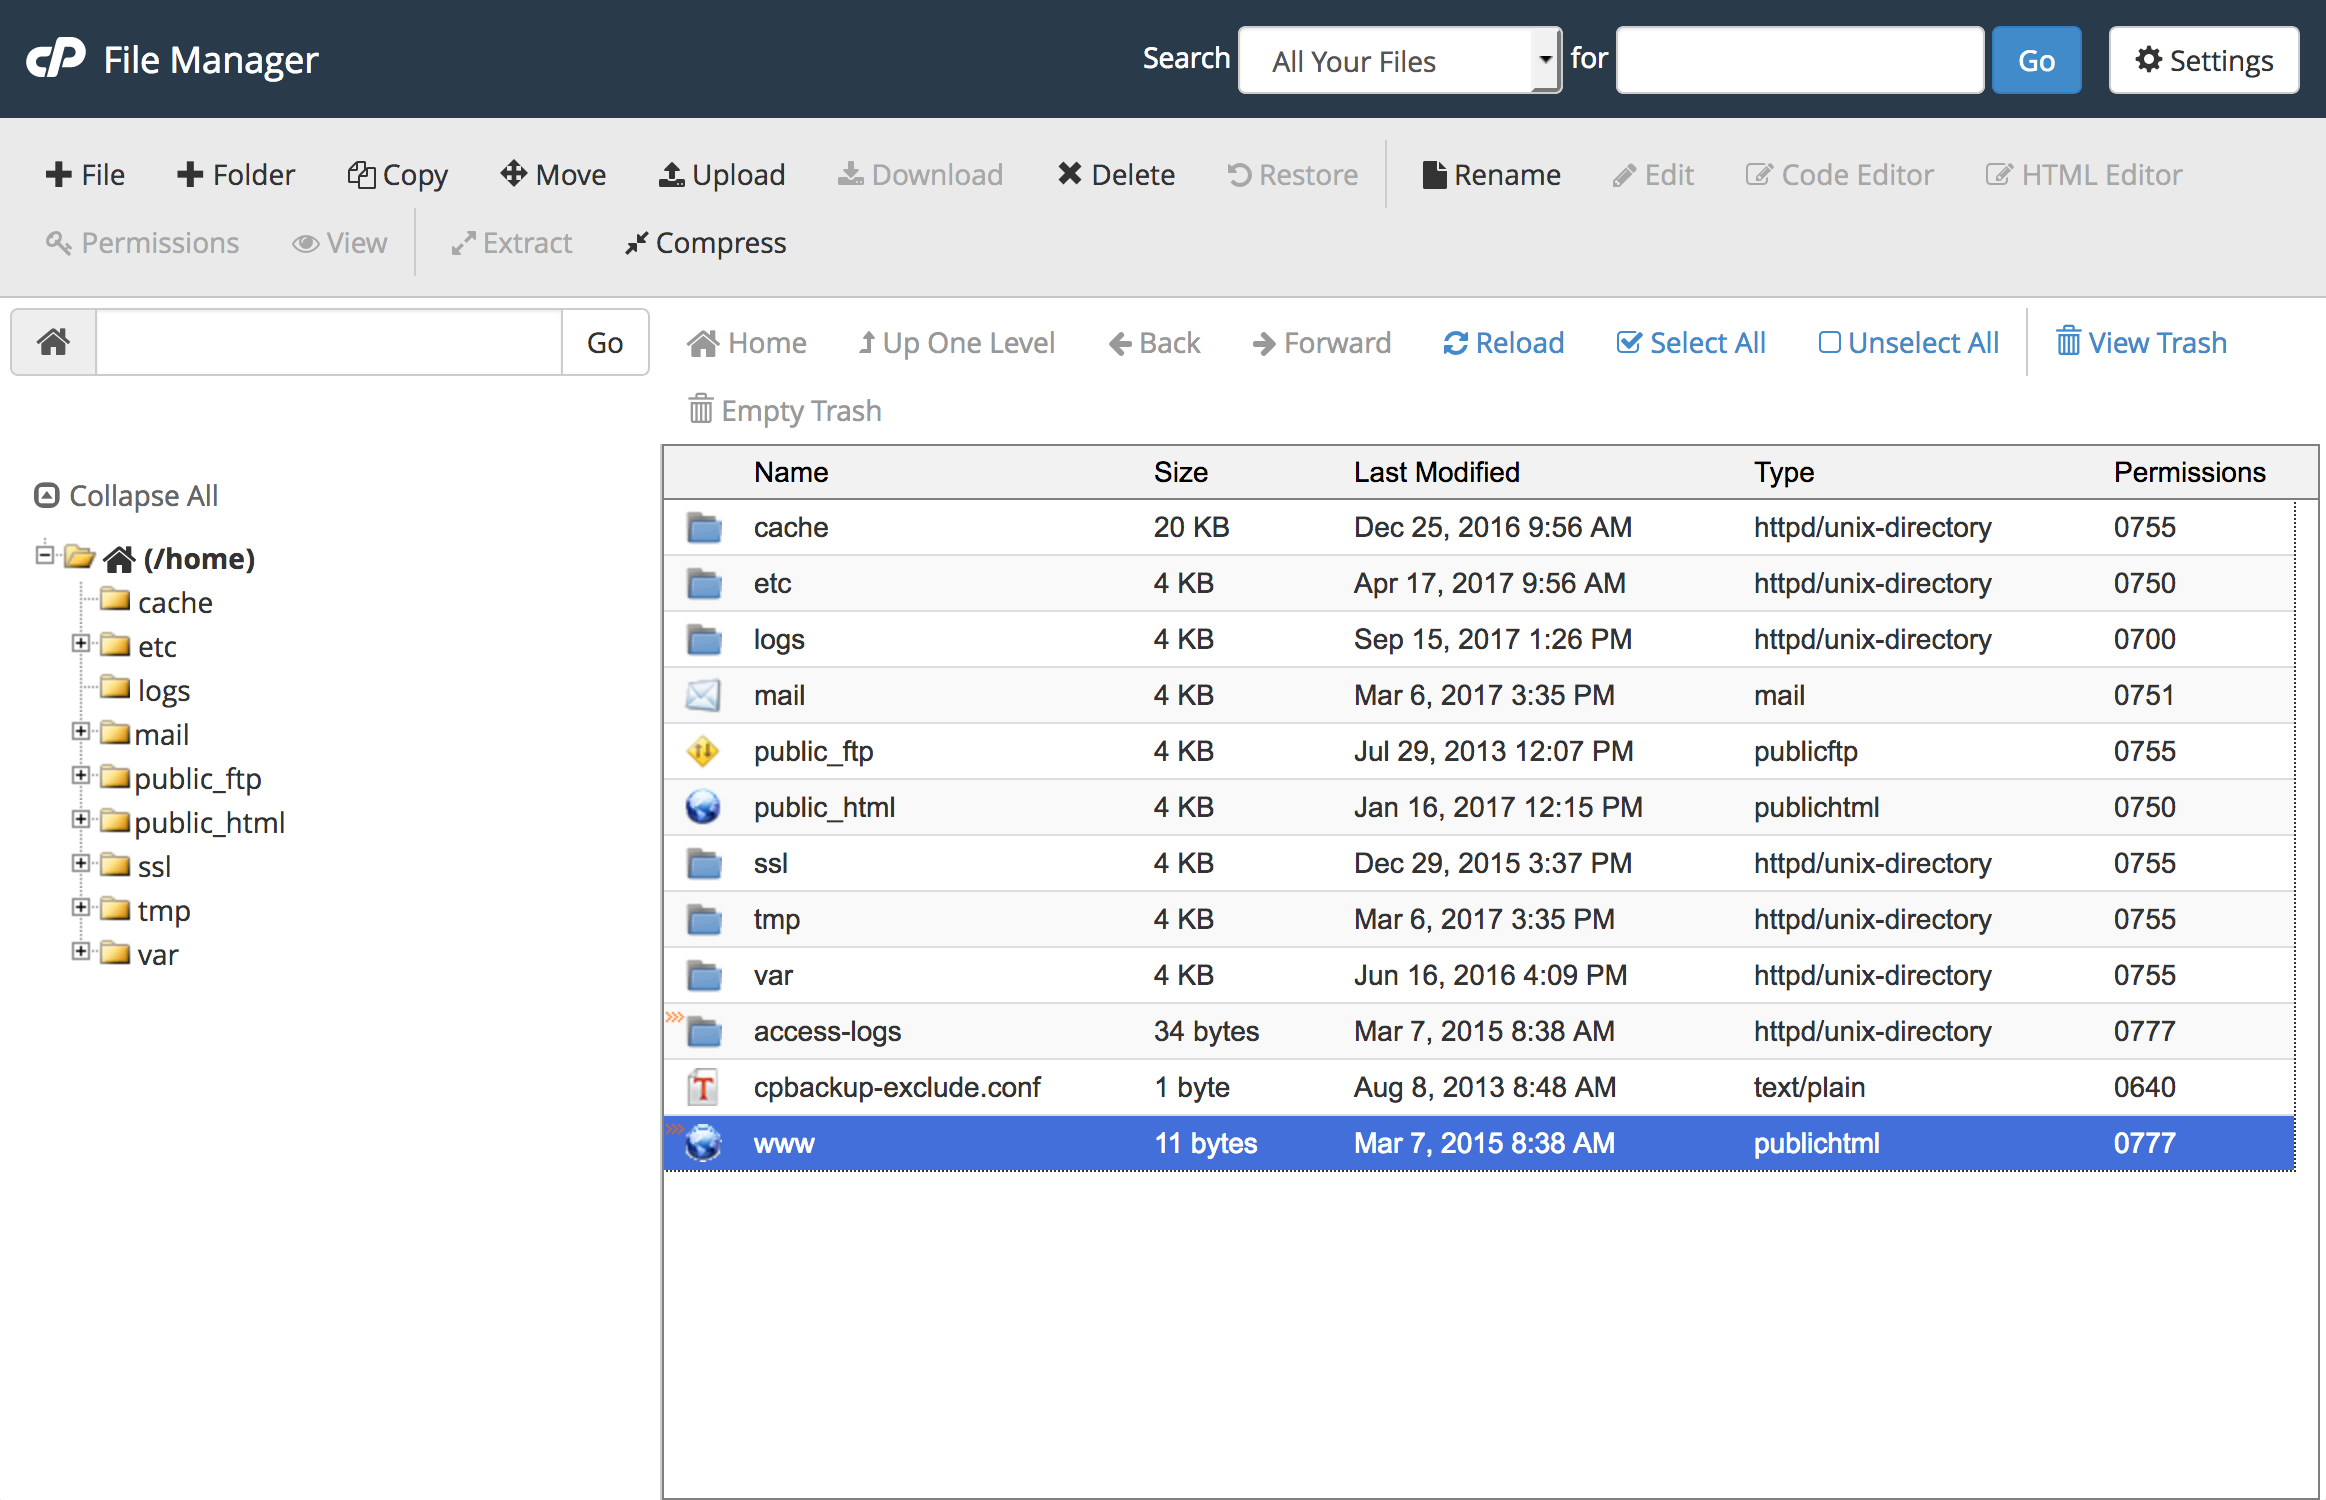
Prefer manual installation? Start by downloading WordPress from the official website. Extract the files on your computer. Next, access your Namecheap cPanel. Use the File Manager to upload WordPress files to your public_html directory. Once uploaded, create a MySQL database. Go to the “MySQL Databases” section in cPanel. Enter a name for your database. Create a user with a secure password. Add this user to the database and grant all privileges.
Now, open your website in a browser. The WordPress setup page will appear. Choose your language. Enter your database details. Use the ones you created earlier. Click “Submit.” WordPress will check your database connection. If successful, continue the setup. Add your site title, username, and password. Click “Install WordPress.” Your manual installation is complete. Your website is ready to use.
Configuring Your WordPress Site
Configuring your WordPress site is where the magic truly begins. You’ve got your domain ready through Namecheap, and now it’s time to dive into the creative process. With WordPress, you have a powerful platform at your fingertips, offering endless customization to make your site uniquely yours. This part of the journey can be both exciting and a bit daunting, but don’t worry, we’re breaking it down into manageable steps.
Setting Up Themes
Themes are the backbone of your site’s appearance. They determine how your site looks and feels, from layout to color scheme. Start by browsing the WordPress theme directory for free themes or consider premium options if you’re looking for something specific.
Once you find a theme that speaks to you, installing it is a breeze. Navigate to Appearance > Themes in your WordPress dashboard, click Add New, and either upload your theme or select from the available options. Activate your chosen theme and watch your site transform instantly.
If you’re unsure which theme to choose, think about what you want your site to convey. Is it professional, playful, or minimalist? Your theme should reflect your brand’s identity.
Adding Essential Plugins
Plugins are like apps for your WordPress site, adding functionality with just a few clicks. Consider starting with essential plugins for SEO, security, and performance. Popular options include Yoast SEO, Wordfence Security, and W3 Total Cache.
To add plugins, go to Plugins > Add New in your dashboard. You can search for plugins by name or browse categories. Once you find what you need, click Install Now and then Activate.
Be cautious not to overload your site with too many plugins, as this can slow down your performance. Focus on what’s essential for your site’s functionality and growth.
Customizing Site Appearance
Your theme sets the foundation, but customization is where your site truly becomes yours. Head over to Appearance > Customize to tweak elements like fonts, colors, and header images. This section offers a live preview, allowing you to see changes in real-time.
Personalizing your site’s appearance can be a fun process. Don’t rush it. Take the time to experiment with different styles and settings. You might discover a layout you hadn’t considered before.
Think about the user experience. Is your site easy to navigate? Is the text readable? A good user experience can keep visitors engaged and coming back for more.
Now, picture this: you’ve configured your WordPress site, and it’s looking exactly how you imagined. It’s a great feeling, isn’t it? What other changes would you consider to keep your site engaging and fresh?
Managing Your Website
Easily manage your website by using WordPress with Namecheap. Set up is simple and hosting is affordable. Perfect for beginners seeking efficient web solutions.
Managing your WordPress website with Namecheap is crucial. It ensures your site runs smoothly. This involves creating content, understanding SEO, and regular maintenance. Each task plays a key role. Let’s explore these aspects to keep your site effective.Creating Content
Content is the heart of your website. It keeps visitors engaged. Start with a content plan. Decide what topics to cover. Use simple language. Break content into small paragraphs. Add images and videos. They enhance user experience. Keep your writing clear and concise. Engage your audience with questions or bold statements. This keeps them interested.Understanding Seo Basics
SEO helps your site rank on search engines. Start with keyword research. Identify words your audience searches. Use these keywords in your content. Include them in titles and headers. Optimize images by adding alt text. Write meta descriptions for each post. They summarize your content. Use internal links to connect your pages. This improves site navigation. Track your performance with tools like Google Analytics.Regular Maintenance Tips
Regular maintenance is vital. It ensures your site functions well. Update WordPress and plugins regularly. This keeps your site secure. Backup your site often. It protects your data from loss. Check site speed regularly. Slow sites frustrate users. Optimize images and plugins to improve speed. Review your content periodically. Ensure information remains accurate and relevant. Keep an eye on broken links. Fix them promptly to maintain user trust.Troubleshooting Common Issues
When using WordPress with Namecheap, you might encounter some common issues that can disrupt your website’s flow. Understanding how to troubleshoot these problems is essential for maintaining a smooth and efficient online presence. Whether you’re dealing with hosting problems or fixing WordPress errors, knowing the right steps can save you time and frustration.
Dealing With Hosting Problems
Hosting issues can be a real headache, especially if your site goes down unexpectedly. One way to address this is by checking your server status through Namecheap’s dashboard. Look for any alerts or notifications about outages.
If your site is running slow, consider upgrading your hosting plan. Sometimes, shared hosting can’t handle high traffic. Opting for a more robust plan can improve performance significantly.
Have you ever faced downtime because of server maintenance? Scheduling updates during low traffic hours can minimize impact. It’s worth checking Namecheap’s maintenance calendar to stay ahead.
Fixing WordPress Errors
Encountering errors like the dreaded “White Screen of Death” can be alarming. Start by disabling plugins one by one. Often, a faulty plugin is the culprit.
Another common error is the “Error Establishing a Database Connection.” Double-check your database credentials in the wp-config.php file. Even a small typo can lead to big issues.
Consider using debugging tools available in WordPress. They can pinpoint exactly where the problem lies. Have you tried using the WP Debugging plugin? It’s a lifesaver when hunting down elusive errors.
Ask yourself, are you backing up your site regularly? A backup can be your best friend when troubleshooting major issues. It allows you to restore your site to a previous state effortlessly.
Remember, every problem has a solution. It’s about knowing where to look and how to address it effectively. By understanding these common issues and their fixes, you can ensure your WordPress site runs smoothly on Namecheap hosting.
Enhancing Website Security
Building a WordPress site with Namecheap offers many benefits. But securing your site is crucial. Website security protects your data and your visitors. A secure site builds trust and enhances credibility. Many tools and practices help to secure your WordPress site.
Implementing Security Plugins
Security plugins add a layer of protection. They help keep threats at bay. Popular plugins include Wordfence and Sucuri. These plugins monitor your site for vulnerabilities. They provide alerts for suspicious activities. Installing them is easy through your WordPress dashboard. Regular updates keep your plugins effective. Always choose plugins with high ratings and reviews. This ensures reliability and support.
Best Practices For Protecting Your Site
Use strong passwords for all accounts. Change them regularly. Limit login attempts to prevent unauthorized access. Enable two-factor authentication for extra security. Regularly update WordPress themes and plugins. Outdated versions can be vulnerable. Back up your site frequently. This ensures data recovery if needed. Monitor your site’s activity regularly. Stay informed about new security threats.
Credit: www.namecheap.com
Frequently Asked Questions
Is Namecheap Compatible With WordPress?
Yes, Namecheap is compatible with WordPress. They offer easy WordPress installations and reliable hosting services. Their support team assists with WordPress-related queries. Namecheap provides hosting plans optimized for WordPress performance. Users can manage WordPress updates and backups efficiently. Their platform ensures fast and secure WordPress website operations.
How Do I Connect My Domain With WordPress?
To connect your domain with WordPress, access your domain registrar’s DNS settings. Update the nameservers to point to WordPress. Log in to your WordPress dashboard and verify the domain under settings. Ensure propagation, which may take up to 48 hours.
Your domain will then be linked to WordPress.
How Do I Transfer A WordPress Site To Namecheap?
To transfer a WordPress site to Namecheap, first, back up your site files and database. Then, update DNS settings at Namecheap. Use a plugin or FTP to upload files to the new server. Import the database and configure wp-config. php with new database details.
Finally, check the site’s functionality.
How Do I Connect My Namecheap Domain To My Website?
Log in to Namecheap, go to Domain List, select your domain, and click “Manage. ” Navigate to “Advanced DNS,” then add or edit A and CNAME records to point to your hosting provider’s IP address and settings. Save changes, and the domain will connect to your website.
Conclusion
WordPress with Namecheap is simple and effective for your website needs. Follow the steps outlined to connect both seamlessly. This pairing ensures reliable hosting with easy content management. Start by setting up your Namecheap account. Then, install WordPress for a smooth experience.
Remember to keep everything updated for security. Regular backups help protect your data. With these tips, manage your website confidently. Enjoy the benefits of a powerful and user-friendly platform. Perfect for beginners and experts alike. So, dive in and make the most of your online presence today.


