
Are you ready to bring your website dreams to life using WordPress on Namecheap? If you’re looking to create a stunning online presence without breaking the bank, you’re in the right place.
Imagine having complete control over your website’s design and functionality, all while keeping it secure and running smoothly. With Namecheap and WordPress, you can achieve this effortlessly. This guide is here to walk you through every step, ensuring you have the confidence and knowledge to build the perfect website.
You’ll discover tips, tricks, and insights that will make the process easier and more enjoyable. So, let’s get started on turning your digital aspirations into reality!
Credit: www.namecheap.com
Setting Up Your Namecheap Account
Setting up your Namecheap account is the first step to harnessing the power of WordPress for your website. Whether you’re a beginner or a seasoned webmaster, understanding the initial steps can save you time and headaches down the line. Let’s dive into the essentials of getting your Namecheap account ready.
Creating An Account
Starting your journey with Namecheap is straightforward. Visit the Namecheap website and click on the Sign Up button. Fill in your details like name, email, and password. It’s essential to use an active email address since you’ll receive account-related notifications. Once registered, verify your email to activate your account.
Domain Registration Process
With your account set up, the next step is registering a domain. Search for a domain name using the Namecheap search bar. Choose a name that represents your brand or purpose effectively. Select your preferred domain extension, such as .com, .net, or .org. Add it to your cart and proceed to checkout. Can you imagine the perfect domain name that captures the essence of your website?
Accessing The Dashboard
After registration, accessing your Namecheap dashboard is crucial for managing your domain. Log in to your Namecheap account, and you’ll find a user-friendly dashboard. Here, you can manage your domains, view billing information, and access additional services. Familiarize yourself with the dashboard layout to streamline your WordPress setup process. Do you feel confident navigating your dashboard?
Setting up your Namecheap account efficiently paves the way for a smooth WordPress experience. Taking these initial steps with care ensures you’re on solid ground as you build and expand your online presence. What’s your biggest takeaway from this process?
Choosing A Hosting Plan
Discover how to use WordPress on Namecheap effortlessly. Select the right hosting plan to ensure smooth performance. Namecheap’s user-friendly interface makes it easy to install and manage WordPress for your website.
Choosing the right hosting plan is crucial when starting with WordPress on Namecheap. A good hosting plan ensures your website performs well. It affects speed, security, and reliability. So, it’s important to understand your options. Let’s dive into the types of hosting and how to make the best choice.Types Of Hosting Available
Namecheap offers various hosting types. Shared hosting is popular for beginners. It’s affordable and easy to use. Then there’s VPS hosting. It provides more control and resources. Dedicated hosting is another option. It’s for large websites needing maximum power. Lastly, there’s WordPress hosting. It’s optimized for WordPress sites.Selecting The Right Plan
Think about your website needs. A personal blog requires less power. An online store needs more resources. Check your budget. Shared hosting is budget-friendly. It suits small sites. For growing sites, VPS hosting is better. Consider future growth. Will your site need more resources soon? Choose a plan that can scale.Purchasing Your Hosting
Visit Namecheap’s website. Browse the hosting plans. Compare features and prices. Once you decide, click the “Buy Now” button. Follow the on-screen instructions. Enter your payment details. After purchasing, you’ll receive a confirmation email. Now, you can set up WordPress easily. Namecheap offers guides to help.Installing WordPress
Installing WordPress on Namecheap is simple. This process involves several steps. Each step is crucial for a successful installation. Follow the steps below to install WordPress smoothly.
Accessing The Cpanel
First, log in to your Namecheap account. Locate the dashboard. Find the “cPanel” button and click it. This takes you to the control panel.
In the cPanel, you will manage your website. Look for the “Software” section. This is where you will find installation tools.
Using The Softaculous Installer
Within the cPanel, locate “Softaculous Apps Installer.” It simplifies WordPress installation. Click on the Softaculous icon.
Next, find WordPress in the list of applications. Click “Install.” A new page will open. Here, you configure your WordPress settings.
Configuring Basic Settings
Choose the domain where you want WordPress installed. Select the directory, or leave it blank. This installs WordPress in the main directory.
Fill in your site settings. Add a site name and description. Create a username and password for your admin account. Choose a strong password.
Set your preferred language. Finally, click “Install” at the bottom of the page. WordPress will begin installing. Once complete, you can access your new WordPress site.
Customizing Your WordPress Site
Setting up WordPress on Namecheap is easy. Start by choosing a hosting plan. Then, install WordPress through the Namecheap dashboard. Customize your site by selecting themes and plugins to match your style.
Customizing Your WordPress Site is an exciting journey that allows you to transform your online presence to reflect your unique style and needs. With WordPress on Namecheap, you have a vast array of tools at your disposal. The key is knowing how to use these tools effectively to create a site that not only looks great but also functions smoothly.Selecting A Theme
The theme of your WordPress site is like its wardrobe. It sets the tone for your visitors’ experience. When choosing a theme, consider your brand’s personality and the message you want to convey. Namecheap offers a variety of free and premium themes to fit any niche. Do you want a clean, minimalistic design? Or perhaps something bold and colorful? Spend time browsing through the WordPress theme directory. Remember, your theme should be responsive and mobile-friendly. This ensures your site looks great on any device.Adding Essential Plugins
Plugins are your secret weapon for adding functionality to your WordPress site. Think of them as apps for your website. From enhancing SEO to boosting security, there’s a plugin for almost everything. Start with essential plugins like Yoast SEO for optimizing your content, and Wordfence Security to protect your site from threats. Don’t forget about contact forms. Plugins like WPForms make it easy for visitors to get in touch with you. Too many plugins can slow down your site. Choose wisely and only install what you truly need.Setting Up Pages And Posts
Pages and posts are the backbone of your WordPress site. Pages are static and great for content like your About or Contact pages. Posts are dynamic and used for blog content. To set up a page, navigate to the WordPress dashboard and click on “Pages” then “Add New.” For posts, go to “Posts” and select “Add New.” Use headers, images, and media to make your content engaging. What do you want to share with your audience? Structure your content to keep them informed and entertained. Customizing your WordPress site on Namecheap is all about making your site work for you. What aspects are most important to your brand? Dive in and start creating a site that truly represents you.Enhancing Site Security
Enhancing the security of your WordPress site on Namecheap is a crucial step in protecting your online presence. With cyber threats on the rise, safeguarding your site should be a top priority. Whether you’re a seasoned blogger or a newbie, understanding how to secure your site is essential. Here’s how you can bolster your WordPress site’s security using Namecheap services.
Activating Ssl Certificates
Activating an SSL certificate is the first step in securing your WordPress site. An SSL certificate encrypts data transmitted between your site and its visitors. This means sensitive information like passwords and credit card numbers are protected from hackers.
To activate an SSL certificate on Namecheap, log into your account and navigate to the SSL section. Follow the simple prompts to purchase and install the certificate on your domain. You’ll see a padlock icon next to your URL, reassuring visitors of a secure connection. Isn’t it comforting to know your site is trustworthy?
Installing Security Plugins
WordPress offers various plugins to enhance your site’s security. Plugins like Wordfence and Sucuri provide firewall protection, malware scanning, and login security. Installing these plugins is straightforward.
Visit the WordPress plugin directory, search for your chosen security plugin, and click ‘Install’. Once installed, configure the settings to suit your needs. Do you prefer automatic scans or manual ones? Adjust the settings to match your security preference.
Regular Backups
Regular backups are your safety net. If your site is compromised, you can quickly restore it to a previous state. Use plugins like UpdraftPlus to schedule regular backups of your site.
Set up daily or weekly backups depending on your site’s activity level. Storing backups on a cloud service like Google Drive adds an extra layer of protection. Imagine the relief of knowing you can recover your site with a few clicks. How often do you backup your site?
By focusing on these practical steps, you ensure your WordPress site on Namecheap is secure and reliable. Protect your hard work and give your visitors peace of mind with a secure browsing experience. What’s stopping you from enhancing your site’s security today?
Optimizing Site Performance
Setting up WordPress on Namecheap boosts site performance. Begin by choosing Namecheap’s hosting plan. Then, easily install WordPress through the control panel. Optimize settings for faster loading speeds and a smoother user experience.
Optimizing your WordPress site on Namecheap can significantly enhance user experience and boost your search engine rankings. Visitors expect fast-loading pages, and search engines like Google prioritize sites that deliver content quickly. By focusing on site performance, you not only satisfy your audience but also improve your online visibility.Improving Load Speed
Load speed is crucial. Slow sites frustrate visitors and lead to higher bounce rates. Start by choosing a lightweight theme and minimize the use of heavy plugins. Use tools like GTmetrix or Google PageSpeed Insights to analyze your site’s speed. These tools provide actionable recommendations, such as compressing images and enabling browser caching. Consider upgrading your hosting plan on Namecheap if your site demands more resources. A faster server can significantly reduce load times.Caching Techniques
Caching stores a version of your site in the visitor’s browser. This reduces server load and speeds up subsequent visits. Use plugins like W3 Total Cache or WP Super Cache to easily implement caching. Set up browser caching to store static files. This ensures that users don’t have to reload everything when revisiting your site. Experiment with different caching settings. Monitor the impact on performance, and adjust accordingly.Monitoring Site Performance
Regularly check your site’s performance. Use tools like Pingdom or UptimeRobot to keep an eye on uptime and response times. Set alerts for any sudden drops in performance. This allows you to quickly address issues before they affect your audience. Ask yourself: How often do you check your site’s health? Regular monitoring can prevent minor issues from becoming major headaches. Remember, optimizing your WordPress site on Namecheap is an ongoing process. By taking these steps, you ensure a smoother, faster experience for your visitors. What tweaks will you try today?Managing Your Site
Managing your WordPress site on Namecheap is crucial for success. It ensures smooth operation and enhances the user experience. This involves regular updates, efficient content management, and solving common issues.
Regular Updates
Keep your WordPress version up-to-date. This protects your site from security threats. Updates bring new features and improve performance. Namecheap makes updating easy. Access your dashboard and check for available updates. Install them promptly to keep your site safe and fast.
Content Management
Effective content management attracts more visitors. Create and organize posts using categories and tags. This helps users find what they need quickly. Use WordPress’s media library for images and videos. Optimize them for faster loading times. Clean up your content regularly. Delete old or irrelevant posts to maintain quality.
Troubleshooting Common Issues
Common issues can disrupt your site’s functionality. Learn basic troubleshooting to fix them. Encountering a white screen? This might be a plugin conflict. Deactivate plugins and reactivate them one by one. Still facing issues? Check your themes and widgets. Review error logs for detailed insights. Use Namecheap’s support if you need help.
Credit: www.namecheap.com
Credit: www.namecheap.com
Frequently Asked Questions
Is Namecheap Good For WordPress?
Namecheap is a reliable choice for WordPress hosting. It offers affordable plans, excellent uptime, and user-friendly features. Their customer support is responsive, and they provide one-click WordPress installation. Namecheap also includes free SSL certificates, enhancing website security. It’s a good option for beginners and small to medium-sized websites.
How Do I Connect My Domain With WordPress?
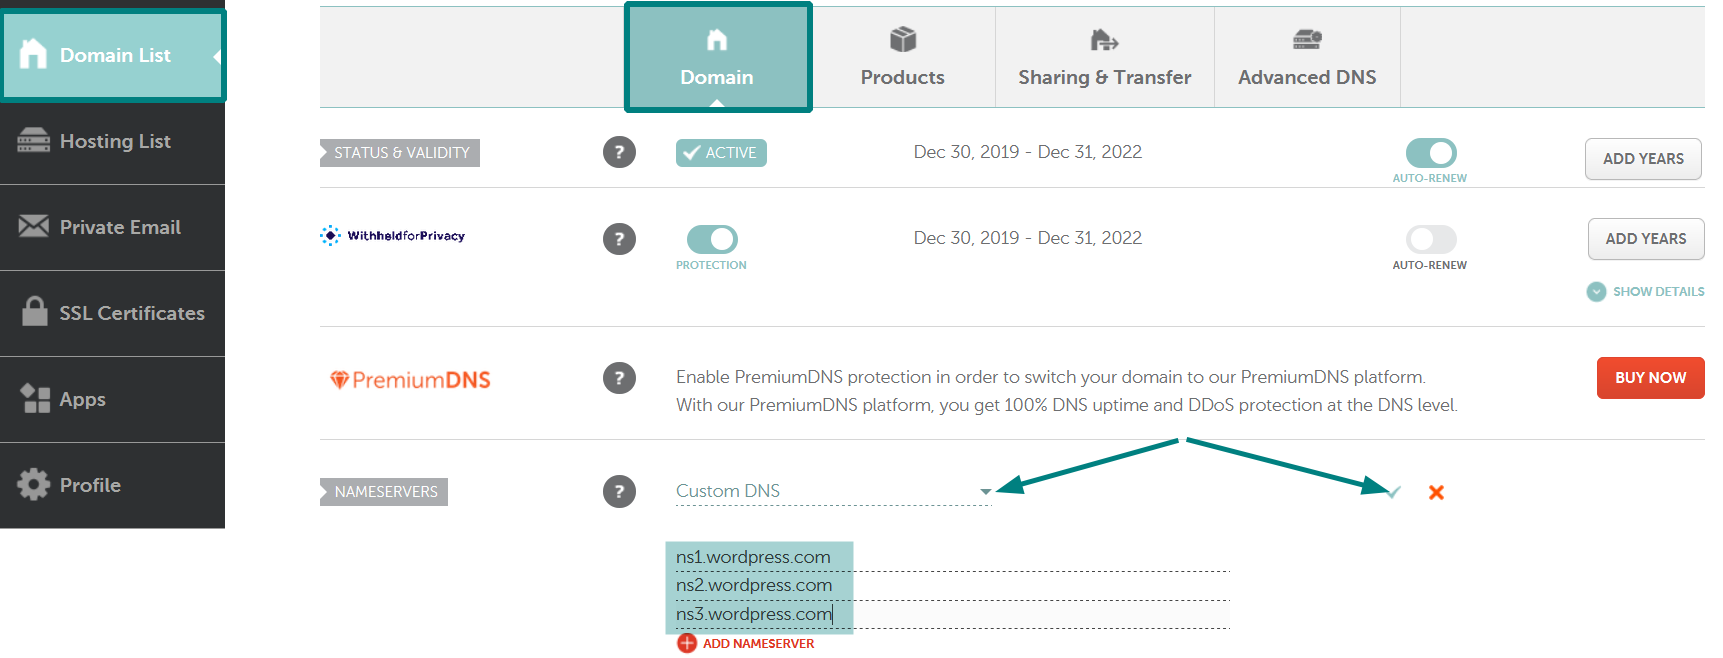
To connect your domain with WordPress, update the domain’s DNS settings to point to your hosting provider. Access your hosting account and find the DNS settings section, then add your domain and configure it to point to WordPress servers. Ensure the domain is registered and your hosting plan supports custom domains.
How Do I Transfer A WordPress Site To Namecheap?
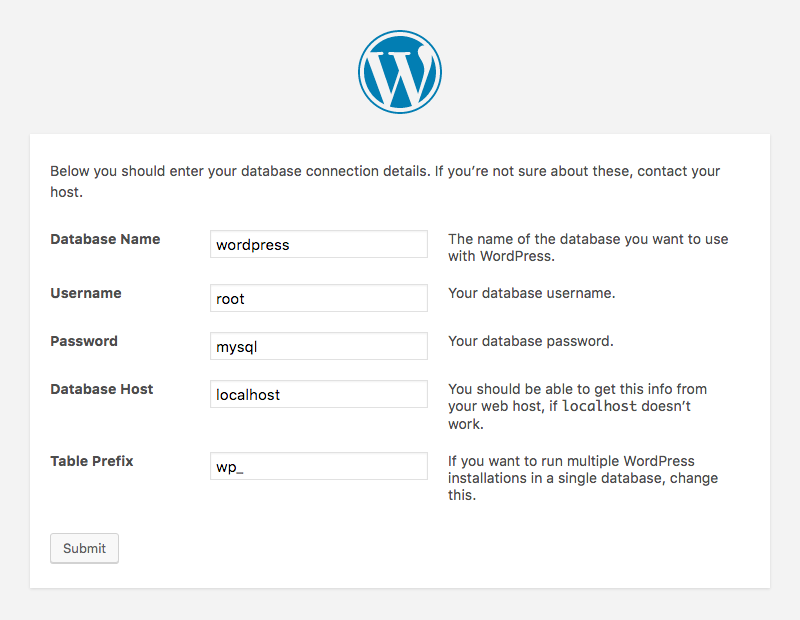
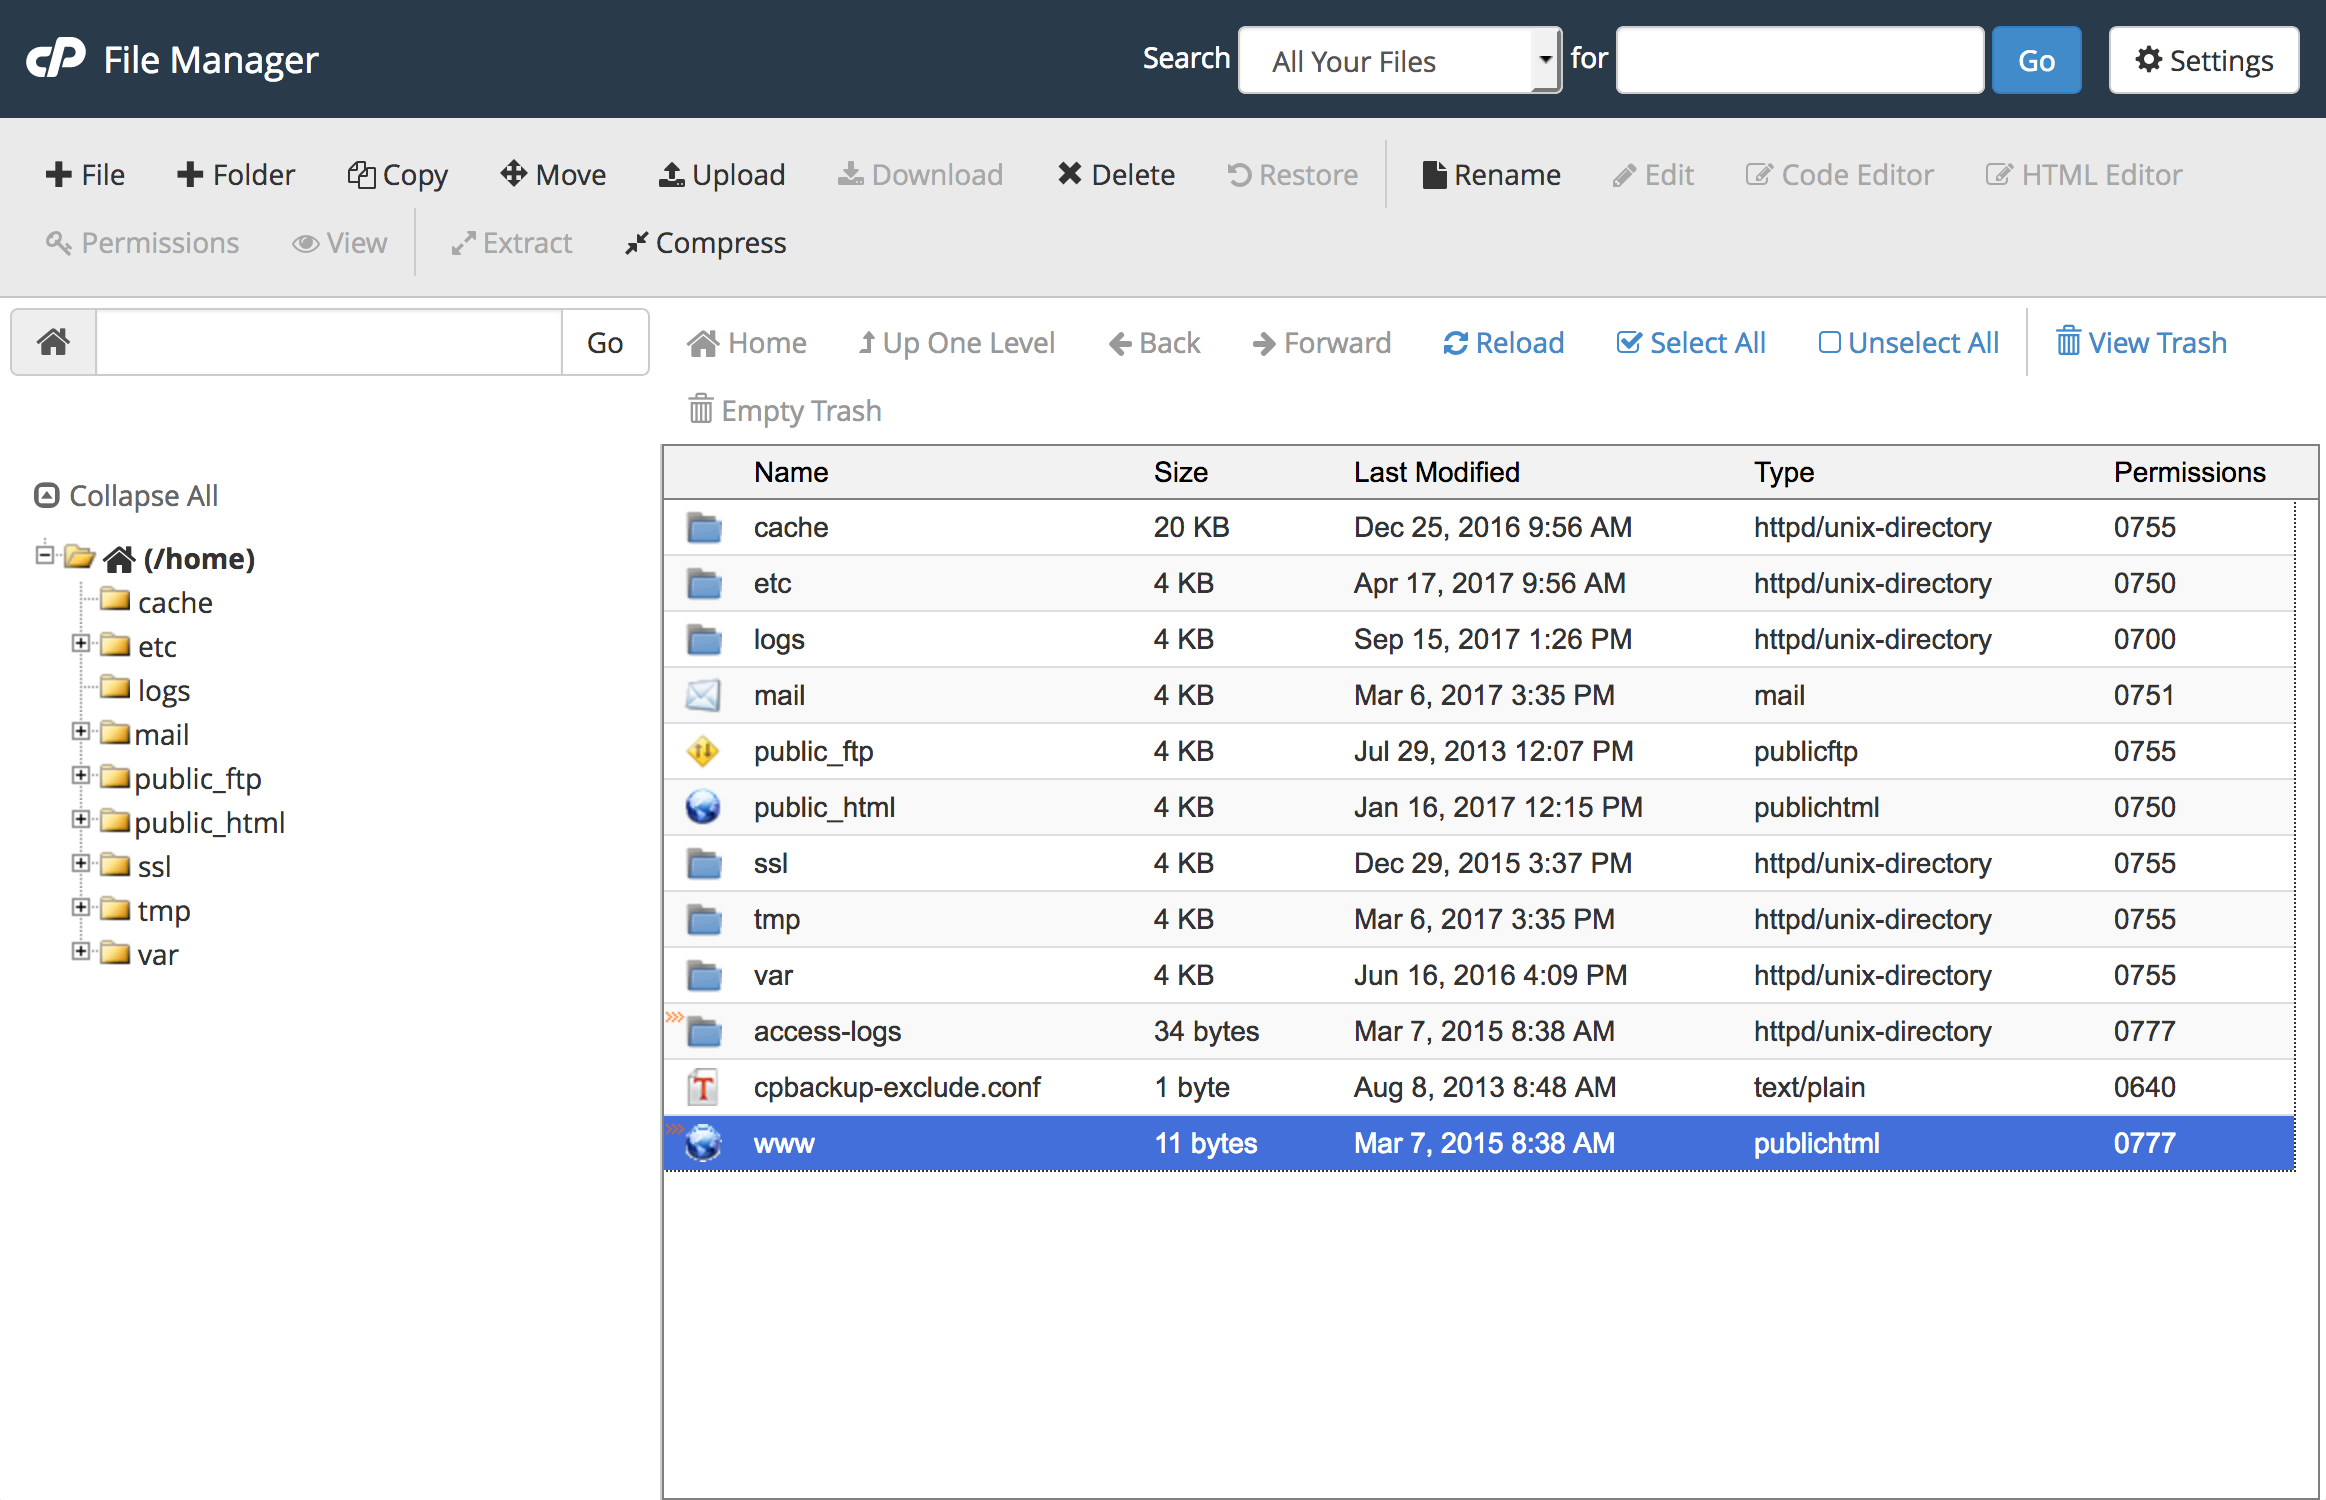
Transfer your WordPress site to Namecheap by backing up files, exporting the database, and updating DNS settings. Use FTP to upload files. Import the database to Namecheap’s hosting. Ensure WordPress configuration file matches new database details. Test the site for functionality.
Contact Namecheap support for assistance if needed.
How To Access The WordPress Dashboard On Namecheap?
Log in to Namecheap account. Navigate to the “Hosting List” under the “Account” tab. Click “Manage” next to your domain. Select “WordPress” from the left menu. Click “Login to WordPress Admin” to access the dashboard. Ensure you have your login credentials ready for successful access.
Conclusion
Using WordPress on Namecheap is simple and effective. You can easily manage your website. Namecheap provides affordable hosting options. This makes it beginner-friendly. Follow the steps to set up your site. Customize themes and plugins as needed. Regular updates keep your site secure.
Troubleshooting resources are readily available. These help solve common issues quickly. Enjoy the flexibility WordPress offers. Create a professional-looking site without hassle. Start your online journey today with confidence. Remember, practice makes perfect. Keep learning and exploring new features. Your website will thrive with time and effort.


