
Are you ready to give your WordPress site a fresh new look but feeling stuck on how to upload your theme using FileZilla? You’re not alone.
Many WordPress users find themselves lost when it comes to navigating the technical side of their website. But don’t worry, you’re about to discover just how simple it can be to transform your site with the perfect theme. Imagine the satisfaction of seeing your website’s design come to life, exactly the way you envisioned it.
By mastering the process of uploading themes via FileZilla, you’ll unlock the door to endless customization possibilities for your site. This guide is crafted to walk you through each step with clarity and ease, so you can focus on what truly matters—creating a website that wows your audience. Stick with us, and by the end of this article, you’ll feel empowered and ready to take your WordPress site to the next level.
Credit: www.wpbeginner.com
Preparation Steps
First, visit the FileZilla website. Look for the download section. Choose the version for your computer. Click the download button. Once downloaded, open the setup file. Follow the on-screen instructions. Install FileZilla on your system.
Begin by finding a WordPress theme you like. Visit a trusted theme provider. Some popular sites are ThemeForest and WordPress.org. Look for the download button. Save the theme file on your computer. Ensure the file is in .zip format. This format is necessary for uploading.
Accessing Your Server
First, find your FTP credentials. These are needed to access your server. Check your hosting account for these details. Look for the FTP username, password, and server address. Keep these details safe. You will use them later.
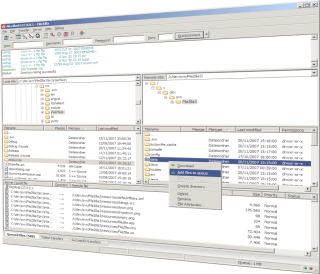
Open FileZilla on your computer. Enter your FTP credentials in the given fields. Type your server address in the “Host” field. Input your username and password in their fields. Click on the Quickconnect button. You should see your server files now.
Uploading The Theme
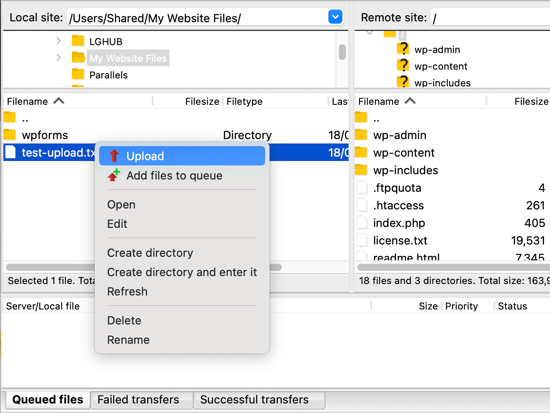
First, open Filezilla. Connect it to your WordPress site. Find the folder named wp-content. Inside, there’s a folder called themes. This is where your theme files go.
On your computer, find the theme folder. It’s the one you want to upload. Drag and drop it into the themes folder on Filezilla. Filezilla will start uploading the files. Wait until all files are transferred. Make sure no files are missed. Once done, check your WordPress dashboard. Your theme should be ready to use.
Credit: docs.presscustomizr.com
Activating The Theme
First, log into your WordPress Dashboard. Use your username and password. Once logged in, look for the Appearance tab. It’s on the left side menu. Click on it. Then click on Themes. Here, you’ll see all your themes.
Next, enable the new theme you uploaded. Find your theme in the list. Click on the Activate button. It’s under your theme’s name. This makes your new theme live. Your website will now use this theme.
Troubleshooting Common Issues
Uploading a theme to WordPress using Filezilla can seem tricky. Ensure Filezilla is connected to your server. Drag and drop theme files into the ‘wp-content/themes’ folder. Verify successful upload by checking the WordPress dashboard for the new theme.
Connection Problems
Sometimes, the connection might fail. Ensure your internet is stable. Check the server settings in Filezilla. Use the right username and password. Double-check your host name. Make sure port number is correct. Look for any firewall issues blocking Filezilla. Disable it and try again. Check if the server is down. Wait a while and reconnect. Ensure Filezilla is up-to-date.
Theme Not Displaying
The theme might not show up correctly. Ensure the theme is in the right folder. Check the wp-content directory. Look for the themes folder. Make sure you uploaded all files. Confirm the theme is activated in WordPress. Check for any missing files. Update WordPress to the latest version. Ensure compatibility with your WordPress version. Check if the theme is broken. Try reinstalling the theme again.

Credit: visualmodo.com
Best Practices
Always make a backup of your website. This keeps your data safe. Mistakes can happen when uploading. A backup helps you restore everything. Use a plugin or manual method to back up. Save the backup file in a safe place. Check that the backup is complete. This step is very important.
Ensure the theme is compatible with your WordPress version. Check the theme’s requirements. Look for information on the theme page. Ensure it supports your plugins. Incompatible themes can cause issues. Your website might not work well. This step saves time and trouble later.
Frequently Asked Questions
How Do I Connect Filezilla To WordPress?
To connect Filezilla to WordPress, open Filezilla and enter your FTP credentials. These include your host, username, password, and port number. You’ll find these details in your web hosting account. Once entered, click ‘Quickconnect’ to establish a connection. You’ll then see your WordPress files in the remote site panel.
Can I Upload A Theme Without Filezilla?
Yes, you can upload a theme through WordPress directly. Go to the ‘Appearance’ section in your WordPress dashboard. Click ‘Themes’, then ‘Add New’. You can upload your theme’s zip file here. However, Filezilla offers more control and is useful for larger themes or troubleshooting issues.
What Are The Benefits Of Using Filezilla?
Filezilla provides a reliable way to manage WordPress files. It allows direct access to your server, offering more control over uploads and downloads. You can easily edit files, manage permissions, and troubleshoot issues. Filezilla is especially useful for larger themes or when WordPress dashboard access is limited.
Is Filezilla Free To Use?
Yes, Filezilla is free to download and use. It’s open-source software, making it accessible for anyone needing FTP access. It offers essential features without any cost, though premium versions with advanced features are available. Filezilla supports cross-platform compatibility, working on Windows, Mac, and Linux systems.
Conclusion
Uploading a WordPress theme via FileZilla is straightforward. First, connect to your server using your credentials. Then, find the theme files on your computer. Drag and drop these files into the WordPress themes directory on your server. Finally, activate the theme in your WordPress dashboard.
This method is quick and effective. No coding skills needed. Follow these steps, and your new theme will be live. Easy and efficient. Now your website has a fresh look. Enjoy the new design and keep exploring WordPress possibilities.


