
Are you feeling overwhelmed by the thought of uploading files to your GoDaddy web hosting account? You’re not alone.
Many people find this process daunting at first. But here’s the good news: it’s easier than you think. Imagine effortlessly managing your website’s content, knowing that your files are exactly where they need to be. This guide is crafted to help you achieve just that.
You’ll discover simple, step-by-step instructions that even a beginner can follow. By the end of this article, you’ll not only have a clear understanding of how to upload your files, but you’ll also gain a newfound confidence in managing your online presence. Ready to simplify your web hosting experience? Let’s dive in and unlock the secrets to seamless file uploads with GoDaddy.
Choosing The Right File Manager
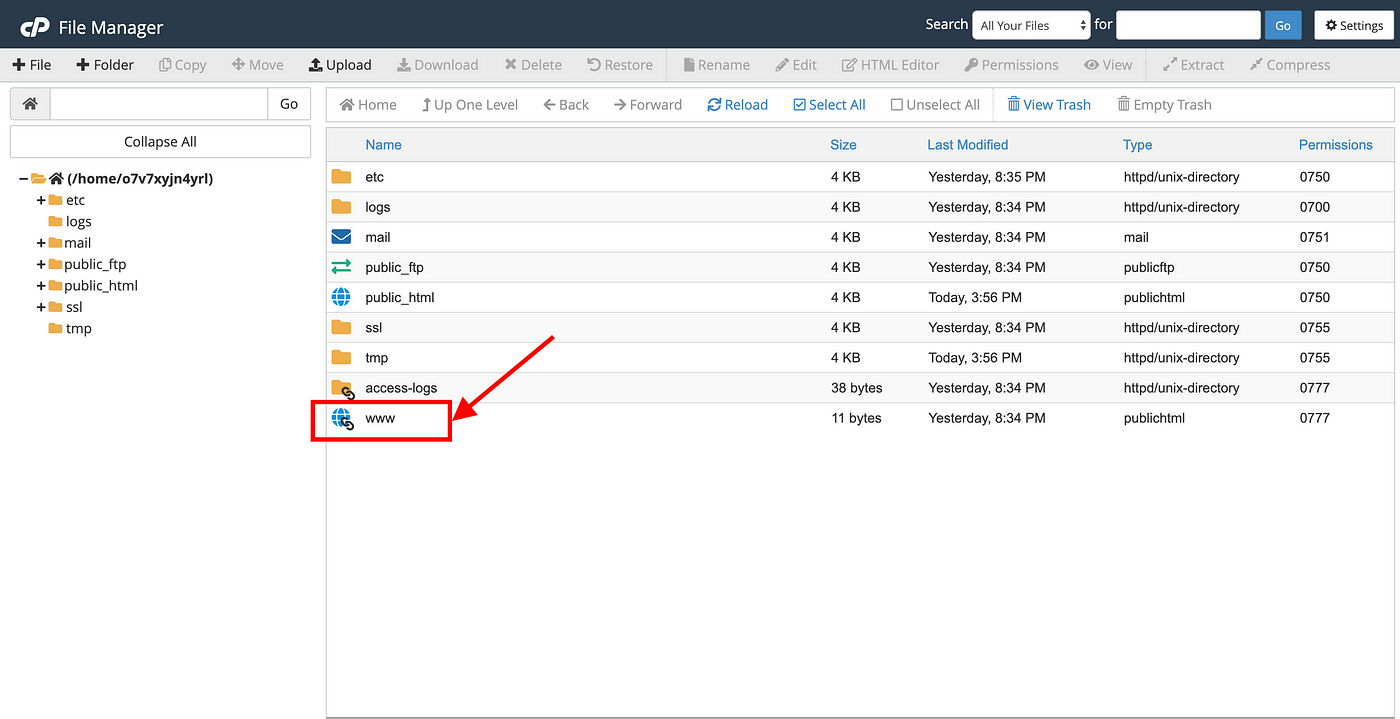
Picking a file manager is important. It helps in uploading files. Godaddy offers several tools. One popular tool is the cPanel File Manager. It’s easy to use. FTP clients like FileZilla are also available. They are useful for larger uploads. cPanel is good for small tasks. FTP is better for big ones. Check your hosting plan. It might have a different tool. Always look for the File Manager option in your account. This is where you start.
Click on it to open. You’ll see your files and folders. To upload, find the Upload button. It’s usually at the top. Click it. Choose your files from your computer. Wait for the upload to finish. Make sure the files are in the right folder. This ensures your website works well.
Credit: klavenj.medium.com
Accessing Godaddy Control Panel
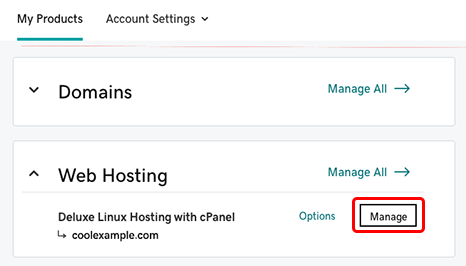
First, log into your Godaddy account using your username. Click on the “My Products” tab. Find the Web Hosting section. Click the “Manage” button next to your hosting plan. This opens your control panel. Look for the cPanel Admin option. Click it to enter the file management area. You will see a lot of icons and options. Focus on the File Manager icon. Click it to access your website files. Now, you are ready to upload files. This is the place you manage your site files.
Navigating To File Manager
First, open the Godaddy dashboard. Log in with your details. Find the web hosting section. Click on it. Look for File Manager. It’s usually in the tools area. Click the File Manager. A new window will open. This window shows your files. You can add new files here.
On the left, there are folders. These folders hold your website files. Click on a folder to see inside. Choose where you want to upload your file. Use the Upload button at the top. Click it. A box will appear. Select your file from your computer. Click Open to start uploading. Your file will show in the folder.
Uploading Files Via File Manager
First, open the File Manager in your Godaddy account. Use the file tree to find where you want to upload your files. Click the “Upload” button. This will open a new window on your screen. Find the files you want to upload on your computer. Select them by clicking once on each file.
Look at the progress bar to see the upload status. It shows how much of your file is uploaded. Wait until it reaches 100%. Do not close the window while uploading. This can stop the upload process. You will see a message once the upload is complete. Check your files in the File Manager. Make sure they are in the right place.
Using Ftp For File Upload
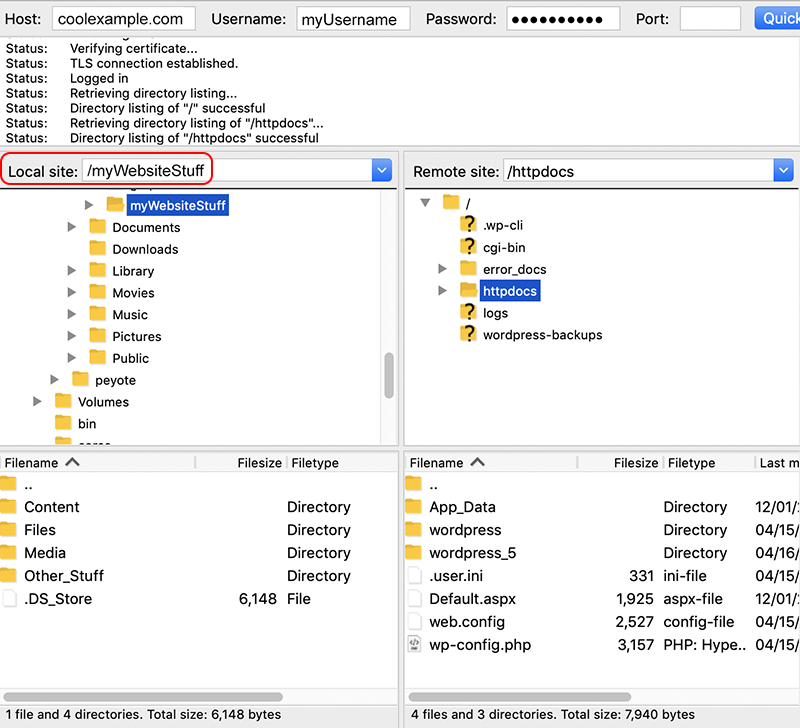
An FTP client helps to upload files easily. First, download an FTP client like FileZilla. Install it on your computer. Open the software once installed.
You need your FTP credentials. These include server, username, and password. Find these details in Godaddy’s hosting dashboard. Enter them in the FTP client. Make sure to choose the right port number, usually 21.
Connect to the server using the FTP client. Select the files you want to upload. Drag and drop them into the server window. Wait for the upload to complete. Check to confirm files are on the server.
Uploading Via Cpanel
Log into your Godaddy account to access cPanel. Click on “Web Hosting” and then click “Manage”. Look for the cPanel Admin button. Click it to open the cPanel dashboard. Here, you will see many options for managing your hosting.
In cPanel, find the File Manager icon. Click on it to open. Navigate to the folder where you want to upload files. Click on the “Upload” button. Select the files you want to upload from your computer. Wait for the upload to complete. You will see your files in the folder when done.
Managing Uploaded Files
Renaming files is simple. Click on the file name. Type the new name. Hit enter. The file now has a new name. Be careful while renaming. Wrong names can be confusing.
Deleting unwanted files is necessary. Select the file you want to delete. Press the delete button. Confirm your choice. The file is gone. No clutter means easy navigation.
Organizing file structure helps a lot. Create folders for different files. Move files into the right folders. Name folders clearly. A tidy structure saves time. You find files faster.
Troubleshooting Common Issues
Uploading files to GoDaddy web hosting can sometimes be tricky. Common issues include incorrect file paths and permissions. Checking these settings helps ensure a smooth upload process.
Addressing Upload Errors
Upload errors can be frustrating. They stop files from reaching the server. Check your internet connection first. Slow internet can cause problems. File size matters too. Large files may not upload easily. Compress files if needed. Use tools like WinRAR or 7-Zip. Server settings can block uploads. Contact support for help. They can adjust settings for you. File names should be simple. Avoid special characters. They confuse the server. Following these tips can solve most upload issues.
Ensuring File Compatibility
Files must be compatible with the server. File format is key. Common formats like JPEG, PNG, and PDF work well. HTML and CSS files are also supported. Check file extensions before uploading. Wrong extensions lead to errors. Software versions can affect compatibility. Update software to the latest version. Keep track of changes in file format standards. Plugins might be needed for certain files. Install necessary plugins for smooth operation. Compatibility ensures files open correctly.
Best Practices For File Upload
File security is very important. Always use strong passwords. Encrypt sensitive files before uploading. Scan files for viruses. Use reliable antivirus software. Avoid uploading unknown files. Check file sources carefully. Regularly update your security software. This keeps threats away.
Backing up files is very important. Use external hard drives. Save copies on cloud storage. This protects data from loss. Schedule regular backup times. Ensure backups are done weekly. Verify backups after saving. Check if files are correct. This keeps your data safe. Always backup before major changes.
Credit: www.godaddy.com
Credit: www.godaddy.com
Frequently Asked Questions
How To Upload Files In Web Hosting Godaddy?
Log in to your GoDaddy account. Access the cPanel and open the File Manager. Click “Upload” and select your files. Ensure files are within size limits. Once uploaded, verify the files in your directory.
How Do I Add Documents To My Godaddy Website?
Log into GoDaddy’s website builder. Click “Edit Site. ” Choose “Add Section,” then “Files. ” Upload your document. Save changes.
How Do I Upload Files To Web Hosting?
To upload files to web hosting, use FTP software like FileZilla. Connect to your server using provided credentials. Drag and drop files into the correct directory. Alternatively, use the hosting control panel’s file manager for uploads. Ensure files are in the right format and directory for proper functionality.
How Do I Add Content To My Godaddy Website?
Log in to your GoDaddy account. Select your website and choose the page to edit. Click “Edit Site. ” Use the editor to add text, images, or other content. Save changes to update your site.
Conclusion
Uploading files to GoDaddy hosting is simple. Follow the steps carefully. Use File Manager for direct uploads. For larger files, try FTP. Always check file permissions after uploading. Keep your website secure and updated. Regular backups are essential. This ensures data safety.
Practice these tips for smooth operations. GoDaddy offers reliable support. If you face issues, contact them. Remember, a well-managed site attracts more visitors. Maintain your site regularly. This boosts performance and user experience. Happy hosting! Enjoy a seamless website journey.


