
Are you looking to add a custom HTML file to your WordPress site but don’t know where to start? Uploading an HTML file might seem tricky at first, but once you learn the simple steps, you’ll have full control over your website’s content.
Whether you want to showcase a special page, add unique features, or simply upload a file you’ve created, this guide will walk you through the process clearly and quickly. Keep reading, and by the end, you’ll confidently know how to upload your HTML file to WordPress without any hassle.
Credit: kinsta.com
Prepare Your Html File
Preparing your HTML file is an important step before uploading it to WordPress. This ensures the file works well with the WordPress system. A clean and organized HTML file helps avoid errors during upload and display.
Take time to check the file’s structure and optimize it for WordPress. This will make your site look professional and load smoothly.
Check File Structure
Start by reviewing your HTML file’s structure. Make sure the code has proper tags like , , and . These tags define the page layout.
Ensure all links to images, stylesheets, and scripts use correct paths. Use relative paths for easier management. Remove any unnecessary or broken code to avoid problems.
Optimize For WordPress
WordPress uses its own style and scripts. Avoid conflicts by cleaning your HTML code. Remove inline CSS or JavaScript that might clash with WordPress themes or plugins.
Use simple HTML and avoid complex elements. WordPress can handle basic HTML well. Prepare your file to fit inside a WordPress page or post without errors.
Credit: blog.hubspot.com
Choose Upload Method
Choosing the right method to upload your HTML file to WordPress depends on your comfort level and access. Each method offers a different way to get your file online. Pick the one that suits your skills and hosting setup best.
Using WordPress Dashboard
Uploading via the WordPress dashboard is simple and quick. Go to the Media Library and click “Add New.” Select your HTML file and upload it directly. This method works well for small files. After uploading, copy the file URL to link it on your site.
Using Ftp Client
FTP clients provide more control over your files. Use software like FileZilla to connect to your web server. Navigate to your WordPress folder, usually “public_html.” Upload the HTML file to the desired directory. This method suits larger files or bulk uploads.
Using File Manager In Hosting
Most hosting providers offer a File Manager tool in their control panel. Log in to your hosting account and find the File Manager. Upload your HTML file directly to the WordPress folder. This method is user-friendly and does not require extra software.
Upload Via WordPress Dashboard
Uploading an HTML file through the WordPress dashboard is a simple way to add custom content. This method keeps your workflow inside WordPress, avoiding extra tools. Follow clear steps to upload and link your HTML files easily.
Access Media Library
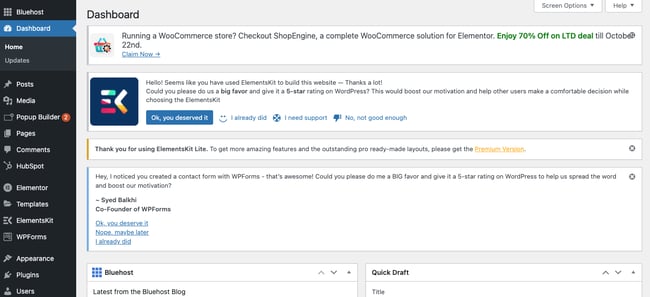
First, log into your WordPress dashboard. Find the “Media” option on the left menu. Click “Library” to open your media files. This area stores all uploaded files for easy access. You will upload your HTML file here.
Upload File
In the Media Library, click the “Add New” button at the top. Drag your HTML file into the upload area or select it manually. Wait a moment for WordPress to finish uploading. The file will appear in your media list once done.
Link Html File To Pages Or Posts
Open the page or post where you want the HTML file. Highlight the text or image to link. Click the “Insert/edit link” icon in the editor toolbar. Paste the URL of your uploaded HTML file from the media library. Save or update the page to finish.
Upload Via Ftp Client
Uploading an HTML file to WordPress through an FTP client is a straightforward process. It allows direct access to your website’s files. This method is useful for adding custom pages or backups quickly.
FTP clients connect your computer to your web server. You can upload, download, and manage files easily. Below are the key steps to upload your HTML file using an FTP client.
Set Up Ftp Connection
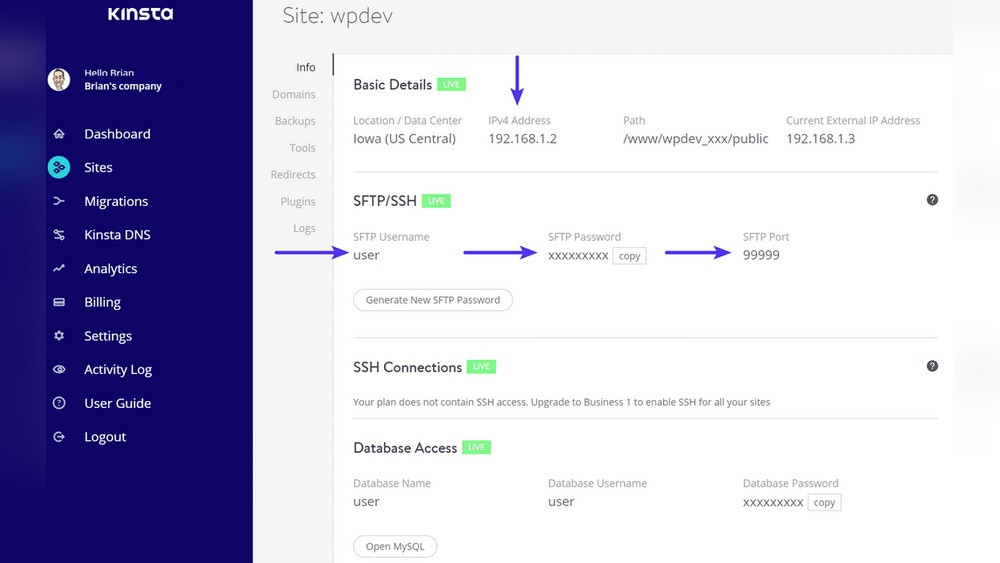
First, download and install an FTP client like FileZilla or Cyberduck. Open the program and enter your FTP details. These include your server address, username, and password. You get this information from your hosting provider. Click “Connect” to establish the link to your server.
Navigate To Correct Directory
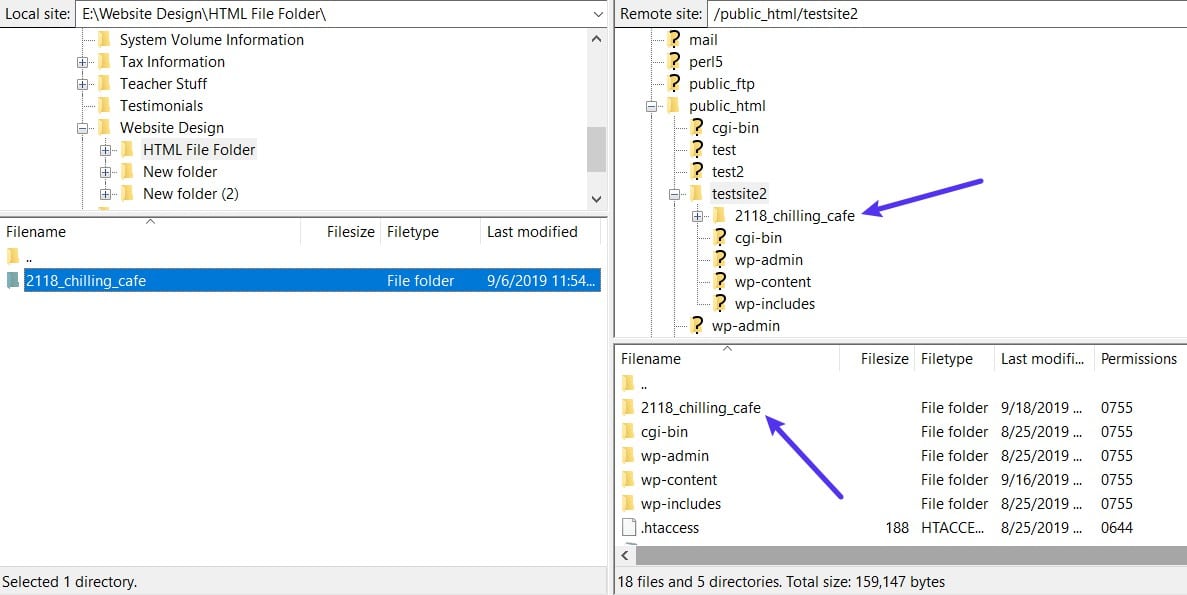
Once connected, locate the folder named “public_html” or “www.” This folder holds your website files. Open it to find where WordPress is installed. Usually, your HTML files go inside this main folder or a subfolder you create. Make sure you are in the right place before uploading.
Transfer Html File
Find your HTML file on your computer using the FTP client’s local pane. Drag and drop the file into the server’s folder pane. The upload starts automatically. After it finishes, check your website URL to see the new HTML page live. This confirms the upload was successful.
Upload Via Hosting File Manager
Uploading an HTML file to WordPress can be done easily using the hosting file manager. This method does not require any plugins or complex steps. It gives direct access to your website files.
Using the hosting file manager, you can place your HTML file in the right folder. This way, it becomes part of your website and can be accessed by visitors.
Log Into Hosting Account
First, open your web browser and go to your hosting provider’s website. Enter your username and password to log in. This information is usually sent to you when you buy hosting.
After logging in, find the dashboard or control panel. This is where you manage your website files and settings.
Locate File Manager
Inside the control panel, look for the “File Manager” tool. It helps you see and manage all files on your server. The name may vary, but it usually says “File Manager” or “Files.”
Click on it to open the file explorer. You will see folders and files of your website here.
Upload Html File
Navigate to the folder where you want to upload your HTML file. Usually, it is the “public_html” or “www” folder. This folder contains your website’s main files.
Click the “Upload” button inside the file manager. Select your HTML file from your computer. Wait a few seconds for the upload to finish.
Once uploaded, check the file is in the folder. Your HTML page is now live and ready to use.
Create Links To Html Files
Creating links to HTML files on your WordPress site helps visitors access extra content. You can link these files in different places. This makes your site more useful and organized.
Add Links In Menu
To add an HTML file link in your menu, go to the WordPress dashboard. Click on Appearance and then Menus. Choose the menu where you want to add the link. Select Custom Links on the left side. Enter the URL of your HTML file. Write the link text that visitors will see. Click Add to Menu. Drag the link to the position you want. Save the menu to apply changes. Visitors can now click the menu item to open your HTML file.
Insert Links In Content
To add a link inside a post or page, open the editor. Highlight the text where you want the link. Click the link icon in the toolbar. Paste the URL of your HTML file in the box. Press Enter or click the apply button. The text becomes a clickable link. Visitors can open the HTML file by clicking the link in the content. This method works well for sharing files within articles or pages.
Troubleshooting Common Issues
Uploading an HTML file to WordPress can sometimes cause issues. These problems can stop your file from showing correctly. Knowing how to fix these common issues saves time and stress. Below are key problems and easy solutions to try.
File Not Loading
The HTML file may not load if the path is wrong. Check the file name and extension carefully. Make sure the file is uploaded to the correct folder. Clear your browser cache and refresh the page. Sometimes, the web host blocks certain files. Contact your host if the problem continues.
Permission Errors
Permission errors happen when WordPress cannot access the file. Set the file permission to 644 for security and access. Use an FTP client or your hosting control panel to change permissions. Avoid setting permissions to 777 because it is unsafe. Proper permissions let WordPress read the file without issues.
Broken Links
Broken links occur if the HTML file links to missing resources. Check all images, scripts, and CSS files used in the HTML. Ensure their paths are correct and files exist on the server. Update any old or incorrect URLs in the HTML code. Fixing broken links improves page loading and user experience.

Credit: www.hosted.com
Tips For Managing Html Files In WordPress
Managing HTML files in WordPress needs care and good habits. Proper handling keeps your website clean and easy to update. It also helps avoid errors and data loss. Follow simple tips to make your work smoother and safer.
Organize Files Properly
Create clear folders for your HTML files. Group similar files together by topic or date. Name files with simple, descriptive words. This helps find files fast. Avoid mixing many files in one folder. Keep your file structure neat and logical.
Keep Backups
Always save copies of your HTML files. Store backups on your computer or cloud storage. Backups protect your work from accidental loss. Update backups regularly after making changes. Having backups saves time and stress later.
Use Plugins For Better Integration
Plugins can help add HTML files smoothly into WordPress. They offer extra features like code editing and file management. Choose plugins that are easy to use and well rated. Plugins reduce errors and improve site performance. Use plugins to keep your site organized and efficient.
Frequently Asked Questions
How Do I Upload An Html File To WordPress?
To upload an HTML file, use an FTP client or your hosting file manager. Upload the file to your WordPress root or a subfolder. Then, access it via your site URL, like www. yoursite. com/filename. html.
Can I Embed Html Files Directly Into WordPress Pages?
WordPress doesn’t allow direct HTML file embedding in pages. Instead, copy your HTML code and paste it into the Text editor. Alternatively, use plugins that support custom HTML embedding for better integration.
Is Uploading Html Files Safe For WordPress Sites?
Uploading HTML files is safe if files are clean and secure. Avoid uploading files from unknown sources. Always scan files for malware before uploading to protect your site.
How Do I Link An Uploaded Html File In WordPress?
After uploading, copy the file URL. Insert this URL into any WordPress post, page, or menu. This creates a clickable link that directs visitors to the HTML page.
Conclusion
Uploading an HTML file to WordPress is simple and quick. You just need to follow clear steps. This helps you add custom pages to your site easily. Avoid confusion by checking your file before uploading. Keep your website organized for better results.
Practice a few times to feel confident. Now, your site can show exactly what you want. Enjoy creating with more control and freedom.


