
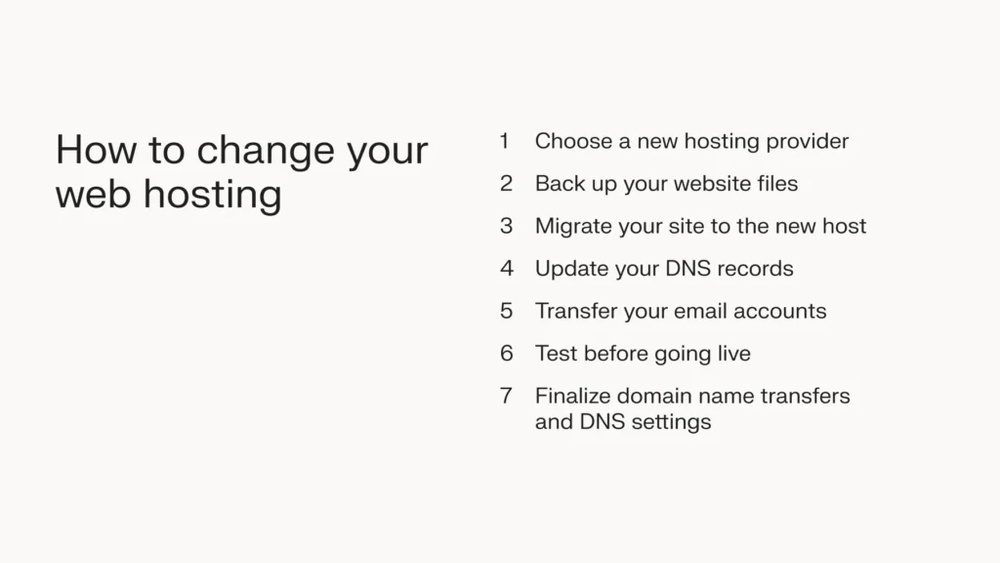
Thinking about moving your domain name to a new host provider? You might feel overwhelmed by the steps or worry about losing important data.
Don’t worry—transferring your domain can be simple and smooth when you know exactly what to do. In this guide, you’ll discover clear, easy-to-follow steps that save you time and avoid common mistakes. By the end, you’ll have the confidence to switch hosts without stress and keep your website running perfectly.
Ready to take control of your online presence? Let’s get started!

Credit: www.youtube.com
Prepare Your Domain For Transfer
Preparing your domain for transfer is a key step before moving to a new host provider. This process ensures a smooth and quick transfer without any issues. Skipping these steps can delay or block the transfer. Follow these simple actions to get your domain ready.
Check Domain Eligibility
First, verify if your domain can be transferred. Most domains cannot move within 60 days of registration or previous transfer. Check your domain’s status in your current registrar’s control panel. Make sure it is active and not expired. Domains on hold or with unresolved disputes cannot transfer.
Unlock Your Domain
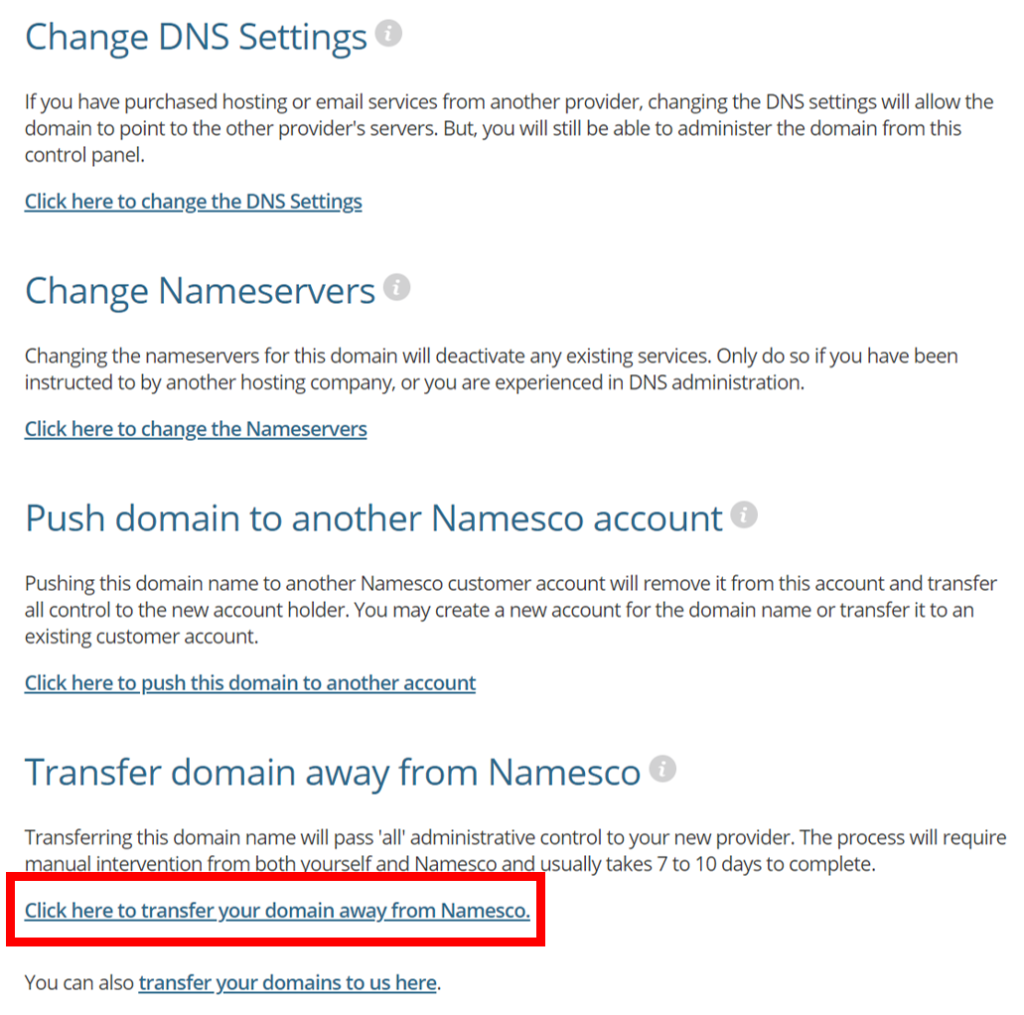
Your domain is usually locked to prevent unauthorized changes. Unlock it in your registrar’s settings. This allows the domain to be transferred safely. Look for “Domain Lock” or “Transfer Lock” and disable it. Keep this setting off until the transfer completes.
Obtain Authorization Code
An authorization code is needed to approve the domain transfer. Request this code from your current registrar. It may be called EPP code or transfer key. You will need to provide this code to your new host provider. Keep it safe and do not share it publicly.
Credit: www.names.co.uk
Choose The Right New Host
Choosing the right new host is a key step in transferring your domain name. The host affects your website’s speed, security, and uptime. It also influences how easy it is to manage your site. Careful selection helps avoid future problems.
Evaluate several hosts before making a choice. Focus on features, cost, and support. This helps ensure you pick a host that fits your needs well.
Compare Hosting Features
Look closely at what each host offers. Check storage space, bandwidth, and server types. See if they support the software your site uses. Some hosts give free SSL certificates and backups. These features protect your site and data.
Also, check if the host offers easy domain management tools. These tools make transferring and updating your domain simple. Choose a host with a user-friendly control panel.
Review Pricing And Plans
Compare prices of different hosting plans. Look for any hidden fees or renewal costs. Some hosts offer low initial prices but charge more later. Pick a plan that fits your budget long-term.
Check if the host allows you to upgrade your plan easily. This helps your site grow without switching hosts again. Avoid plans with strict limits on traffic or storage.
Check Support And Reputation
Good customer support is essential. Test how fast and helpful their support team is. Look for 24/7 support options. Live chat and phone support are best.
Read reviews from other users. See how the host handles issues and downtime. A reliable host keeps your site online and secure. Trustworthy hosts have positive feedback and high ratings.
Initiate The Transfer Process
Starting the domain transfer process is a key step when changing your hosting provider. This step sets everything in motion and ensures your domain moves smoothly. Follow these simple actions to begin the transfer without hassle.
Start Transfer With New Host
Log in to your new host’s control panel. Find the option to transfer domains. Enter your domain name exactly as it appears. This starts the transfer request from the new host’s side.
Enter Authorization Code
Get the authorization code from your current registrar. This code is also called EPP code or transfer key. Enter the code in the new host’s transfer form. It confirms you own the domain and allows the transfer.
Verify Transfer Request
Check your email linked to the domain. You will get a transfer approval request. Click the link or follow instructions to confirm the transfer. This step stops unauthorized transfers and protects your domain.
Monitor Transfer Status
Monitoring the status of your domain transfer is very important. It helps you know if the process moves smoothly. Also, you can act fast if any problem happens. Regular checks keep you informed and reduce stress during the transfer.
Check Email For Confirmation
After starting the transfer, check your email often. Both your old and new hosts send messages. These emails ask you to confirm the transfer. Respond quickly to avoid delays. Sometimes the email goes to the spam folder. Look there if you do not see it in your inbox.
Track Transfer Progress
Most hosts have a dashboard to track your domain transfer. Log in and look for the transfer section. This area shows the current status and any needed actions. It updates regularly as the transfer moves forward. Check it daily to stay updated.
Resolve Common Issues
Sometimes transfers get stuck or fail. Common problems include incorrect contact info or locked domains. Make sure your domain is unlocked before the transfer. Confirm your contact details are correct with your current host. If issues appear, contact support quickly for help. Fixing problems fast speeds up the transfer.
Finalize Transfer And Update Settings
After transferring your domain name to a new host, the final steps are crucial. This phase ensures your website and email services work without interruption. You must complete the transfer, update key settings, and test everything carefully. Properly finalizing the transfer prevents downtime and keeps visitors happy.
Confirm Transfer Completion
Check your email for transfer confirmation messages. Your new host or domain registrar usually sends these. Confirm that the domain status shows “active” or “transferred” in your account. This means the transfer is complete. If the status is still “pending,” wait a few more hours. Contact support if delays last more than 48 hours.
Update Dns Records
Log into your new hosting control panel. Find the DNS management section to update records. Change your domain’s nameservers to those provided by the new host. Update A records, CNAMEs, and MX records as needed. This step links your domain to the right website and email servers. Save all changes and double-check for typos.
Test Domain Functionality
Open a browser and enter your domain name. Check if your website loads correctly on the new host. Test email addresses connected to the domain by sending and receiving emails. Use online tools to verify DNS propagation. If something doesn’t work, review your DNS settings or ask support. Testing prevents surprises for your visitors and customers.

Credit: www.youtube.com
Tips For A Smooth Domain Transfer
Transferring a domain name to a new host provider can feel tricky. Simple steps help avoid delays and errors. These tips make the process smooth and stress-free.
Avoid Transfer During Expiry
Do not start a domain transfer close to its expiration date. Transfers can take several days to complete. Starting early helps prevent losing your domain. Renew your domain before transferring to avoid interruptions.
Backup Important Data
Save all your website files and emails before moving. Transfers might cause temporary downtime or data loss. A backup keeps your information safe. Use cloud storage or an external drive for backups.
Maintain Communication With Hosts
Stay in touch with both your old and new hosting providers. They can guide you if any issue arises. Respond quickly to any requests or verification emails. Clear communication speeds up the transfer process.
Frequently Asked Questions
How Do I Prepare My Domain For Transfer?
To prepare your domain for transfer, unlock it at your current registrar and get the authorization code. Ensure your contact information is updated. Disable privacy protection if enabled. These steps help a smooth and quick transfer to the new host provider.
How Long Does A Domain Transfer Usually Take?
A domain transfer typically takes 5 to 7 days. Some transfers may complete faster if both registrars cooperate. You’ll receive notifications about the transfer status. Plan accordingly to avoid downtime during this period.
Can I Transfer My Domain Without Downtime?
Yes, you can transfer your domain without downtime. Keep your website files and emails active on the old host during transfer. Update DNS settings carefully after transfer completion to ensure seamless service.
Are There Any Fees For Transferring A Domain Name?
Most registrars charge a transfer fee, often including a one-year renewal. Check your current and new host’s policies. Some providers offer free transfers as promotions, which can save you money.
Conclusion
Transferring your domain name to a new host is simple with clear steps. Start by preparing your domain and unlocking it. Then, get the authorization code from your current provider. Next, initiate the transfer with the new host and confirm the process.
Keep an eye on your email for important messages. Transfers usually finish within a few days. Take time to follow each step carefully. This helps avoid downtime or loss of control. Your website will stay online and ready for visitors during the move.
Stay patient and organized for a smooth transfer experience.


