
Are you thinking about moving your website but don’t know how to transfer your domain from one hosting provider to another? You’re not alone.
Changing your hosting can feel confusing and risky, especially when your online presence depends on it. But what if you could make the switch smoothly, without losing traffic or facing downtime? In this guide, you’ll discover simple, step-by-step instructions that anyone can follow.
By the end, you’ll feel confident handling your domain transfer like a pro. Keep reading to unlock the secrets to a hassle-free hosting change.
Credit: www.milesweb.com
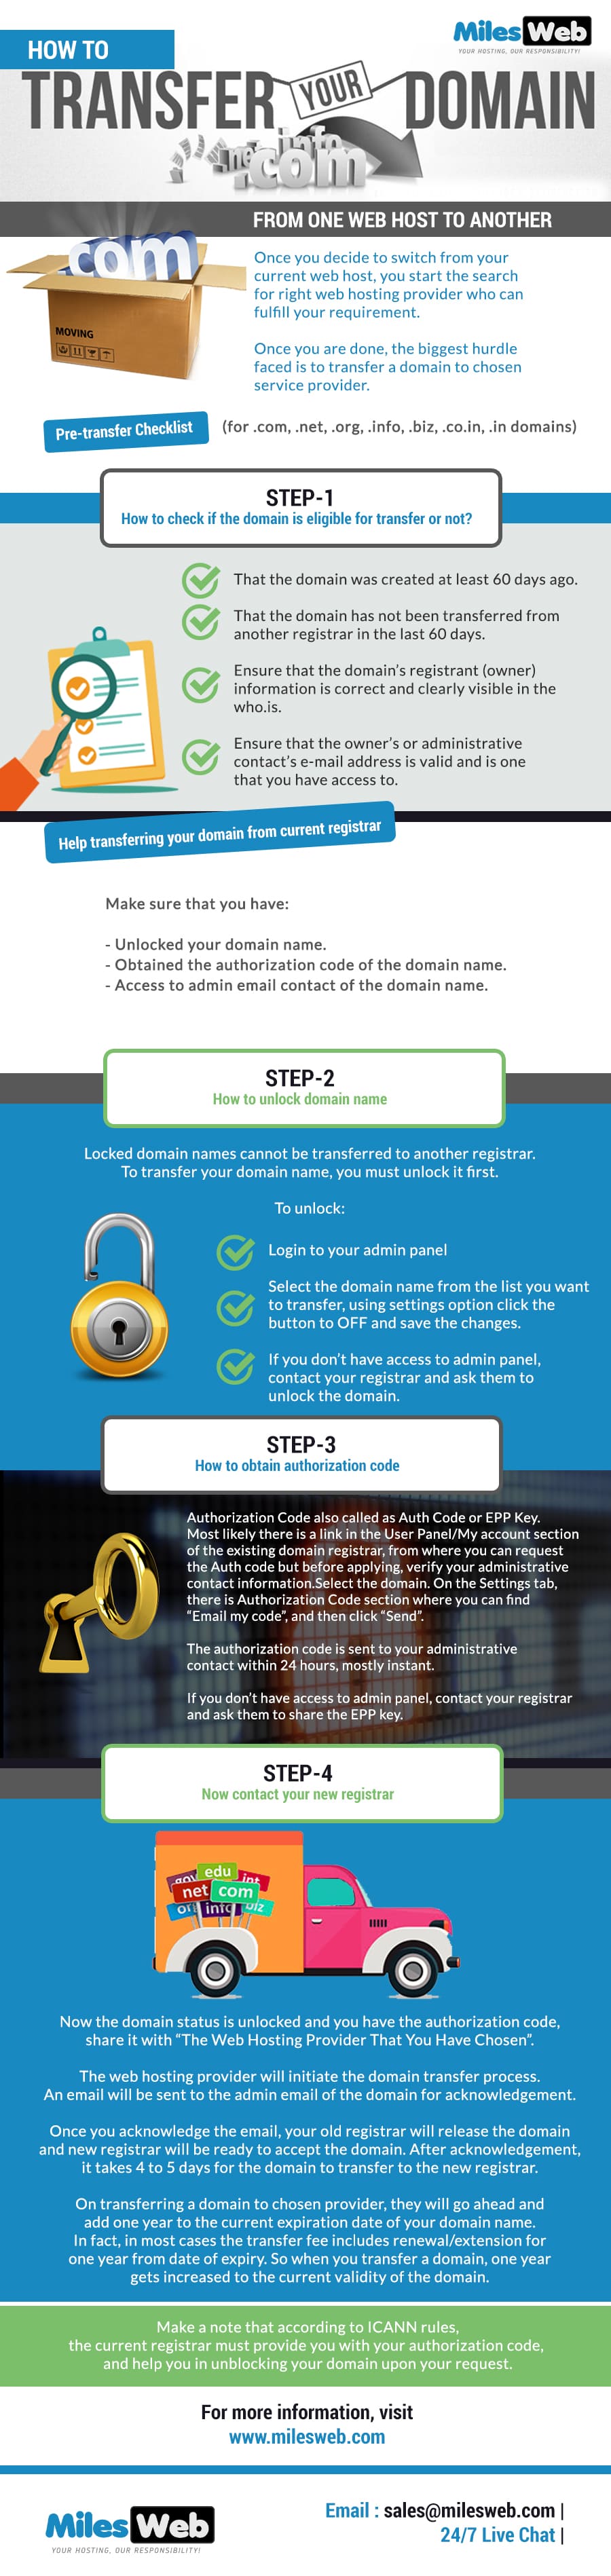
Check Domain Eligibility
Before you transfer your domain from one hosting provider to another, check if your domain is eligible for transfer. This step helps avoid delays and problems during the process. Domains often have rules set by registrars that control if and when they can be moved.
Some domains must meet specific conditions before they can be transferred. Knowing these conditions helps you plan better and complete your transfer smoothly.
Confirm Domain Unlock Status
Domains have a security feature called “lock.” This lock stops unauthorized transfers. Check if your domain is locked with your current registrar. If it is, you must unlock it before starting the transfer.
Go to your domain management panel and find the lock option. Make sure the domain shows as “unlocked.” Only unlocked domains can be transferred to a new host.
Verify Domain Age And Lock Periods
Most domains cannot be transferred within 60 days of registration or a previous transfer. This rule is set by ICANN, the organization that manages domain names.
Check your domain’s registration date and last transfer date. If your domain is too new or recently transferred, wait until the lock period ends. Trying to transfer too soon will result in failure.
Backup Website Data
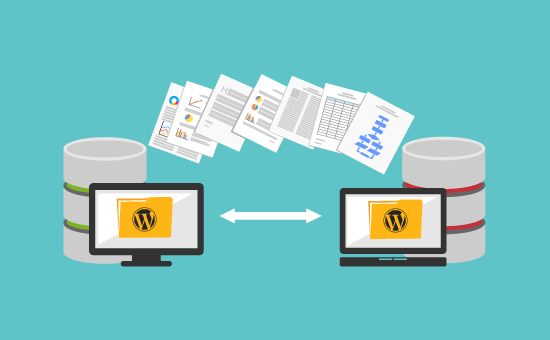
Backing up your website data is a key step before transferring your domain to new hosting. It keeps your files safe and stops data loss. Saving your website ensures a smooth move and quick recovery if problems arise.
Prepare your backup carefully. It includes all website files, databases, and emails. This way, your site stays complete and works well after the transfer.
Export Website Files
Start by exporting all your website files. These include images, scripts, and content files. Use an FTP client like FileZilla to connect to your current host. Download all files from the public_html or www folder. Save them in a safe folder on your computer. This is your full website copy.
Backup Databases And Emails
Next, backup your databases. Most websites use MySQL databases. Use phpMyAdmin in your hosting control panel to export them. Choose the export option and save the database as an SQL file. Also, backup emails linked to your domain. Use the email backup tools in your hosting panel or download emails via an email client. Keep all backups secure before starting the transfer.
Obtain Authorization Code
Obtaining the authorization code is a key step in moving your domain from one host to another. This code acts like a password that allows the transfer. Without it, the new host cannot take control of your domain. The process to get this code is simple but important. Follow these steps carefully to avoid delays.
Request Epp Code From Current Registrar
Contact your current domain registrar to ask for the EPP code. You can usually find this option in your account dashboard. Some registrars send the code by email. Others may require you to submit a support ticket. Keep your account details ready to prove ownership.
Make sure your domain is unlocked before requesting the code. Locked domains cannot be transferred. Check the domain status in your registrar’s control panel. Unlock it if needed to receive the EPP code.
Understand Code Validity
The EPP code is valid for a limited time. Most codes expire after a few days or weeks. Use the code quickly to start the domain transfer. If the code expires, you must request a new one. Keep track of the expiration date to avoid problems.
Never share your authorization code publicly. Treat it like a password. Only provide it to your new hosting provider. This helps keep your domain safe during the transfer.
Credit: www.wpbeginner.com
Choose New Hosting Provider
Choosing a new hosting provider is a key step in transferring your domain. The right host affects your website’s speed, security, and uptime. Take time to explore options carefully. Select a host that fits your needs and budget. This helps avoid problems after the transfer.
Compare Hosting Plans
Start by checking different hosting plans. Look at storage space, bandwidth, and server speed. See if the plan supports your website type. Consider plans with easy upgrades. Make sure the cost matches your budget. Compare features side by side to find value.
Check Domain Transfer Support
Not all hosts support domain transfers. Confirm that the new provider allows transfers smoothly. Ask about transfer fees and time frames. Check if they provide assistance during transfer. Good support reduces downtime and errors. Choose a host with clear, helpful transfer policies.
Initiate Domain Transfer
Starting a domain transfer is an important step to move your website to a new hosting provider. This process involves a few key actions to ensure a smooth transition. Initiating the transfer correctly helps avoid downtime or loss of control over your domain.
Begin by preparing your domain for transfer. Make sure it is unlocked and your contact information is up to date. Then, follow the steps below to officially start the transfer.
Submit Transfer Request
Go to the new hosting provider’s domain transfer page. Enter your domain name in the transfer form. Submit the request to start the process.
The new host will check the domain’s eligibility. If your domain is unlocked and meets requirements, the transfer request moves forward. This step sets the transfer in motion.
Enter Authorization Code
Next, get the authorization code from your current registrar. This code is also called an EPP or transfer code.
Enter this code on the new host’s transfer page. The code confirms your permission to move the domain. Without it, the transfer cannot proceed.
Keep the code safe and enter it carefully. A wrong code will delay the transfer or cause it to fail.
Approve Transfer
Approving the domain transfer is a crucial step in moving your website. It ensures the process moves forward without delays. You must confirm the transfer to avoid cancellation or hold-ups. This step involves responding to emails and watching the transfer progress closely.
Respond To Transfer Approval Emails
After initiating the transfer, check your email inbox regularly. You will receive approval requests from your current domain registrar. These emails contain links or instructions to confirm the transfer. Open the message and follow the steps carefully. Approving promptly speeds up the transfer process. Missing these emails can cause the transfer to fail. Keep an eye on spam or junk folders too.
Monitor Transfer Status
Once you approve, monitor the transfer status daily. Most hosting providers offer a dashboard to check progress. The transfer usually takes 5 to 7 days to complete. You will see updates like “pending,” “in progress,” and “completed.” Contact support if the status stays the same too long. Monitoring helps catch issues early and keeps you informed. Stay patient but alert during this phase.
Update Dns Settings
After moving your domain to a new host, updating DNS settings is a key step. This process tells the internet where to find your website. Without updating DNS, visitors may see the old hosting site or an error page. It is important to act quickly and carefully to avoid downtime.
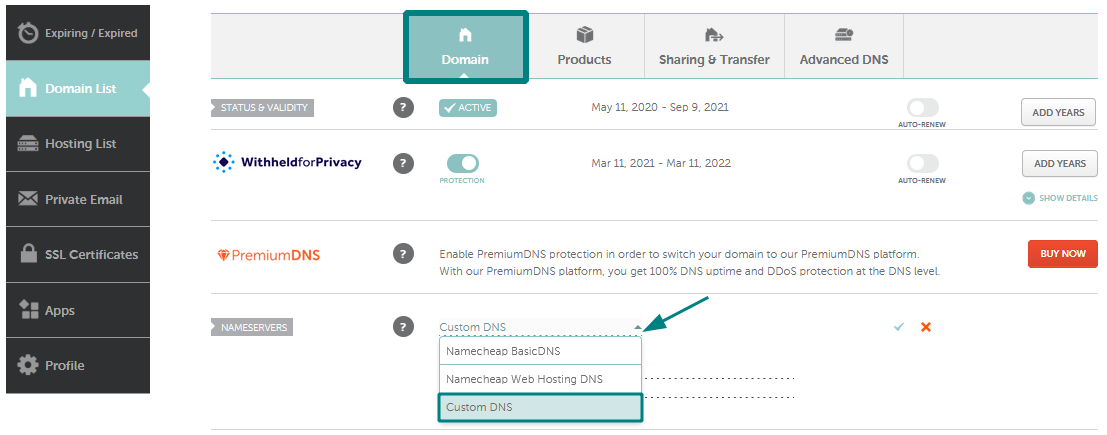
Change Nameservers
Nameservers connect your domain name to the new hosting server. You must log in to your domain registrar account to change these settings. Find the option to edit nameservers and enter the new host’s nameservers. These are usually provided by your new hosting provider. Save changes and exit.
Changing nameservers directs traffic from your domain to the new hosting server. This step is essential to complete the domain transfer. Mistakes here can cause your website to become unreachable. Double-check the nameserver details before saving.
Verify Dns Propagation
DNS propagation means the update spreads across the internet. This process can take time, sometimes up to 48 hours. During this period, some visitors may see the old site. You can use online tools to check if propagation is complete.
Type your domain into a DNS checker tool. It shows which servers have updated your domain’s information. When most servers show the new nameservers, propagation is done. Your website should now load from the new hosting provider.
Credit: www.namecheap.com
Test Website Functionality
Testing your website functionality is a crucial step after transferring your domain to a new host. It ensures your site works correctly and visitors have a smooth experience. Checking everything now helps avoid problems later. Spend time on this step to confirm all features run as expected.
Check Website Accessibility
Open your website in different browsers to see if it loads properly. Test on mobile and desktop devices to check responsiveness. Make sure all pages appear without errors or broken links. Refresh the site several times to confirm consistent access. This step helps catch issues early.
Test Email Services
Verify your email accounts linked to the domain still work after the transfer. Send test emails to and from your addresses to confirm delivery. Check for any delays or bounce-back messages. Access your email through webmail or an email client to ensure login success. This step keeps your communication smooth.
Renew Domain Registration
Renewing your domain registration is an important step before transferring it to a new host. It ensures your domain remains active throughout the process. Without renewal, your domain may expire, causing downtime and loss of ownership.
Always check the domain’s expiration date early. This helps avoid last-minute issues during the transfer. Renewing on time keeps your website and email services running smoothly.
Confirm Domain Expiry Date
Start by logging into your current domain registrar account. Locate the domain management or dashboard section. Find the exact expiry date of your domain name. Note this date carefully. It tells you how much time is left before renewal is needed.
Many registrars send email reminders. Still, verifying directly is safer. This step prevents unexpected domain suspension during transfer.
Extend Registration If Needed
If the domain is near expiry, renew it immediately. Most registrars allow renewal for one year or more. Renewing adds extra time to your current registration period. This protects your domain from lapsing during transfer.
Choose a renewal period that covers the transfer duration. This avoids any risk of losing your domain. Pay the renewal fee and confirm the updated expiry date. Your domain is now ready for a smooth transfer.
Frequently Asked Questions
How Do I Start Transferring My Domain To New Hosting?
Begin by unlocking your domain at the current registrar. Then, obtain the authorization code needed for transfer. Finally, initiate the transfer request with your new hosting provider.
How Long Does A Domain Transfer Usually Take?
Domain transfers typically take 5 to 7 days to complete. This timeframe depends on the registrar and domain extension. Some transfers may finish faster with manual approval.
Will My Website Experience Downtime During Domain Transfer?
Generally, domain transfer does not cause downtime if DNS settings remain unchanged. Keep your website files intact on the current hosting until transfer completes. Update DNS records carefully to avoid service interruptions.
Do I Need To Back Up My Website Before Transferring Hosting?
Yes, always back up your website files and databases before transferring. Backups ensure you can restore data in case of errors or data loss. It’s a critical step for safe domain and hosting migration.
Conclusion
Transferring your domain to a new host is simpler than it seems. Follow each step carefully to avoid issues. Keep your domain information updated and secure during the process. Always check your new hosting service for compatibility. A smooth transfer keeps your website running without downtime.
Stay patient and double-check details for the best results. This way, your site stays live and visitors stay happy.


