
Are you looking to transfer your domain from Namecheap to GoDaddy? Whether you’re seeking better features, improved customer service, or simply prefer GoDaddy’s interface, moving your domain can seem like a daunting task.
But don’t worry—you’re not alone, and this article is here to help you navigate the process smoothly. Picture yourself effortlessly transferring your domain with confidence, knowing every step is laid out clearly for you. You’ll discover how straightforward it can be, armed with the right information.
Uncover the secrets to a successful domain transfer and ensure your online presence is in the best hands possible. Let’s dive in and make your domain transfer a breeze!

Credit: www.youtube.com
Preparing For Domain Transfer
Transferring a domain from Namecheap to GoDaddy involves simple steps. Unlock your domain at Namecheap, and get the authorization code. Enter the code at GoDaddy to initiate the transfer.
Transferring your domain from Namecheap to GoDaddy can seem daunting, but with a bit of preparation, the process can be smooth and straightforward. Whether you’re looking for better features or simply aligning your domains under one registrar, preparing for this transfer is crucial. It’s like packing for a trip: you wouldn’t leave without ensuring you have everything you need. So, what steps should you take to ensure a successful domain transfer?Check Domain Eligibility
First, confirm your domain is eligible for transfer. Not all domains are ready to move immediately. Did you register your domain less than 60 days ago? If so, it’s not eligible yet due to the ICANN policy. Similarly, if you’ve recently updated your domain’s contact information, there might be a waiting period. Ensure your domain is unlocked and that you have access to the authorization code. Without these, the transfer can’t proceed.Backup Important Data
Before initiating the transfer, safeguard your data. Think of it like moving houses: you wouldn’t want to lose your prized possessions along the way. Backup any essential files, emails, or settings linked to your domain. This step is crucial, especially if you have website files or databases tied to the domain. Imagine the frustration of losing valuable data during the transfer process. A simple backup can prevent this headache.Have you ever experienced a domain transfer before? What did you wish you knew beforehand? Addressing these questions can guide you towards a seamless transition. This preparation doesn’t just ease the technical process; it also gives you peace of mind. Don’t leave anything to chance—check eligibility, backup your data, and pave the way for a smooth domain transfer.
Credit: www.namecheap.com
Unlocking Your Domain
Transferring your domain from Namecheap to GoDaddy is a straightforward process. The first step involves unlocking your domain. This action ensures your domain is ready for transfer. Without unlocking, moving your domain is impossible. Follow the steps below to unlock your domain.
Access Namecheap Account
First, log into your Namecheap account. Use your username and password. Once logged in, navigate to the dashboard. Here, you’ll see a list of your domains. Click on the domain you want to transfer. This will open the domain settings page.
Disable Domain Lock
On the domain settings page, find the ‘Domain Lock’ option. It is usually enabled by default. Click to disable it. This action unlocks your domain. You will see a confirmation message. Ensure that the lock status is off. This step is crucial for a smooth transfer.
Obtaining Transfer Code
Get the transfer code from Namecheap to move your domain to GoDaddy. Log in, find the domain settings, and request the transfer code. This code is essential to complete the transfer process smoothly.
Transferring your domain from Namecheap to GoDaddy can seem like a daunting task, but obtaining the transfer code is a straightforward step in the process. This code, also known as the EPP code or authorization code, is essential to initiate the transfer. Let’s break down the steps to ensure you secure this code smoothly and efficiently. ###Request Authorization Code
First, you’ll need to log into your Namecheap account. Once you’re in, navigate to the “Domain List” section on your dashboard. Here, you’ll see a list of all your domains. Click on “Manage” next to the domain you wish to transfer. Look for the “Sharing & Transfer” tab. This is your go-to spot for anything related to transferring your domain. Find the “Auth Code” section and click on “Get Auth Code” or “Send Auth Code”. Namecheap will email the code to the email address associated with your account. Keep this code safe, as it’s necessary for the transfer process. ###Verify Email Confirmation
After requesting the authorization code, check your email. It’s crucial to ensure that your contact email is up-to-date to avoid any delays. Have you ever missed an important email because it ended up in your spam folder? Double-check there if you don’t see it immediately in your inbox. Once you receive the email, verify the code and save it somewhere secure. This code is like a key that unlocks the ability to transfer your domain. Without it, you can’t proceed. Does receiving and verifying the authorization code sound simpler now? With these steps, you’re well on your way to transferring your domain effortlessly. Remember, obtaining the transfer code is just one step. Are you ready to take control and move your domain to GoDaddy?Initiating Transfer To Godaddy
Transferring your domain from Namecheap to GoDaddy might feel daunting, but with a clear roadmap, it’s a straightforward process. Initiating the transfer is a crucial step. It involves a few key actions to ensure your domain moves smoothly without any hiccups. Whether you’re seeking better hosting options or consolidating your domains, this guide will help you navigate the process confidently.
Log Into Godaddy Account
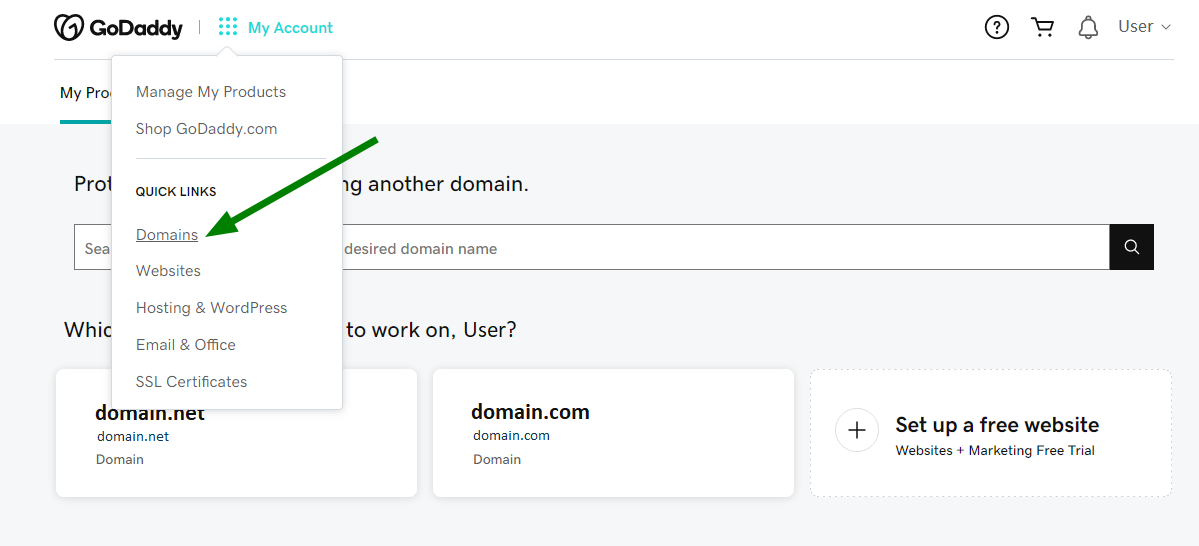
Start by logging into your GoDaddy account. If you don’t have one, create an account—it only takes a few minutes. Once logged in, you’ll find yourself in the dashboard, a familiar place for those who’ve been around the domain block a few times. The dashboard offers a user-friendly interface, making it easy to find what you need.
Remember the first time you set up an online account? It might have seemed like a maze, but each click led you closer to your goal. Similarly, navigating GoDaddy’s dashboard is a simple path to transferring your domain, so take a deep breath and dive in.
Enter Authorization Code
Next, you’ll need to enter the authorization code you obtained from Namecheap. This code is like a key, granting permission for the transfer. Without it, the process halts, so ensure you have it ready.
Think of the authorization code as your domain’s passport. It verifies that you’re the rightful owner, enabling a smooth transition to GoDaddy. If you’ve ever misplaced an important document, you know the panic that ensues. Avoid this by double-checking the code before proceeding.
After entering the code, confirm the details. This step ensures everything aligns perfectly with your transfer intentions. Have you ever sent a letter to the wrong address? This is your chance to prevent a similar mishap in the digital realm.
Transferring domains may seem like a complex task, but breaking it down into manageable steps makes it accessible to everyone. What motivates you to move your domain? Maybe it’s the allure of better features or the desire for a more robust support system. Whatever your reason, initiating the transfer to GoDaddy is a step towards achieving your goals.
Completing The Transfer Process
Transferring a domain from Namecheap to GoDaddy involves several steps. Once you initiate the transfer, completing the process is crucial. It ensures your domain moves smoothly without interruptions. This final stage requires attention to detail. Follow these steps to ensure a successful transfer.
Confirm Transfer Request
After initiating the transfer, confirm your request. This involves checking your email for a confirmation link. Open the email from GoDaddy. Click the link to approve the transfer. This step is essential. Without confirmation, the process stalls. Ensure you complete this within five days.
Monitor Transfer Status
Keep an eye on the transfer status. Log into your GoDaddy account. Navigate to the domain management section. Here, you can track the progress. Transfers usually take a few days. Patience is key, but stay alert. If there are issues, contact support. They can assist with any problems.

Credit: www.youtube.com
Post-transfer Steps
After transferring your domain from Namecheap to GoDaddy, update DNS settings to ensure smooth website operation. Verify the domain’s registration and contact details for accuracy. Finally, confirm that your domain’s email and web services are functioning properly to prevent any disruptions.
Transferring a domain from Namecheap to GoDaddy can feel like crossing a digital bridge. You’ve completed the move, but what’s next? Post-transfer steps are crucial to ensure your domain functions seamlessly. Missing these steps might lead to disruptions. Let’s dive into what you need to do once the transfer is complete.Check Dns Settings
After the transfer, your DNS settings might need a thorough check. These settings direct internet traffic to your website, so they must be accurate. Imagine trying to drive home but having your address wrong—frustrating, right? Verify that your DNS records, such as A, CNAME, and MX records, are correctly set. This is especially important for maintaining email functionality and site accessibility. It’s wise to compare the DNS settings from your Namecheap account with those now in GoDaddy. If anything seems off, make the necessary adjustments immediately.Update Contact Information
Your domain’s contact information is like your digital ID. Ensuring it’s up-to-date post-transfer is vital. Have you moved, changed your email, or updated your phone number recently? Access your GoDaddy account and update your personal details if needed. This step is not just about keeping your information accurate; it’s about safeguarding your domain’s security and ensuring you receive essential notifications. Regularly check these details to avoid any potential mishaps. These steps might seem small, but they’re essential for smooth domain management. Have you ever overlooked a minor detail that became a major issue later? Taking action now could prevent future headaches.Frequently Asked Questions
How Can I Transfer My Domain From Namecheap To Godaddy?
Unlock your domain at NameCheap. Obtain the transfer authorization code. Initiate transfer on GoDaddy by entering the code. Confirm the transfer via email. Wait for the transfer to complete.
How Do I Transfer A Domain From Namecheap?
Unlock your domain at NameCheap. Obtain the EPP code. Initiate the transfer with your new registrar. Confirm the transfer via email. Ensure your domain status changes to ‘Transferred’.
How Can I Move My Domain To Godaddy?
Transfer your domain to GoDaddy by unlocking it, getting the authorization code, and starting the transfer process. Confirm the transfer through the link in the email sent by GoDaddy. Ensure your domain is eligible for transfer and you have access to your current registrar’s email account.
How To Connect Namecheap Domain To Godaddy Hosting?
To connect NameCheap domain to GoDaddy hosting, update DNS settings. Log in to NameCheap, navigate to “Domain List,” click “Manage,” select “Custom DNS,” and enter GoDaddy’s nameservers. Save changes. Ensure GoDaddy hosting is configured to accept the domain. Propagation may take up to 48 hours.
Conclusion
Transferring your domain from Namecheap to GoDaddy is straightforward. Follow the steps carefully. First, unlock your domain on Namecheap. Get your authorization code. Then, initiate the transfer on GoDaddy. Enter the code when prompted. Confirm the transfer through the email sent.
Wait for the process to complete. Typically takes a few days. Check your domain status on GoDaddy. Ensure everything transferred correctly. Now, your domain lives with GoDaddy. Enjoy the new features and services available. Always keep your domain information updated.
This ensures smooth operations and security.


