

Are you ready to move your website but worried about transferring your domain database safely? You’re not alone.
Moving your domain database to a new hosting provider might sound complicated, but with the right steps, you can do it smoothly and without losing any important data. In this guide, you’ll discover simple, clear instructions that make the whole process easy to follow.
By the end, you’ll feel confident handling the transfer yourself, saving time and avoiding common pitfalls. Keep reading to unlock the secrets to a hassle-free domain database transfer!
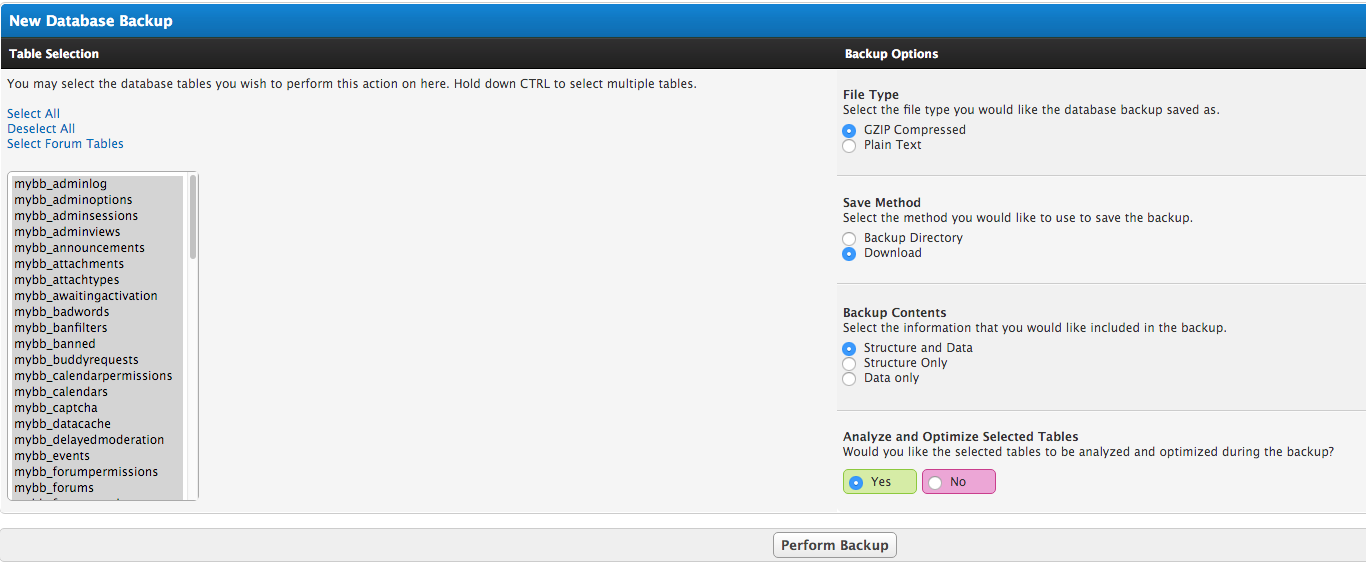
Credit: docs.mybb.com
Preparing For The Transfer
Preparing for the transfer of your domain database is a crucial step. It ensures the process goes smoothly and without data loss. Taking time to prepare helps avoid downtime and technical issues. Follow these steps carefully to get ready for the move.
Backup Your Database
Create a full backup of your database before starting the transfer. This keeps your data safe in case something goes wrong. Use your current hosting control panel or tools like phpMyAdmin for the backup. Save the backup file on your computer or cloud storage for easy access.
Check Hosting Requirements
Review the new hosting provider’s requirements for database types and versions. Ensure your database format is supported by the new host. Check the PHP version and MySQL compatibility to avoid problems. Confirm the maximum database size allowed on the new server.
Choose The Right Hosting Provider
Select a hosting provider that fits your website’s needs. Look for reliable uptime and good customer support. Ensure they offer easy database migration tools or services. Consider hosting plans with enough storage and bandwidth for your database.
Credit: www.wpbeginner.com
Exporting The Database
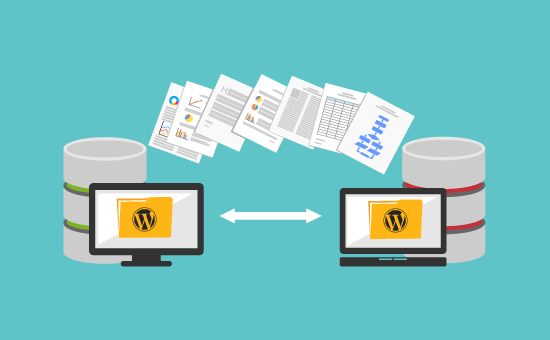
Exporting the database is a key step in moving your domain to new hosting. It means saving all your website’s data into a file. This file can then be uploaded to your new server. Doing this carefully avoids data loss and keeps your site running smoothly.
There are different ways to export your database. Some use graphical tools, while others prefer command line commands. Choose the method that fits your skill level and hosting setup.
Accessing Your Current Database
First, you must find where your database is stored. Most hosts provide a control panel like cPanel or Plesk. Log in to this panel to locate the database section.
Look for the database name linked to your website. Note down the login details: username, password, and database name. You will need these to export your data.
Using Phpmyadmin To Export
phpMyAdmin is a popular tool for managing databases via a web browser. Access it through your hosting control panel.
Select your database from the left menu. Click on the “Export” tab at the top. Choose the “Quick” export method for a simple process.
Set the format to “SQL.” Click “Go” to download the database file. Save this file safely for your new hosting.
Exporting Via Command Line
Command line export suits users comfortable with terminal commands. Connect to your server using SSH.
Run the command: mysqldump -u username -p database_name > backup.sql. Replace username and database_name with your details.
Enter your database password when prompted. This creates a file named backup.sql with your database content.
Transfer this file to your new host for import. This method is fast and efficient for large databases.
Setting Up The New Hosting
Setting up your new hosting is a key step in transferring your domain database. It prepares the server to hold your data safely. Proper setup avoids errors and keeps your website running smoothly. Follow these steps carefully to ensure a smooth transfer.
Create A New Database
Start by creating a new database on your new hosting server. This database will store all your website data. Use the hosting control panel to find the database section. Choose a clear, simple name for your database. Avoid spaces or special characters for better compatibility.
Assign User Permissions
Next, assign a user to your new database. This user needs permission to access and manage the data. Create a new user with a strong password. Grant full privileges for the user to read, write, and modify the database. This step is vital for your website to function properly.
Configure Database Settings
Finally, adjust the database settings to match your website needs. Set the correct character set and collation, usually UTF-8. These settings help avoid errors with text and symbols. Check the database connection details like host, username, and password. Save these details for use during the migration process.
Credit: www.cloudways.com
Importing The Database
Importing the database is a key step in moving your website to a new hosting provider. This process transfers all your site data, such as posts, users, and settings, to the new server. A smooth import ensures your site works well without data loss or errors.
You can import the database using different methods. Choosing the right one depends on your comfort level and hosting setup. Two common ways are using phpMyAdmin or the command line. Both are effective and widely supported.
Using Phpmyadmin To Import
phpMyAdmin is a popular web tool for managing databases. To import your database, log into phpMyAdmin on your new hosting control panel. Select the database you created for your website. Click the “Import” tab at the top.
Click “Choose File” and select the SQL file exported from your old host. Then, press the “Go” button to start the import. Wait until you see a success message. The time depends on your file size.
Importing Via Command Line
For advanced users, the command line offers a fast way to import databases. Connect to your new server using SSH. Use this command:
mysql -u username -p database_name < /path/to/your/file.sqlReplace “username,” “database_name,” and file path with your details. After running it, enter your password. The import will begin and finish quickly for most files.
Resolving Common Import Errors
Errors may occur during import due to file size limits or syntax problems. Increase the upload limit in phpMyAdmin if your file is too large. Adjust “max_upload_size” and “max_execution_time” in your php.ini file.
Check your SQL file for incomplete or broken commands if errors persist. Some hosts limit database size or connection time. Contact your host for support if needed. Fixing these issues ensures a clean import.
Updating Domain Settings
Updating domain settings is a crucial step when transferring your domain database to new hosting. It ensures your website stays online without interruption. Proper changes in domain settings point your domain to the new hosting server. This step involves adjusting DNS records and settings at your domain registrar. Careful updates prevent downtime and keep your site accessible to visitors.
Modify Dns Records
Start by accessing your current DNS records. Look for A, CNAME, MX, and TXT records. Replace the old IP addresses with the new hosting server’s IP. Check each record carefully to avoid mistakes. Save the changes once updated. This step directs web traffic to your new hosting smoothly.
Update Domain Registrar Settings
Log in to your domain registrar account. Find the section for nameservers or DNS settings. Change the nameservers to those provided by your new hosting provider. This change tells the internet where to find your website data. Confirm the update and save your changes in the registrar panel.
Verify Domain Propagation
Domain propagation means spreading your new DNS settings worldwide. It can take up to 48 hours to complete. Use online tools to check if your domain points to the new host. Test your website from different locations. Wait until the changes appear everywhere before making more adjustments.
Testing The Transferred Site
Testing the transferred site is a key step after moving your domain database to a new hosting. It helps confirm that everything works as expected. This step avoids surprises and ensures visitors see the right content. Take your time to check all parts of the website carefully.
Check Website Functionality
Open your website in different browsers to see if it loads properly. Click through all pages to check links and images. Make sure buttons and forms work correctly. Test interactive features like search bars or login areas. Watch for missing content or error messages.
Verify Database Connections
Check if the website connects to the database without errors. Login to your admin panel to see if data appears correctly. Test adding, editing, and deleting records to confirm full access. Review settings in configuration files to ensure correct database info. A broken connection can cause serious problems.
Troubleshoot Issues
Note any errors or broken features you find. Clear your browser cache and try again. Check error logs on your hosting control panel for clues. Fix file permission problems or missing files. Ask your hosting support for help if you cannot solve an issue. Fixing problems early saves time later.
Tips For A Smooth Transfer
Transferring your domain database to a new hosting provider requires careful planning. Small mistakes can cause downtime or data loss. Follow these tips for a smooth transfer. They help keep your website safe and running without interruptions.
Schedule During Low Traffic
Choose a time when your website has fewer visitors. This reduces the risk of disrupting user experience. Nighttime or weekends often work best. Less traffic means fewer people will notice if something goes wrong.
Keep Backup Copies
Always create full backups of your domain database before starting. Store backups in multiple safe locations. This step protects your data if problems occur during the transfer. You can restore your site quickly without losing information.
Seek Professional Help If Needed
Do not hesitate to ask experts for help. Some transfers can be tricky and require technical skills. A professional ensures the process goes smoothly. They can fix issues fast, saving you time and stress.
Frequently Asked Questions
What Is Domain Database Transfer In Hosting?
Domain database transfer means moving your website’s domain and data to a new hosting provider. It ensures your site remains live and accessible during the switch. This process involves exporting your database and updating domain settings to point to the new server.
How Do I Export My Domain Database Safely?
To export your domain database safely, use your hosting control panel’s export tool. Most hosts provide options like phpMyAdmin to download a database backup. Always save a copy locally and verify the file before proceeding with the transfer.
Can I Transfer Domain Database Without Downtime?
Yes, you can transfer your domain database with minimal or no downtime. Use a staging environment to test the database on the new host first. Update DNS settings during off-peak hours and lower TTL to speed up propagation.
What Are Common Errors During Database Transfer?
Common errors include incorrect database credentials, incomplete backups, and DNS misconfiguration. These can cause connection issues or site downtime. Double-check your export/import steps and verify DNS records to avoid problems.
Conclusion
Transferring your domain database to new hosting can seem tough. Take it step by step and stay patient. Always back up your data before starting the move. Check your website after transfer to ensure everything works well. Keep your login details safe and organized.
This process helps your site stay online without problems. A smooth transfer keeps visitors happy and your site running. Follow these simple tips to make the change easier and safer.


