
Switching web hosting can feel overwhelming, but it doesn’t have to be. You might be looking for better performance, lower costs, or enhanced features.
Whatever your reason, making a move can be a smart choice for your website’s future. Imagine faster load times, improved security, and reliable support. These benefits are within your reach. But how do you get there without stress or downtime?
The answer lies in a simple, step-by-step approach. You don’t need to be a tech wizard to switch web hosting successfully. With clear guidance, you can navigate the process smoothly. You’ll discover easy methods to transition your site with confidence. Say goodbye to hosting hassles and hello to a better web experience. Are you ready to take control and give your website the upgrade it deserves? Dive in, and let’s get started!
Choosing A New Web Host
Picking the right web host is important. Consider your website’s needs. Does your site need more space or speed? Think about traffic. Will your site get many visitors? Check for extra features. Some hosts offer email or backups. Security is key. Your site must be safe from hackers. Support matters too. Ensure help is available when issues arise.
Hosts offer different plans. Look at the cost. Some plans are cheaper than others. Examine the features. Do plans include domain names? Check the speed. Faster plans make sites load quickly. Review the uptime. Sites should be online most of the time. Analyze support options. Good support can solve problems fast.
Backing Up Your Website
A full website backup is very important. It keeps your data safe. Copy all files to your computer. This includes images and HTML files. Use an FTP client like FileZilla. It helps in transferring files easily. Make sure all files are copied. Check twice to ensure nothing is missed. You can also use a backup plugin if available. These plugins make the job easier. They save time and effort.
Websites often have a database. This holds your content and settings. Use phpMyAdmin to back up the database. It is a common tool in web hosting. First, log in to phpMyAdmin. Select the database you want to save. Click on the “Export” button. Choose the SQL format. This is best for backups. Download the file and store it safely. Remember, both files and databases are important.
Setting Up The New Hosting Environment
Configuring domain settings is very important. Start by logging into your domain registrar account. Look for the DNS settings section. Here, you will need to update the nameservers to point to your new host. This tells the internet where to find your website. Changes might take up to 48 hours to update. Be patient during this time. Ensure you have backed up important information.
Begin by gathering all website files. Use an FTP client to upload them to the new host. Make sure the structure is the same as before. This ensures everything works as expected. Double-check that all files have been transferred. Missing files can cause errors. Test your website thoroughly after upload. This ensures everything is in the right place.
Transferring Databases
Start by logging into your current hosting account. Go to the database section. Find the database you want to export. Click on export. Save the file on your computer. This file is important. It has all your data.
Access your new host’s control panel. Go to the database section there. Click on import. Choose the file you saved. Upload it to the new host. Check the settings. Ensure everything is correct. Your data is now on the new host.
Testing The New Setup
Check all parts of your website. Click each link. Make sure they work. Look at images. See if they load correctly. Test forms. Ensure they send data. Try interactive elements. Confirm they respond properly. Test on different devices. Make sure it looks good everywhere.
Test functionality step by step. Start with basic features. Ensure they work as expected. Move to advanced parts. Look for any glitches. Test user login. See if it works smoothly. Review shopping carts. Make sure they add items correctly. Test payment gateways. Confirm they process payments securely.
Common issues need attention. Check for broken links. Fix them immediately. Look for slow loading pages. Optimize them for speed. Watch for missing images. Re-upload them if necessary. Monitor error messages. Resolve them promptly. Check for plugin conflicts. Update or replace plugins as needed.

Credit: www.greengeeks.com
Changing Dns Settings
Name servers help direct your website traffic. They act like a map. You need to update them when switching hosts. Go to your domain provider’s site. Find the DNS settings page. Enter the new name server details. Be careful with this step. Make sure to save your changes. This action connects your domain to the new host.
Changes in DNS can take time to spread. This process is called propagation. It might take a few hours. Sometimes, it can take up to 48 hours. Your site might not be visible right away. Be patient during this time. It will soon show up for everyone. Keep checking your website. Make sure everything is working fine.
Monitoring Website Performance
Switching web hosting impacts website performance. Choose a reliable host with strong uptime and support. Backup data before transferring files.
Using Analytics Tools
Analytics tools help track website performance. They show how well your site is doing. Google Analytics is a popular tool. It gives you data on website visits. You can see which pages are visited the most. It also shows how long visitors stay on your site. This helps you understand what content is engaging.
Addressing Performance Bottlenecks
Performance bottlenecks slow down your website. Identifying these is important. Page load speed is a common bottleneck. Slow pages make visitors leave quickly. Use tools to check your page speed. Image size can affect load times. Compress images to make them load faster. Another common issue is server response time. A slow server can make your site lag. Upgrade your server if needed. Addressing these issues can enhance user experience.
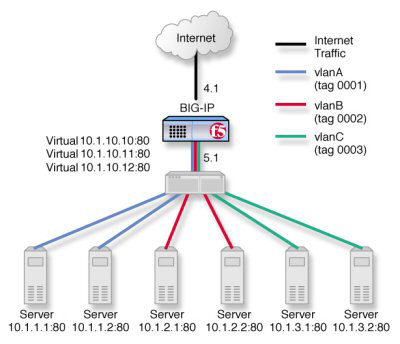
Credit: techdocs.f5.com

Credit: seolocale.com
Frequently Asked Questions
Can I Switch Website Hosting?
Yes, you can switch website hosting. Choose a new host, back up your site, and transfer files. Update domain settings to point to the new server. Ensure your site is functional before cancelling the old hosting. Check for downtime and test thoroughly for a seamless transition.
Can I Move My Domain To A Different Host?
Yes, you can transfer your domain to a different host. Ensure your domain is unlocked and obtain the transfer code. Follow the new host’s instructions to complete the transfer. This process typically takes a few days. Transferring your domain can help improve website management and performance.
How Long Does It Take To Change Website Hosting?
Changing website hosting typically takes 24 to 72 hours. This includes transferring files, databases, and updating DNS settings. Prepare backups and notify visitors about potential downtime to ensure a smooth transition. Consult your hosting provider for specific details and support during the process to avoid delays.
How Do I Shift A Website From One Server To Another?
To shift a website, backup all files and databases first. Choose a new server, then upload files and import databases. Update DNS settings to point to the new server. Test the site thoroughly to ensure functionality and security.
Conclusion
Switching web hosting requires patience and planning. Follow steps carefully for success. Backup your files to avoid data loss. Check compatibility with the new host. Update DNS settings for smooth transition. Test your website after the switch. Ensure everything works perfectly.
Reach out to support if needed. Remember, preparation is key. A smooth hosting switch boosts website performance. Enjoy the benefits of improved hosting. Your site deserves the best environment. Keep learning and stay informed. Happy hosting switch!


