
Switching web hosting sites can seem daunting, but it doesn’t have to be. You might be looking to upgrade your website’s performance, find better customer service, or simply save on costs.
Whatever your reason, making the move can bring significant benefits. Imagine faster load times, improved security, and seamless support whenever you need it. In this guide, you’ll discover simple steps to make your transition smooth and stress-free. You’ll learn how to choose the right host, transfer your files without hiccups, and ensure your website continues to run perfectly.
Think of this as your roadmap to a better online presence. Are you ready to unlock your website’s potential? Let’s dive in and make the switch together!
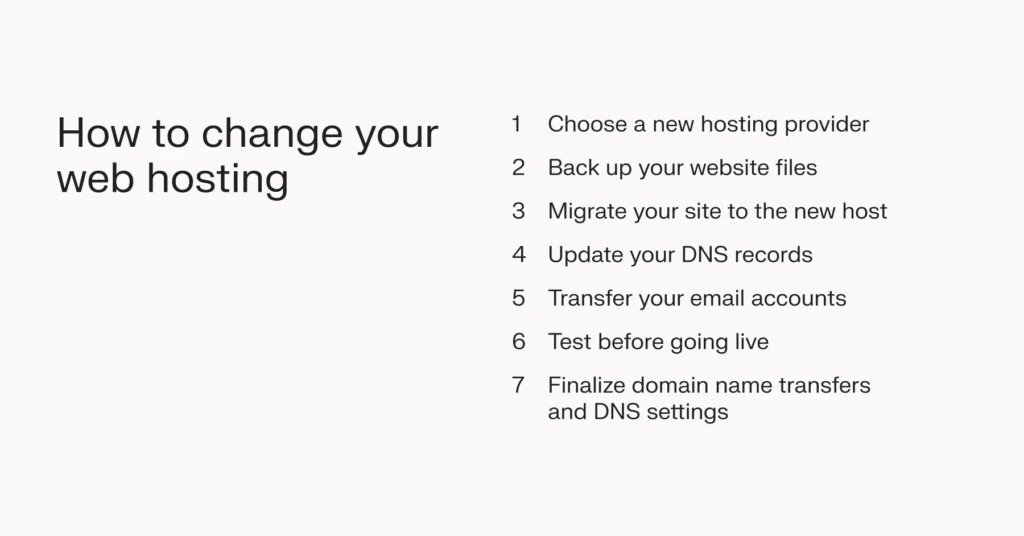
Credit: www.liquidweb.com
Choosing The Right Hosting Provider
Think about what you need from your hosting provider. Do you need a lot of storage? Is speed important? Consider security features. Write a list. This helps in making a choice.
Different hosts offer different plans. Check costs and features. Some plans have unlimited storage. Others focus on speed. Compare at least three providers. This will help you see the differences.
Reviews tell you about other people’s experiences. Look for honest opinions. Read about customer service quality. Check response time to issues. Reviews can show hidden problems. Testimonials share success stories. They highlight positive experiences.
Preparing For The Transfer
Always start by making a backup of your website. This keeps your data safe. Use a reliable backup tool. Save all your files and databases. Store them in a secure location. This step is very important. It prevents data loss during transfer.
Verify your domain settings. Ensure they are correct. Update your DNS records if needed. Check your email settings too. Make sure they work with the new host. This avoids any email disruption. Double-check everything before moving forward.
Identify all essential files for your website. These include HTML, CSS, and images. Don’t forget your database files. Make a list of these important files. Organize them for easy access. This ensures nothing gets left behind.
Initiating The Hosting Switch
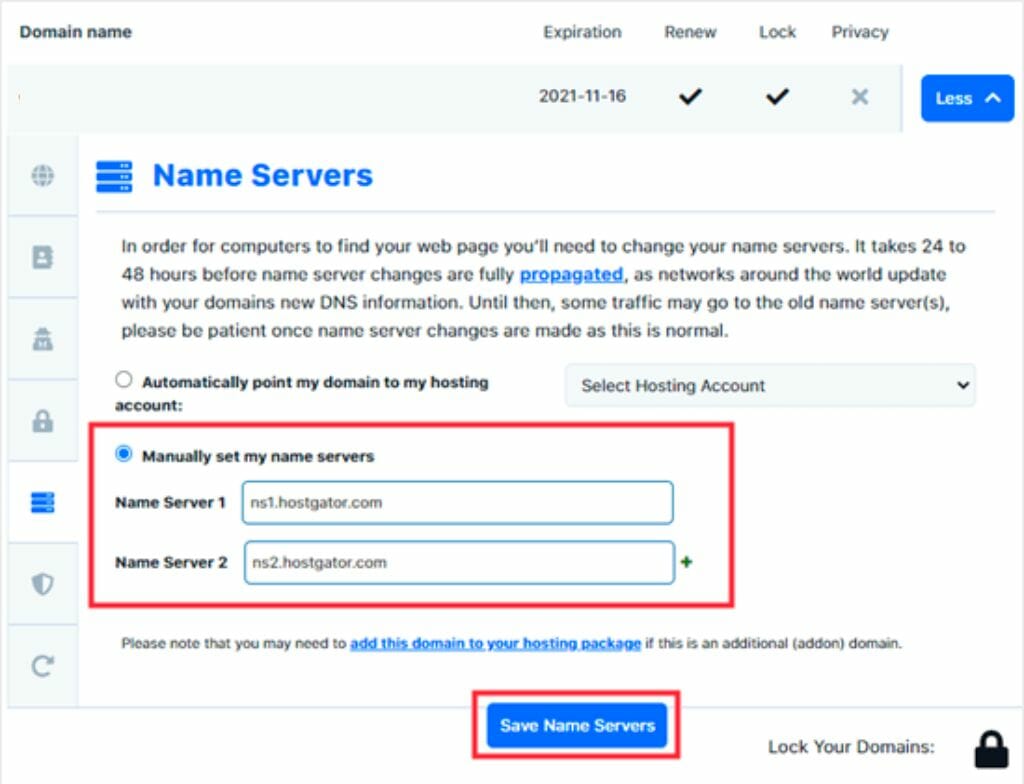
Domain Name Servers (DNS) help in finding your website. First, access your new hosting account. Look for the DNS settings. Now, get the DNS details from your new host. Log into your domain registrar. Update the DNS information there. Save the changes. It may take some time to update.
Start by downloading your website files. Use an FTP client for this task. Connect to your old host. Download all files to your computer. Now, connect to your new host. Upload the files you downloaded. Ensure everything is in the right place. Check your website to see if it looks good.
Export the database from your old host. Use a tool like phpMyAdmin. Save the file on your computer. Go to your new host. Create a new database there. Use the same name if possible. Import the file you saved earlier. Ensure all settings match. Check the connections. Your website should now work with the new host.
Testing New Hosting Setup
Check if your website opens fast. Click on different pages. Make sure each page loads correctly. Test all the links. Broken links can confuse users. Ensure images show up. Missing images look bad.
Test your email by sending a message. Confirm you receive it. Check spam folder too. Sometimes emails hide there. Reply to the email. Ensure it sends without errors. Test emails on different devices. Computers and phones can act differently.
Use tools to check site speed. Fast sites make users happy. Slow sites lose visitors. Monitor uptime regularly. Downtime can hurt your site. Check server response time. Short response times mean good performance.
Troubleshooting Common Issues
Switching web hosting sites can be challenging, but troubleshooting common issues helps ease the process. Check domain settings, update DNS records, and ensure all files are transferred correctly. These steps help maintain your website’s functionality during the switch.
Resolving Dns Propagation Delays
DNS changes can take time to spread. It may take up to 48 hours. This delay can be frustrating. Clear your browser cache to see updates faster. Use online tools to check DNS status. Monitor the progress frequently. Patient waiting is often the best solution.
Fixing Broken Links
Broken links are common after a switch. They confuse visitors and harm SEO. Use tools to find broken links quickly. Update or remove incorrect URLs promptly. Check your site’s structure for any missed links. Regular maintenance prevents future issues.
Addressing Server Errors
Server errors can halt site access. This affects user experience. Check server logs for error details. Restart the server if needed. Contact your hosting provider for support. Ensure all software is up to date. Proper settings prevent many errors.
Credit: diggitymarketing.com
Finalizing The Transfer
Updating Security Settings is crucial after switching hosting. Ensure all firewalls are active. Check that your SSL certificates are valid. Update all your passwords to be strong. Never share them with others. Always use two-factor authentication for added security.
Optimizing Site Speed makes your site fast. A fast site keeps visitors happy. Use caching tools to reduce load time. Compress all large images. This helps pages load quicker. Always check your site’s speed with tools.
After switching, notifying users and clients is important. Inform them about the changes. Send a simple email. Explain any new features or changes. Keep the message short and clear. Thank them for their patience and support.

Credit: firstsiteguide.com
Frequently Asked Questions
Can I Switch Web Hosting Companies?
Yes, you can switch web hosting companies. Choose a new host, back up your data, and transfer your domain. Ensure minimal downtime by scheduling the transfer during low-traffic periods. Test your website thoroughly after the switch to ensure everything functions smoothly.
How Do I Move From One Hosting To Another?
To move hosting, first, choose a new provider. Backup your website files and database. Transfer domain and files to the new host. Update DNS settings. Test your website on the new server. Ensure everything is functional before canceling the old hosting account.
Is It Hard To Change Web Hosting?
Changing web hosting isn’t hard. Follow steps: backup data, migrate files, update DNS settings, test site functionality. Ensure seamless transition by choosing reliable hosting. Consult support if needed.
How Do I Shift A Website From One Server To Another?
To shift a website, back up files and databases first. Transfer them to the new server. Update domain DNS settings. Test the website on the new server. Finally, monitor for any issues.
Conclusion
Switching web hosting sites can be simple. Follow the steps carefully. Start by backing up your data. Choose a reliable new hosting provider. Transfer your files and databases. Update your DNS settings. Test your website to ensure everything works. This process may take time but ensures a smooth transition.
Patience and careful planning are key. With these tips, you can switch hosting sites easily. Your website will continue to run smoothly. Enjoy your new hosting experience with confidence.


